안녕하세요. Gameeye에서 deeplol.gg 서비스를 개발 중인 김철기입니다.
클라우드 서버 인프라 구축, 백엔드 개발, 딥러닝 모델 연구를 담당하고 있습니다.
해당 포스팅은 tensorflow 환경에서 학습된 딥러닝 모델(deeplearning model)을 사용자에게 서빙(serving)하는 방법에 대해서 다룹니다.
딥러닝 모델 서빙 방법
딥러닝 모델을 서빙하는 방법은 여러가지가 있겠지만 많이 사용하는 3가지를 추려볼 수 있습니다.
- django, flask, fastapi 등의 웹 프레임워크를 이용해 웹서버를 구축하고 restful api로 인퍼런스 결과를 반환하는 방법
- tensorflow serving을 이용해 rest api를 구축하고 인퍼런스 결과를 반환하는 방법
- tensorflow-js를 이용해 클라이언트단에서 인퍼런스하는 방법
서빙 방법별 장단점
-
django, flask, fastapi 등의 웹 프레임워크를 이용해 웹서버를 구축하고 restful api로 인퍼런스 결과를 반환하는 방법
장점: 인퍼런스 이외의 클라이언트 요청도 존재하는 경우, 인퍼런스 요청과 다른 클라이언트 요청을 하나의 웹서버에서 처리할 수 있어 별도의 서버를 추가로 구축하지 않아도 됨
단점: 비동기처리 병렬처리를 위해서는 uvicorn, gunicorn 등 별도의 미들웨어 세팅이 필요함 -
tensorflow serving을 이용해 rest api를 구축하고 인퍼런스 결과를 반환하는 방법
장점: 웹 프레임워크를 이용하는 경우와 비교하여 일반적으로 처리 속도가 빠름
단점: 기존 api 서버와 별개로 인퍼런스 서버를 따로 구축해야 함
(퍼포먼스 비교 참고: Tensorflow Serving vs Flask REST API) -
tensorflow-js를 이용해 클라이언트단에서 인퍼런스하는 방법
장점: 별도의 api 서버없이 클라이언트단에서 인퍼런스 가능
단점: 클라이언트 pc 스펙의 영향을 많이 받고 무거운 모델은 인퍼런스 시간이 매우 오래 걸림
간단하게 3가지 모델 서빙 방법에 대하여 살펴보았습니다. 해당 포스팅에서는 그 중 Tensorflow Serving을 이용하여 딥러닝 모델의 inference 단계를 처리하는 방법에 대해서 알아보도록 하겠습니다. 개인적으로 해당 방법의 경우 서버가 분리되어 관리되고 모델 서빙에 최적화되어 있기 때문에 가장 안정적이면서 퍼포먼스도 좋은 방법이라고 생각합니다.
개발환경, 코드 및 참고자료
포스팅에 앞서 완성 코드와 참고한 튜토리얼을 공유드립니다.
개발환경: python3.7, tensorflow 2.8.0
깃허브: https://github.com/kimcheolgi/Ironkey-Deeplearning-Model-Serving
공식 튜토리얼: https://colab.research.google.com/github/tensorflow/tfx/blob/master/docs/tutorials/serving/rest_simple.ipynb#scrollTo=vGvFyuIzW6n6
예제 설명
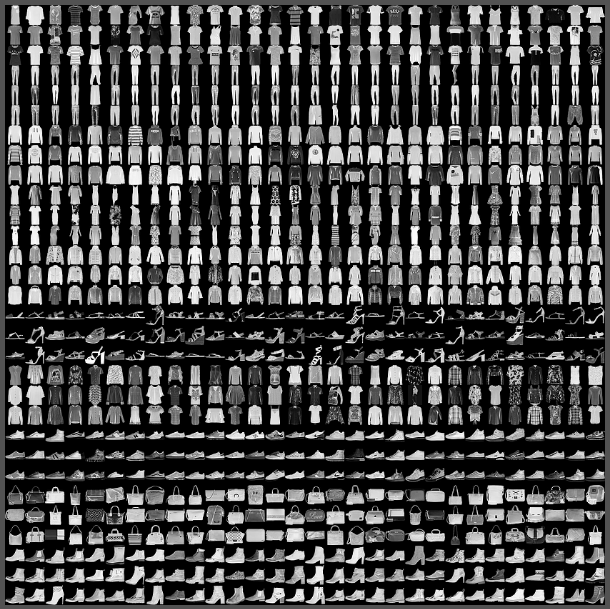
tensorflow에서 제공하는 fashion_mnist 데이터를 이용하여 CNN(Convolution Neural Network) 기반 의상 이미지 분류기를 만들고 서빙하는 예제를 다룹니다.
(딥러닝 모델의 구체적인 설명(모델의 구조, 학습 기법 등)은 다루지 않습니다.)
모델 생성 및 저장 코드 작성
간단한 모델 생성 및 저장 코드를 작성하고 모델을 저장합니다.
create_model.py
- fashion_mnist 데이터(그레이 스케일, 28x28)를 로드해 0~1사이 값으로 스케일링
- convolution과 softmax로 구성된 모델 구성
fashion_mnist = keras.datasets.fashion_mnist
(train_images, train_labels), (test_images, test_labels) = fashion_mnist.load_data()

# scale the values to 0.0 to 1.0
train_images = train_images / 255.0
test_images = test_images / 255.0

# reshape for feeding into the model
train_images = train_images.reshape(train_images.shape[0], 28, 28, 1)
test_images = test_images.reshape(test_images.shape[0], 28, 28, 1)

class_names = ['T-shirt/top', 'Trouser', 'Pullover', 'Dress', 'Coat',
               'Sandal', 'Shirt', 'Sneaker', 'Bag', 'Ankle boot']

print('\ntrain_images.shape: {}, of {}'.format(train_images.shape, train_images.dtype))
print('test_images.shape: {}, of {}'.format(test_images.shape, test_images.dtype))

model = keras.Sequential([
    keras.layers.Conv2D(input_shape=(28, 28, 1), filters=8, kernel_size=3,
                        strides=2, activation='relu', name='Conv1'),
    keras.layers.Flatten(),
    keras.layers.Dense(10, activation=tf.nn.softmax, name='Softmax')
])
model.summary()- adam optimizer로 5epoch 학습 후 테스트 세트에서의 정확도 확인
epochs = 5

model.compile(optimizer='adam',
              loss='sparse_categorical_crossentropy',
              metrics=['accuracy'])
model.fit(train_images, train_labels, epochs=epochs)

test_loss, test_acc = model.evaluate(test_images, test_labels)
print('\nTest accuracy: {}'.format(test_acc))- 생성된 모델을 저장(tensorflow 버전에 따라 옵션 파라미터가 다를수 있음)
tf.keras.models.save_model(
    model,
    export_path,
    overwrite=True,
    include_optimizer=True,
    save_format=None,
    signatures=None
)
tensorflow/serving docker image 실행
tensorflow/serving docker image를 실행하여 rest api를 구축합니다.
docker run을 이용한 방법
docker run -t --rm -p 8501:8501 \
    -v "./saved_model:/models/test_model" \
    -e MODEL_NAME=test_model \
    tensorflow/serving &
docker-compose를 이용한 방법
- docker-compose.yml 파일을 작성
- docker-compose up -d 명령어 실행
service:
  image: tensorflow/serving
  restart: always
  volumes:
    - ./saved_model:/models/test_model
  environment:
    - MODEL_NAME=test_model
  ports:
    - "8501:8501"
docker image를 실행하고 나면 localhost:8501로 접근하여 모델을 인퍼런스 할 수 있습니다.
요청 테스트
requests를 이용해 실제로 인퍼런스 값을 제대로 반환하는지 테스트할 수 있습니다.
request_test.py
- 테스트 데이터를 가공
- 가공한 데이터를 post 요청에 넘길수 있는 형식으로 변환
fashion_mnist = keras.datasets.fashion_mnist
(train_images, train_labels), (test_images, test_labels) = fashion_mnist.load_data()

# scale the values to 0.0 to 1.0
test_images = test_images / 255.0

# reshape for feeding into the model
test_images = test_images.reshape(test_images.shape[0], 28, 28, 1)

class_names = ['T-shirt/top', 'Trouser', 'Pullover', 'Dress', 'Coat',
               'Sandal', 'Shirt', 'Sneaker', 'Bag', 'Ankle boot']

print('test_images.shape: {}, of {}'.format(test_images.shape, test_images.dtype))

rando = random.randint(0, len(test_images)-1)

data = json.dumps({"signature_name": "serving_default", "instances": test_images[0:3].tolist()})
print('Data: {} ... {}'.format(data[:50], data[len(data)-52:]))- 생성한 api주소로 post 메소드를 요청
- 인퍼런스 결과값을 반환
headers = {"content-type": "application/json"}
json_response = requests.post('http://localhost:8501/v1/models/test_model:predict', data=data, headers=headers)
predictions = json.loads(json_response.text)['predictions']- 예측값과 실제 정답을 비교
for i in range(3):
    print(('The model thought this was a {} (class {}), and it was actually a {} (class {})'.format(
      class_names[np.argmax(predictions[i])], np.argmax(predictions[i]), class_names[test_labels[i]], test_labels[i])))
테스트에 사용된 데이터는 예측값과 정답이 일치하는 것으로 확인되었습니다.
정리
해당 포스팅에서는 모델을 만들고 로컬에서 docker image로 tensorflow serving api를 실행해 인퍼런스까지 해보았습니다. 튜토리얼과 docker image를 이용해 비교적 간단하게 진행되었는데요, 다음 포스팅에서는 CI/CD까지 구축해서 클라우드 서버로 인퍼런스 api를 제공하는 내용을 소개하겠습니다. 이해가 되지 않거나 내용이 잘못된 부분은 댓글 남겨주시면 감사하겠습니다.