Google Colab

google colab 들어가기
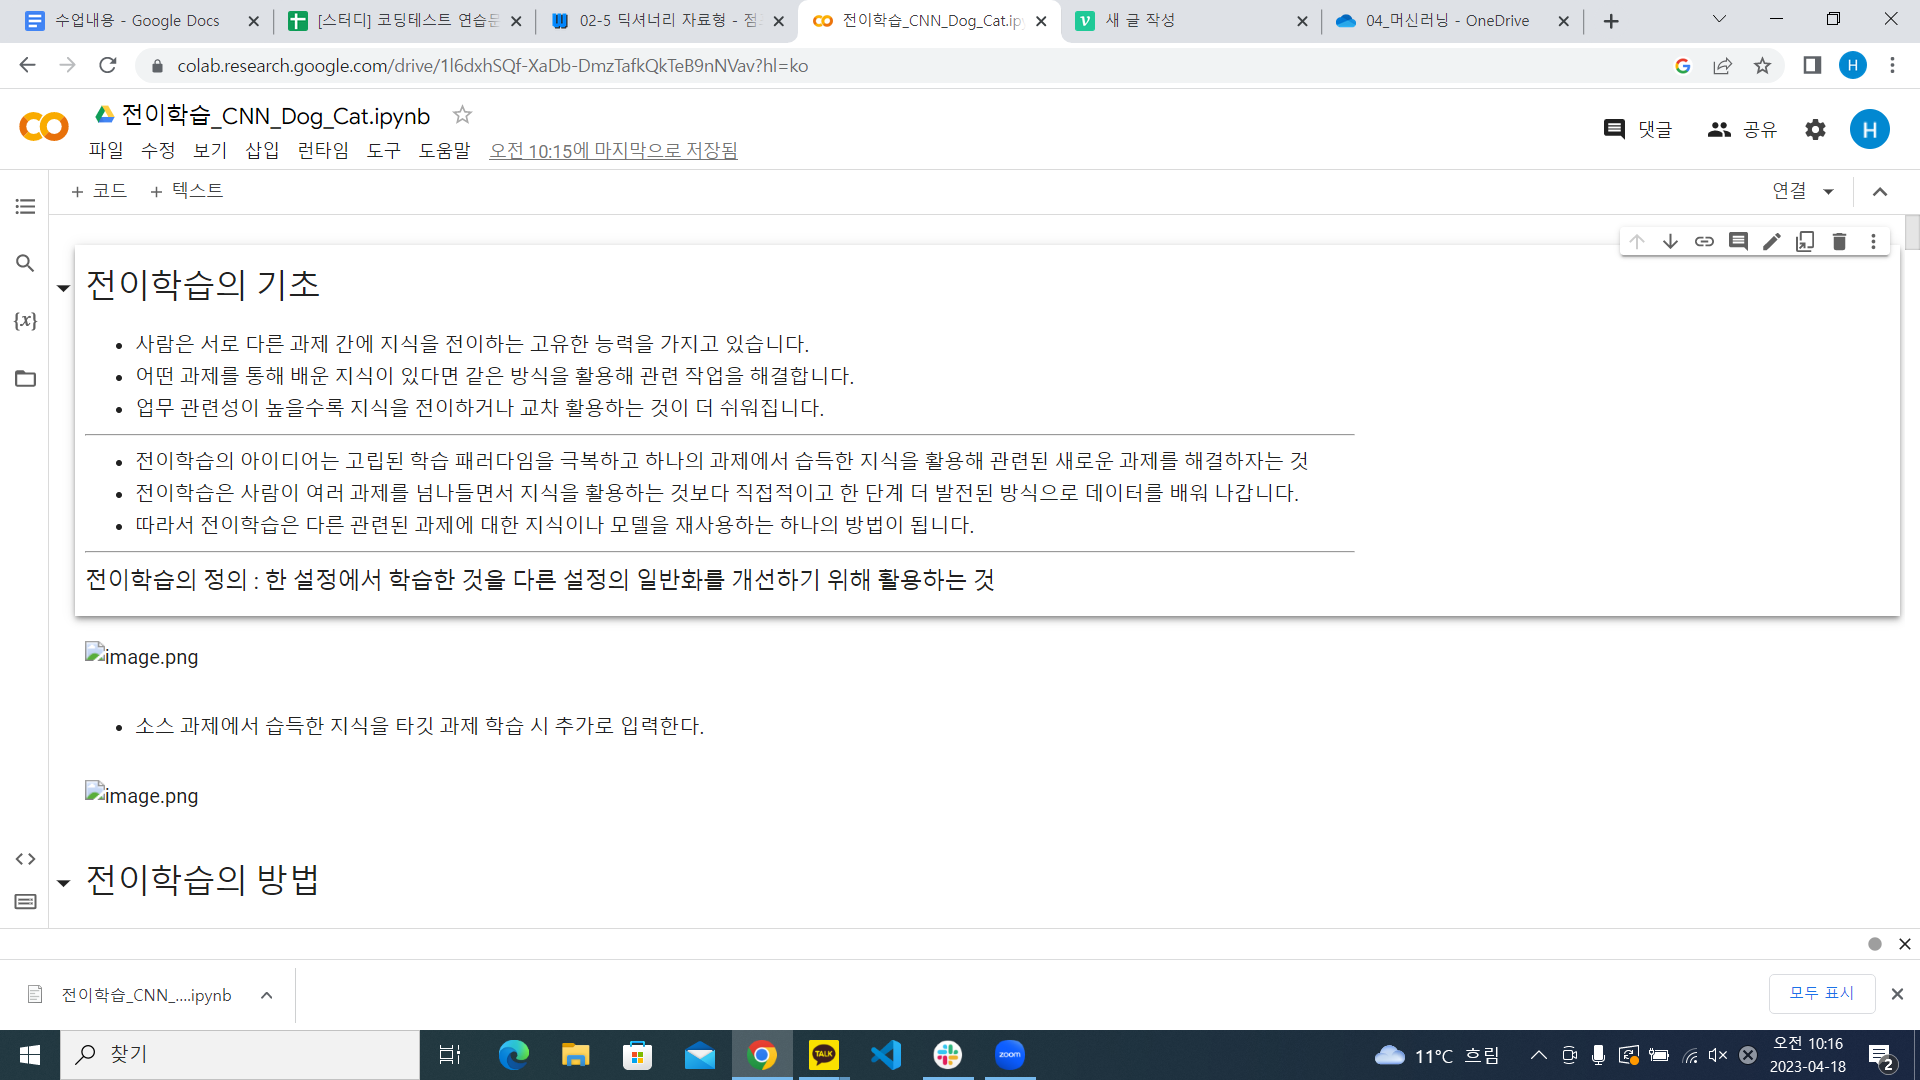
google colab에서 파일 업로드 -> 수업때 다운로드 받은 파일 업로드
코랩은 구글이 제공하는 컨테이너.
구글 코랩에서 content의 drive를 열어서 연동시키겠다.라는 구문을
google colab에서는 항상 실행해줘야 함(아래 구문과 같음)
from google.colab import drive

drive.mount('/content/drive')
위의 구문을 실행하면 사진과 같은 창이 뜨는데, 이는 google drive에 연결을 누르면 됨
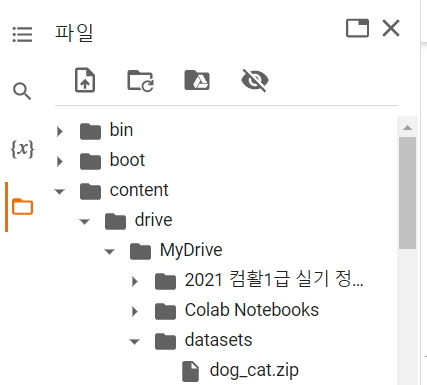
파일 -> content -> drive -> MyDrive -> datasets이라는 폴더를 생성 후 안에 다운로드 받은 dog_cat.zip 파일을 업로드
import zipfile
import glob
import numpy as np
import matplotlib.pyplot as plt
from tensorflow.keras.preprocessing.image import ImageDataGenerator, load_img, img_to_array, array_to_img
파일 가져오기
# zipfile를 통해서 압축을 해제
# data 폴더에 해당 내용을 압축 해제한다.
zip_file = zipfile.ZipFile("/content/drive/MyDrive/datasets/dog_cat.zip", "r")
extract_dir = "./data"
zip_file.extractall(extract_dir)
그 다음 google colab에서 위 구문을 실행
이때 파일이 위치한 주소 경로는 파일 점세개 -> 경로복사를 선택하고 붙여넣기 하면 된다. 나의 경우 /content/drive/MyDrive/datasets/dog_cat.zip가 복사됨
위의 구문을 실행할 경우 발생하는 오류 -> BadZipFile: File is not a zip file : 이는 file이 제대로 업로드 되지 않았거나, 파일이 제대로 된 zip file이 아닐 경우 발생하는 오류여서,
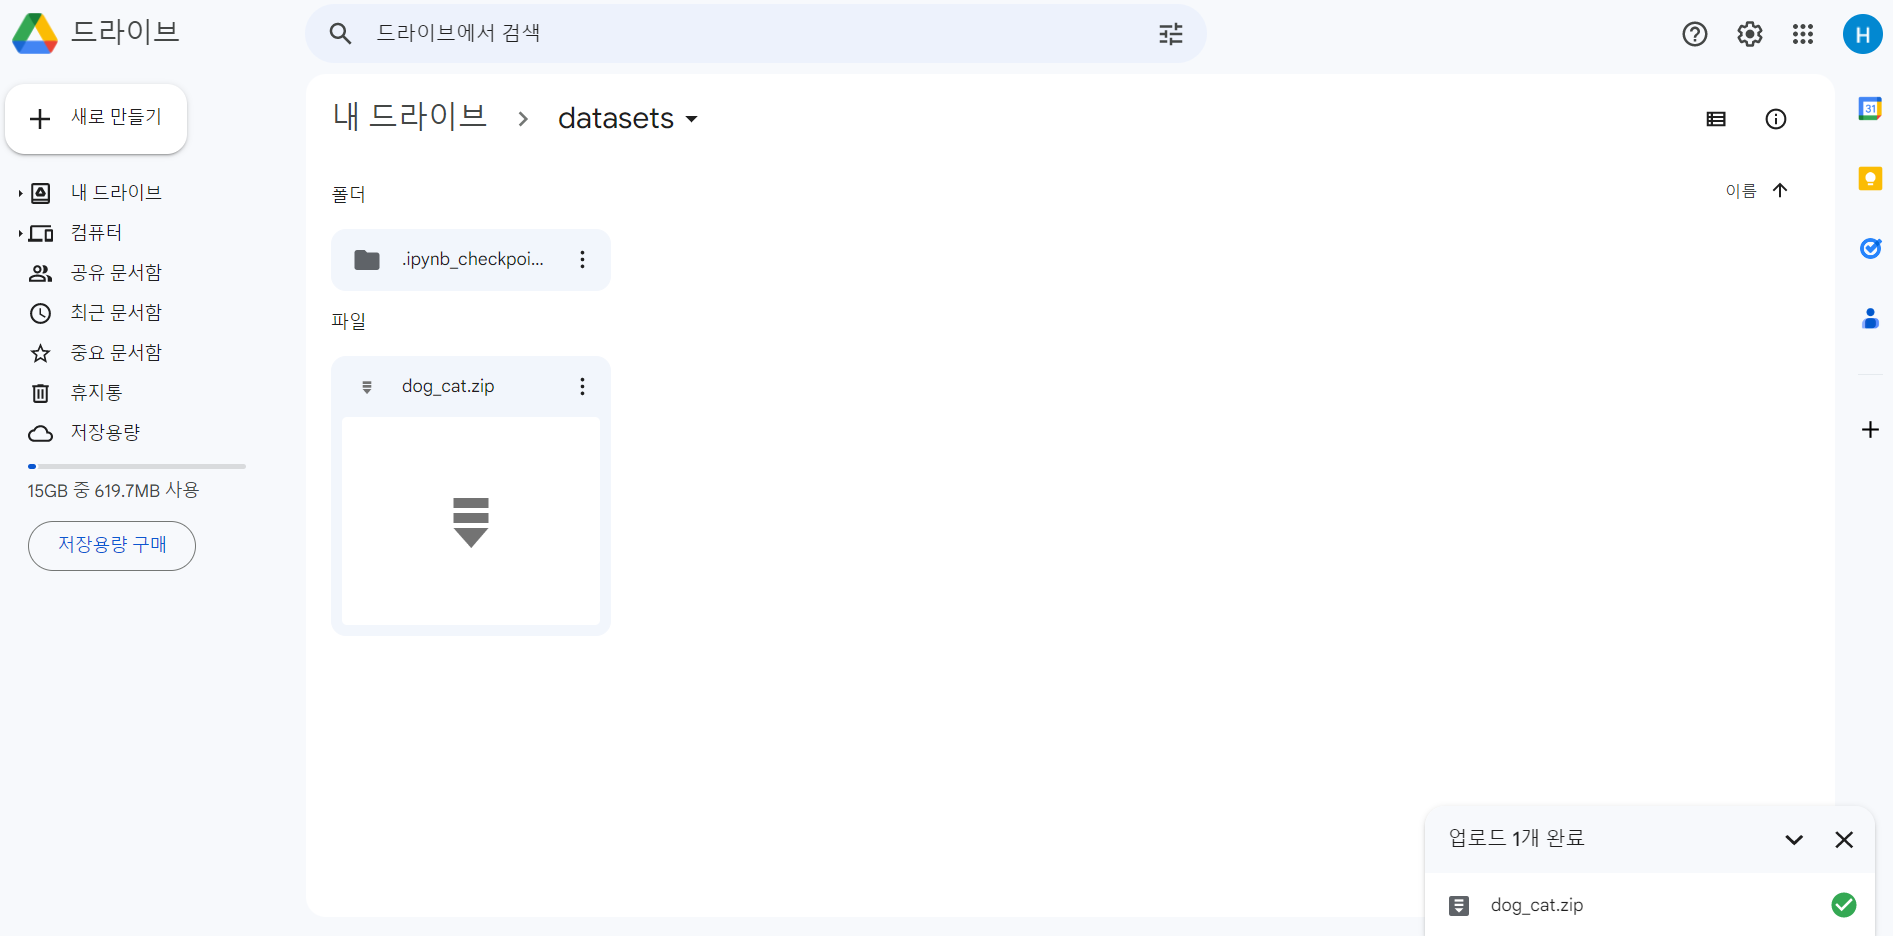
구글 드라이브에 들어가서 기존 업로드한 파일을 삭제하고 직접 업로드하였더니 드디어 !!! 위 구문이 실행됐다.(오류 해결해서 뿌듯함)
기존 딥러닝 모델 활용하기
훈련 데이터 읽기
# training set를 만들기 위해서 압축된 폴더에서 강아지, 고양이 사진을 별도로 읽는다.
IMG_DIM = (150, 150)
train_files = glob.glob('./data/training_set/training_set/dogs/*.jpg')
train_dogs_imgs = [img_to_array(load_img(img, target_size=IMG_DIM)) for img in train_files]
train_files = glob.glob('./data/training_set/training_set/cats/*.jpg')
train_cats_imgs = [img_to_array(load_img(img, target_size=IMG_DIM)) for img in train_files]
train_imgs = np.concatenate((np.array(train_dogs_imgs), np.array(train_cats_imgs)))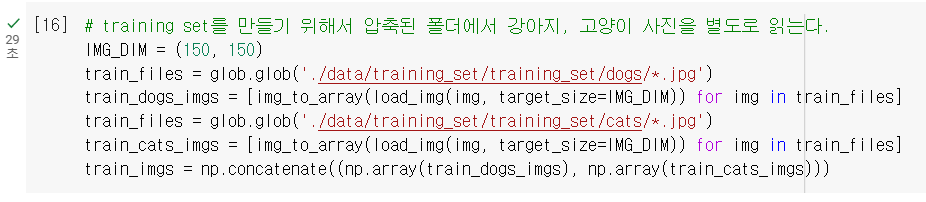
확실히 GPU로 돌리는 google colab을 사용해서 위 구문을 돌리니 29초만에 사진을 전부 읽어왔다 ! (어제 jupyter에서 실행했을때는 1-2분 정도 소요됐던 듯)
# label 데이터 만들기
train_dogs_label = np.ones(len(train_dogs_imgs))
train_cats_label = np.zeros(len(train_cats_imgs))
train_label = np.concatenate((train_dogs_label, train_cats_label))

# 강아지 사진 4005장, 고양이 사진 4000장 사진인지 확인한다.
print (train_dogs_imgs.__len__())
print (train_cats_imgs.__len__())

# index 번호 4005부터는 고양이 사진이 시작된다.
array_to_img(train_imgs[4005])

# 데이터를 255 값으로 나누어 정규화를 시킨다.
train_imgs_scaled = train_imgs.astype('float32')
train_imgs_scaled /= 255
테스트 데이터 읽기
# test set를 만들기 위해서 압축된 폴더에서 강아지, 고양이 사진을 별도로 읽는다.
IMG_DIM = (150, 150)
test_files = glob.glob('./data/test_set/test_set/dogs/*.jpg')
test_dogs_imgs = [img_to_array(load_img(img, target_size=IMG_DIM)) for img in test_files]
test_files = glob.glob('./data/test_set/test_set/cats/*.jpg')
test_cats_imgs = [img_to_array(load_img(img, target_size=IMG_DIM)) for img in test_files]
test_imgs = np.concatenate((np.array(test_dogs_imgs), np.array(test_cats_imgs)))
test_imgs_scaled = test_imgs.astype('float32')
test_imgs_scaled /= 255


# label 데이터 만들기
test_dogs_label = np.ones(len(test_dogs_imgs))
test_cats_label = np.zeros(len(test_cats_imgs))
test_label = np.concatenate((test_dogs_label, test_cats_label))

print (test_imgs_scaled.shape)
print (test_label.shape)

from sklearn.model_selection import train_test_split
X_train, X_val, y_train, y_val = train_test_split(train_imgs_scaled, train_label, test_size=0.2, random_state=42)
모델 설계
batch_size = 32
epochs = 10
input_shape = (150, 150, 3)

from tensorflow.keras.layers import Conv2D, MaxPooling2D, Flatten, Dense, Dropout
from tensorflow.keras.models import Sequential
from tensorflow.keras import optimizers

model = Sequential()

model.add(Conv2D(16, kernel_size=(3, 3), activation='relu',
                 input_shape=input_shape))
model.add(MaxPooling2D(pool_size=(2, 2)))

model.add(Conv2D(64, kernel_size=(3, 3), activation='relu'))
model.add(MaxPooling2D(pool_size=(2, 2)))

model.add(Conv2D(128, kernel_size=(3, 3), activation='relu'))
model.add(MaxPooling2D(pool_size=(2, 2)))

model.add(Flatten())
model.add(Dense(512, activation='relu'))
model.add(Dense(1, activation='sigmoid'))


model.compile(loss='binary_crossentropy',
              optimizer=optimizers.RMSprop(),
              metrics=['accuracy'])

model.summary()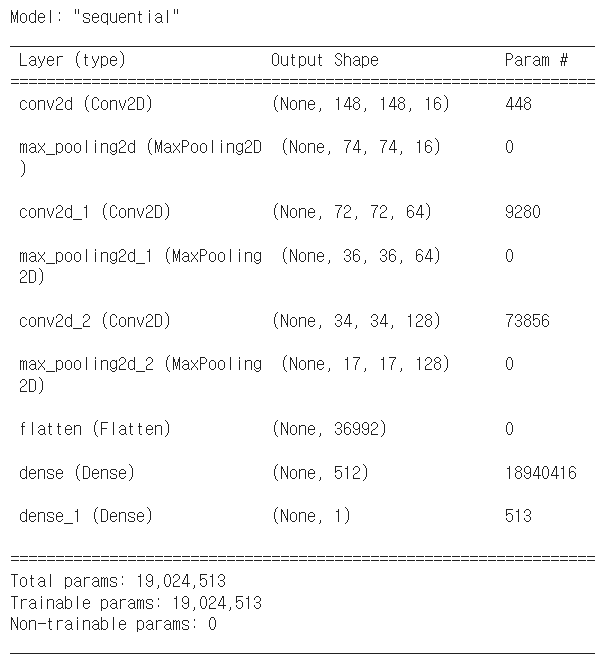
#모델 생성
history = model.fit(x=X_train, y=y_train,
                    validation_data=(X_val, y_val),
                    batch_size=batch_size,
                    epochs=epochs,
                    verbose=1)
#만든 모델 저장
model.save('cats_dogs_basic_cnn_1.h5')
f, (ax1, ax2) = plt.subplots(1, 2, figsize=(12, 4))
t = f.suptitle('Basic CNN Performance', fontsize=12)
f.subplots_adjust(top=0.85, wspace=0.3)

#만든 모델 검증
epoch_list = list(range(1,11))
ax1.plot(epoch_list, history.history['accuracy'], label='Train Accuracy')
ax1.plot(epoch_list, history.history['val_accuracy'], label='Validation Accuracy')
ax1.set_xticks(np.arange(0, 11, 5))
ax1.set_ylabel('Accuracy Value')
ax1.set_xlabel('Epoch')
ax1.set_title('Accuracy')
l1 = ax1.legend(loc="best")

ax2.plot(epoch_list, history.history['loss'], label='Train Loss')
ax2.plot(epoch_list, history.history['val_loss'], label='Validation Loss')
ax2.set_xticks(np.arange(0, 11, 5))
ax2.set_ylabel('Loss Value')
ax2.set_xlabel('Epoch')
ax2.set_title('Loss')
l2 = ax2.legend(loc="best")
모델 검증
model1_out = model.predict(test_imgs_scaled)
#모델 정확도 평가
model.evaluate(test_imgs_scaled, test_label)
-> 기존 CNN 모델의 경우 정확도가 77% 정도 나옴
Dropout 적용하기
model2 = Sequential()

model2.add(Conv2D(16, kernel_size=(3, 3), activation='relu',
                 input_shape=input_shape))
model2.add(MaxPooling2D(pool_size=(2, 2)))

model2.add(Conv2D(64, kernel_size=(3, 3), activation='relu'))
model2.add(MaxPooling2D(pool_size=(2, 2)))

model2.add(Conv2D(128, kernel_size=(3, 3), activation='relu'))
model2.add(MaxPooling2D(pool_size=(2, 2)))

model2.add(Conv2D(128, kernel_size=(3, 3), activation='relu'))
model2.add(MaxPooling2D(pool_size=(2, 2)))

model2.add(Flatten())
model2.add(Dense(512, activation='relu'))
model2.add(Dropout(0.3))
model2.add(Dense(512, activation='relu'))
model2.add(Dropout(0.3))
model2.add(Dense(1, activation='sigmoid'))


model2.compile(loss='binary_crossentropy',
              optimizer=optimizers.RMSprop(),
              metrics=['accuracy'])

model2.summary()

history = model2.fit(x=X_train, y=y_train,
                    validation_data=(X_val, y_val),
                    batch_size=batch_size,
                    epochs=20,
                    verbose=1)


f, (ax1, ax2) = plt.subplots(1, 2, figsize=(12, 4))
t = f.suptitle('Basic CNN Performance', fontsize=12)
f.subplots_adjust(top=0.85, wspace=0.3)

epoch_list = list(range(1,21))
ax1.plot(epoch_list, history.history['accuracy'], label='Train Accuracy')
ax1.plot(epoch_list, history.history['val_accuracy'], label='Validation Accuracy')
ax1.set_xticks(np.arange(0, 21, 5))
ax1.set_ylabel('Accuracy Value')
ax1.set_xlabel('Epoch')
ax1.set_title('Accuracy')
l1 = ax1.legend(loc="best")

ax2.plot(epoch_list, history.history['loss'], label='Train Loss')
ax2.plot(epoch_list, history.history['val_loss'], label='Validation Loss')
ax2.set_xticks(np.arange(0, 21, 5))
ax2.set_ylabel('Loss Value')
ax2.set_xlabel('Epoch')
ax2.set_title('Loss')
l2 = ax2.legend(loc="best")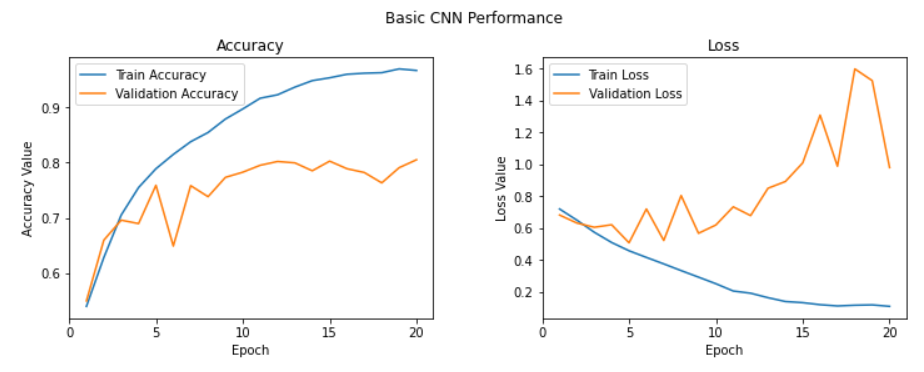
model2.save('cats_dogs_basic_cnn_2.h5')
model2.evaluate(test_imgs_scaled, test_label)
-> 정확도 81%로 향상
전이학습
from tensorflow.keras.applications import vgg16 as vgg
base_model = vgg.VGG16(weights='imagenet',
                       include_top=False,
                       input_shape=(150, 150, 3))

# VGG16 모델의 세 번째 블록에서 마지막 층 추출
last = base_model.get_layer('block3_pool').output

from tensorflow.keras.layers import Dropout, Flatten, Dense, GlobalAveragePooling2D,BatchNormalization
from tensorflow.keras import Model

# 상위 층에 분류층 추가
x = GlobalAveragePooling2D()(last)
x= BatchNormalization()(x)
x = Dense(256, activation='relu')(x)
x = Dense(256, activation='relu')(x)
x = Dropout(0.6)(x)
pred = Dense(1, activation='sigmoid')(x)
model3 = Model(base_model.input, pred)

for layer in base_model.layers:
     layer.trainable = False

model3.compile(loss='binary_crossentropy',
              optimizer=optimizers.Adam(lr=0.01),
              metrics=['accuracy'])

model3.summary()

history = model3.fit(x=X_train, y=y_train,
                    validation_data=(X_val, y_val),
                    batch_size=batch_size,
                    epochs=20,
                    verbose=1)


f, (ax1, ax2) = plt.subplots(1, 2, figsize=(12, 4))
t = f.suptitle('Basic CNN Performance', fontsize=12)
f.subplots_adjust(top=0.85, wspace=0.3)

epoch_list = list(range(1,21))
ax1.plot(epoch_list, history.history['accuracy'], label='Train Accuracy')
ax1.plot(epoch_list, history.history['val_accuracy'], label='Validation Accuracy')
ax1.set_xticks(np.arange(0, 21, 5))
ax1.set_ylabel('Accuracy Value')
ax1.set_xlabel('Epoch')
ax1.set_title('Accuracy')
l1 = ax1.legend(loc="best")

ax2.plot(epoch_list, history.history['loss'], label='Train Loss')
ax2.plot(epoch_list, history.history['val_loss'], label='Validation Loss')
ax2.set_xticks(np.arange(0, 21, 5))
ax2.set_ylabel('Loss Value')
ax2.set_xlabel('Epoch')
ax2.set_title('Loss')
l2 = ax2.legend(loc="best")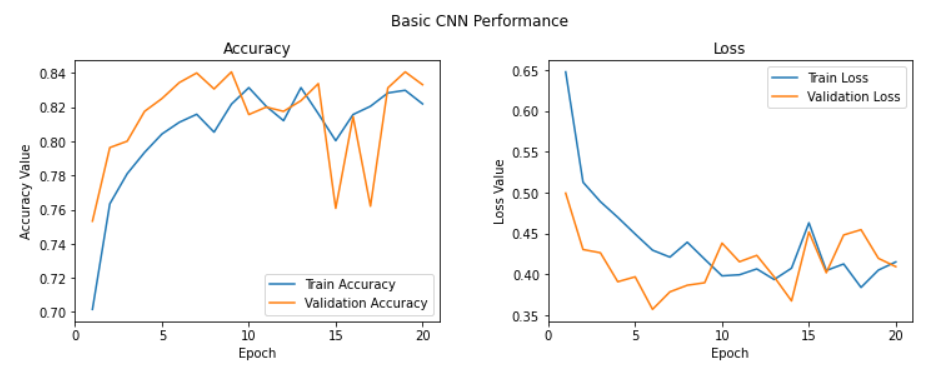
model3.evaluate(test_imgs_scaled, test_label)
model3.save('cats_dogs_basic_cnn_3.h5')
-> 모델 정확도 84%로 가장 향상
model3 실행
import tensorflow as tf
model = tf.keras.models.load_model("./cats_dogs_basic_cnn_3.h5")

from tensorflow.keras.preprocessing.image import ImageDataGenerator, load_img, img_to_array, array_to_img
import numpy as np
path = r"C:\workspace\dog_cat\test_set\test_set\cats\cat.4003.jpg"
data = load_img(path, target_size=(150,150))


data = img_to_array(data).astype('float32')
data /= 255.0

model.predict(data.reshape(-1 ,150, 150, 3))
model 서비스
vscode wsl 실행 -> cd workspace -> python3 -m virtualenv ms ->cd ./ms/bin -> . . activate
ms 라는 가상환경 만들고 가상환경 실행

앞에 (ms)가 뜨면 제대로 실행이 된 것
vim requirements.txt
들어가서 i 누르고 (insert 모드로 변경)
absl-py==1.4.0
asgiref==3.6.0
astunparse==1.6.3
cachetools==5.3.0
certifi==2022.12.7
charset-normalizer==3.1.0
Django==4.2
djangorestframework==3.14.0
flatbuffers==23.3.3
gast==0.4.0
google-auth==2.17.3
google-auth-oauthlib==1.0.0
google-pasta==0.2.0
grpcio==1.53.0
h5py==3.8.0
idna==3.4
jax==0.4.8
keras==2.12.0
libclang==16.0.0
Markdown==3.4.3
MarkupSafe==2.1.2
ml-dtypes==0.1.0
numpy==1.23.5
oauthlib==3.2.2
opt-einsum==3.3.0
packaging==23.1
Pillow==9.5.0
protobuf==4.22.3
pyasn1==0.4.8
pyasn1-modules==0.2.8
pytz==2023.3
requests==2.28.2
requests-oauthlib==1.3.1
rsa==4.9
scipy==1.10.1
six==1.16.0
sqlparse==0.4.3
tensorboard==2.12.2
tensorboard-data-server==0.7.0
tensorboard-plugin-wit==1.8.1
tensorflow==2.12.0
tensorflow-estimator==2.12.0
tensorflow-io-gcs-filesystem==0.32.0
termcolor==2.2.0
typing_extensions==4.5.0
urllib3==1.26.15
Werkzeug==2.2.3
wrapt==1.14.1
복붙한 뒤 esc 누르고 -> :wq
pip install -r requirements.txt 입력
