Transfer Learning - 이미지 증강
- colab에서 작성
- 데이터가 작을 때, 모델이 과적합되지 않게 하기 위한 방법도 됨
# import

import matplotlib.pyplot as plt
import numpy as np
import tensorflow as tf
import tensorflow_datasets as tfds

from tensorflow.keras import layers
from tensorflow.keras.datasets import mnist
# 데이터 다운로드
(train_ds, val_ds, test_ds), metadata = tfds.load(
'tf_flowers',
split = ['train[:80%]', 'train[80%:90%]', 'train[90%:]'],
with_info = True,
as_supervised = True,
)# 클래스의 개수는 5개
num_classes = metadata.features['label'].num_classes
print(num_classes)# 클래스의 종류
get_label_name = metadata.features['label'].int2str
[get_label_name(n) for n in range(5)]# 생긴 것 확인
# next, iter : https://dojang.io/mod/page/view.php?id=2408
get_label_name = metadata.features['label'].int2str
image, label = next(iter(train_ds))
_ = plt.imshow(image)
_ = plt.title(get_label_name(label))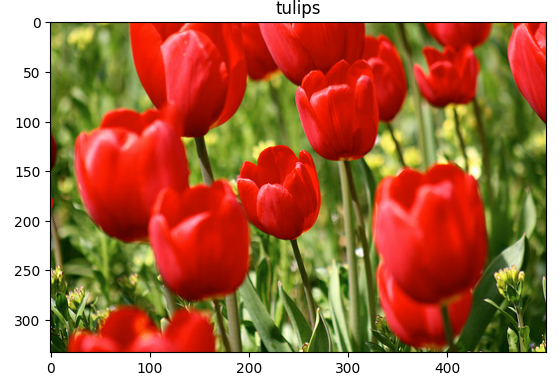
# 크기와 비율 조절
# Rescaling(1 / 127.5, offset = -1) 이런 옵션도 있다

IMG_SIZE = 180

resize_and_rescale = tf.keras.Sequential([
    layers.experimental.preprocessing.Resizing(IMG_SIZE, IMG_SIZE),
    layers.experimental.preprocessing.Rescaling(1/255)
])
# 이렇게 바뀜

result = resize_and_rescale(image)
_ = plt.imshow(result)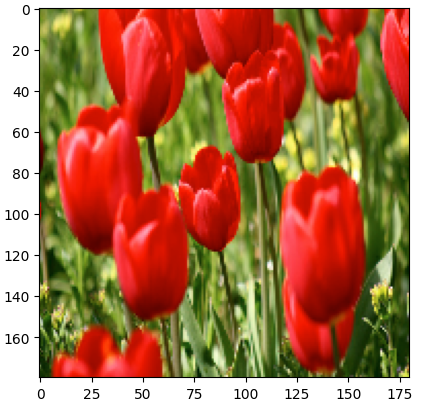
# 바뀐 픽셀 범위

print('Min and max pixel values : ', result.numpy().min(), result.numpy().max())
# 데이터 회전과 관련된 증강
data_augmentation = tf.keras.Sequential([
layers.experimental.preprocessing.RandomFlip('horizontal_and_vertical'),
layers.experimental.preprocessing.RandomRotation(0.2)
])# tf.extend_dims의 역할
image.shape# add the image to a batch
image = tf.expand_dims(image, 0)image.shapeplt.figure(figsize=(10, 10))
for i in range(9):
augmented_image = data_augmentation(image)
ax = plt.subplot(3, 3, i + 1)
plt.imshow(augmented_image[0])
plt.axis('off')# 증강을 모델에 구성할 수 있다
# 데이터 증강은 나머지 레이어와 동기적으로 기기이ㅔ서 실행되며 GPU 가속을 이용
# model.fit(model.evaluate 또는 model.predict가 아님) 호출 중에만 증강
model = tf.keras.Sequential([
resize_and_rescale,
data_augmentation,
layers.Conv2D(16, 3, padding = 'same', activation = 'relu'),
layers.MaxPooling2D(),
])# 다른 방식
aug_ds = train_ds.map(lambda x, y: (resize_and_rescale(x, training=True), y))# 데이터 증강을 위한 구성
batch_size = 32
AUTOTUNE = tf.data.experimental.AUTOTUNE
def prepare(ds, shuffle=False, augment=False):
# Resize and rescale all datasets
ds = ds.map(lambda x, y: (resize_and_rescale(x), y),
num_parallel_calls = AUTOTUNE)
if shuffle:
ds = ds.shuffle(1000)
# Batch all datasets
ds = ds.batch(batch_size)
# Use data augmentation only on the raining set
if augment:
ds = ds.map(lambda x, y : (data_augmentation(x, training = True), y),
num_parallel_calls = AUTOTUNE)
# Use buffered prefecting on all datasets
return ds.prefetch(buffer_size = AUTOTUNE)# 데이터 구성
train_ds = prepare(train_ds, shuffle=True, augment=True)
val_ds = prepare(val_ds)
test_ds = prepare(test_ds)# 모델 구성
model = tf.keras.Sequential([
layers.Conv2D(16, 3, padding = 'same', activation = 'relu'),
layers.MaxPooling2D(),
layers.Conv2D(32, 3, padding = 'same', activation = 'relu'),
layers.MaxPooling2D(),
layers.Conv2D(64, 3, padding = 'same', activation = 'relu'),
layers.MaxPooling2D(),
layers.Flatten(),
layers.Dense(128, activation='relu'),
layers.Dense(num_classes)
])# 컴파일
model.compile(optimizer = 'adam', loss = tf.keras.losses.SparseCategoricalCrossentropy(from_logits=True),
metrics=['accuracy'])# 학습
epochs = 5
history = model.fit(
train_ds, validation_data = val_ds, epochs = epochs
)# 결과
loss, acc = model.evaluate(test_ds)
print('Accuracy', acc)
# 람다 레이어를 이용한 데이터 증강

def random_invert_img(x, p=0.5): # 확률 값을 받아와 정해진 확률값 이상, 이하일 때 나눠 이미지 반전
  if tf.random.uniform([]) < p:
    x = (255 - x)
  else:
    x
  return x
def random_invert(factor = 0.5):
return layers.Lambda(lambda x: random_invert_img(x, factor))
random_invert = random_invert()plt.figure(figsize = (10, 10))
for i in range(9):
augmented_image = random_invert(image)
ax = plt.subplot(3, 3, i + 1)
plt.imshow(augmented_image[0].numpy().astype('uint8'))
plt.axis('off')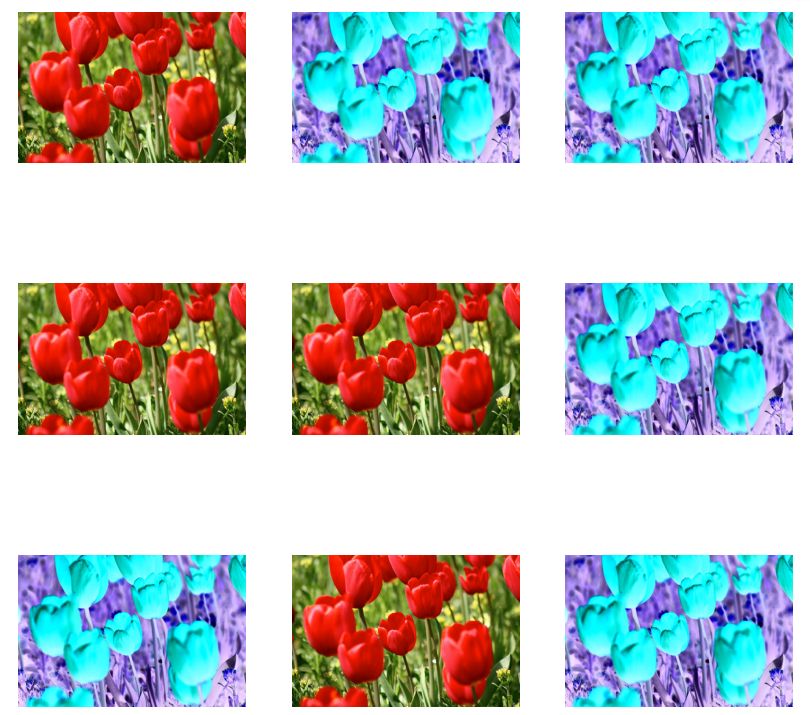
# 혹은 서브 클래스 이용

class RandomInvert(layers.Layer):
  def __init__(self, factor = 0.5, **kwargs):
    super().__init__(**kwargs)
    self.factor = factor

  def call(self, x):
    return random_invert_img(x)
_ = plt.imshow(RandomInvert()(image)[0])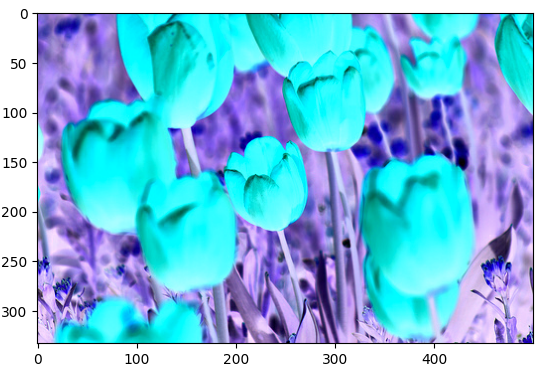
# 다른 방법

(train_ds, val_ds, test_ds), metadata = tfds.load(
    'tf_flowers',
    split=['train[:80%]', 'train[80%:90%]', 'train[90%:]'],
    with_info=True,
    as_supervised=True
)
image, label = next(iter(train_ds))
_ = plt.imshow(image)
_ = plt.title(get_label_name(label))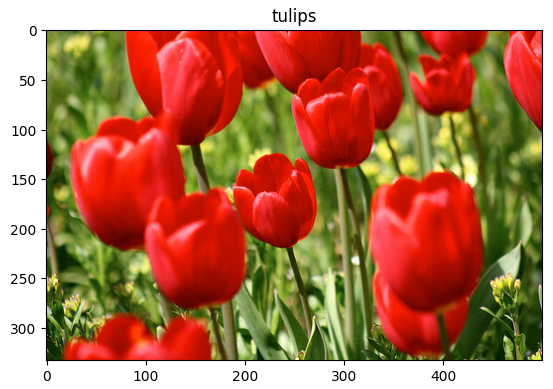
# 비교함수

def visualize(original, augmented):
  fig = plt.figure()
  plt.subplot(1, 2, 1)
  plt.title('Original image')
  plt.imshow(original)

  plt.subplot(1, 2, 2)
  plt.title('Augmented image')
  plt.imshow(augmented)
# tf.image의 뒤집기
flipped = tf.image.flip_left_right(image)
visualize(image, flipped)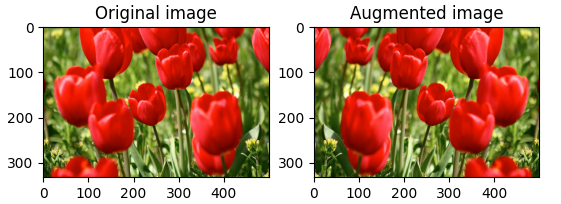
# tf.image의 gray

grayscaled = tf.image.rgb_to_grayscale(image)
visualize(image, tf.squeeze(grayscaled))
_ = plt.colorbar()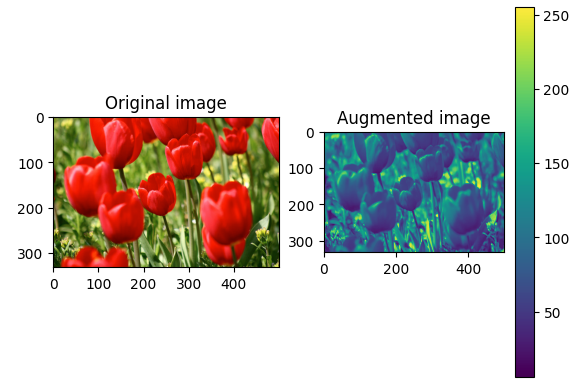
# 채도 변화를 이용한 증강

saturated = tf.image.adjust_saturation(image, 3)
visualize(image, saturated)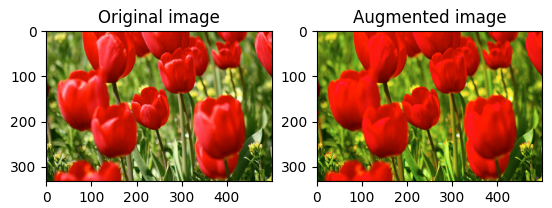
# 밝기 변화

bright = tf.image.adjust_brightness(image, 0.4)
visualize(image, bright)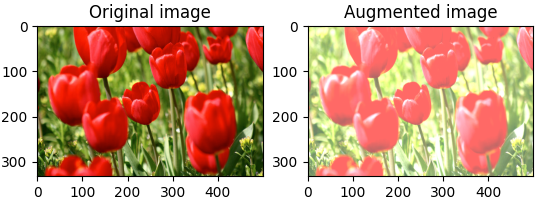
# 이미지 자르기
cropped = tf.image.central_crop(image, central_fraction = 0.5)
visualize(image, cropped)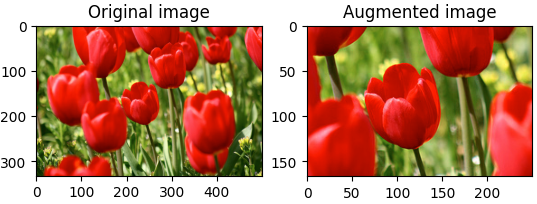
# 90도 회전

rotated = tf.image.rot90(image)
visualize(image, rotated)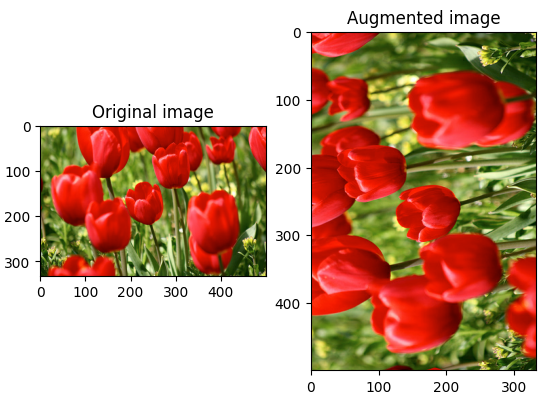
# 증강코드 함수화

def resize_and_rescale(image, label):
  image = tf.cast(image, tf.float32)
  image = tf.image.resize(image, [IMG_SIZE, IMG_SIZE])
  image = (image / 255)
  return image, label
def augment(image, label):
image, label = resize_and_rescale(image, label)
# Add 6 pixels of padding
image = tf.image.resize_with_crop_or_pad(image, IMG_SIZE + 6, IMG_SIZE + 6)
# Random crop back to the original size
image = tf.image.random_crop(image, size = [IMG_SIZE, IMG_SIZE, 3])
image = tf.image.random_brightness(image, max_delta = 0.5) # random brightness
image = tf.clip_by_value(image, 0, 1)
return image, label# 데이터 구성
train_ds = (
train_ds
.shuffle(1000)
.map(augment, num_parallel_calls = AUTOTUNE)
.batch(batch_size)
.prefetch(AUTOTUNE)
)val_ds = (
val_ds
.map(resize_and_rescale, num_parallel_calls = AUTOTUNE)
.batch(batch_size)
.prefetch(AUTOTUNE)
)test_ds = (
test_ds
.map(resize_and_rescale, num_parallel_calls = AUTOTUNE)
.batch(batch_size)
.prefetch(AUTOTUNE)
)너무너무 어렵다 ㅠㅠ...
💻 출처 : 제로베이스 데이터 취업 스쿨

#데이터분석 #퍼포먼스마케팅 #데이터 #디지털마케팅