단위 테스트는 각 구성 요소의 효율성을 결정하기 위해 특정 코드 단위를 격리하고 테스트하는 방법입니다. 따라서 코드의 단위를 적게 잡을수록 더 자세하게 전체코드를 테스트하는게 가능합니다.
여기서는 간단하게 Web 호출에 따른 ApiTest 각 component단위(Controller, Service)의 테스트를 하는 법을 알아봅니다.
1. 시작하기
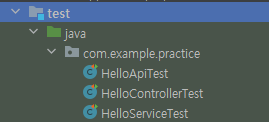
단위테스트를 할때에는 테스트 파일을 생성해주어야합니다. 이때 테스트 파일은 프로젝트의 test폴더아래에서 생성해주시면 됩니다.
2. Api 단위테스트
api 단위테스트를 하기 위해서는 http요청을 할 수 있게 해야합니다. TestRestTemplate을 작성하고 Test하려는 Url, 응답타입, 파라미터를 작성해주면 됩니다.
TestRestTemplate rest  = new TestRestTemplate();
ResponseEntity<String> res = rest.getForEntity("http://localhost:8080/hello?name={name}", String.class,"good");
그 다음에 Assertions (import org.assertj.core.api.Assertions)를 선언하여 리턴값을 비교하면 됩니다.
Assertions.assertThat(res.getStatusCode()).isEqualTo(HttpStatus.OK);
Assertions.assertThat(res.getHeaders().getFirst(HttpHeaders.CONTENT_TYPE)).startsWith(MediaType.TEXT_PLAIN_VALUE);
//startWith는 앞에 값이 TEXT_PLAIN_VALUE로 오면 ture로 인식한다. 한글같은 경우에는 "text/plain;charset=ISO-8859-1" 이렇게 끝나므로 charset부터는 맞지 않아 isEquals로는 테스트가 안된다.
Assertions.assertThat(res.getBody()).isEqualTo("Hello service : good");
이제 실패했을때도 Exception이 정상적으로 나타나는지도 코드로 작성해야합니다.
전체코드를 작성하면 다음과 같습니다.
public class HelloApiTest {
    @Test
    void helloApi(){
        TestRestTemplate rest  = new TestRestTemplate();
        ResponseEntity<String> res = rest.getForEntity("http://localhost:8080/hello?name={name}", String.class,"good");

        Assertions.assertThat(res.getStatusCode()).isEqualTo(HttpStatus.OK);
        Assertions.assertThat(res.getHeaders().getFirst(HttpHeaders.CONTENT_TYPE)).startsWith(MediaType.TEXT_PLAIN_VALUE);
        // startWith는 앞에 시작을 ""로 오면 ture로 인식한다. 한글같은 경우에는 "text/plain;charset=ISO-8859-1" 이렇게 끝나므로 charset부터는 맞지 않아 isEquals가 안된다.
        Assertions.assertThat(res.getBody()).isEqualTo("Hello service : good");
    }

    @Test
    void failsHelloApi(){
        TestRestTemplate rest  = new TestRestTemplate();
        ResponseEntity<String> res = rest.getForEntity("http://localhost:8080/hello?name={name}", String.class,""); // ""를 넣어 공백에러(== null)가 뜨게 한다.

        Assertions.assertThat(res.getStatusCode()).isEqualTo(HttpStatus.INTERNAL_SERVER_ERROR);
    }
}
3. Service 단위테스트
서비스는 간단합니다. 객체를 불러와서 원하는 값을 입력 후 비교하면 됩니다. 마찬가지로 실패할게 있으면 실패도 넣어주면 됩니다. 해당 글에서는 따로 실패 검증문을 넣을게 없어서 작성 안했습니다.
public class HelloServiceTest {
    @Test
    void HelloService(){
        HelloService helloService = new HelloService();

        String result = helloService.say("Test");
        Assertions.assertThat(result).isEqualTo("Hello service : Test");
    }
}
4. Controller 단위테스트
컨트롤러의 경우에는 약간 까다로울 수 있다 Service를 생성자로 갖기 때문이다. 다른 객체 대신에 가짜 객체(Mock Object)를 주입하여 어떤 결과를 반환하라고 정해진 답변을 준비시켜야 하는데, 이를 스텁(Stub)이라고 한다.
public class HelloControllerTest {
@Test
void helloController() throws Exception {
HelloController helloController = new HelloController(new HelloServiceImpl() {
@Override
public String say(String name) {
return null;
}
}); // 다음과 같이 컨트롤러는 서비스를 생성자로 갖고 있고 해당부분은 웹 어플리케이션이 실행 되어야만 입력이 가능할거 같지만 아니다.
// 그냥 단순하게 새로 객체를 생성하고 오버라이딩해서 값을 집어넣어 사용해도 된다. 테스트 스텁(Stub)이라고 부른다.
String result = helloController.hello("ControllerTest");
Assertions.assertThat(result).isEqualTo("TT");
}
@Test
void falisHelloController() throws Exception {
HelloController helloController = new HelloController(new HelloServiceImpl() {
@Override
public String say(String name) {
return null;
}
});
// 에러의 경우에는 에러가 발생하면 테스트 정상을 나타내야하기 때문에 assertThatThrownBy를 사용한다.
Assertions.assertThatThrownBy(()-> {
helloController.hello(null);
}).isInstanceOf(IllegalAccessException.class);
Assertions.assertThatThrownBy(()-> {
helloController.hello("");
}).isInstanceOf(IllegalAccessException.class);
}
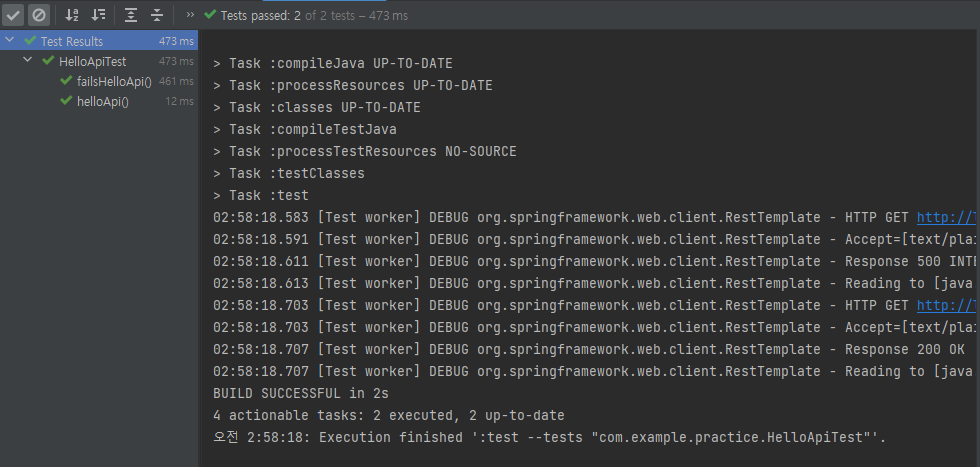
}5. 결과
결과를 로그에서 확인하면 된다. 다음 사진과 같이 fails와 helloApi 두개를 테스트했고 응답이 200일때도 500일때도 테스트가 정상적으로 완료했다.
참고로 단위테스트를 하는데는 Web통신을 이용한 API테스트가 실제 웹환경이니 가장 좋기는 하지만, 속도가 느리므로 여러 테스트를 진행해야 할땐 그냥 Component별 단위 테스트 하는게 좋다.