Intro
- 오늘 ViewBinding에 대해 공부하는 시간을 가졌다. 간략하게 사용법을 살펴봤는데 보다보니 궁금한게 한두가지가 아니어서 도대체 ViewBinding은 어떤식으로 구현될까싶어 class를 까봤다.
ViewBinding
- 먼저 ViewBinding을 사용하기위해 build.gradle에서 설정해주자. gradle 파일에서 android 안에 선언해주면 된다. 그리고 gradle을 sync 해주면 적용이된다.
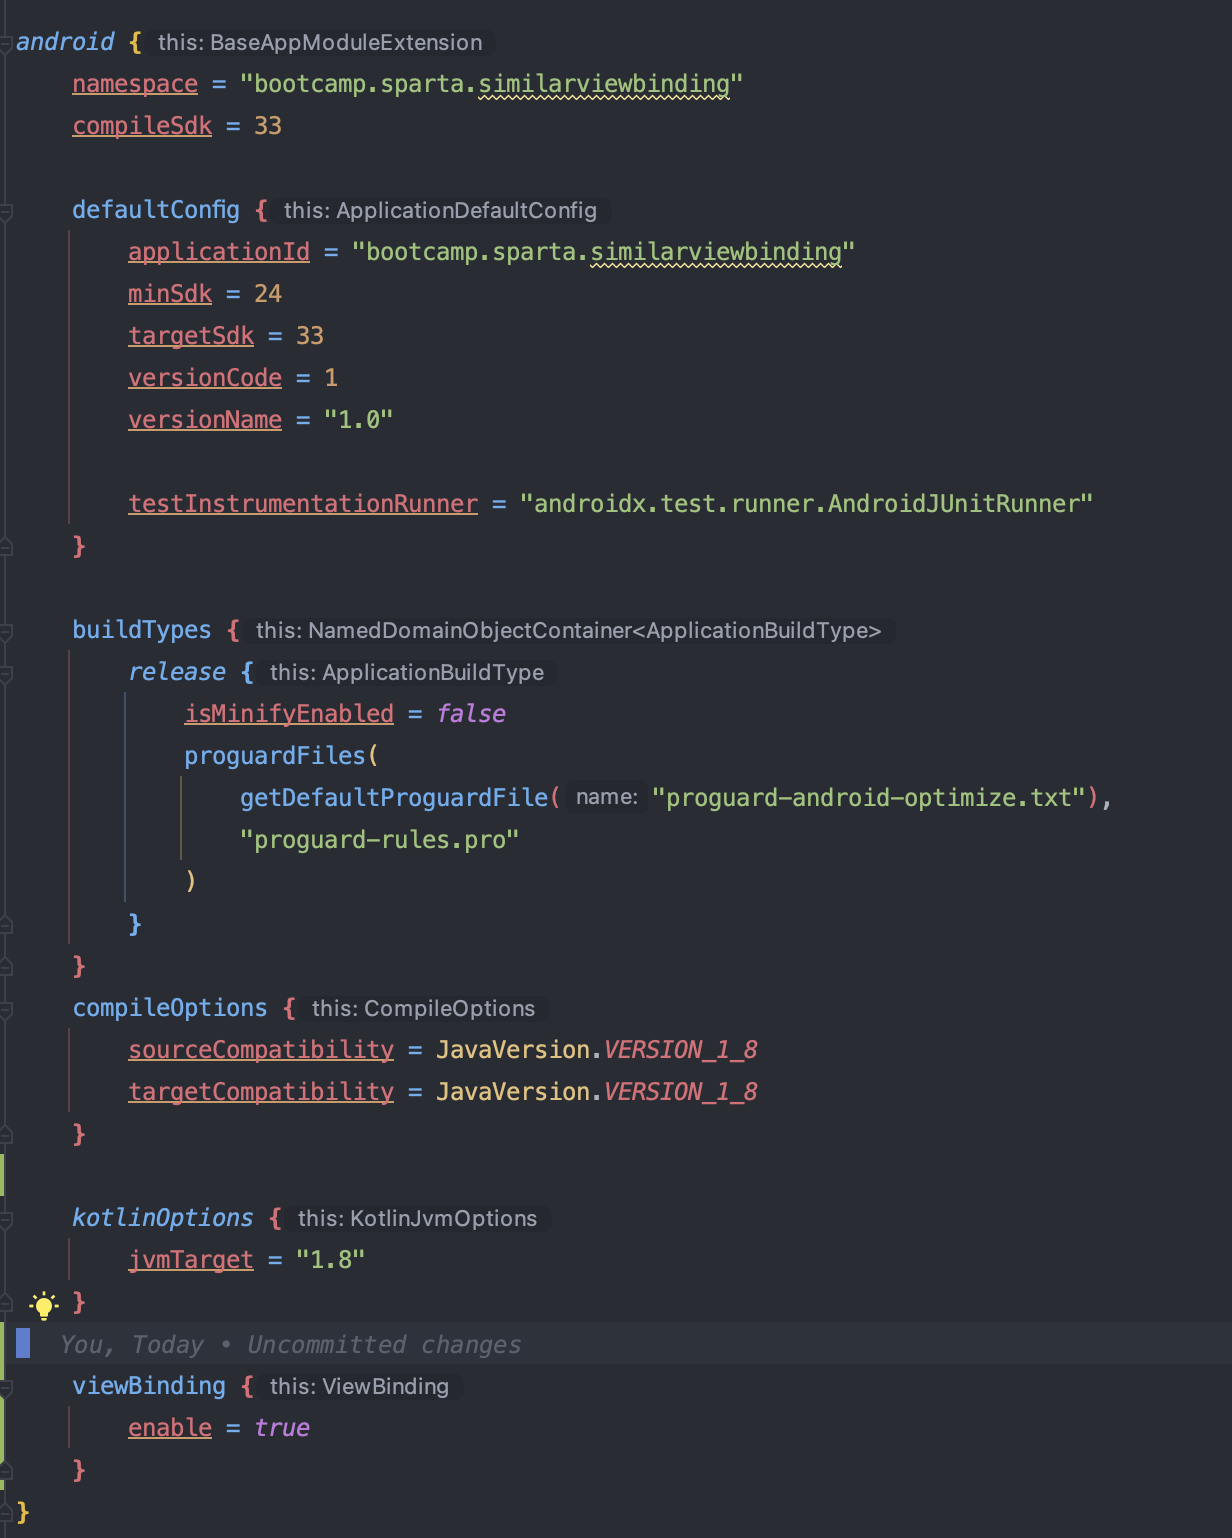
    viewBinding {
        enable = true
}- 이렇게 선언하면 내가만드는 모든 layout xml에 1:1 대응하는 class를 알아서 만들어준다. 해당 클래스는 아래 위치에 있다. 단, 앱을 한번은 실행해줘야 파일이 생기는듯하다. 그전에는 생기지 않으니 안보인다면 앱을 한번 실행해보면된다.
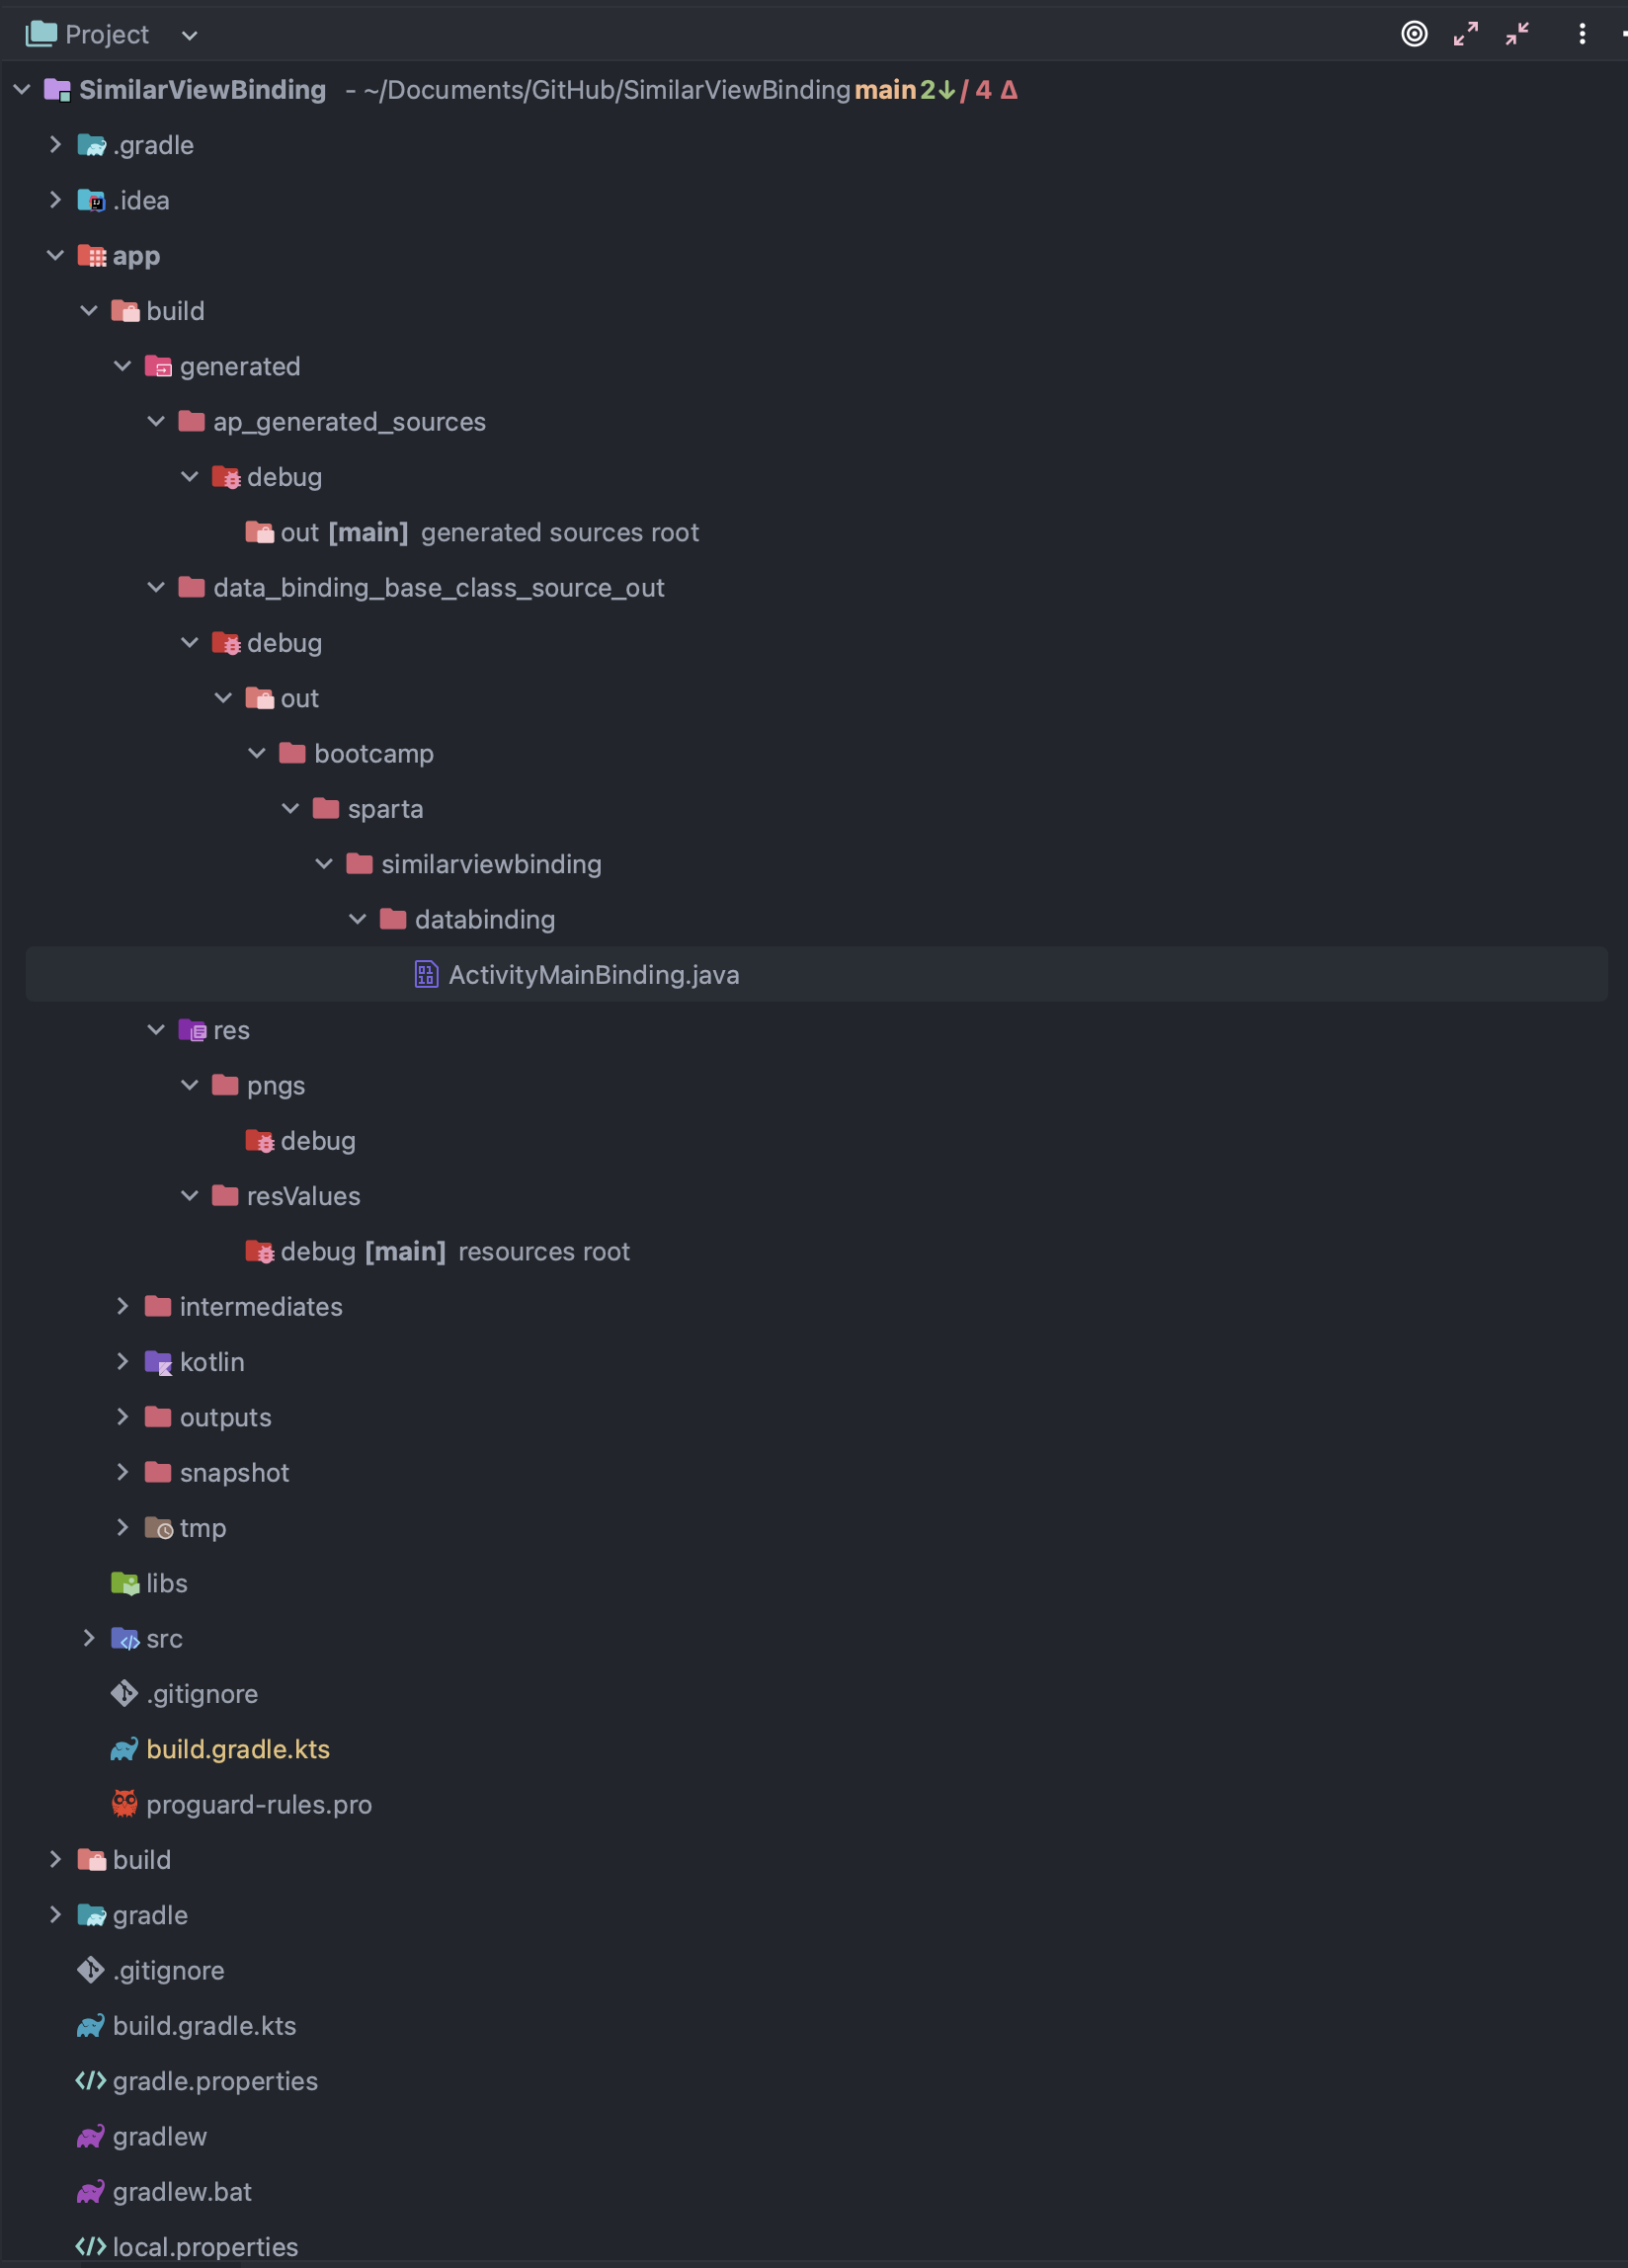
- java class 파일을 보면 아래와같은 구조로 되어있다. 사실 위에 더 있지만 실질적으로 inflate하는 부분만 가져와봤다.
ActivityMainBinding.java

@NonNull
  public static ActivityMainBinding inflate(@NonNull LayoutInflater inflater) {
    return inflate(inflater, null, false);
  }

  @NonNull
  public static ActivityMainBinding inflate(@NonNull LayoutInflater inflater,
      @Nullable ViewGroup parent, boolean attachToParent) {
    View root = inflater.inflate(R.layout.activity_main, parent, false);
    if (attachToParent) {
      parent.addView(root);
    }
    return bind(root);
  }

  @NonNull
  public static ActivityMainBinding bind(@NonNull View rootView) {
    // The body of this method is generated in a way you would not otherwise write.
    // This is done to optimize the compiled bytecode for size and performance.
    int id;
    missingId: {
      id = R.id.button;
      Button button = ViewBindings.findChildViewById(rootView, id);
      if (button == null) {
        break missingId;
      }

      id = R.id.tv_text;
      TextView tvText = ViewBindings.findChildViewById(rootView, id);
      if (tvText == null) {
        break missingId;
      }

      return new ActivityMainBinding((ConstraintLayout) rootView, button, tvText);
    }
    String missingId = rootView.getResources().getResourceName(id);
    throw new NullPointerException("Missing required view with ID: ".concat(missingId));
  }
activity_main.xml
<?xml version="1.0" encoding="utf-8"?>
<androidx.constraintlayout.widget.ConstraintLayout xmlns:android="http://schemas.android.com/apk/res/android"
xmlns:app="http://schemas.android.com/apk/res-auto"
xmlns:tools="http://schemas.android.com/tools"
android:layout_width="match_parent"
android:layout_height="match_parent"
tools:context=".MainActivity">
<TextView
android:id="@+id/tv_text"
android:layout_width="wrap_content"
android:layout_height="wrap_content"
android:text="Hello World!"
app:layout_constraintBottom_toBottomOf="parent"
app:layout_constraintEnd_toEndOf="parent"
app:layout_constraintStart_toStartOf="parent"
app:layout_constraintTop_toTopOf="parent" />
<Button
android:id="@+id/button"
android:layout_width="0dp"
android:layout_height="wrap_content"
android:layout_margin="20dp"
android:text="버튼"
app:layout_constraintBottom_toBottomOf="parent"
app:layout_constraintEnd_toEndOf="parent"
app:layout_constraintStart_toStartOf="parent" />
</androidx.constraintlayout.widget.ConstraintLayout>- 여기서 메서드를 찬찬히 살펴보면 layout을 inflate해서 화면에 보여주게되는데 그때 "bind"메서드에서 내가 선언했던 TextView와 Button의 id를 가져와 findviewById를 해주게된다. 비교를위해 xml코드도 가져와봤다.
- AndroidStudio에서 만들어준 Binding코드를 보는데 잘 이해하지못한부분이 바로 bind 메서드 안에있는 ViewBinding.findChildViewById 였다. 대충 찾아보니 view의 id를 모르는 상태에서 view에 접근하여 뭔가를 하기위해 사용한다고 하는데 아직은 쓸일이 없어서 잘 모르겠다.
- 아무튼 이 코드를 보고나니 이것과 비스무리하게 만들어볼수있겠다는생각이 들었다. 그래서 만들어봤다..!
SimilarActivityMainBinding.kt

package bootcamp.sparta.similarviewbinding

import android.content.Context
import android.view.LayoutInflater
import android.view.View
import android.widget.Button
import android.widget.TextView

class SimilarActivityMainBinding(context: Context) : View(context) {
    lateinit var button: Button
    lateinit var tvText: TextView
    lateinit var root: View

    init {
        initRootView()
        binding()
    }

    private fun initRootView() {
        root = LayoutInflater.from(context).inflate(R.layout.activity_main, null, false)
    }

    private fun binding() {
        button = root.findViewById(R.id.button)
        tvText = root.findViewById(R.id.tv_text)
    }
}- 처음 살펴본 class와 동일한 역할을 하도록 얼추 비슷하게 만들어봤다. 실행해보니 잘 된다.
- ViewBinding을 사용하면 Null-Safety, Type-Safety, 성능상 이득을 본다고하였는데 그 이유를 알 것 같다. findviewById를 사용하면 모든 리소스에서 id를 찾는다고 알고있는데 그에반해 ViewBinding은 미리 선언되어있는 view에 접근하기때문에 성능상 차이가 날 수 밖에없다.
전체코드는 여기에
Outro
- ViewBinding이 대략 어떤식으로 돌아가는지 살펴보았다. 그리고 ViewBinding이 왜 Null-Sfaety하고 Type-Safety한지 그리고 findViewById보다 나은 성능이라는 이유도 알게되었다.
- Android 코드 하나씩 뜯어보는 재미(?)가 커지길 바라며..

잘부탁드립니다!