돌림판 클래스
2편을 작성하고나서 html에 작성되었던 코드를 모두 js로 옮겼다.
//가독성을 위해 import문과 jsdoc, 메소드 내부 동작을 제거함
export default class SpinWheel {
  svgEl;

  constructor({ size, radius, sectorData, container }) {
    this.size = size;
    this.radius = radius;
    this.circumference = 2 * Math.PI * this.radius;
    this.container = container;

    this.sectorData = sectorData;
    this.totalSector = sectorData.reduce((acc, cur) => cur.ratio + acc, 0);
    this.sectorGroup = [];
    this.draw();
  }

  draw() {
	...
    this.drawSector();
  }

  drawSector() {
  }

  update({ sectorData = this.sectorData }) {
	...
    this.remove();
    this.draw();
  }

  remove() {
    ...
  }

  rotate() {
    ...
  }

  stopRotate() {
  	...
  }
}
이런식으로 생긴 클래스를 제작했다. 함수로 만들어보는 것도 좋지만, 클래스에 약해서 이번 프로젝트는 클래스를 이용해 만들어보기로 했다.
아무튼 이렇게 만들어진 룰렛에 텍스트를 입력해서 넣어야한다.
예전 노션 클론프로젝트때 사용했던 contenteditable속성을 이용해보려 한다.
contenteditable
요 속성은 사용자가 엘리먼트를 직접 수정 할수 있게 만든다.
input을 사용하면 간단했을테지만 써본 적도 있고 재밌어보인다 ㅎㅎ
이 속성을 활용하는 EditableDiv라는 클래스를 제작해본다.
export default class EditableDiv {
  #id;
  #container;
  #divEl;

  constructor({ id, container, text = "" }) {
    this.#id = id;
    this.#container = container;
    this.text = text;
    this.#divEl = document.createElement("div");
    this.#setAttrs();
    this.setText(text);
    this.#render();
  }
  get element() {
    return this.#divEl;
  }

  #setAttrs() {
    setAttributes(this.#divEl, {
      contenteditable: true,
      ["data-contenteditable"]: true,
      id: this.#id,
    });
    Object.assign(this.#divEl.style, DEFAULT_EDITABLE_STYLE);
  }

  setText(text) {
    if (!text) return;
    this.#divEl.textContent = text;
  }

  clear() {
    this.#divEl.textContent = "";
  }

  #render() {
    this.#container.appendChild(this.#divEl);
  }
}
private 도 활용하고 getter도 사용해보았다.
또한 setAttribute는 하나의 속성만 설정할 수 있어서 setAttributes라는 함수도 제작하여 사용했다.
export default function setAttributes(el, attrs) {
  Object.keys(attrs).forEach((key) => el.setAttribute(key, attrs[key]));
}
이렇게 만들어진 EditableDiv클래스도 활용해보자.
먼저 룰렛의 부채꼴 영역와 1대1대응을 해야한다. 이때문에 id같은 특정 값을 부채꼴과 EditableDiv에 부여해서 사용하려했는데 그럴 필요가 없다는 걸 깨달았다.
EditableDiv과 룰렛 영역 1대1 대응시키기
SpinWheel클래스는 아래와 같은 값을 받는다.
let sectorData = [
  { ratio: 1, sectorColor: "tomato", text: "돌림판" },
  { ratio: 1, sectorColor: "pink", text: "입니다" },
];
이후인스턴스를 생성하면, 배열을 순회하며 나눠진 영역이 렌더링된다.

그리고 EditableDiv에 적혀있는 텍스트값은 sectorData배열 내부 객체의 text필드값과 순서가 일치해야 한다.


그렇단 얘기는 sectorData의 인덱스와 EditavbleDiv를 인스턴스화 하여 만든 엘리먼트의 순서가 같아야 한단 소리다.
이를 통해 id같은 특정 값 부여 없이 특정 룰렛 텍스트를 생성, 수정, 삭제할 수 있다.
실제로 EditableDiv 부모의 childNodes값을 콘솔에 찍어보면 다음과 같다.
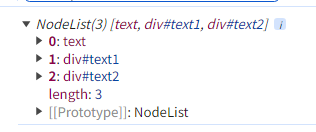
주의할점은 0번인덱스는 대부분 text를 자식으로 갖고있다. 따라서 0번인덱스를 제거해야한다.
또한 NodeList는 배열이아니며 살아있는 객체(참조중)다. for-of같은 순회를 사용할 수 있지만, 배열 메서드를 사용할수 없다. 그냥 마음 편하게 스프레드 연산자를 사용해서 배열로 바꿔주었다.
const getChildNodesArr = (target) => [...target.childNodes];이제 위에서 설명한 내용과 만든 함수를 적절히 조합하면...
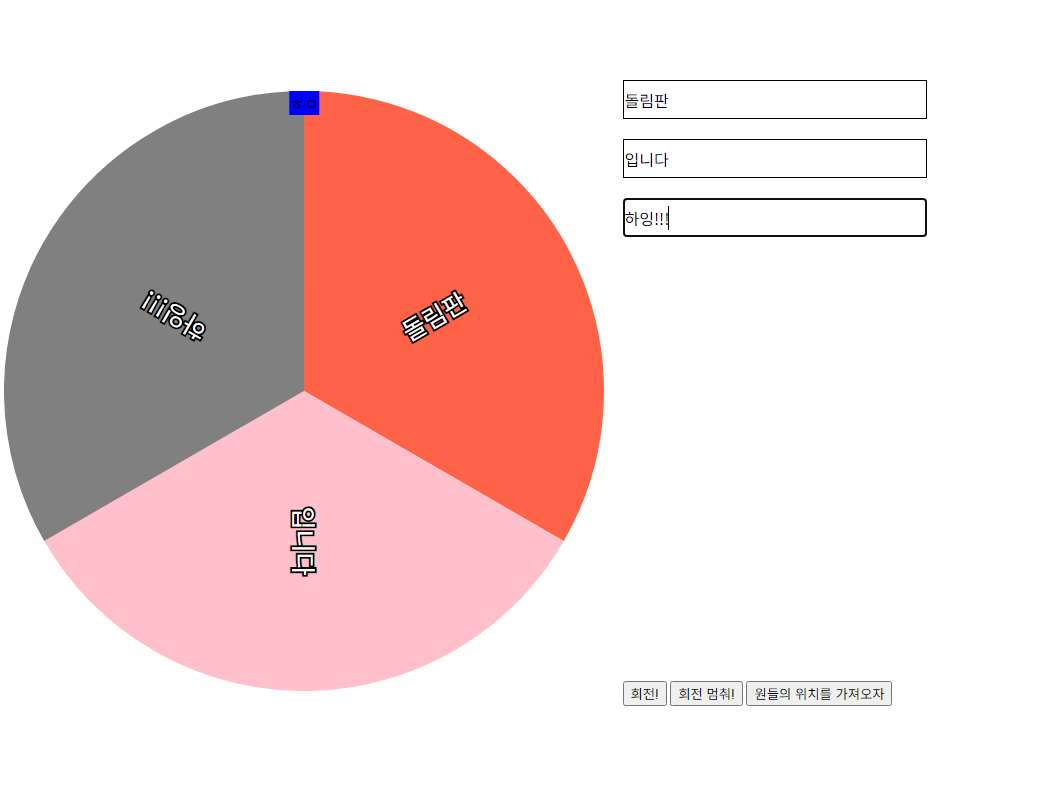
깰꼼하게 완성 되었다!