
1. naver movie review crawling
- 하나의 페이지에 있는 리뷰 수집(iframe태그)
- 1~5페이지의 리뷰 수집 -> 텍스트파일로 저장(open 활용)
- 모든 페이지의 리뷰 수집 -> 전체 페이지수 필요
- 수집한 리뷰를 텍스트파일로 저장
- 워드클라우드 그리기(wordcloud library install, matplotlib)
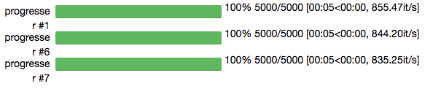
1) import (tqdm)
- 실행되는 과정을 프로그래스 bar로 시각화되어 보여주는 역할을 한다.
2) 원하는 페이지의 HTML을 로딩하기
movie_url = "https://movie.naver.com/movie/bi/mi/pointWriteFormList.naver?code=191634&type=after&isActualPointWriteExecute=false&isMileageSubscriptionAlready=false&isMileageSubscriptionReject=false"
header = {"user-agent":"Mozilla/5.0 (Windows NT 10.0; Win64; x64) AppleWebKit/537.36 (KHTML, like Gecko) Chrome/103.0.0.0 Safari/537.36"}
res = req.get(movie_url, headers = header)
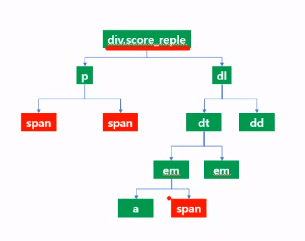
html = bs(res.text, 'lxml')3) CSS 선택하기
- BeautifulSoup의 select 문에서 CSS선택자인 id가 계쏙 바뀐다면 활용하기 어렵다.
reples = html.select("div.score_reple > p > span")

for reple in reples:
    if "관람객" not in reple:
print(reple.text.strip())text는 요소가 1개일때만 써야함으로 리스트 변수에 갖다 써도 error가 날 뿐이다.
4) iframe
- 어떠한 웹 페이지 안에 웹 페이지를 로딩하여 하나의 페이지 처럼 보이게 하는 기술이다.
- 문제는 BeautifulSoup를 사용한다면 iframe안에 있는 data값들은 추출이 불가능하기 때문에 따로 해당 사이트로 이동하여 HTML 파일을 다시 불러와주어야 한다.
5) params
- parameter의 준말로 url 뒤에 키값을 붙히고 :은 =로 치환되어 url뒤에 계쏙 이어 붙어진다.
<style>

f = open("movie_reple.txt",'w')

for pageNo in range(1,6):
    # 직접하려면 f포멧팅으로 해야한다.
    movie_url="https://movie.naver.com/movie/bi/mi/pointWriteFormList.naver?code=191634&type=after&isActualPointWriteExecute=false&isMileageSubscriptionAlready=false&isMileageSubscriptionReject=false"
    header = {"user-agent":"Mozilla/5.0 (Windows NT 10.0; Win64; x64) AppleWebKit/537.36 (KHTML, like Gecko) Chrome/103.0.0.0 Safari/537.36"}

    # url의 flase&page=1 부분
    res = req.get(movie_url, headers = header, params = {"page":pageNo})
    html = bs(res.text, 'lxml')


    reples = html.select("div.score_reple > p > span")


    for reple in reples:
        if "관람객" not in reple:
            f.write(reple.text.strip()+"\n")

f.close()

</style>- 즉 movie_url의 끝부분인
...Reject=false의 뒤에 params 속성의 dictionary의 key값이 뒤로 붙어...Reject=false&page=2이렇게 바뀐다.
6) 전체 페이지 수 구하기
- 전체 페이지수 구하기(총 리뷰건수를 활용)
- 총리뷰건수를 수집
- ','를 제거하고 정수로 변환한다.( replace() , int() ) => 이때 re sub와 translate method도 함께 정리
- 10으로 나누에 페이지수를 구한다.
- 나머지를 구하는 연산자로 나누었을 때 0보다 크면 페이지수에 +1
strPages = html.select_one("strong.total > em").text
intPages = int(strPages.replace(",",""))

totalPage = intPages//10

if intPages%10 > 0:
    totalPage += 1

print("페이지 수 : ",totalPage)

#result
페이지 수 :  147
7) 모든 페이지의 리뷰를 txt파일로 저장
<style>

f = open("movie_reple2.txt",'w')

for pageNo in tqdm(range(1,totalPage+1)):
    # 직접하려면 f포멧팅으로 해야한다.
    movie_url="https://movie.naver.com/movie/bi/mi/pointWriteFormList.naver?code=191634&type=after&isActualPointWriteExecute=false&isMileageSubscriptionAlready=false&isMileageSubscriptionReject=false"
    header = {"user-agent":"Mozilla/5.0 (Windows NT 10.0; Win64; x64) AppleWebKit/537.36 (KHTML, like Gecko) Chrome/103.0.0.0 Safari/537.36"}
    # url의 flase&page=1 부분
    res = req.get(movie_url, headers = header, params = {"page":pageNo})
    html = bs(res.text, 'lxml')
    reples = html.select("div.score_reple > p > span")

    for reple in reples:
        if "관람객" not in reple:
            f.write(reple.text.strip())
f.close()

</style>
8) 워드 클라우드 다운 및 확인 후 import
!pip install wordcloud

!pip install wordcloud == 3.2.5- 아래처럼 특정 버젼을 다운받을 수 있다.
확인
!pip list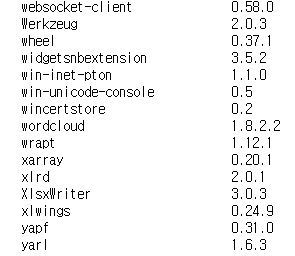
- import
from wordcloud import WordCloud
import matplotlib.pyplot as plt
9) 워드클라우드, matplotlib을 이용하기
- 준비가 완료되었으면 matplotlib를 이용하여 표에 그릴 수 있다.
wc = WordCloud(
    font_path="C:/Windows/Fonts/malgunbd.ttf",
    background_color="white"
).generate(data)

plt.imshow(wc) # 워드 클라우드 출력
plt.axis('off') # x,y축 제거
plt.savefig("wordcoud.jpg") # 이미지 저장

智(지)! 德(덕)! 體(체)!