서버
Flask
Flask는 파이썬 웹 프레임워크로 Django같은 것인데 더 가볍고 간단한 것이라고 생각하면 쉽다. 금주차에는 이 Flask 프레임워크를 활용하여 API를 만고 클라이언트에 연결할 것이다.
Flask 설치하기
Pycharm - preferences - 프로젝트:PythonPrac - Python인터프리터 - '+'클릭 - Flask 검색 - 설치

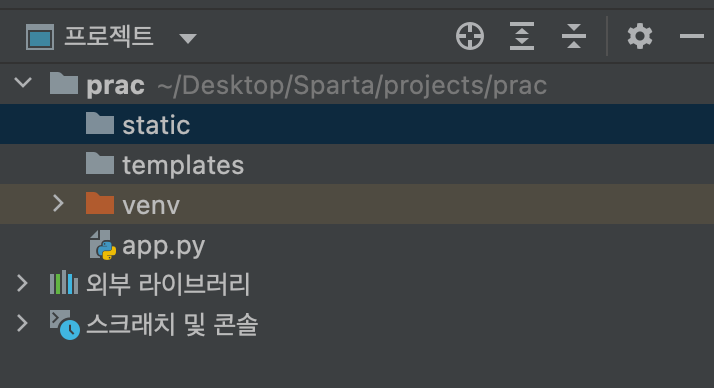
Flask로 서버를 만들 때에는 폴더 안에 아래와 같이 static, templates, app.py 파일를 따로 만들어주어야 한다. static 폴더는 주로 css 파일, image 파일이 들어갈 곳이고, templates는 html 파일이 들어갈 곳이다.
서버 연결하기
from flask import Flask
app = Flask(__name__)

@app.route('/')
def home():
   return 'This is Home!'

if __name__ == '__main__':
   app.run('0.0.0.0',port=8000,debug=True)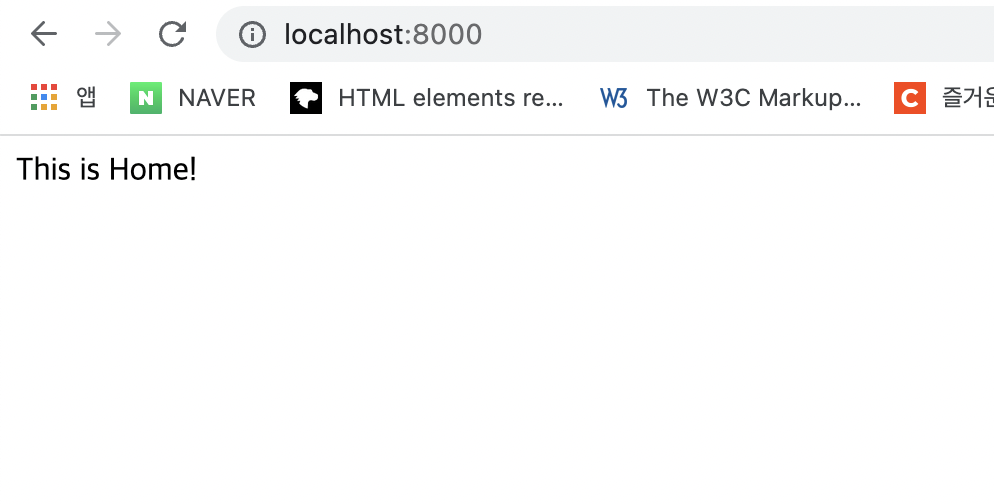
연결이 되었다.
처음에 port를 5000으로 하라고 해서 5000으로 했는데
Already address is use error가 발생하여 port번호를 8000으로 바꿔주었다. 5000번 포트를 자체적으로 사용하고 있는 응용 프로그램이 있다거나 하는 경우 발생하는 에러라고 한다.
URL 나눠보기
from flask import Flask
app = Flask(__name__)

@app.route('/')
def home():
   return 'This is Home!'

@app.route('/mypage')
def mypage():
   return 'This is MyPage!'

if __name__ == '__main__':
   app.run('0.0.0.0',port=8000,debug=True)
@app.rout('/') 부분을 수정해서 url을 나눌 수 있다. localhost:8000/mypage 로 연결을 하니까 'This is MyPage!'가 출력된 창이 나타났다.
url별로 함수명이 같거나, route('/')내의 주소가 같으면 안된다.
index.html파일 불러와서 보여주기
먼저, templates directory 안에 index.html 파일을 넣어놓고 아래 코드를 실행해준다.
from flask import Flask, render_template
app = Flask(__name__)

@app.route('/')
def home():
   return render_template('index.html')

if __name__ == '__main__':
   app.run('0.0.0.0',port=8000,debug=True)
이렇게 해주면 index.html파일을 localhost:8000에서 불러와서 띄워준다.

API 만들기
API를 만들기에 앞서 데이터를 요청할 때는 GET, POST 방식을 사용할 수 있는데 이 방식들에 대해 정리하고 시작하고자 한다.
Get
일반적으로 데이터 조회(Read)를 요청할 때 사용한다.
예) 영화 목록 조회
→ 데이터 전달 : URL 뒤에 물음표를 붙여 key=value로 전달
예: google.com?q=북극곰
Post
데이터 생성(Create), 변경(Update), 삭제(Delete) 요청 할 때 사용한다.
예) 회원가입, 회원탈퇴, 비밀번호 수정
→ 데이터 전달 : 바로 보이지 않는 HTML body에 key:value 형태로 전달
GET 요청 API
-클라이언트
#jQuery import
<script src="https://ajax.googleapis.com/ajax/libs/jquery/3.5.1/jquery.min.js"></script>
<script>
#GET 요청 확인 AJAX 코드
    function hey(){
            $.ajax({
                type: "GET",
                #/test라는 창구에서 title_give라는 키의 데이터 '봄날은간다'를 요청한다.
                url: "/test?title_give=봄날은간다",
                data: {},
                success: function (response) {
                    console.log(response)
                }
            })
    }
</script>
<body><button onclick="hey()">버튼</button></body>
-서버
@app.route('/test', methods=['GET'])
def test_get():
title_receive = request.args.get('title_give')
print(title_receive)
return jsonify({'result':'success', 'msg': '이 요청은 GET!'})서버를 실행, 연결하고 브라우저 창에서 버튼을 클릭하면 hey() 함수가 실행이 되고, '봄날은간다'는 데이터를 클라이언트에서 서버로 준다. 서버는 받은 데이터 title_receive를 출력하고 {'result':'success', 'msg': '이 요청은 GET!'}라는 데이터를 클라이언트에게 전달해주고 클라이언트에서 이를 브라우저 콘솔창에 출력한다.
127.0.0.1 - - [23/Feb/2022 17:50:59] "GET /test?title_give=봄날은간다 HTTP/1.1" 200 -
봄날은 간다

msg: "이 요청은 GET!"
result: "success"
POST 요청 API
-클라이언트
<script>
        function hey(){
            $.ajax({
                type: "POST",
                url: "/test",
                data: {title_give: '봄날은간다'},
                success: function (response) {
                    console.log(response['msg'])
                }
            })
        }
</script>
<body><button onclick="hey()">버튼</button></body>
-서버
@app.route('/test', methods=['POST'])
def test_post():
title_receive = request.form['title_give']
print(title_receive)
return jsonify({'result':'success', 'msg': '이 요청은 POST!'})브라우저에서 버튼을 클릭하면 클라이언트에서 서버로 ajax 요청을 하고 이 때 서버에서는 request.form['title_give']을 가져왔는지 확인한다. 'title_give'의 value값 '봄날은 간다'를 가져온 것을 확인한 후 터미널창에 출력한다. 성공적으로 이를 수행했다면 그 다음 {'result':'success', 'msg': '이 요청은 POST!'}를 클라이언트로 전달해주고 클라이언트는 여기서 ',msg'에 해당하는 부분을 브라우저 콘솔창에 출력해준다.
127.0.0.1 - - [23/Feb/2022 18:03:15] "POST /test HTTP/1.1" 200 -
봄날은간다

이 요청은 POST!요청을 잘 받았어요
서버연결 연습하기 1 - 화성땅 공동구매
POST 방식
단계별로 확인하기
- 요청 정보 : URL= /mars, 요청 방식 = POST
- 클라(ajax) → 서버(flask) : name, address, size
- 서버(flask) → 클라(ajax) : 메시지를 보냄 (주문 완료!)
- 요청 정보 : URL= /mars, 요청 방식 = POST
-서버
from flask import Flask, render_template, request, jsonify

app = Flask(__name__)

@app.route('/')
def home():
    return render_template('index.html')

@app.route("/mars", methods=["POST"])
def web_mars_post():
    sample_receive = request.form['sample_give']
    print(sample_receive)
    return jsonify({'msg': 'POST 연결 완료'})

@app.route("/mars", methods=["GET"])
def web_mars_get():
    return jsonify({'msg': 'GET 연결 완료!'})

if __name__ == '__main__':
    app.run('0.0.0.0', port=8000, debug=True)
-클라이언트
<script>
$(document).ready(function () {
show_order();
});
function show_order() {
$.ajax({
type: 'GET',
url: '/mars',
data: {},
success: function (response) {
alert(response['msg'])
}
});
}
function save_order() {
$.ajax({
type: 'POST',
url: '/mars',
data: {sample_give: '데이터전송'},
success: function (response) {
alert(response['msg'])
}
});
}
</script>
<body>
<button onclick="save_order">주문하기</button>
</body>- 서버 만들기
@app.route("/mars", methods=["POST"])
def web_mars_post():
    name_receive = request.form['name_give']
    address_receive = request.form['address_give']
    size_receive = request.form['size_give']
    doc = {
        'name':name_receive,
        'address':address_receive,
        'size':size_receive
    }
    db.mars.insert_one(doc)

return jsonify({'msg': '주문 완료'})- 클라이언트 만들기
function save_order() {
            let name = $('#name').val()
            let address = $('#address').val()
            let size = $('#size').val()

            $.ajax({
                type: 'POST',
                url: '/mars',
                data: {name_give:name, address_give:address, size_give:size},
                success: function (response) {
                    alert(response['msg'])
                    window.location.reload()
                }
            });
        }
DB에서도 확인 완료!
- window.location.reload() :
reload() 메소드(Method)는, 현재 웹페이지를 다시 불러오게 하는 것. 키보드의 F5키를 눌러 브라우저를 "새로 고침"하는 것과 같다.
컴퓨터의 캐쉬에서 우선 파일을 찾아본다. 없으면 서버에서 받아온다.
GET 방식
단계별로 확인하기
- 요청 정보 : URL= /mars, 요청 방식 = GET
- 클라(ajax) → 서버(flask) : (없음)
- 서버(flask) → 클라(ajax) : 전체 주문을 보내주기
- 요청 정보 : URL= /mars, 요청 방식 = GET
-서버
@app.route("/mars", methods=["GET"])
def web_mars_get():
    return jsonify({'msg': 'GET 연결 완료!'})
-클라이언트
$(document).ready(function () {
show_order();
});
function show_order() {
$.ajax({
type: 'GET',
url: '/mars',
data: {},
success: function (response) {
alert(response['msg'])
}
});
}- 서버 만들기
@app.route("/mars", methods=["GET"])
def web_mars_get():
    order_list = list(db.mars.find({}, {'_id': False}))

    return jsonify({'orders':order_list})
클라이언트에서 GET방식으로 데이터를 요청하면, order_list를 DB에서 불러온 뒤, orders라는 이름으로 order_list를 클라이언트로 보내 줄 것이다.
- 클라이언트 만들기
function show_order() {
            $.ajax({
                type: 'GET',
                url: '/mars',
                data: {},
                success: function (response) {
                    let rows = response['orders']
                    for(let i  = 0; i < rows.length; i++){
                        let name = rows[i]['name']
                        let address = rows[i]['address']
                        let size = rows[i]['size']
                        let temp_html = `<tr>
                                            <td>${name}</td>
                                            <td>${address}</td>
                                            <td>${size}</td>
                                        </tr>`
                        $('#order_list').append(temp_html)
                    }
                }
            });
list형태로 데려온 데이터를 for반복문을 활용하여 각각의 변수에 넣고 이를 temp_html 변수에 코드형식으로 데이터를 받아 넣은 뒤 order_list < tbody > 태그에 추가한다.
페이지가 로드되면 아래와 같은 화면을 얻을 수 있게된다.

서버 연결 연습하기 2 - 스파르타피디아
우리가 친구들에게 어떤 링크를 떠다가 공유할 때 아래와 같이 링크 밑에 이미지 제목 설명이 같이 붙어서 메시지가 간다.

바로 어떤 기능들을 < meta >태그에 심어놓았기 때문이다!
이 기능들을 먼저 알아보고 연습하기에 들어가려고 한다.

여기서 보이는 property="og:title", property="og:image", property="og:description" 때문에 저렇게 사진, 제목, 설명이 붙어서 나온다고 한다.
그래서 아래에서 우선 og:title, og:image, og:description을 크롤링해고자 한다.
meta 태그 정보 스크래핑하기
import requests
from bs4 import BeautifulSoup

url = 'https://movie.naver.com/movie/bi/mi/basic.naver?code=191597'

headers = {'User-Agent' : 'Mozilla/5.0 (Windows NT 10.0; Win64; x64)AppleWebKit/537.36 (KHTML, like Gecko) Chrome/73.0.3683.86 Safari/537.36'}
data = requests.get(url,headers=headers)

soup = BeautifulSoup(data.text, 'html.parser')

title = soup.select_one('meta[property="og:title"]')
print(title)
---------------------------------------------------------
출력: <meta content="보스 베이비 2" property="og:title"/>
영화 제목만 출력하기 위해서 코드를 아래처럼 바꿔주었다.
title = soup.select_one('meta[property="og:title"]')['content']
print(title)
---------------------------------------------------------
출력: 보스 베이비 2
이제 이미지, 설명도 같이 불러오고자 한다.
title = soup.select_one('meta[property="og:title"]')['content']
image = soup.select_one('meta[property="og:image"]')['content']
description = soup.select_one('meta[property="og:description"]')['content']
print(image, title, description)
---------------------------------------------------------
출력: 보스 베이비 2 https://movie-phinf.pstatic.net/20210622_174/1624324910624JhEq2_JPEG/movie_image.jpg?type=m665_443_2 베이비 주식회사의 레전드 보스 베이비에서 인생 만렙 CEO가 된 ‘테드’.베이비인 줄 알았던 조카 ‘티...
자, 이제 준비되었으니 API를 만들어보자!
*참고 : 포트 5000번을 누가 쓰나 했더니 APPLE에서는 AirPlay Receiver가 사용한다고 한다. 그냥 8000을 쓰기로 한다.
POST 방식 (포스팅 하기)
- 요청 정보 : URL= /movie, 요청 방식 = POST
- 클라(ajax) → 서버(flask) : url, star, comment
- 서버(flask) → 클라(ajax) : 메시지를 보냄 (포스팅 완료!)
-
요청 정보 : URL= /movie, 요청 방식 = POST
-
서버 만들기
from flask import Flask, render_template, request, jsonify
app = Flask(__name__)

import requests
from bs4 import BeautifulSoup

from pymongo import MongoClient
import certifi

#DB
client = MongoClient('mongodb+srv://isabel_noh:sparta@cluster0.0vjef.mongodb.net/Cluster0?retryWrites=true&w=majority',tlsCAFile=certifi.where())
db = client.dbsparta

#API
@app.route('/')
def home():
    return render_template('index.html')

@app.route("/movie", methods=["POST"])
def movie_post():
    url_receive = request.form['url_give']
    star_receive = request.form['star_give']
    comment_receive = request.form['comment_give']

    headers = {
        'User-Agent': 'Mozilla/5.0 (Windows NT 10.0; Win64; x64)AppleWebKit/537.36 (KHTML, like Gecko) Chrome/73.0.3683.86 Safari/537.36'}
    data = requests.get(url_receive, headers=headers)

    soup = BeautifulSoup(data.text, 'html.parser')

#Web Scraping
    title = soup.select_one('meta[property="og:title"]')['content']
    image = soup.select_one('meta[property="og:image"]')['content']
    description = soup.select_one('meta[property="og:description"]')['content']

#DB에 저장
    doc = {
        'title': title,
        'image':image,
        'description': description,
        'star':star_receive,
        'comment':comment_receive
    }
    db.users.insert_one(doc)

    return jsonify({'msg': '저장 완료!'})


@app.route("/movie", methods=["GET"])
def movie_get():
    return jsonify({'msg': 'GET 연결 완료!'})

if __name__ == '__main__':
app.run('0.0.0.0', port=8000, debug=True)- 클라이언트 만들기
        function posting() {
        #input으로부터 받아오기
            let url = $('#url').val()
            let star = $('#star').val()
            let comment = $('#comment').val()
         #ajax 요청
            $.ajax({
                type: 'POST',
                url: '/movie',
                data: {url_give:url, star_give:star, comment_give:comment},
                success: function (response) {
                    alert(response['msg'])
                    window.location.reload()
                }
            });
        }
GET 방식 (불러오기)
- 요청 정보 : URL= /movie, 요청 방식 = GET
- 클라(ajax) → 서버(flask) : (없음)
- 서버(flask) → 클라(ajax) : 전체 영화를 보내주기
- 요청 정보 : URL= /movie, 요청 방식 = GET
- 서버 만들기
@app.route("/movie", methods=["GET"])
def movie_get():
    movie_list = list(db.movies.find({}, {'_id': False}))
    return jsonify({'movies':movie_list})
서버는 간단하다. 전체 리스트를 읽어오기만 하면 된다.
- 클라이언트 만들기
function listing() {
            $('#cards-box').empty()
            $.ajax({
                type: 'GET',
                url: '/movie',
                data: {},
                success: function (response) {
                    let rows = response['movies']
                    for(let i = 0; i < rows.length; i++){
                        let title = rows[i]['title']
                        let star = rows[i]['star']
                        let comment = rows[i]['comment']
                        let image = rows[i]['image']
                        let description  = rows[i]['description']
                        let star_image = '⭐'.repeat(star)
                        let temp_html = `<div class="col">
                                            <div class="card h-100">
                                                <img src="${image}"
                                                     class="card-img-top">
                                                <div class="card-body">
                                                    <h5 class="card-title">${title}</h5>
                                                    <p class="card-text">${description}</p>
                                                    <p>${star_image}</p>
                                                    <p class="mycomment">${comment}</p>
                                                </div>
                                            </div>
                                        </div>`
                        $('#cards-box').append(temp_html)

                    }
                }
            })
        }
숙제 - 팬명록 기능 완성하기
결혼식 방명록에 댓글을 다는 기능을 추가하였다.
-서버
from flask import Flask, render_template, request, jsonify
from pymongo import MongoClient
import certifi

app = Flask(__name__)

client = MongoClient('mongodb+srv://isabel_noh:sparta@cluster0.0vjef.mongodb.net/Cluster0?retryWrites=true&w=majority',tlsCAFile=certifi.where())
db = client.dbsparta

@app.route('/')
def home():
    return render_template('index.html')

@app.route("/homework", methods=["POST"])
def homework_post():
    name_receive = request.form['name_give']
    comment_receive = request.form['comment_give']
    doc = {
        'name': name_receive,
        'comment': comment_receive
    }
    db.visitors.insert_one(doc)
    return jsonify({'msg': '댓글 달기 완료!'})


@app.route("/homework", methods=["GET"])
def homework_get():
    visitor_list = list(db.visitors.find({}, {'_id': False}))
    return jsonify({'visitors': visitor_list})

if __name__ == '__main__':
    app.run('0.0.0.0', port=8000, debug=True)
-클라이언트
 function save_comment() {
            let name = $('#name').val()
            let comment = $('#comment').val()
            $.ajax({
                type: 'POST',
                url: '/homework',
                data: {'name_give': name, 'comment_give': comment},
                success: function (response) {
                    alert(response['msg'])
                    window.location.reload()
                }
            })
        }

        function show_comment() {
            $('#comment-list').empty()
            $.ajax({
                type: "GET",
                url: "/homework",
                data: {},
                success: function (response) {
                    let rows = response['visitors']
                    for(let i = 0; i < rows.length; i++){
                        let name = rows[i]['name']
                        let comment = rows[i]['comment']
                        let temp_html = `<div class="card">
                                          <div class="card-body">
                                            <blockquote class="blockquote mb-0">
                                              <p>${comment}</p>
                                              <footer class="blockquote-footer">신부측 친구 <cite title="Source Title">${name}</cite></footer>
                                            </blockquote>
                                          </div>
                                        </div>`
                        $('#comment-list').append(temp_html)
                    }
                }
            });
완성! 아직은 그래도 어떤 것들을 해야하는지 리스트업하는 게 헷갈리기는 한다.
여러번 해서 익숙해지자!
4주차도 완강!!
