안녕하세요. Gameeye에서 deeplol.gg 서비스를 개발 중인 김철기입니다.
클라우드 서버 인프라 구축, 백엔드 개발, 딥러닝 모델 연구를 담당하고 있습니다.
해당 포스팅은 Style Transfer deeplearning 모델을 웹으로 서비스해보는 시리즈의 2편입니다. 2편에서는 Tensorflow Hub에서 받아온 Style Transfer Model과 FastAPI를 사용하여 Style Transfer가 적용된 결과값을 반환하는 API를 구현합니다.
참고 자료와 기술 스택, 실행 방법 등 기본적인 내용은 1편에 있으니 참고하시길 바랍니다.
시리즈
- FastAPI와 Jinja2를 활용하여 메인 페이지 작성하기
- Style Transfer Model의 결과를 반환하는 API 작성하기
- AWS Beanstalk와 Docker, Github Action을 이용해 CI/CD 구축하기
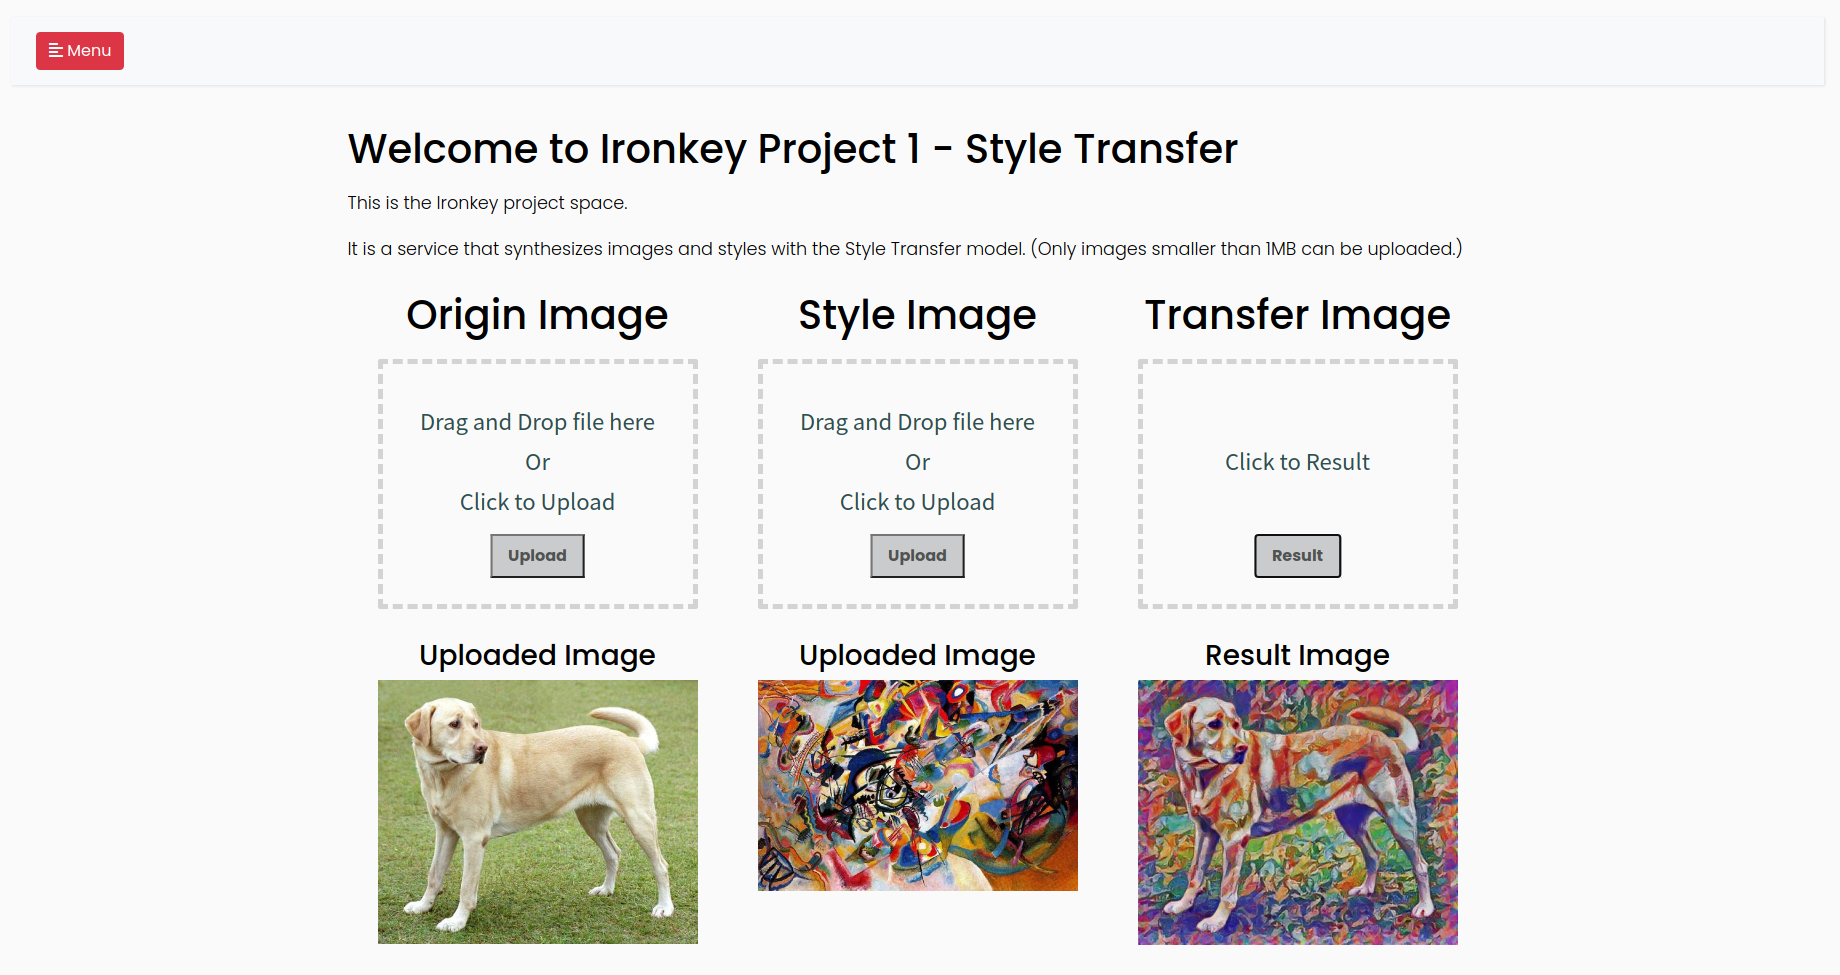
최종 결과
서비스 사용해보기 (서버비용 이슈로 사용종료)
Github 코드 보기
비즈니스 로직 구현
해당 포스팅에서는 Tensorflow에서 제공하는 자료를 참고하였습니다. colab에서 쉽게 따라해볼 수 있으니 개발에 앞서 튜토리얼을 진행해보시는 것을 추천합니다.
app/library/style_transfer.py
모델 로드
Tensorflow Hub에서 제공하는 기능으로 쉽게 기학습된 모델을 로드할 수 있습니다.
import tensorflow_hub as hub
hub_module = hub.load('https://tfhub.dev/google/magenta/arbitrary-image-stylization-v1-256/1')
텐서를 이미지로 변환
모델의 결과를 이미지로 변환하기 위한 함수입니다.
def tensor_to_image(tensor):
    tensor = tensor * 255
    tensor = np.array(tensor, dtype=np.uint8)
    if np.ndim(tensor) > 3:
        assert tensor.shape[0] == 1
        tensor = tensor[0]
    return PIL.Image.fromarray(tensor)
이미지 로드
대상 이미지를 로드한 뒤 모델 입력이 가능한 구조로 디코딩 및 스케일링 작업을 하는 함수입니다.
def load_img(path_to_img):
    max_dim = 512
    img = tf.io.read_file(path_to_img)
    img = tf.image.decode_image(img, channels=3)
    img = tf.image.convert_image_dtype(img, tf.float32)

    shape = tf.cast(tf.shape(img)[:-1], tf.float32)
    long_dim = max(shape)
    scale = max_dim / long_dim

    new_shape = tf.cast(shape * scale, tf.int32)

    img = tf.image.resize(img, new_shape)
    img = img[tf.newaxis, :]
    return img
Style Transfer 작업 및 저장
작성한 tensor_to_image와 load_img 함수, Style Transfer 모델을 활용해 결과값을 추출하고 이미지로 저장합니다.
def save_style_transfer_image(content_path, style_path):
    workspace = create_workspace()
    file_path = Path('transfer.jpg')
    img_full_path = workspace / file_path

    content_image = load_img(content_path)
    style_image = load_img(style_path)
    stylized_image = hub_module(tf.constant(content_image), tf.constant(style_image))[0]
    tensor_to_image(stylized_image).save(str(img_full_path))
    return img_full_path
API 작성
response model 작성
pydantic의 basemodel을 사용하여 response model을 정의합니다.
class TransferData(BaseModel):
    result: str
Style Transfer API
작성한 비즈니스 로직을 활용하여 이미지 데이터를 입력으로 받아 Stylize 된 이미지를 반환하는 API를 구현합니다. 작업에 사용된 원본 이미지들은 작업에 사용된 후 삭제합니다.
@router.get("/style_transfer", response_model=TransferData)
async def style_transfer(original_path: str, style_path: str):
    transfer_path = save_style_transfer_image(content_path=original_path, style_path=style_path)
    shutil.rmtree(original_path.replace(original_path.split('/')[-1], ''))
    shutil.rmtree(style_path.replace(style_path.split('/')[-1], ''))

    return TransferData(result=str(transfer_path))
결과 버튼 인터랙션
onClick 이벤트
Result 버튼을 누르면 앞서 작성한 style_transfer API가 동작하는 JS 코드를 구현합니다.
$('#result_transfer').on("click", function() {
  var split_origin_image = document.getElementById('origin_img').src.split('static/upload', 1)[0]
  var split_style_image = document.getElementById('style_img').src.split('static/upload', 1)[0]
  let original_image = document.getElementById('origin_img').src.replace(split_origin_image, '');
  let style_image = document.getElementById('style_img').src.replace(split_style_image, '');
  fetch("/style_transfer?original_path="+original_image+"&style_path="+style_image)
    .then((res) => {
        return res.json();
    })
    .then((json) => {
        update_result_src(json); // 서버에서 주는 json데이터가 출력 됨
    });
})
API 결과값 표시
API 결과값이 성공적으로 반환되었을 때 결과 이미지를 화면에 표시하는 JS 코드를 구현합니다.
function update_result_src (data) {
  console.log(data)
  let original = `<img src="/${data.result}" class="responsive" alt="" id="result_img">`;
  $("#result_original_image").html(original);
}
고생하셨습니다! 여기까지 코드를 작성하신 후 앱을 실행시키면 최종완성본과 동일하게 동작하는 페이지를 확인하실 수 있습니다.
정리
해당 포스팅에서는 Tensorflow Hub에서 제공하는 모델과 FastAPI, 간단한 JS 코드를 활용해 원본 이미지와 스타일 이미지를 입력으로 받아 Stylize된 이미지를 반환받는 코드를 구현해보았습니다. Tensorflow Hub를 통해 손쉽게 파워풀한 Deeplearning 모델을 활용할 수 있다는 것이 눈에 띄는 부분이었습니다. 다음 포스팅에서는 작성한 앱을 자동으로 테스트하고 배포하는 CI/CD 부분을 구현해보도록 하겠습니다. 이해가 어렵거나 궁금한 부분이 있으면 댓글 남겨주세요. 감사합니다.