객체 메소드 이어서:
- in과 with키워드
in: 객체 내에 해당 속성이 있는지 확인해주는 키워드(존재하면 t 아니면 f)
with: 객체의 속성 접근시 객체명을 생략 가능(코드 효율 향상 키워드)
    이름: <input id="name"><br>
    국어: <input type="number" id="kor"><br>
    수학: <input type="number" id="math"><br>
    영어: <input type="number" id="eng"><br>
    <button onclick="test2();">확인</button>
    <div id="area2" class="area">

    </div>
    <script>
        function test2() {
            const student = {
                name: document.getElementById("name").value,
                kor: Number(document.getElementById("kor").value),
                math: Number(document.getElementById("math").value),
                eng: Number(document.getElementById("eng").value),
                //input으로 넣으면 String형이라 숫자로 형변환
                toString: function() {
                    return `${this.name}: ${this.kor}, ${this.math}, ${this.eng}`;
                },
                getSum: function() {
                    return this.kor + this.math + this.eng;
                },
                getAvg: function() {
                    //return this.getSum() / 3;
                    return Math.round((this.getSum() / 3)*10) / 10;
                    //string에서 Number로의 강제형변환에서 자리수 조정
                    //(10은 소수 첫째, 100은 소수 둘째 자리까지 나타냄)
                    //return Math.round(this.getSum() / 3).toFixed(1); 소수 첫째자리까지 고정
                }
            }
            console.log(student);
            const area2 = document.getElementById("area2");
            area2.innerHTML += `student- ${student}<br>`;
            //내가 지정한 객체는 toString재정의를 해야 값이 나옴

            //"속성명" in 객체명: 객체에 해당 속성이 존재할 경우 true
            area2.innerHTML += `name속성 존재? ${"name" in student}<br>`;
            area2.innerHTML += `age속성 존재? ${"age" in student}<br>`;
            //area2.innerHTML += `총점: ${student.kor + student.math + student.eng}<br>`;
            area2.innerHTML += `총점: ${student.getSum()}<br>`;
            area2.innerHTML += `평균: ${student.getAvg()}<br>`;

            with(student) {
                //with(student)했기 때문에 student. 생략 가능
                area2.innerHTML += `학생이름: ${name}<br>`
                area2.innerHTML += `총점: ${getSum()}<br>`;
                area2.innerHTML += `평균: ${getAvg()}<br>`;
            }
        }
    </script>
객체 속성 추가와 삭제:
    <button onclick="test1();">확인</button>
    <div id="area1" class="area"></div>

    <script>
        function test1() {
            const student = {}; //빈 객체 생성(중괄호) 배열은[]대괄호

            //객체에 속성 추가
            student.name = "아무개";
            student.hobby = ["독서", "영화감상", "운동"];
            student.dream = "프로그래머";
            student.age = 25;

            // 중복이름 불가 => 덮어쓰기가 됨
            student.name = "홍길동";

            console.log(student);

            //객체에 메소드 추가
            student.toString = function() {
                const str = `name: ${this.name}<br>
                            hobby: ${this.hobby}<br>
                            dream: ${this.dream}<br>
                            age: ${this.age}<br>`;
                return str;
            }
            document.getElementById("area1").innerHTML = `${student}<hr>`;

            //객체의 속성 제거
            delete(student.age);
            document.getElementById("area1").innerHTML += student;
        }
    </script>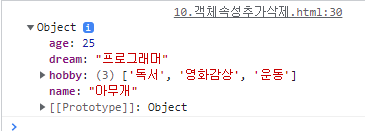
객체 배열과 날짜(Date):
- 객체 배열을 이용한 다량의 데이터 관리:
    <div id="area1" class="area"></div>
    <button onclick="test1();">확인</button>

    <script>
        function test1() {
            const student1 = { name:"이일순", java: 100, oracle: 90, HTML: 100, css: 75};
            const student2 = { name:"이이순", java: 87, oracle: 99, HTML: 88, css: 100};
            const student3 = { name:"이삼순", java: 45, oracle: 70, HTML: 85, css: 97};
            const student4 = { name:"이사순", java: 32, oracle: 100, HTML: 77, css: 100};

            const students = [];
            students.push(student1);
            students.push(student2);
            students.push(student3);
            students.push(student4);
            // 한줄로 const students = [student1, student2, student3, student4];

            console.log(students[0]);
            console.log(students[3].name);

            for(i in students) {
                students[i].javascript = 100; //모든 학생의 javascript 속성 추가
                //console.log(students[i].name, ":" , students[i].javascript);

                //메소드 추가
                students[i].getSum = function() {
                    return this.java + this.oracle + this.HTML + this.css;
                };

                students[i].getAvg = function() {
                    return this.getSum() / 5;
                };
            }

            const area1 = document.getElementById("area1");
            for(let i in students) {
                area1.innerHTML += `이름: ${students[i].name},
                                    총점: ${students[i].getSum()},
                                    평균: ${students[i].getAvg()}<br>`;
            }
        }
</script>- 생성자 함수: new 키워드를 통해서 객체를 생성할 수 있는 함수(함수명 제시시 첫글자는 대문자)
    <button onclick="test2();">확인</button>
    <div id="area2" class="area"></div>

    <script>
        function test2() {
            const student0 = new Student("홍길동",98,65,87,67,100);
            console.log(student0);
            const student1 = new Student("아무개",91,62,83,64,56);
            const student2 = new Student("김익명",95,66,87,68,90);

        }
        function Student(name, java, oracle, HTML, css, javascript) {
            //일반 속성 정의
            this.name =  name;
            this.java = java;
            this.oracle = oracle;
            this.HTML = HTML;
            this.css = css;
            this.javascript = javascript;

            //메소드 정의
            this.getSum = function() {
                return this.java + this.oracle + this.HTML + this.css + this.javascript;
            }
            this.getAvg = function() {
                return this.getSum() / 5;
            }
        }
</script>- 날짜 출력 메소드:
    <button onclick="test3();">확인</button>
    <div id="area3" class="area"></div>

    <script>
        function test3() {
            const area3 = document.querySelector("#area3");

            const date1 = new Date(); //현재날짜 및 시간
            console.log(date1);

            // 월 0부터 시작이라 -1
            const date2 = new Date(2023, 3-1, 28);
            console.log(date2);

            //시간까지 설정
            const date3 = new Date(2023, 4-1, 5, 13, 45, 20);
            console.log(date3);

            //밀리세컨드 초까지
            // 1s = 1000ms
            const date4 = new Date(2023, 4-1, 5, 13, 48, 20, 5000);
            console.log(date4);

            area3.innerHTML = `Date() : ${date1}<br>`;
            area3.innerHTML += `Date(년,월,일) : ${date2}<br>`;
            area3.innerHTML += `Date(년,월,일,시,분,초) : ${date3}<br>`;
            area3.innerHTML += `Date(년,월,일,시,분,초,밀리초) : ${date4}<br>`;

            area3.innerHTML += `년도: ${date1.getFullYear()}<br>`;
            area3.innerHTML += `월: ${date1.getMonth()+1}<br>`;
            area3.innerHTML += `일: ${date1.getDate()}<br>`;
            area3.innerHTML += `요일: ${date1.getDay()}<br>`;
            // 시: getHours(), 분: getMinutes(), 초:getSeconds()

            //현재날짜부터 종강일까지 남은 일수
            const end = new Date(2023, 7-1, 20);
            const now = new Date();
            //area3.innerHTML += end-now; //얼마 기간이 남았는지 밀리초로 반환
            /*
            1s = 1000ms
            1m = 60s*1000ms
            1h = 60m*(60s*1000ms)
            1d = 24h*60m*60s*1000ms
            */
           const Dday = (end-now) / (24*60*60*1000);
           area3.innerHTML += `종강일까지 ${Math.round(Dday)}일 남음`;

        }
    </script>
분해할당:
배열이나 객체에 들어있는 속성값을 각각의 변수에 할당
메소드 함수는 괄호 넣어줘야되는 거 까먹지 말기!!!!!!!!!!!!!
- 배열의 분해 할당, rest연산자
<script>
        (function() {
            // ES5 버전
            const point = [10, 20, 30];
            const x = point[0];
            const y = point[1];
            const z = point[2];
            console.log('x, y, z: ', x, y, z);

            // ES6 버전
            const [x2, y2, z2] = [10, 20, 30];
            console.log('x2, y2, z2 ', x2, y2, z2);

            //두번째 값 무시하기
            const [x3, ,z3] = point;
            console.log('x3, z3: ', x3, z3);

            //2,3번째 무시
            const [x4, , ,w4] = point;
            console.log('x4, w4: ', x4, w4);

            //rest연산자(...): 여러개의 인자값(배열로 들어옴)
            //java의 가변인자(String ... arg)
            const [x5, x6, ... rest] = [10,20,30,40,50,60,70];
            console.log('x5: ', x5);
            console.log('x6: ', x6);
console.log('rest: ', rest);- 객체의 분해 할당
            const car = {
                model:'k9',
                color: 'black',
                made: 2023
            };

            // ES5 버전
            const model1 = car.model;
            const color1 = car.color;
            const made1 = car.made;
            console.log('model, color, made: ',model1, color1, made1);

            // ES6 버전
            const {model, color, made} = car;
            //특정키워드를 넣지 않을 경우 속성명이 같아야 값을 가져옴
            console.log('model, color, made: ', model, color, made);

            const {model: model2, color: color2, year: year2} = car;
            console.log('model2, color2, made2: ', model2, color2, made2);

            const fun1 = function(car1) {
                const {model, color} = car1;
                console.log(model, color);
            }
            fun1(Car)

            //화살표 함수로 표현
            const fun2 = ({model, color}) => console.log(mode1, color);
            fun2(Car);
        })();
    </script>
Window 객체:
Window객체는 자바스크립트 최상위 객체, BOM / DOM으로 나뉜다
-BOM(Browser Object Model): location, screen, navigator객체, history객체
-DOM(Document Object Model): document
- Window 객체
[window.]open("url","창이름(중복불가)","창의 특성");
*창의 특성(px): 되는게 없어서 잘 안 씀
width: 창의 너비
height: 창의 높이
-yes|no
resizable: 창의 크기 조절 가능 여부
location: 주소창
menubar: 메뉴바(상단의 뒤로,앞으로,새로고침부분)
scrollbar: 우측의 스크롤바 존재 여부
staths: 상태표시줄 존재 여부
    <button onclick="test1();">네이버</button>

    <script>
        function test1() {

            window.open("http://www.naver.com","네이버메인홈","width=500, height=600");
            //공통: 주소창 수정 안 됨, menubar없음, 상태표시줄 없음
            //크롬: resizable 고정 안 됨, scrollbar 무조건 => 지멋대로야ㅋㅋ
            window.open("http://www.naver.com","네이버메인홈","width=500, height=600, resizable=no, location=no, menubar=yes, scrollbars=yes, status=yes, toolbar=yes");
        }
</script>- window객체의 timer관련 메소드:
setTimeout(함수, 일정시간ms): 설정한 일정시간 후에 해당함수 한 번만! 실행
    <button onclick="test2();">확인</button>
    <script>
        function test2() {
            const myWindow = window.open();

            myWindow.alert("3초 후에 이 페이지가 종료됩니다.");
            setTimeout(function(){
                myWindow.close();
            }, 3000);
            //setTimeout: 설정한 일정시간 후에 해당함수 한 번만! 실행
        }
    </script>
[window.]setInterval(함수, 일정시간ms)
    <button onclick="test3()">확인</button>
    <div id="area1" class="area"></div>

    <script>
        function test3() {
            const area1 = document.getElementById("area1");
            setInterval(function() {
                const now = new Date();

                let hour = now.getHours();
                let min = now.getMinutes();
                let sec = now.getSeconds();

                if(hour < 10) { //한자리 숫자에 0 붙이기
                    hour = '0' + hour;
                }
                if(min < 10) {
                    min = '0' + min;
                }
                if(sec < 10) {
                    sec = '0' + sec;
                }

                area1.innerHTML = `${hour} : ${min} : ${sec}`;
            },1000);
        }
    </script>
BOM(Browser Object Model):
- location 객체: 브라우저 주소창과 관련된 객체
    <a href="http://www.naver.com">네이버로</a>
    <br>
    <button onclick="location.href='http://www.naver.com';">★네이버로 이동 버튼</button>
    <br>
    <div onclick="location.href='http://www.naver.com';">네이버로 이동 div</div>
    <br><br>
    <!--assign()메소드 이용-->
    <button onclick="location.assign('http://www.google.com');">구글로 assign 이동</button>
    <br>
    <!--replace는 뒤로가기가 없는 창-->
    <button onclick="location.replace('http://www.google.com');">구글로 replace 이동</button>
    <br>
    <button onclick="location.href = location.href;">새로고침</button>
<button onclick="location.reload();">★현재 위치 그대로 새로고침</button>- screen 객체: 가로 세로 사이즈에 따라 모바일,태블릿 가능
<button onclick="console.log(screen);">screen객체 확인</button>- navigator객체: 브라우저에 따른 속성들의 버전 확인
<button onclick="console.log(navigator);">navigator객체 확인</button>- history객체: 내가 이제까지 했던 이벤트들 확인
<button onclick="console.log(history);">history객체 확인</button>DOM(Document Object Model):
html에 있는 각각의 요소들을 노드(Node)라고 함<
-요소 노드(Element Node): 태그 그 자체를 의미
-텍스트 노드(Text Node): 태그 내에 기록되는 내용
텍스트노드가 존재하는 요소(시작태그 종료태그가 한쌍으로 이루어짐): h1~,div,li,p,a,...
텍스트노드가 존재하지 않는 요소(시작태그만 존재): input, img, hr, br, ...
~다음 수업 시간에~