[The Killer Website Project] Section 5. The Killer Website Project 학습내용정리
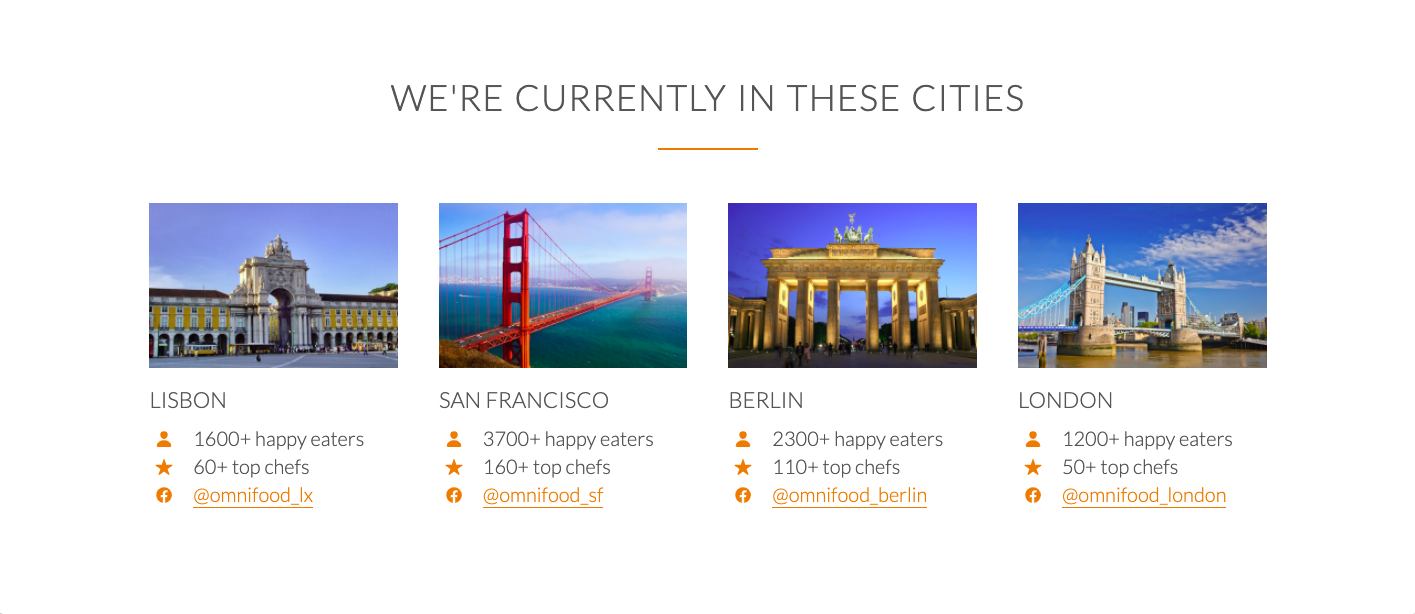
#47 - 48 Building the cities section
#47 Building the cities section - Part 1
icon & text를 side-by-side로 넣기
[ HTML ]
//Ex
/*html*/
 <h3>Lisbon</h3>
    <div class="city-feature">
        <ion-icon name="person"></ion-icon> ⭐️⭐️⭐️ //icon
        1600+ happy eaters ⭐️⭐️⭐️ //text
    </div>
    <div class="city-feature">
        <ion-icon name="star"></ion-icon> ⭐️⭐️⭐️ //icon
        60+ top chefs ⭐️⭐️⭐️ //text
    </div>
    <div class="city-feature">
        <ion-icon name="logo-facebook"></ion-icon> ⭐️⭐️⭐️ //icon
        @omnifood_lx ⭐️⭐️⭐️ //text
    </div>
Icon 출처: https://ionicons.com/
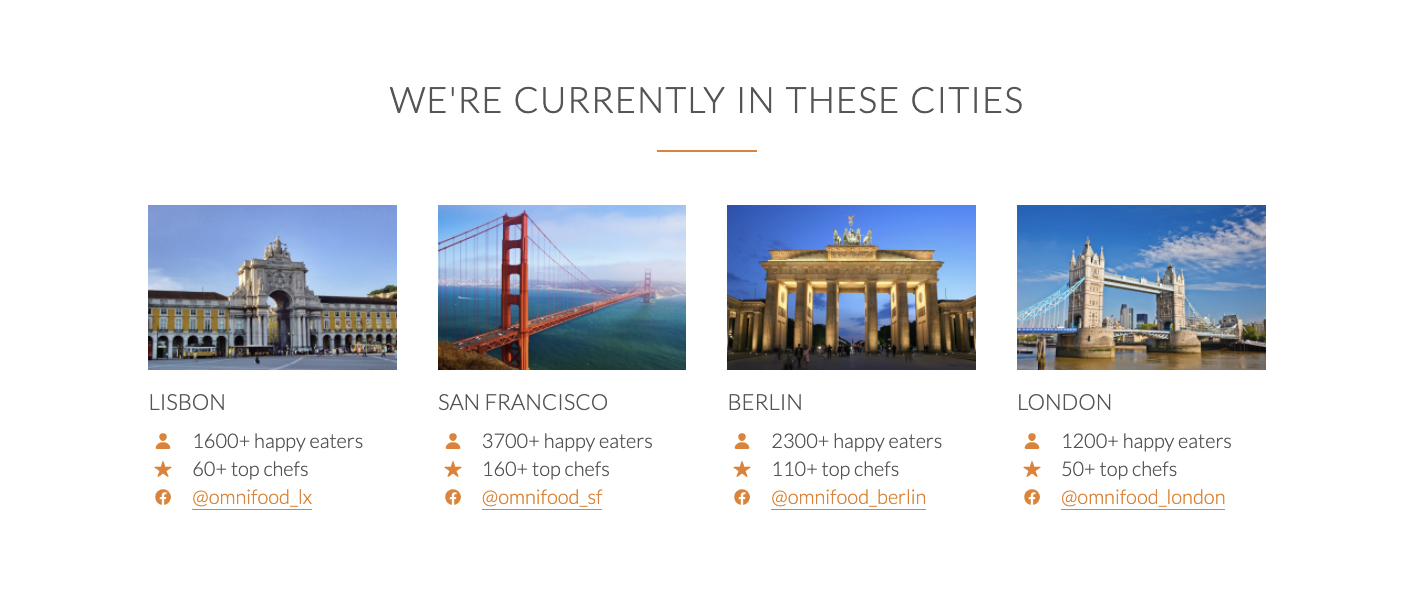
output ⬇️ 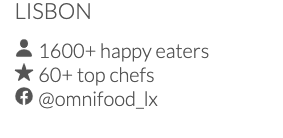
#48 Building the cities section - Part 2
음수 마진(Negative Margin)으로 정렬맞추기
크게 눈에 띄는 건 아니지만 자세히 들여다보면 아이콘과 텍스트의 높이가 완전히 같지 않음을 알 수 있다.
적용 전 ⬇️
이때 Negative Margin(음수 마진)을 이용해 높이를 조절할 수 있다!
[ CSS ]
margin-top(bottom/left/right): —__px;//Ex. /*html*/ <h3>Lisbon</h3> <div class="city-feature"> <ion-icon class="icon-small" name="person"></ion-icon> 1600+ happy eaters </div> <div class="city-feature"> <ion-icon class="icon-small" name="star"></ion-icon> 60+ top chefs </div> <div class="city-feature"> <ion-icon class="icon-small" name="logo-facebook"></ion-icon> @omnifood_lx </div> /*css*/ .icon-small { display: inline-block; /*width 프로퍼티를 쓸 수 있게 바꿔주기*/ width: 30px; text-align: center; color: #e67e22; font-size: 120%; /*----------------secrets to align text & icons--------------*/ line-height: 120%; vertical-align: middle; margin-top: -4px; ⭐️⭐️⭐️ }
양수(+)margin이 공간을 더해준다면, 음수(-)margin은 공간을 줄어들게하는 효과를 낸다.
margin-top의 음수가 커질수록 아이콘은 위로 움직인다.
적용 후 ⬇️ 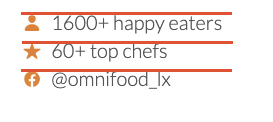
<a>링크에 스타일 적용하기: 색상변경 + underline 새로 추가
기본적으로<a>태그를 적용한 텍스트는 아래와 같이 보여진다.
적용 전 ⬇️ 다음의 코드는 링크의 색상과 underline을 바꾼다.
[ CSS ]
text-decoration: none; <--- 기존의 보라색 underline을 없앰
border-bottom: _px solid #색상코드;//Ex. /*html*/ <a href="#">@omnifood_lx</a> <a href="#">@omnifood_sf</a> <a href="#">@omnifood_berlin</a> <a href="#">@omnifood_london</a> /*css*/ a:link, a:visited { color: #e67e22; text-decoration: none; ⭐️⭐️⭐️ /*default 보라색 underline 없애기*/ padding-bottom: 1px; /*underline과 text사이 간격을 조절*/ border-bottom: 1px solid #e67e22; ⭐️⭐️⭐️ transition: border-bottom 0.2s, color 0.2s; /*hovering 효과를 더 부드럽게*/ }
적용 후 ⬇️
마우스 hover시 underline 없애기
[ CSS ]
border-bottom: _px solid transparent;//Ex. /*css*/ a:hover, a:active { color: #555; border-bottom: 1px solid transparent; ⭐️⭐️⭐️/*transparent 마우스를 올리면 언더라인이 사라지는 효과*/ }
적용 후 ⬇️(강의화면)
+Plus:
여기서 CSS선택자를 <a>태그로 하였기 때문에 의도하지 않았던 App Store 버튼과 Google Play Store 버튼까지도 border(underline)을 갖게 된다.
적용 전 ⬇️ 
이 두 버튼에게서 underline을 없애는 것은 아래 코드로 가능하다.
/*css*/
.btn-app:link,
.btn-app:visited {
  border: 0; ⭐️⭐️⭐️ /*cities 링크에서 설정해주었던 border를 없애는 것*/
}
적용 후 ⬇️ 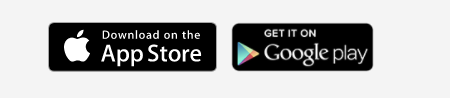
Cities Section 완성
Reference
*본 게시물은 Udemy의 'Build Responsive Real World Websites with HTML5 and CSS3'강좌 내용을 포함하고 있습니다.
https://www.udemy.com/course/design-and-develop-a-killer-website-with-html5-and-css3/
https://webclub.tistory.com/541
