
1. 지난 시간 리뷰
ECS
- 클러스터 - Fargate (서버리스 환경) 가격 높음 / EC2 / 외부
- 태스크 - 컨테이너 정의 (Image 및 리소스 정의)
- 서비스 - 태스크(패밀리)를 클러스터에 배포
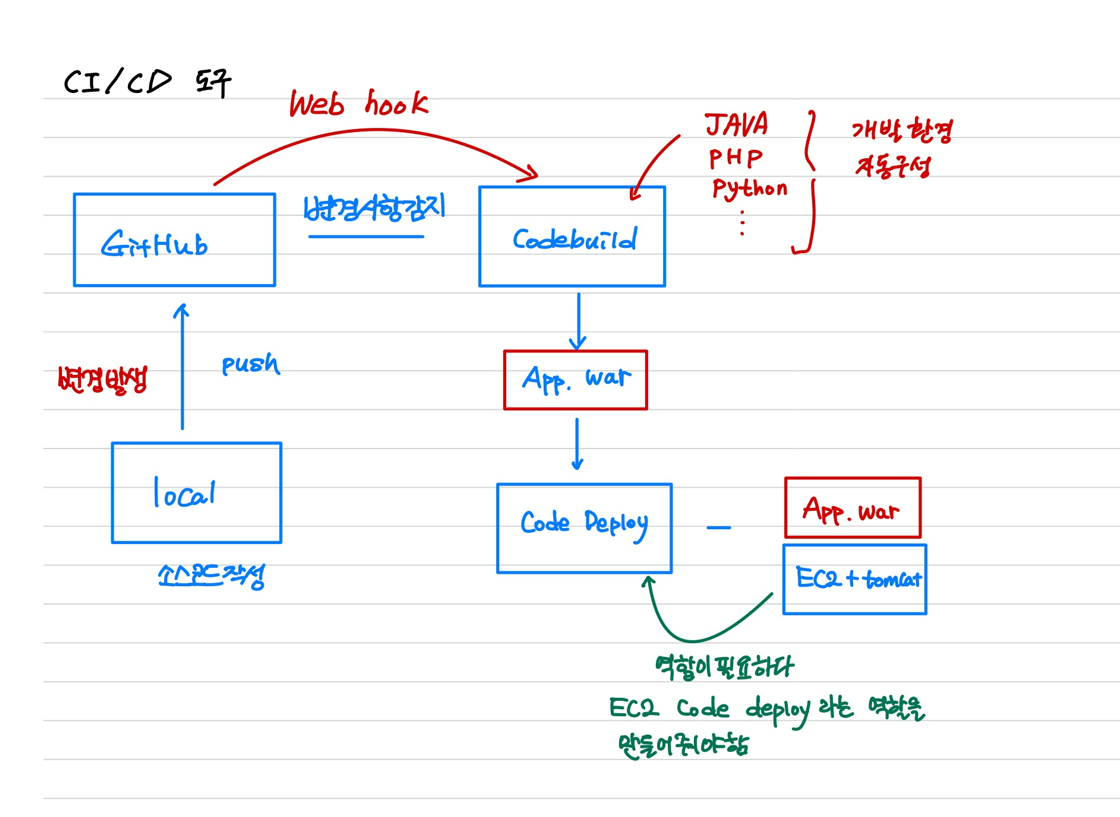
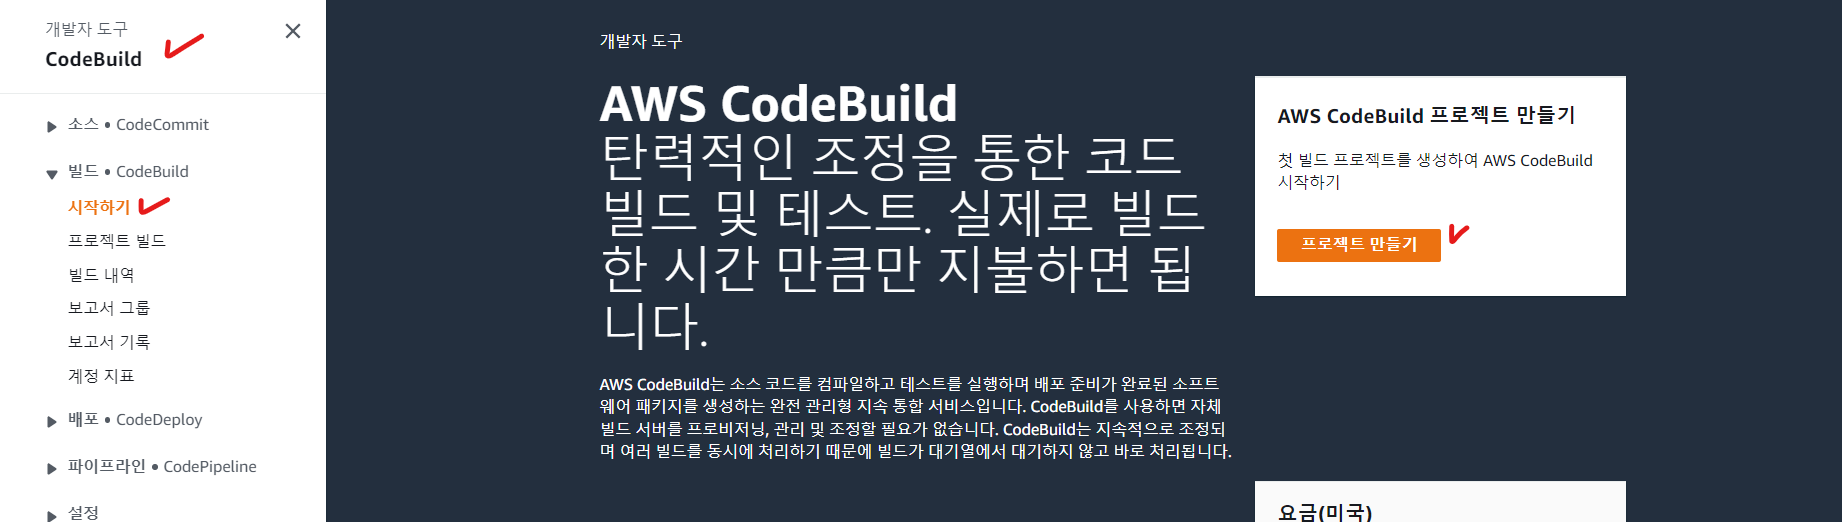
2. 개발자 도구 (CI/CD 도구)
Continuous Integration & Continuous Development
CI/CD 가 구성이 잘 됐다면, 소스코드가 수정됐을때 개발자 도구가 자동으로 감지하여 빌드하고, 빌드된 애플리케이션을 자동으로 감지하여 인프라에 자동으로 애플리케이션을 배포하게 된다.
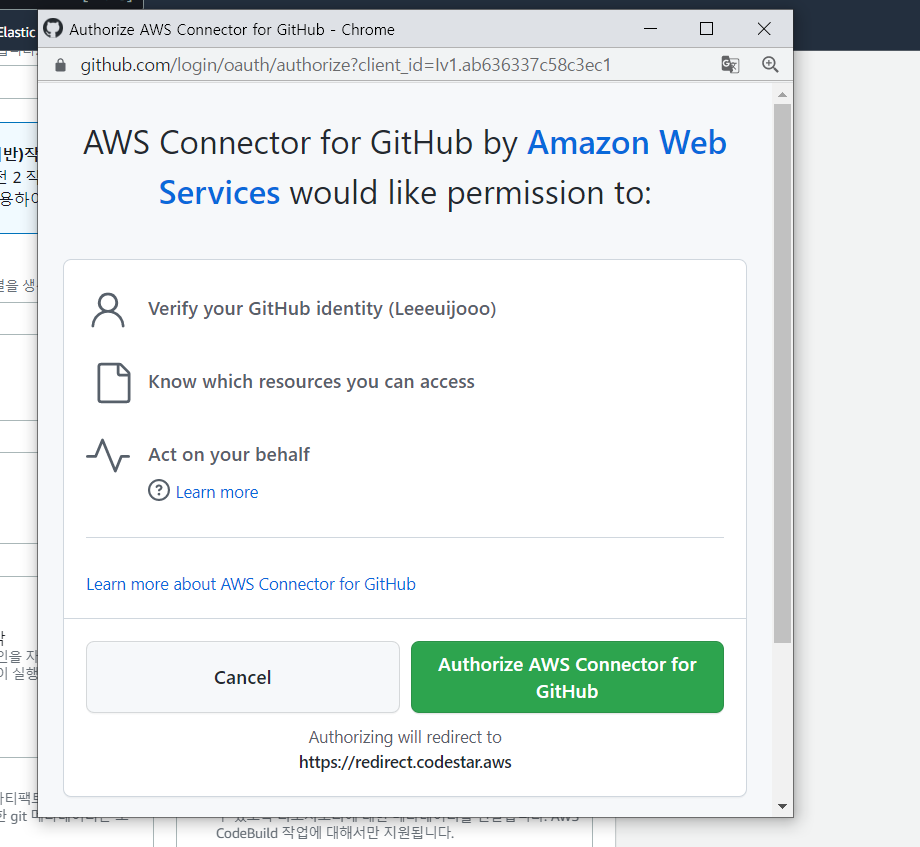
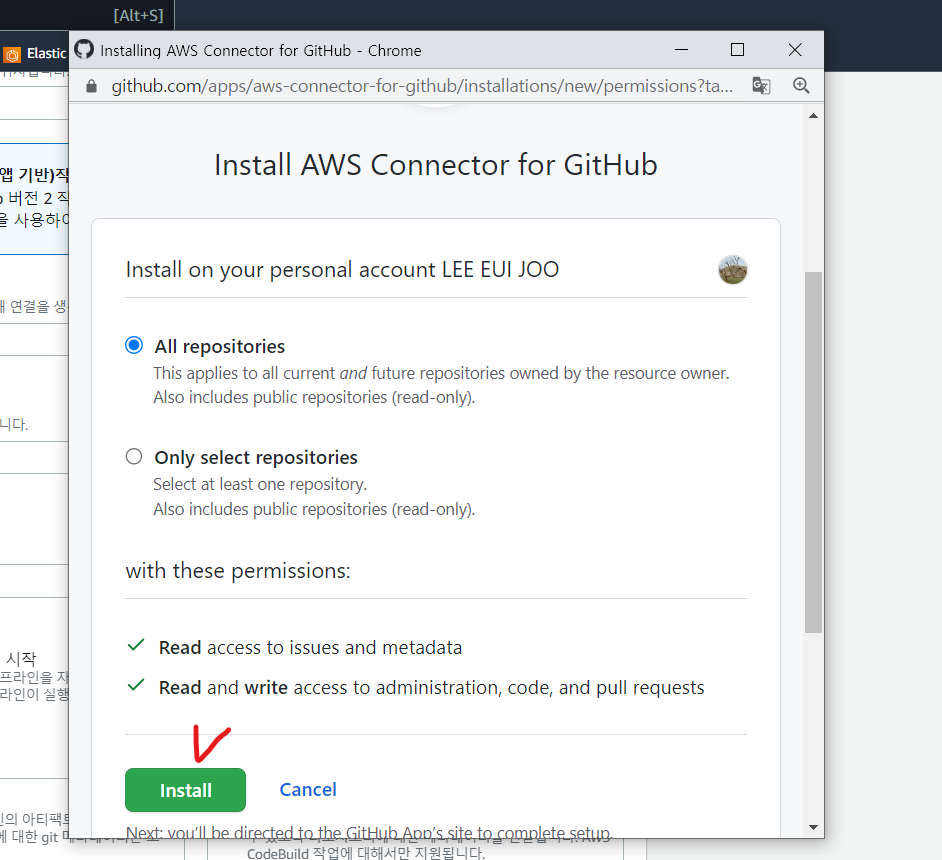
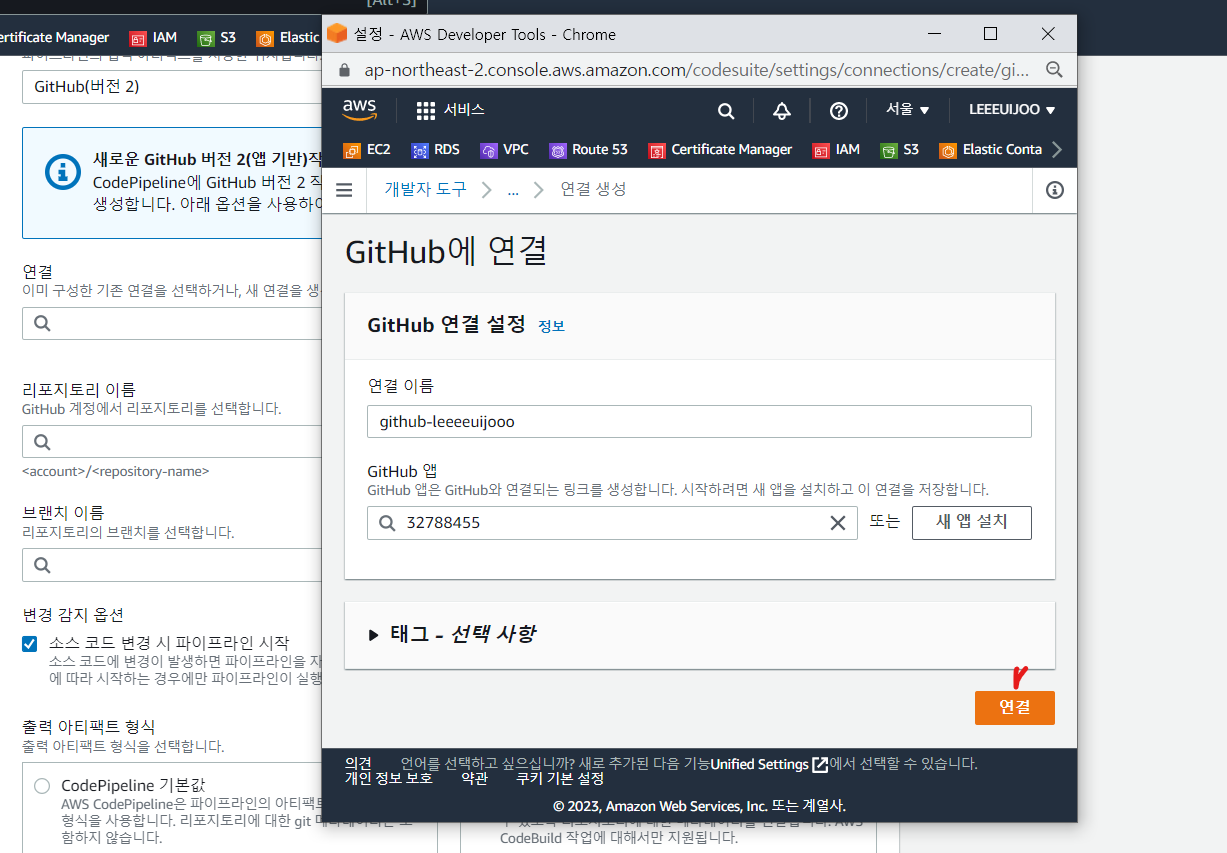
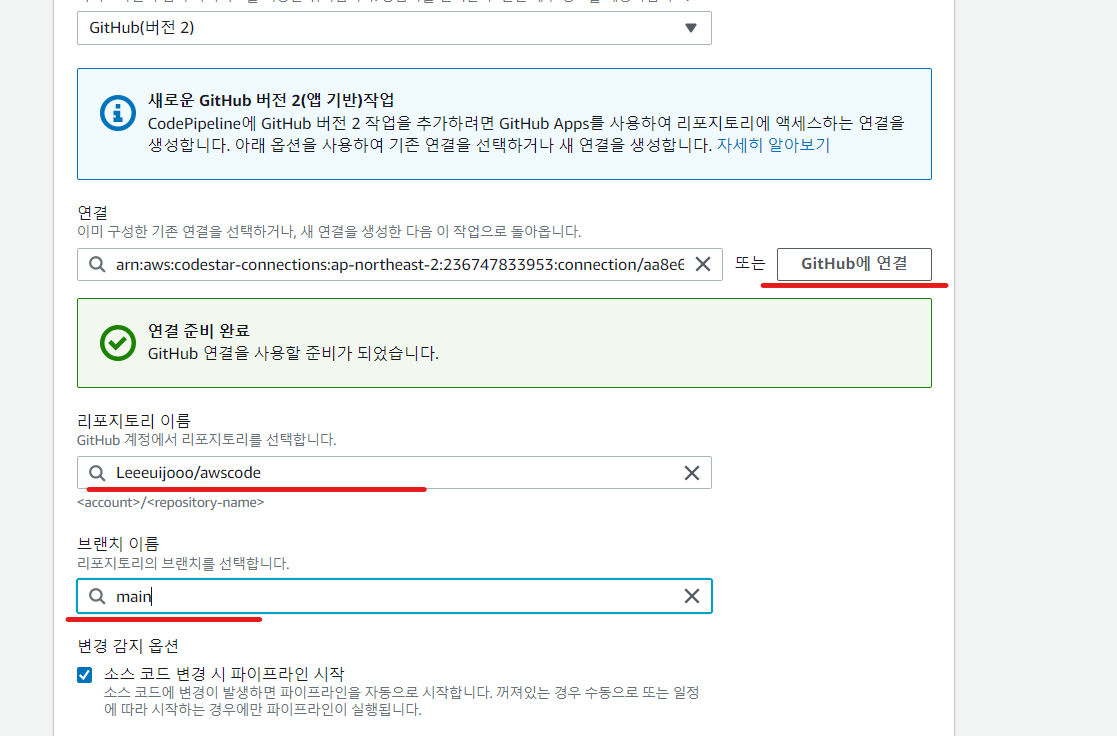
3. AWS 개발자 도구로 웹서버 배포
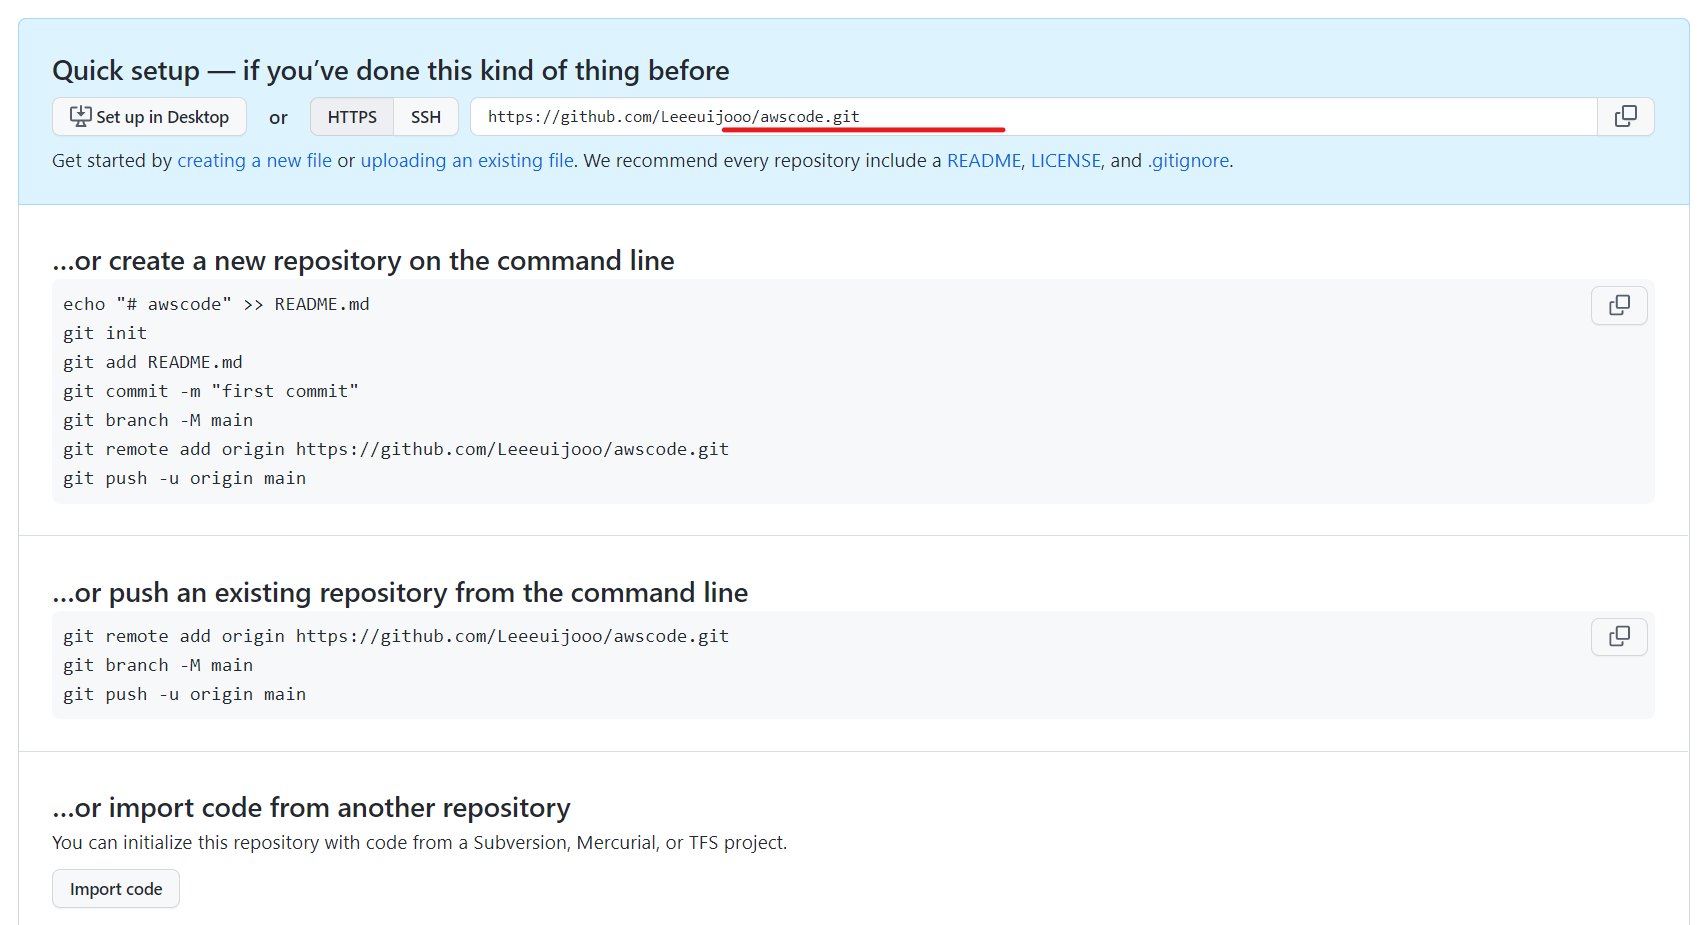
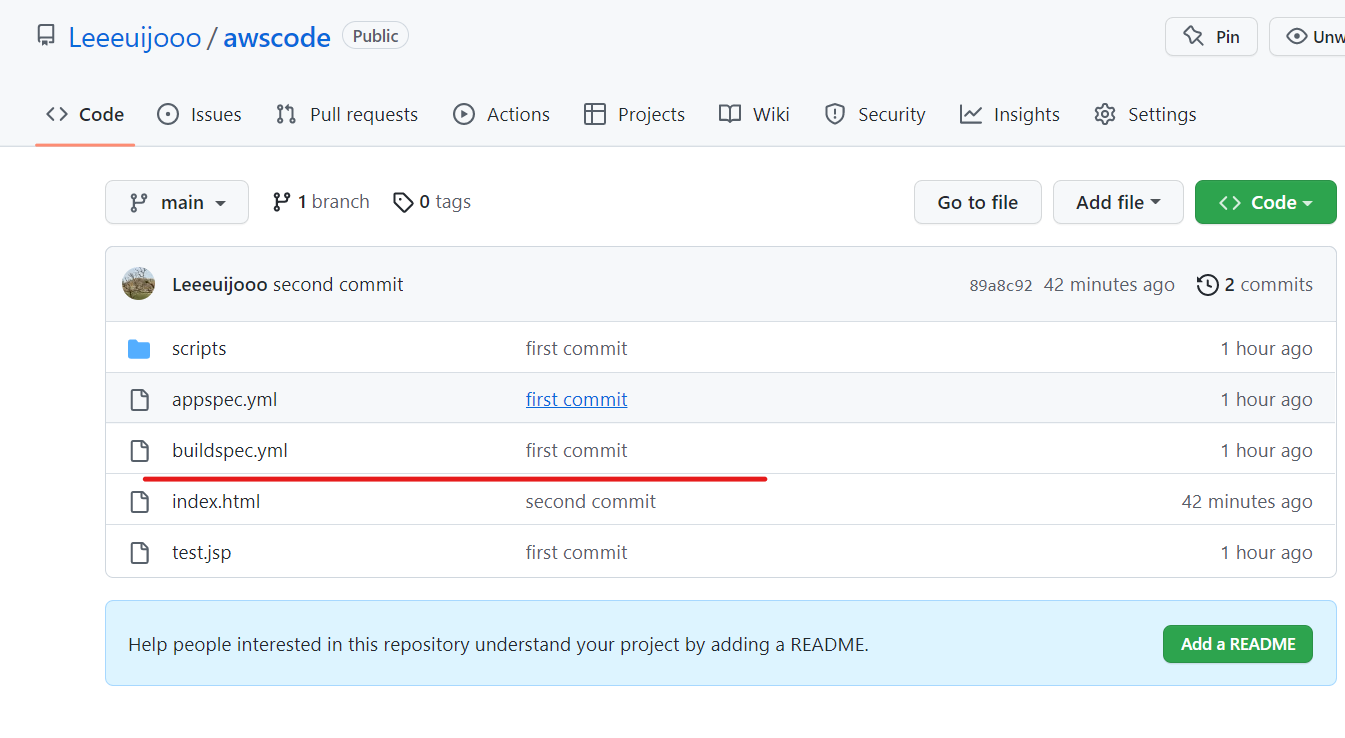
- Git Hub 에 접속하여 새로운 Repository(awscode) 생성
- 레포지토리에 커밋할 로컬 파일을 가상환경에 드래그 하여 옮길 수 있는 패키지 설치
root@ubuntu:~# apt-get -y install lrzsz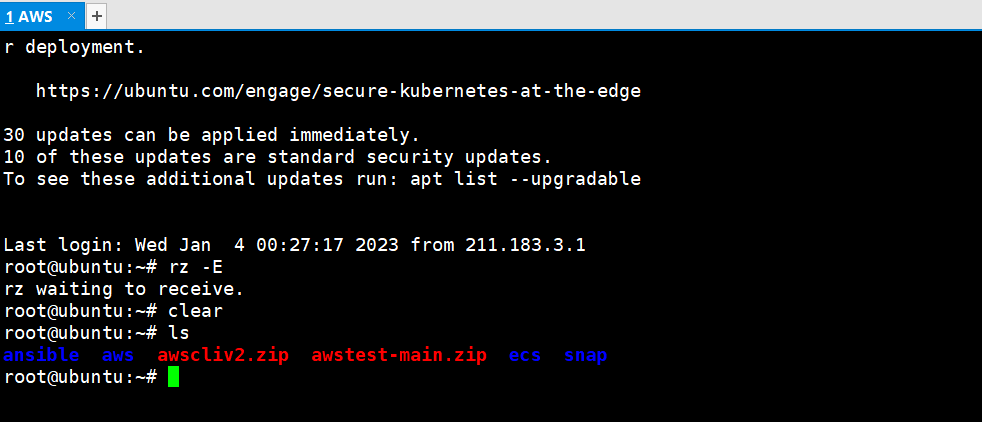
-
패키지의 도움을 받아 zip 파일을 드래그하여 파일 전송
-
awscode 레포지토리에 커밋
root@ubuntu:~# unzip awstest-main.zip
Archive:  awstest-main.zip
f1211c2bd2ad873c3ea0982e41299accd67be188
   creating: awstest-main/
  inflating: awstest-main/appspec.yml
  inflating: awstest-main/buildspec.yml
 extracting: awstest-main/index.html
   creating: awstest-main/scripts/
  inflating: awstest-main/scripts/server_start.sh
  inflating: awstest-main/scripts/server_stop.sh
  inflating: awstest-main/test.jsp
root@ubuntu:~# ls
ansible  aws  awscliv2.zip  awstest-main  awstest-main.zip  ecs  snap
root@ubuntu:~# cd awstest-main/
root@ubuntu:~/awstest-main# ls
appspec.yml  buildspec.yml  index.html  scripts  test.jsp

<로컬 레포지토리 초기화>

root@ubuntu:~/awstest-main# git init
Initialized empty Git repository in /root/awstest-main/.git/
root@ubuntu:~/awstest-main# git config --global user.email "euijoo@gmail.com"
root@ubuntu:~/awstest-main# git config --global user.name "Leeeuijooo"

root@ubuntu:~/awstest-main# ls
appspec.yml  buildspec.yml  index.html  scripts  test.jsp

root@ubuntu:~/awstest-main# git add .
root@ubuntu:~/awstest-main# git commit -m "first commit"
[master (root-commit) 5ae5ad5] first commit
 6 files changed, 67 insertions(+)
 create mode 100644 appspec.yml
 create mode 100644 buildspec.yml
 create mode 100644 index.html
 create mode 100644 scripts/server_start.sh
 create mode 100644 scripts/server_stop.sh
 create mode 100644 test.jsp

root@ubuntu:~/awstest-main# git branch -M main

root@ubuntu:~/awstest-main# git push -u origin main
Username for 'https://github.com': Leeeuijooo
Password for 'https://Leeeuijooo@github.com':
Enumerating objects: 9, done.
Counting objects: 100% (9/9), done.
Delta compression using up to 2 threads
Compressing objects: 100% (8/8), done.
Writing objects: 100% (9/9), 1.33 KiB | 1.33 MiB/s, done.
Total 9 (delta 0), reused 0 (delta 0)
To https://github.com/Leeeuijooo/awscode
 * [new branch]      main -> main
Branch 'main' set up to track remote branch 'main' from 'origin'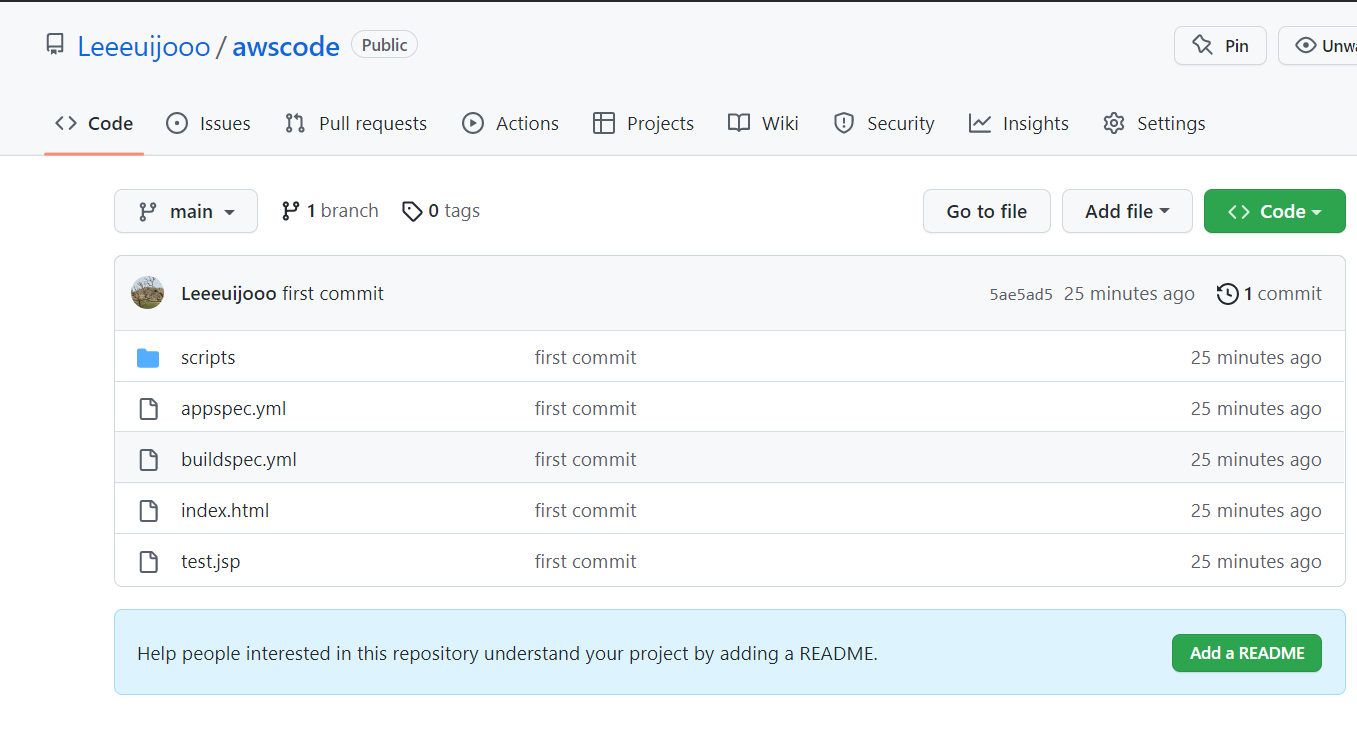
CI/CD 개발자 도구 흐름
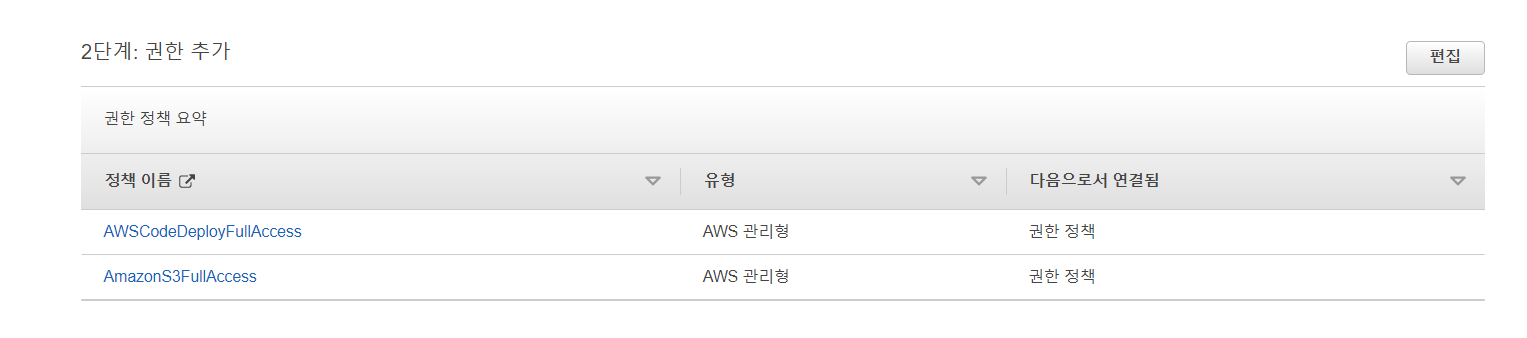
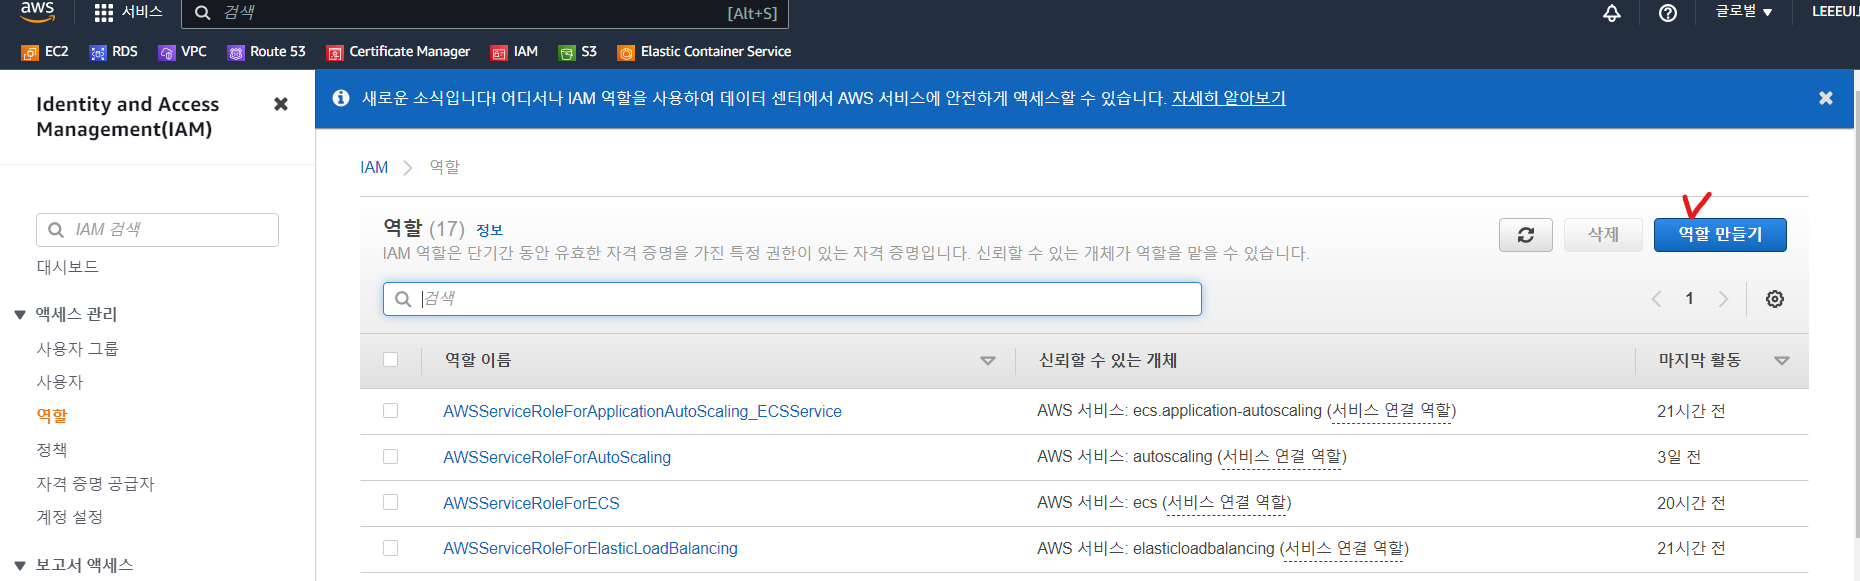
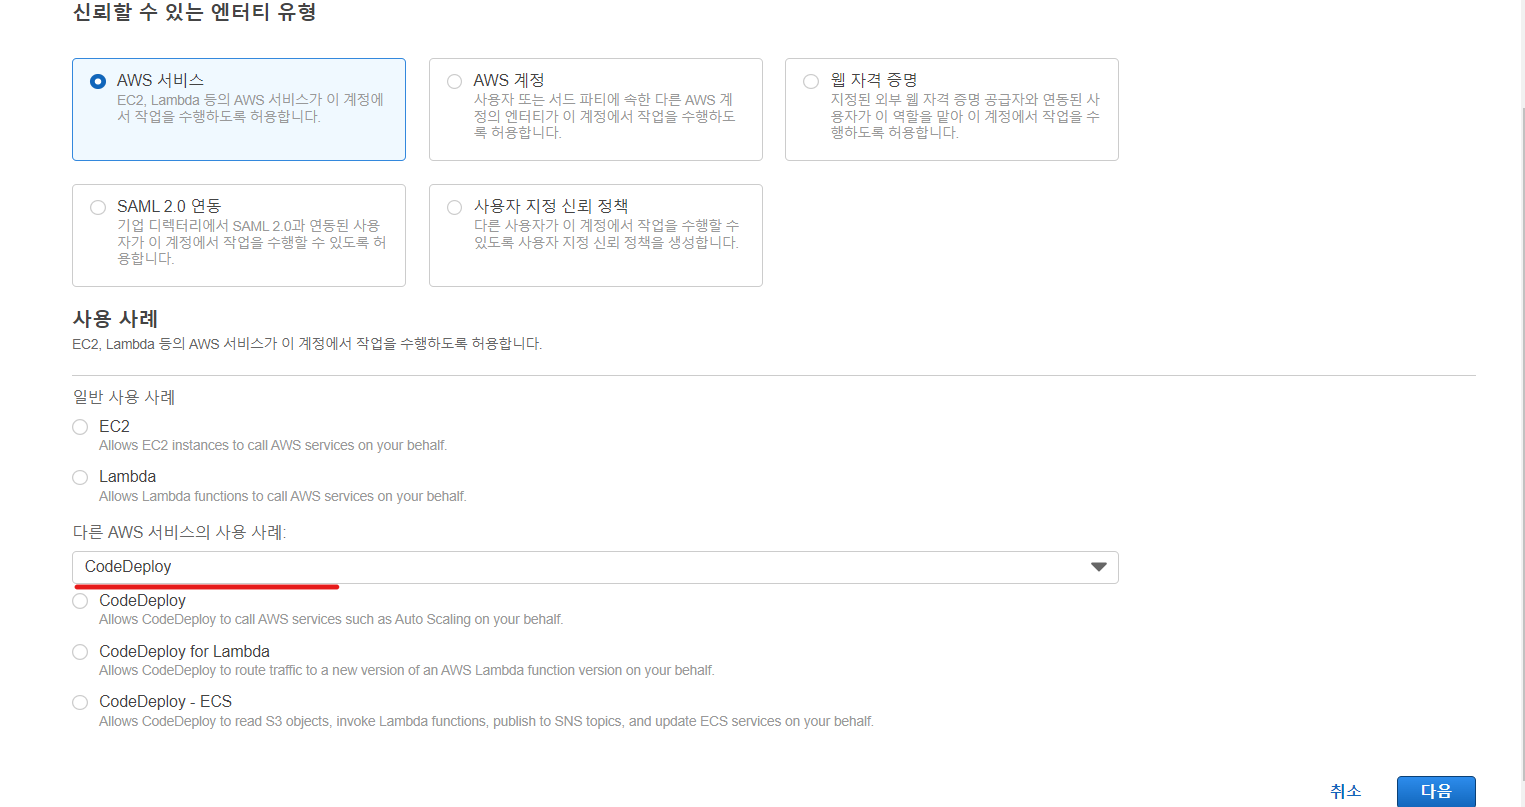
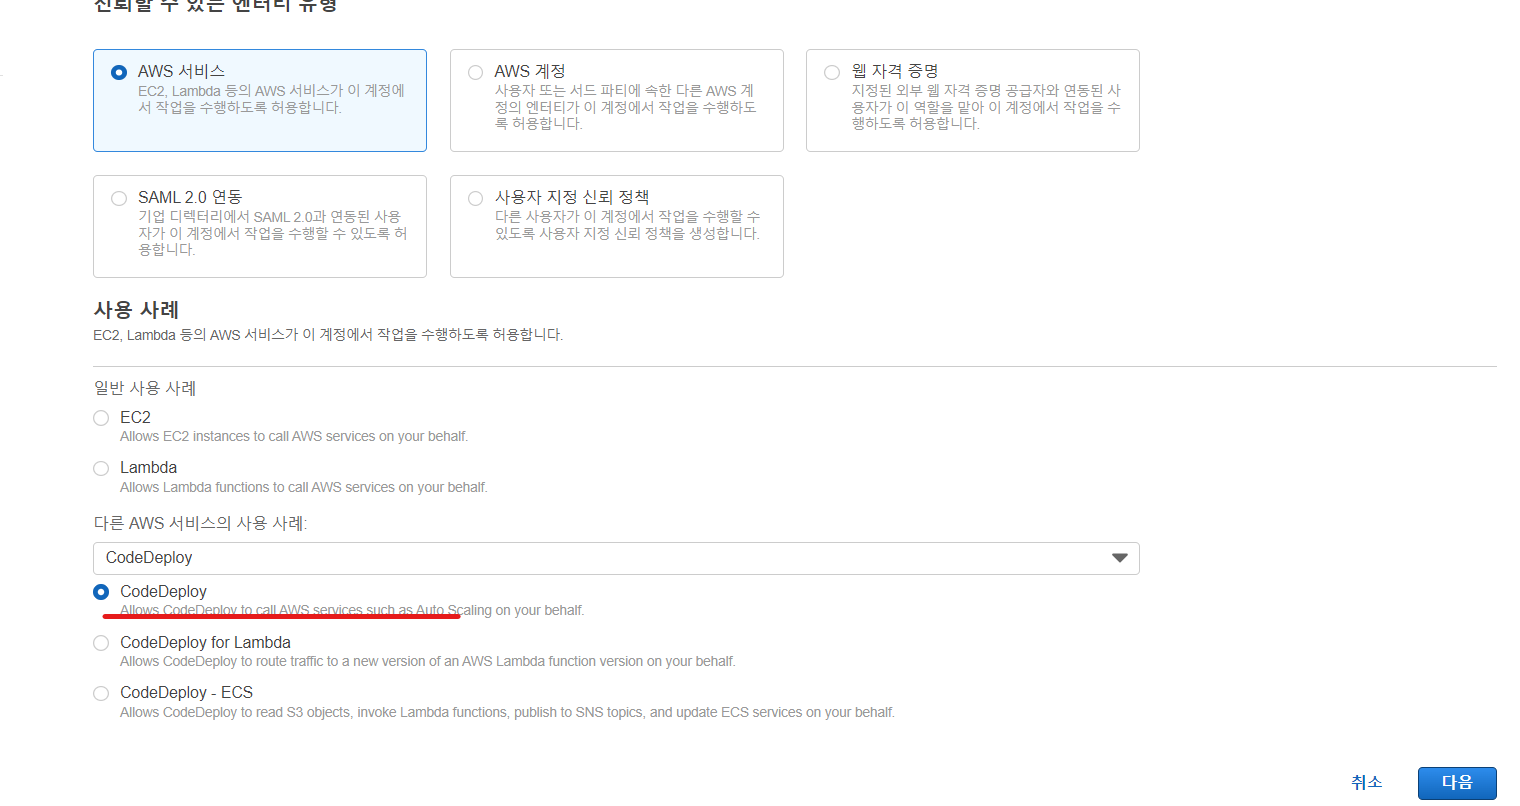
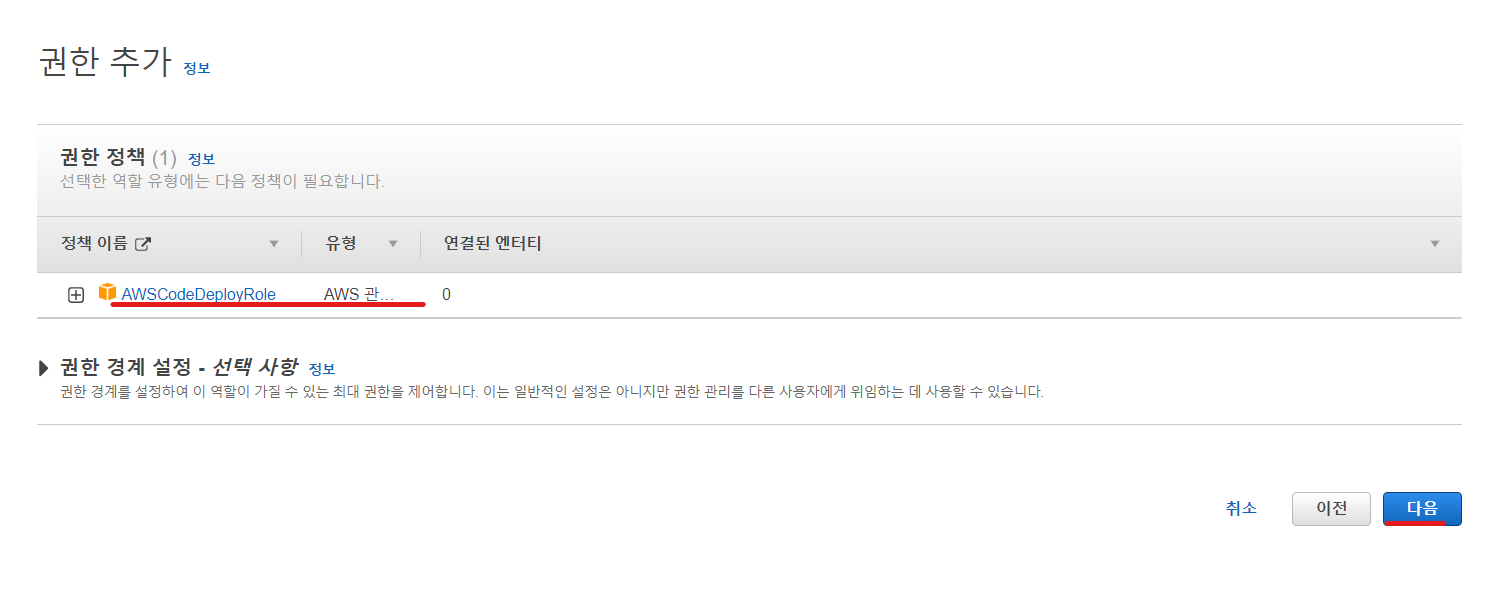
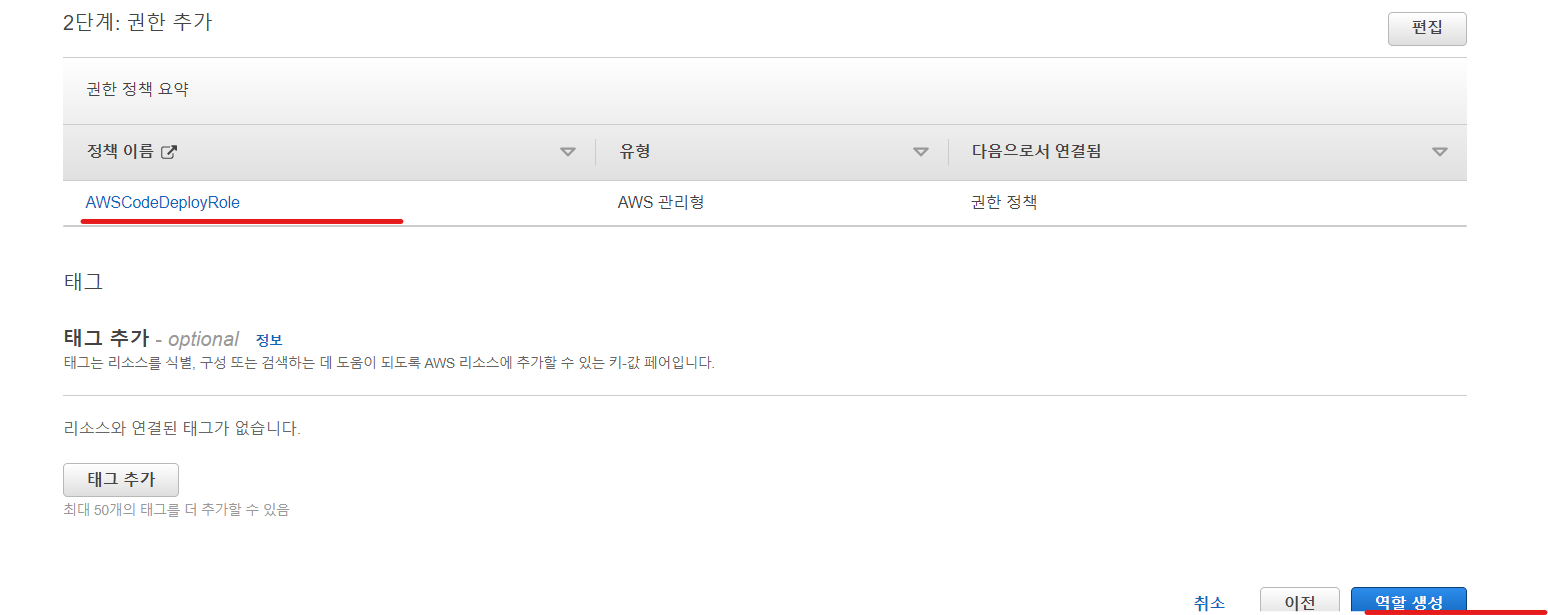
- 웹 인스턴스 생성 전에 IAM 콘솔로 이동하여 Codedeploy 역할 하나 생성

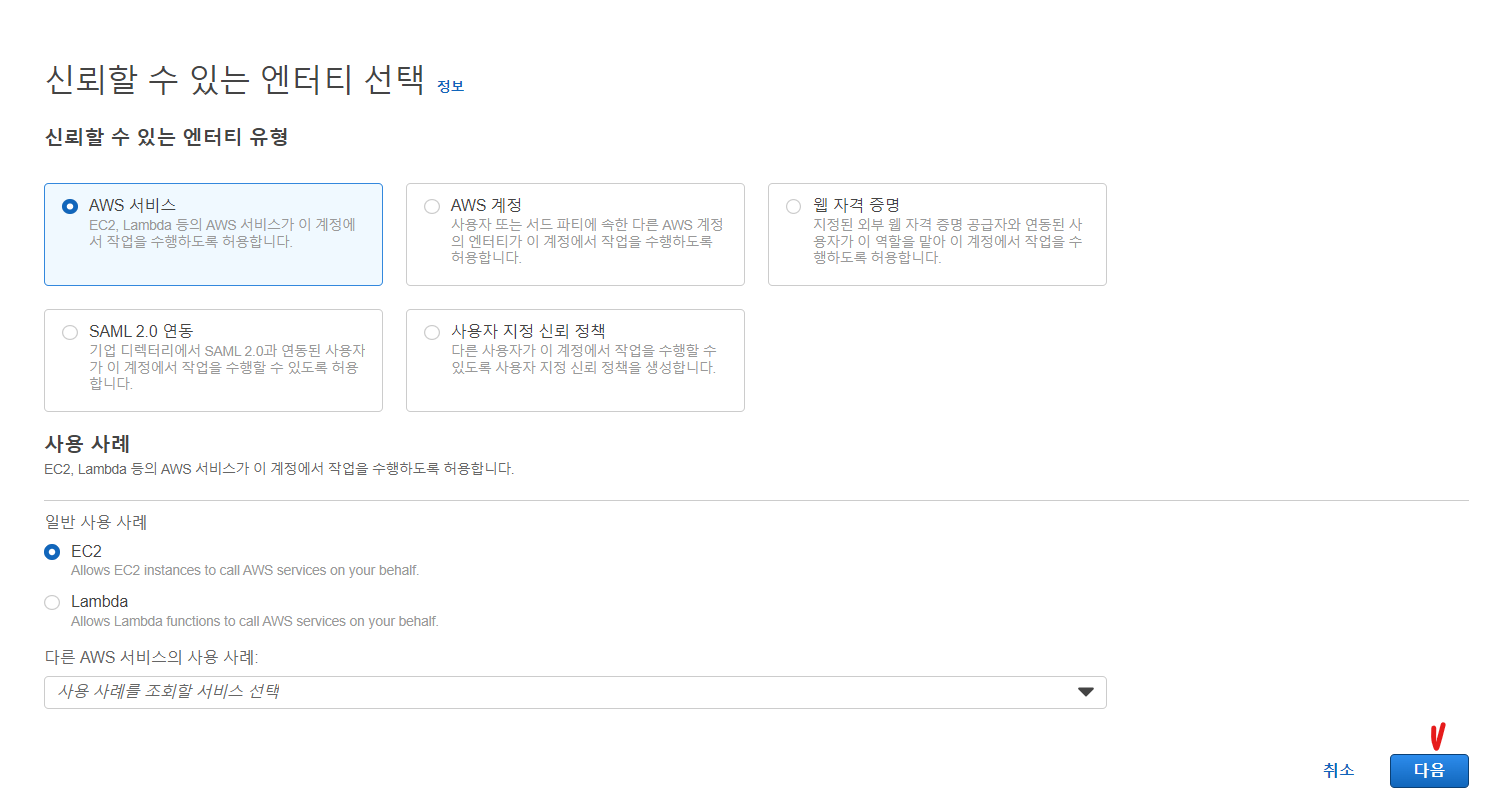
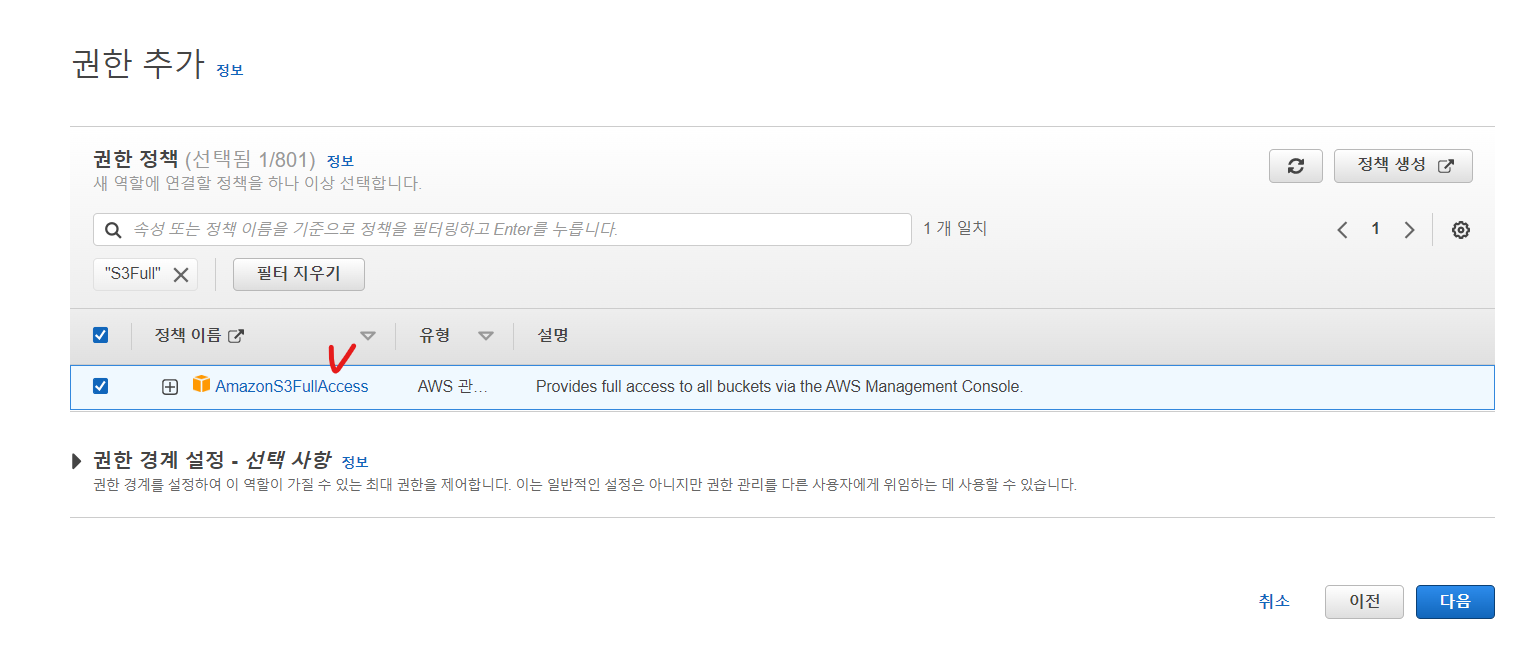
- s3 권한 멕여주기
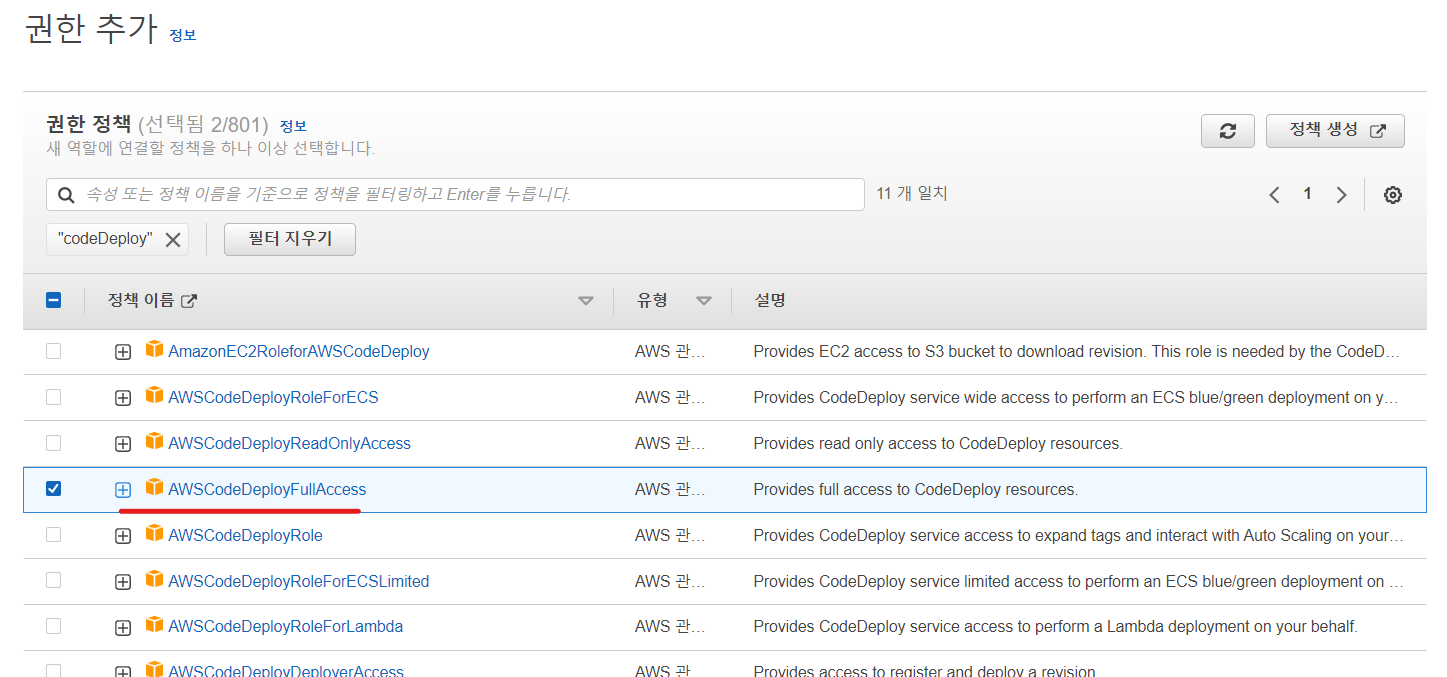
- Codedeploy를 이용할 수 있게 또한 권한 추가
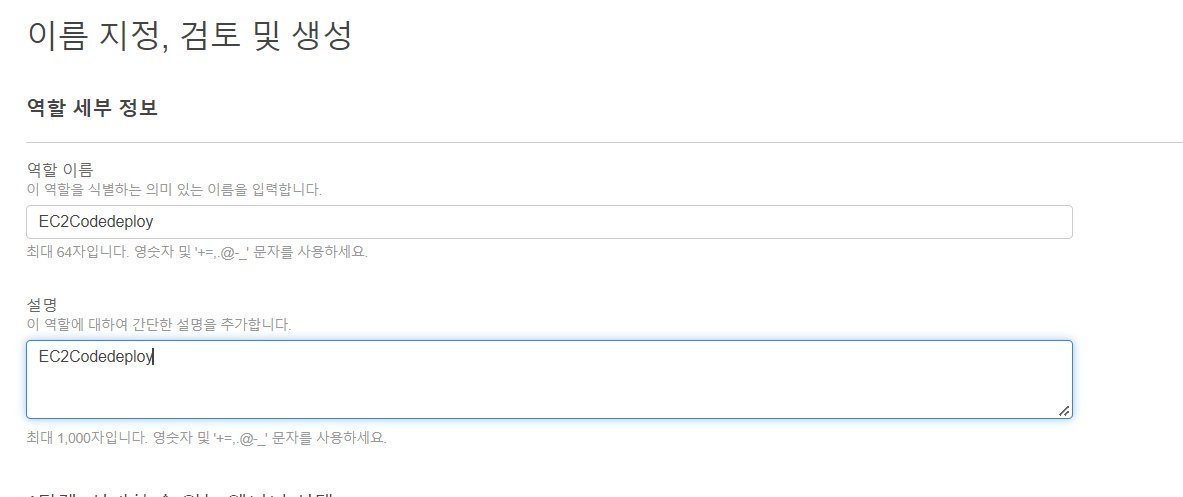
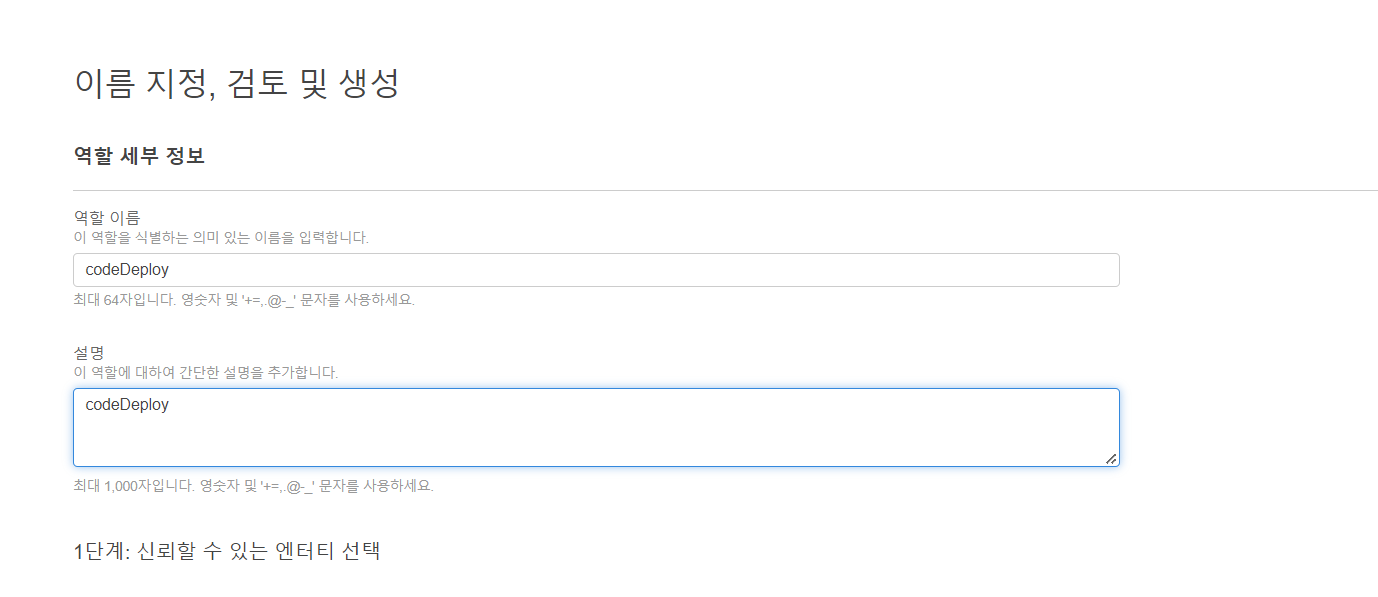
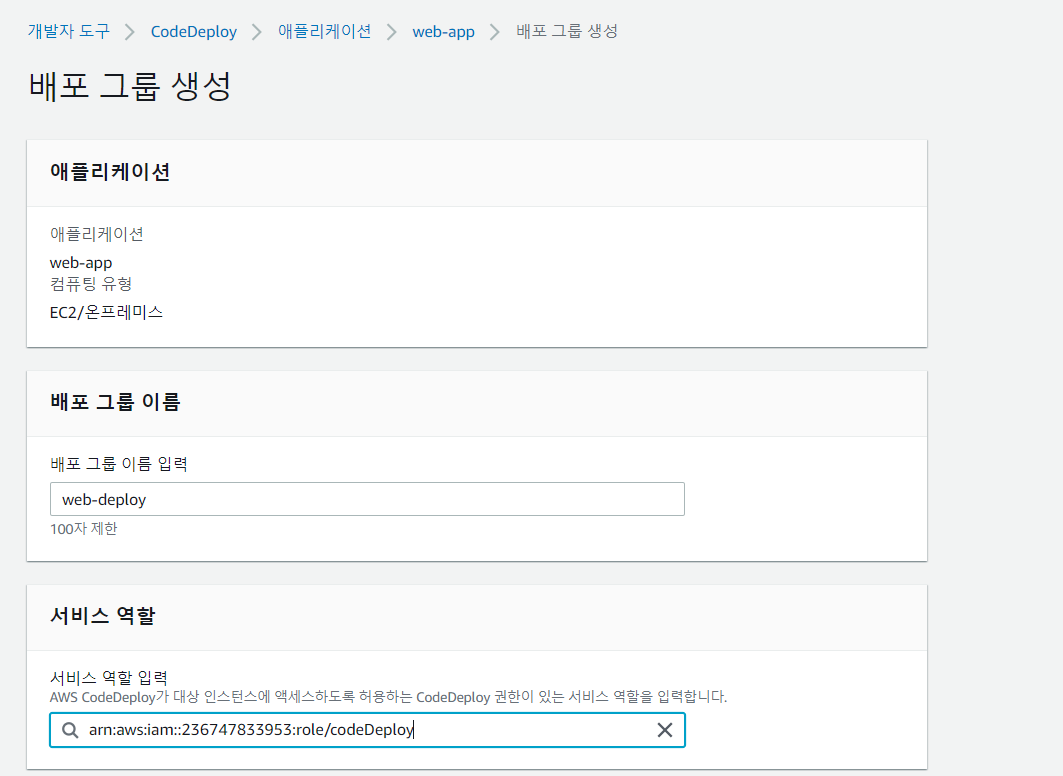
- 역할 이름 설정

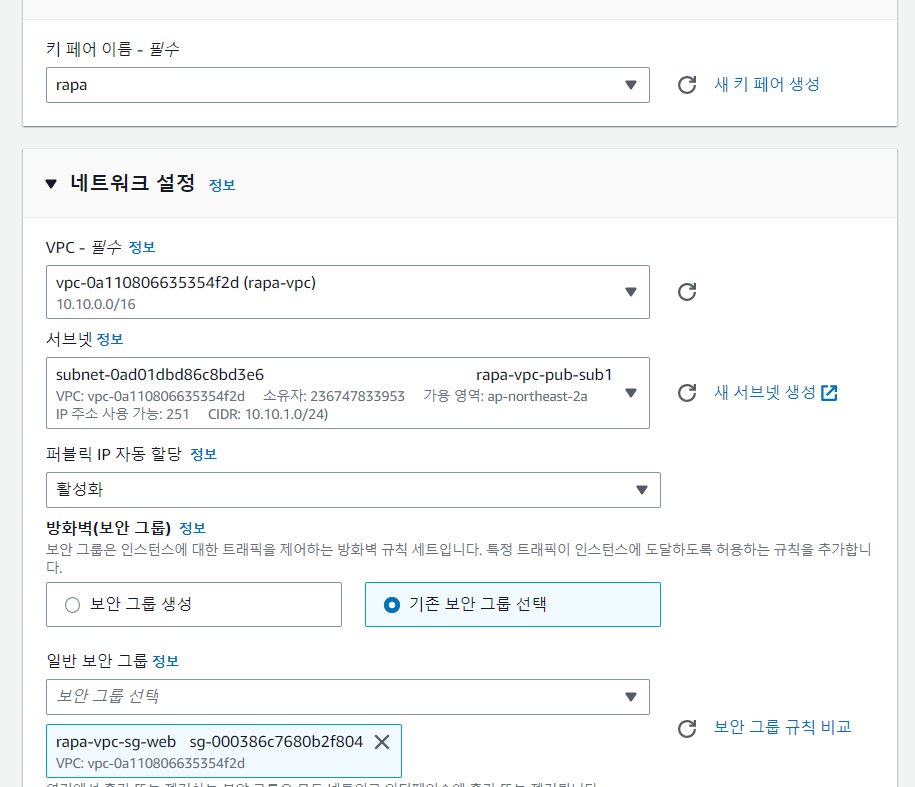
- 웹 인스턴스 하나 생성

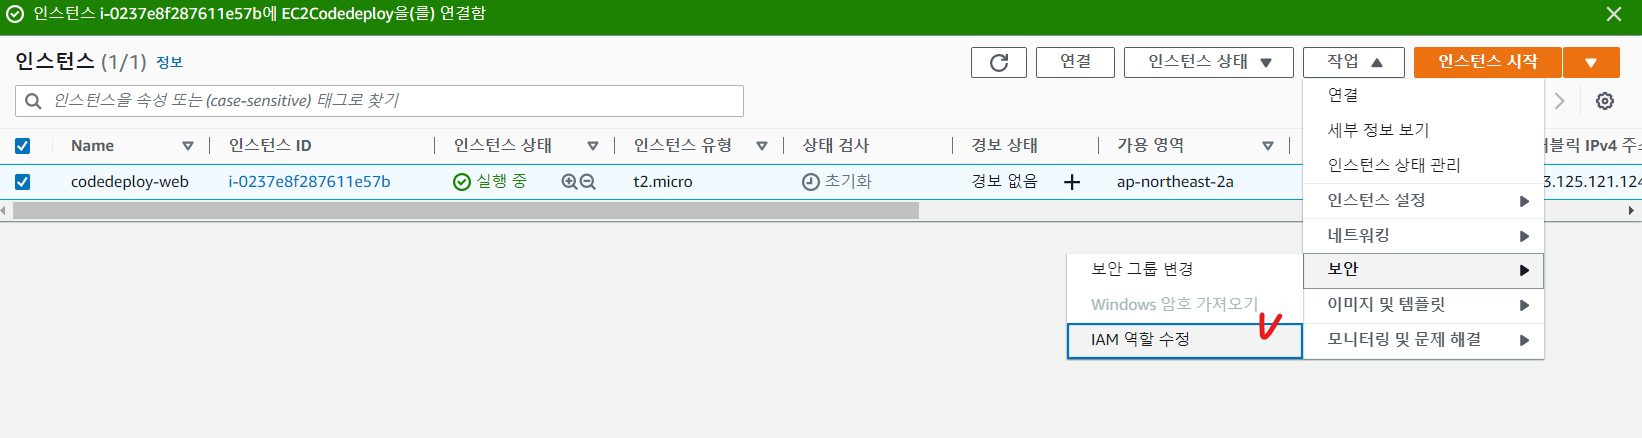
- 인스턴스 생성 후 인스턴스의 IAM 역할 업데이트
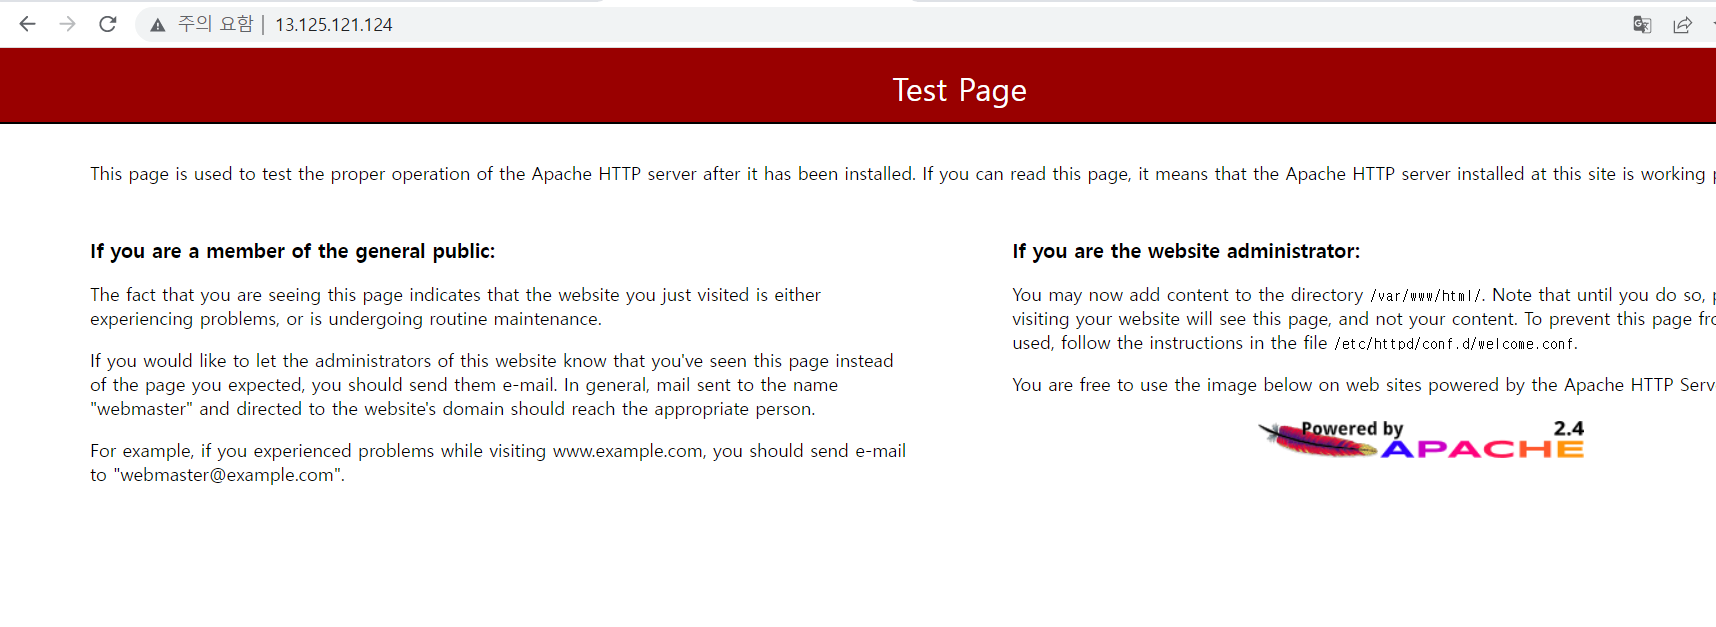
- 쉘로 인스턴스에 접속하여 웹서버에 필요한 패키지 설치 후 테스트 - 정상
- Codedeploy 설치
[ec2-user@ip-10-10-1-113 ~]$ sudo yum -y install ruby
[ec2-user@ip-10-10-1-113 ~]$ wget https://aws-codedeploy-ap-south-1.s3.ap-south-1.amazonaws.com/latest/install
[ec2-user@ip-10-10-1-113 ~]$ sudo chmod +x ./install
[ec2-user@ip-10-10-1-113 ~]$ sudo ./install auto
[ec2-user@ip-10-10-1-113 ~]$ sudo systemctl restart codedeploy-agent
[ec2-user@ip-10-10-1-113 ~]$ sudo systemctl enable codedeploy-agent
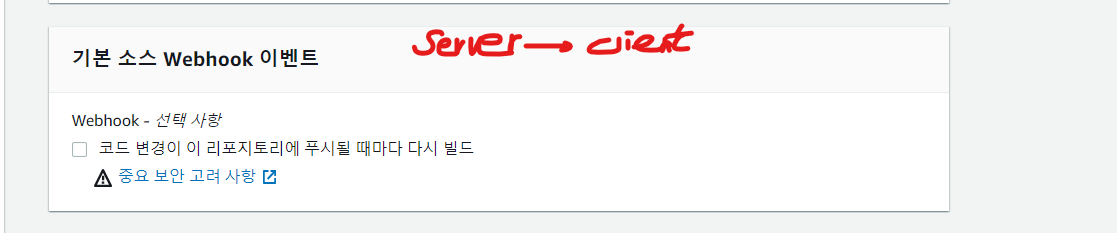
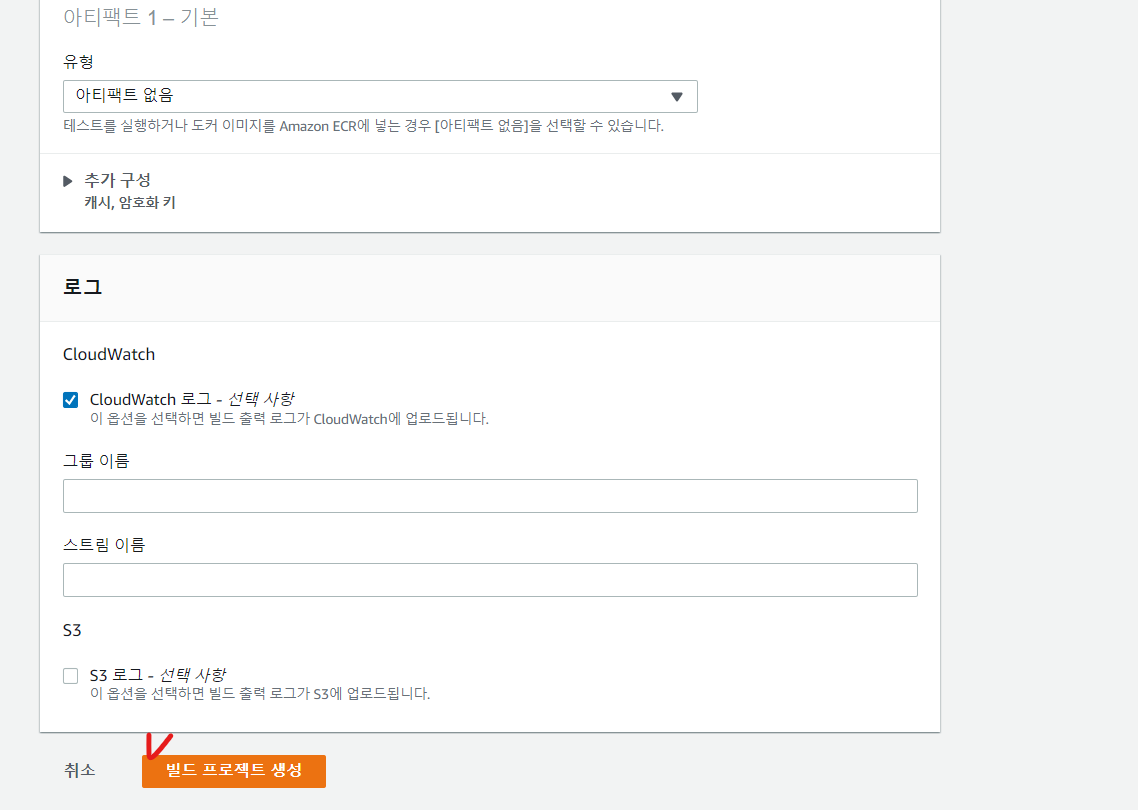
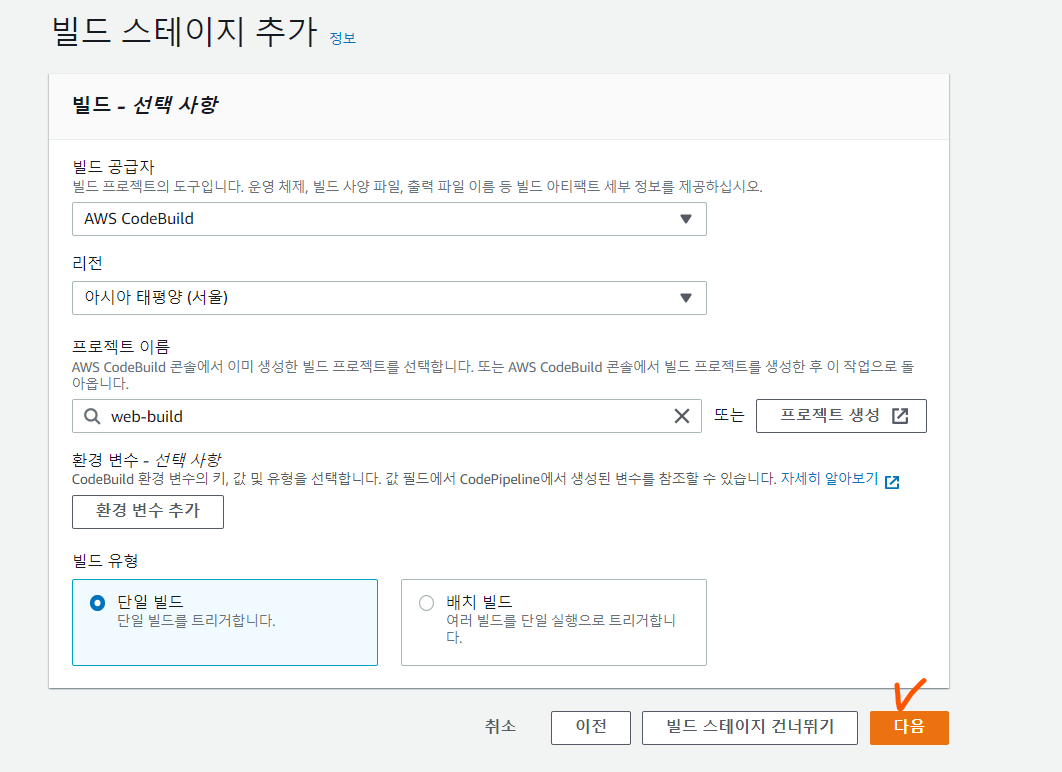
- 개발자 도구 콘솔의 codebuild 콘솔로 이동
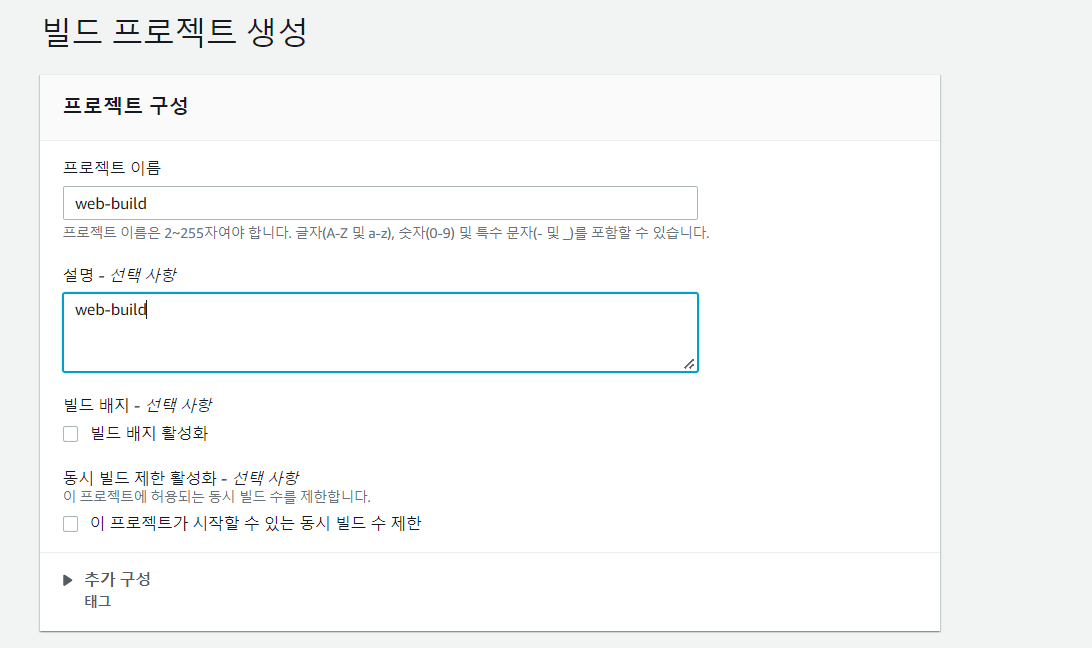
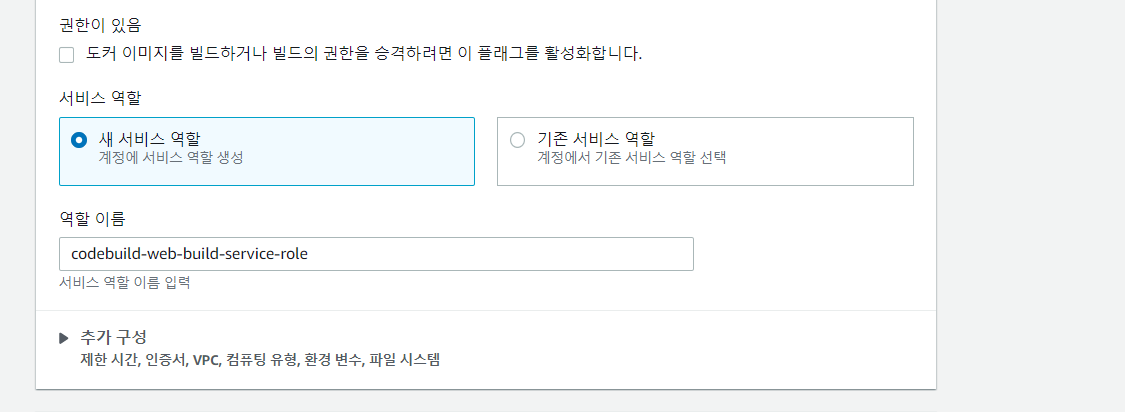
- 빌드 프로젝트 구성
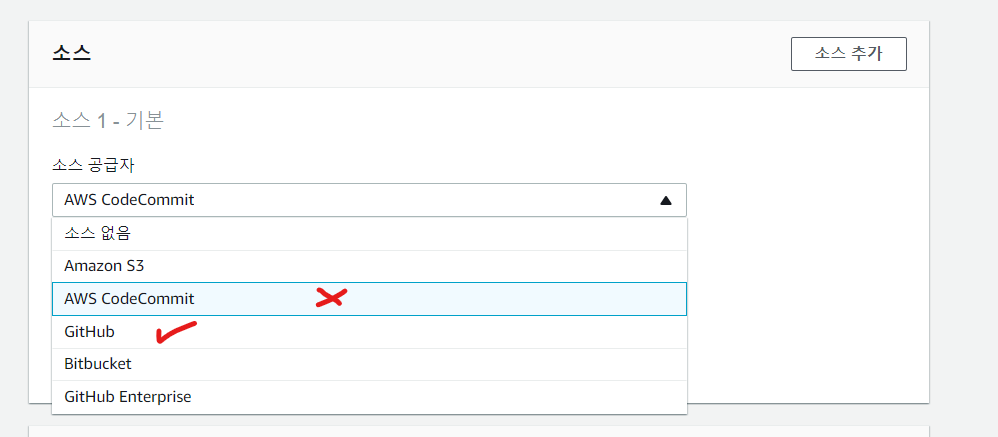
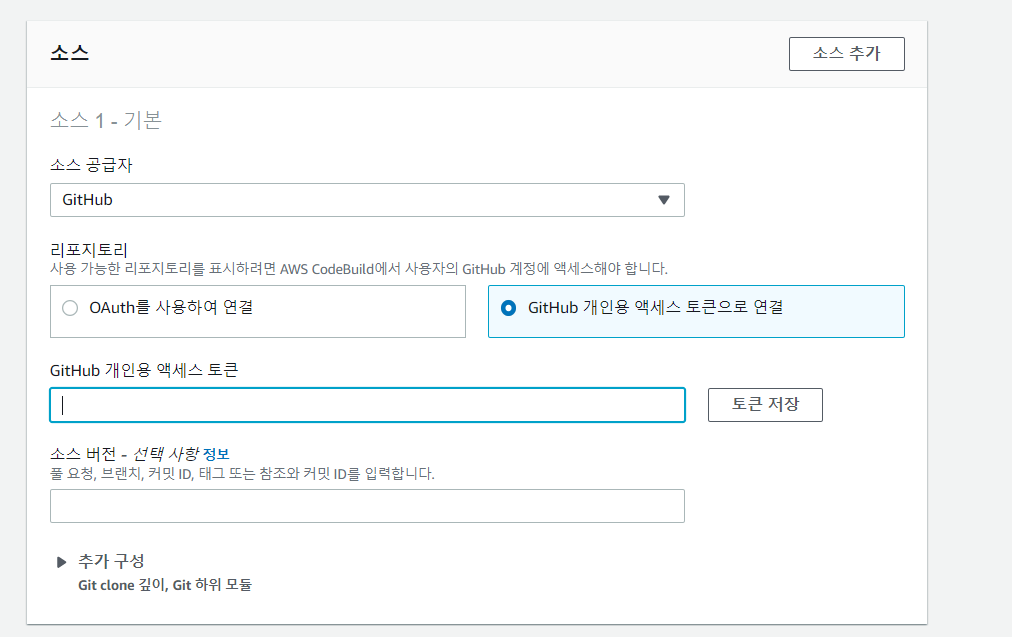
- git 허브에 업로드한 code로 빌드할 것임
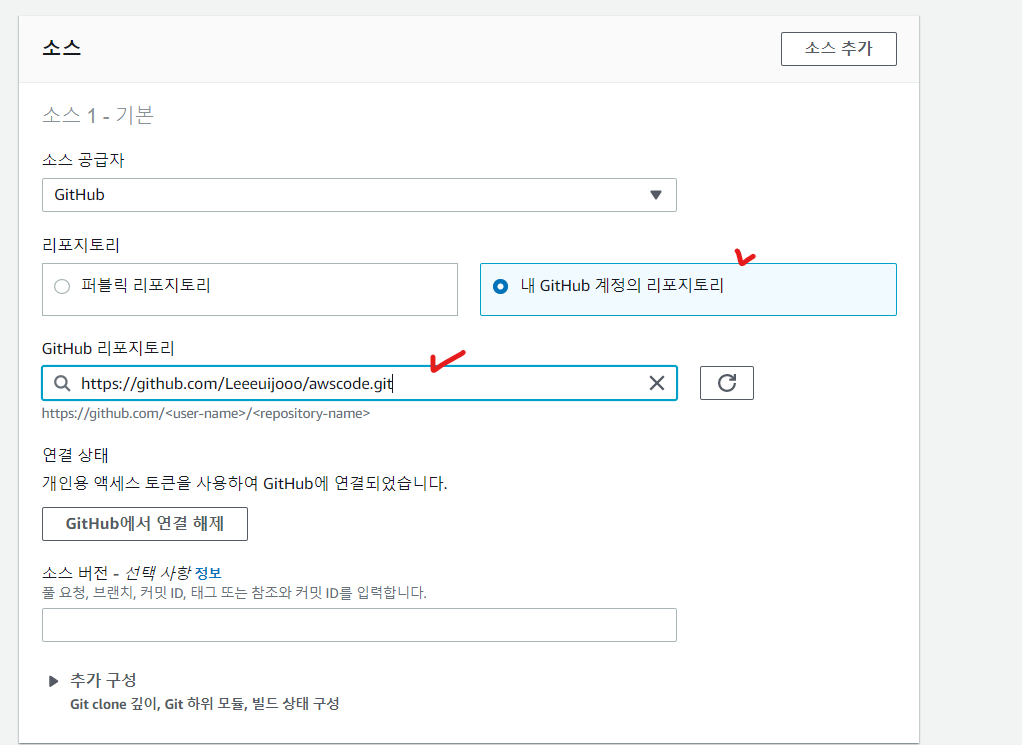
- 일단 선택하지 않음
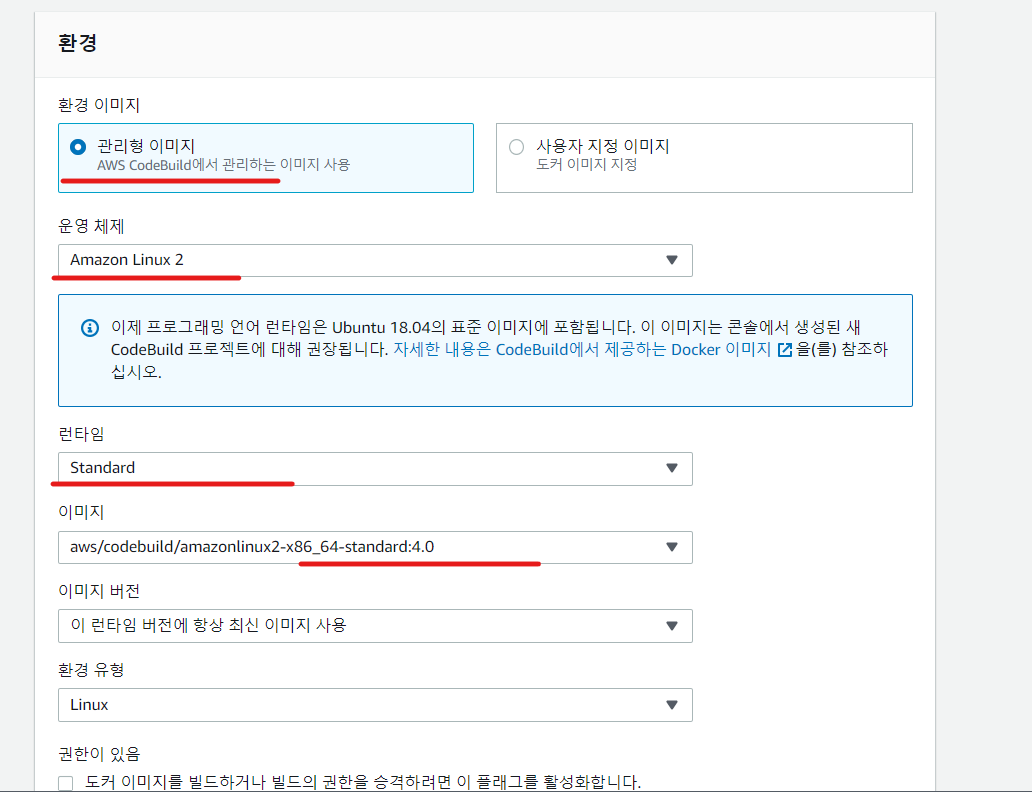
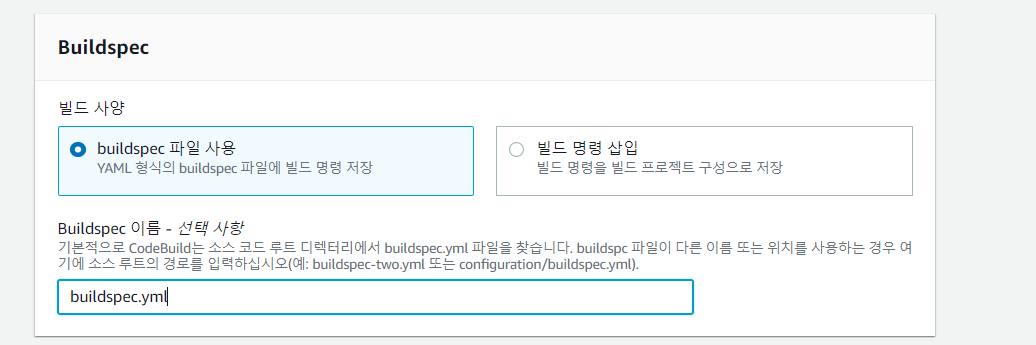
- 빌드 스펙(buildspec) - 빌드 절차를 명시해놓은 파일을 업로드
소스코드의 루트 디렉토리에서 buildspec 파일을 aws 가 알아서 찾는다
.yml 파일을 통해서 빌드를 진행
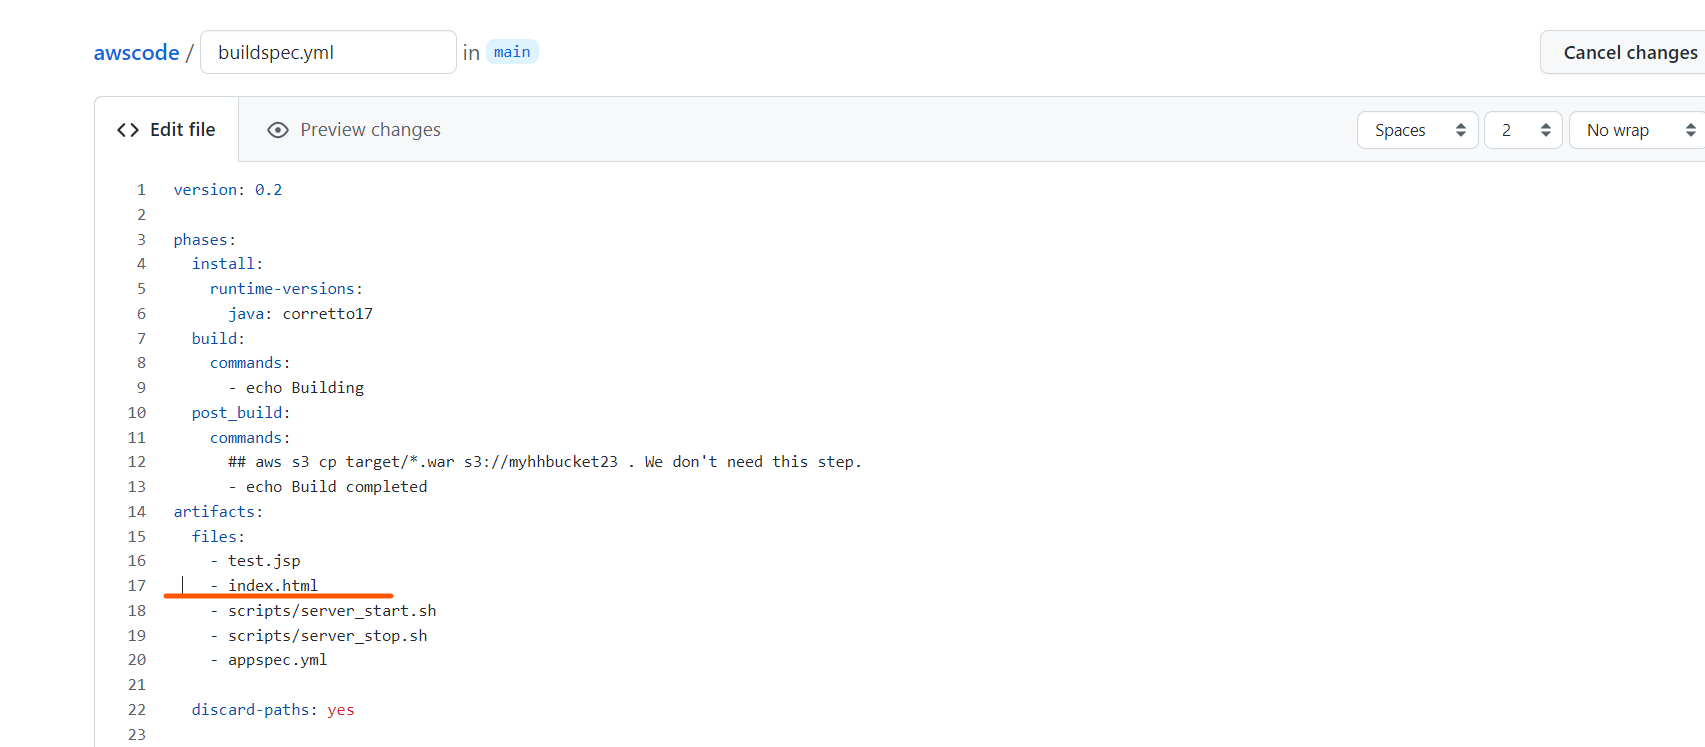
<빌드 절차 파일 : buildspec>
version: 0.2
phases:
install:
runtime-versions:
java: corretto17 # 자바 버전을 설치
build: # 빌드를 하고 나서 어떤 행동을 할 것인지 현재 상태에는 빌드할 내용이 없다
commands:
- echo Building
post_build: # 빌드가 끝나고 나서
commands:
## aws s3 cp target/*.war s3://myhhbucket23 . We don't need this step.
- echo Build completed
artifacts: # 서버에 올라갈 파일들을 명시한다.
files:
- test.jsp
# - index.html
- scripts/server_start.sh
- scripts/server_stop.sh
- appspec.yml
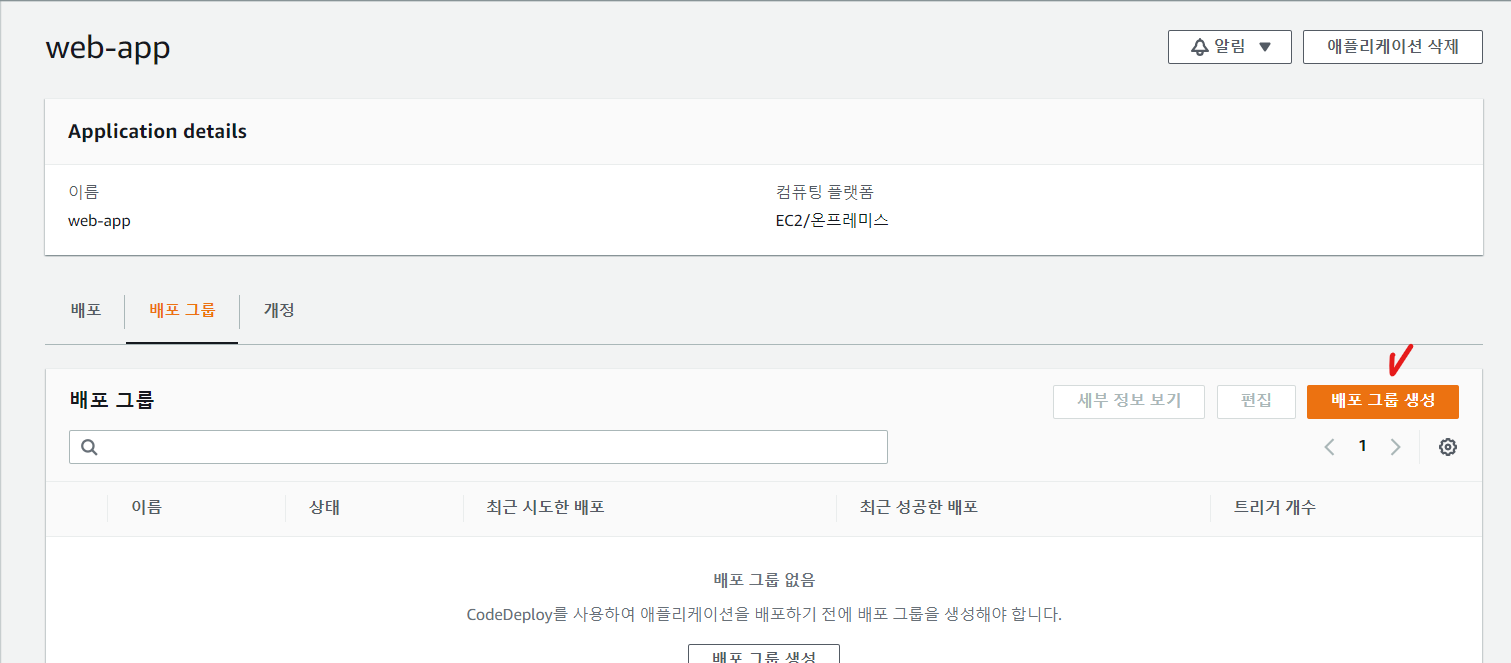
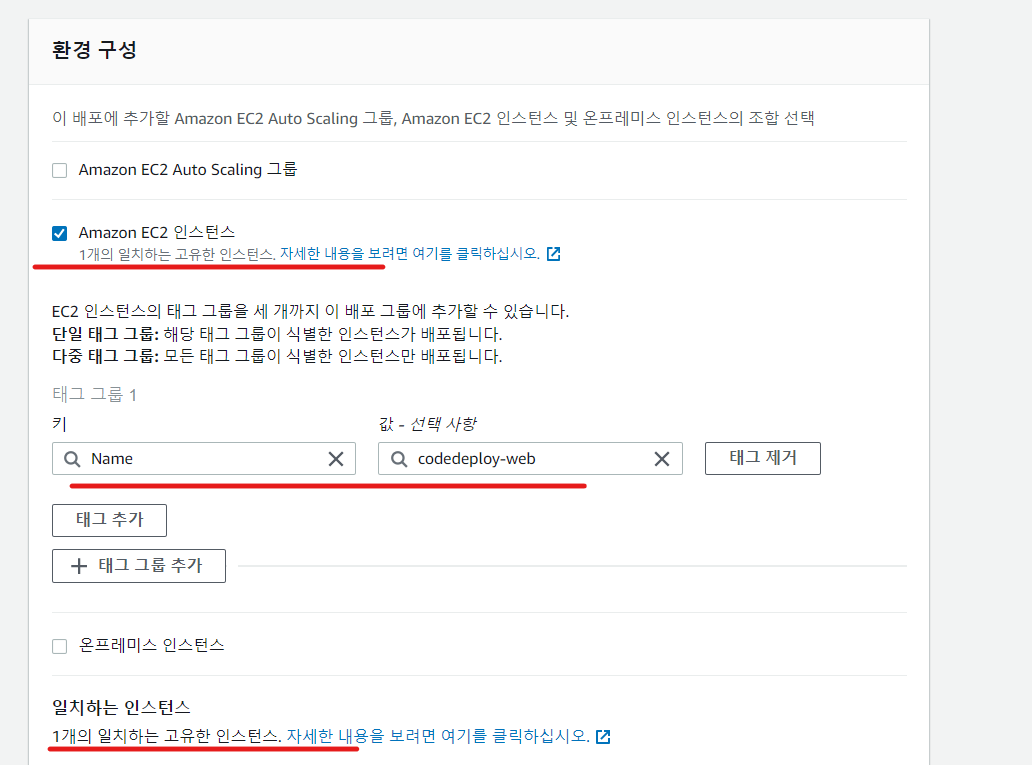
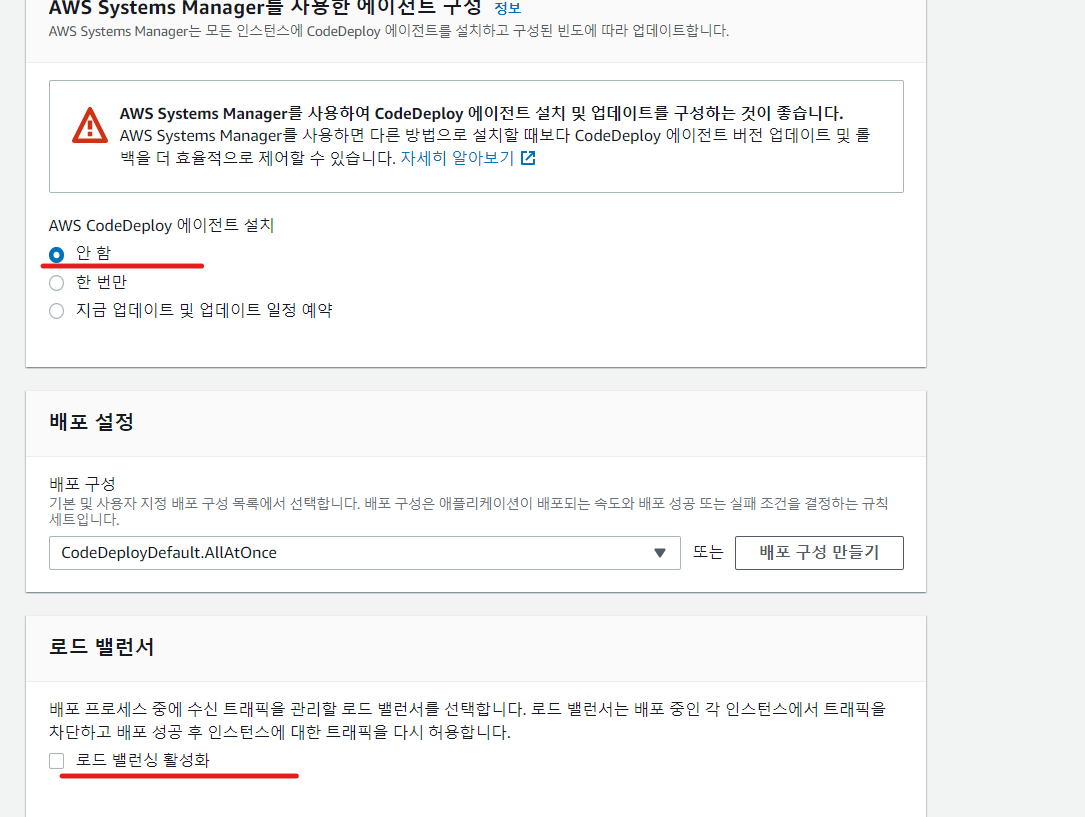
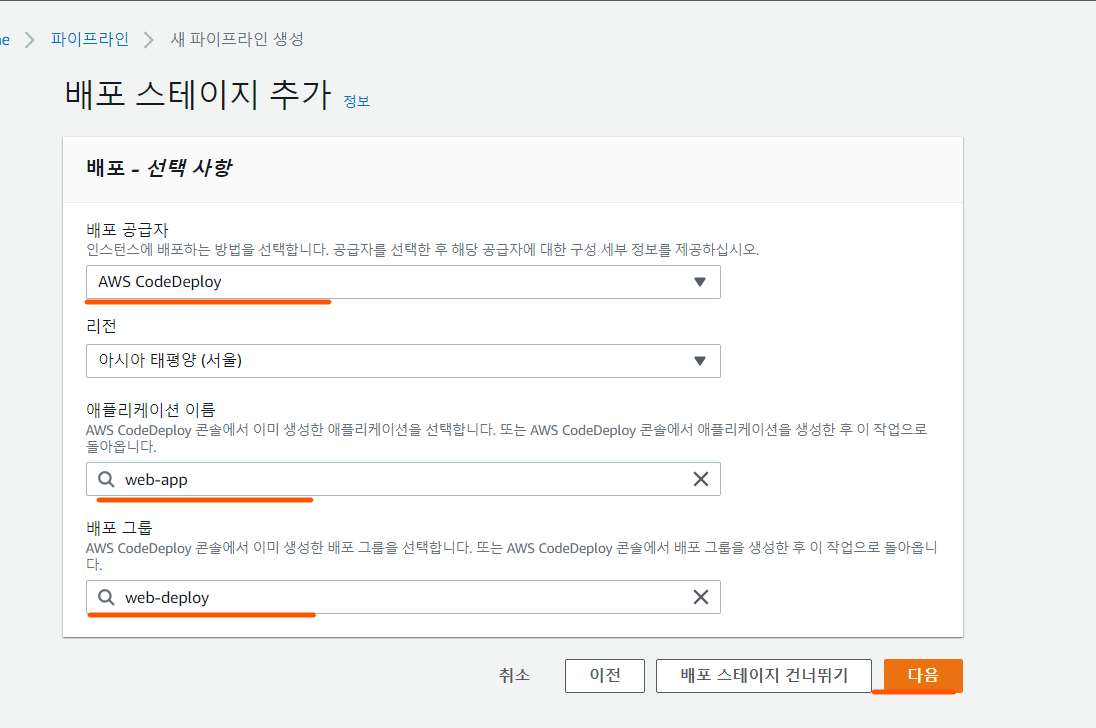
discard-paths: yes # 파일의 경로를 무시하겠다.- 코드 디플로이(Codedeploy) 구성 - IAM 콘솔에서 codedeploy 역할 생성
- 개발자 도구 콘솔로 이동


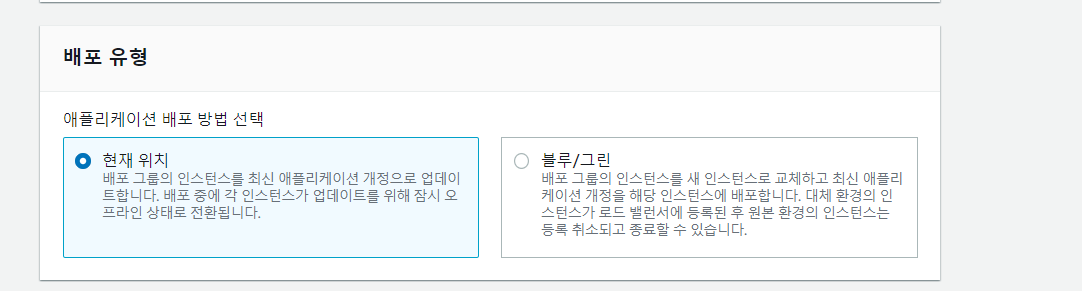
- 블루/그린 : 새 서버에 새로 만든 어플리케이션을 만들고 동작하는지 확인하고 이전에 생성했었던 인프라를 삭제 하겠다
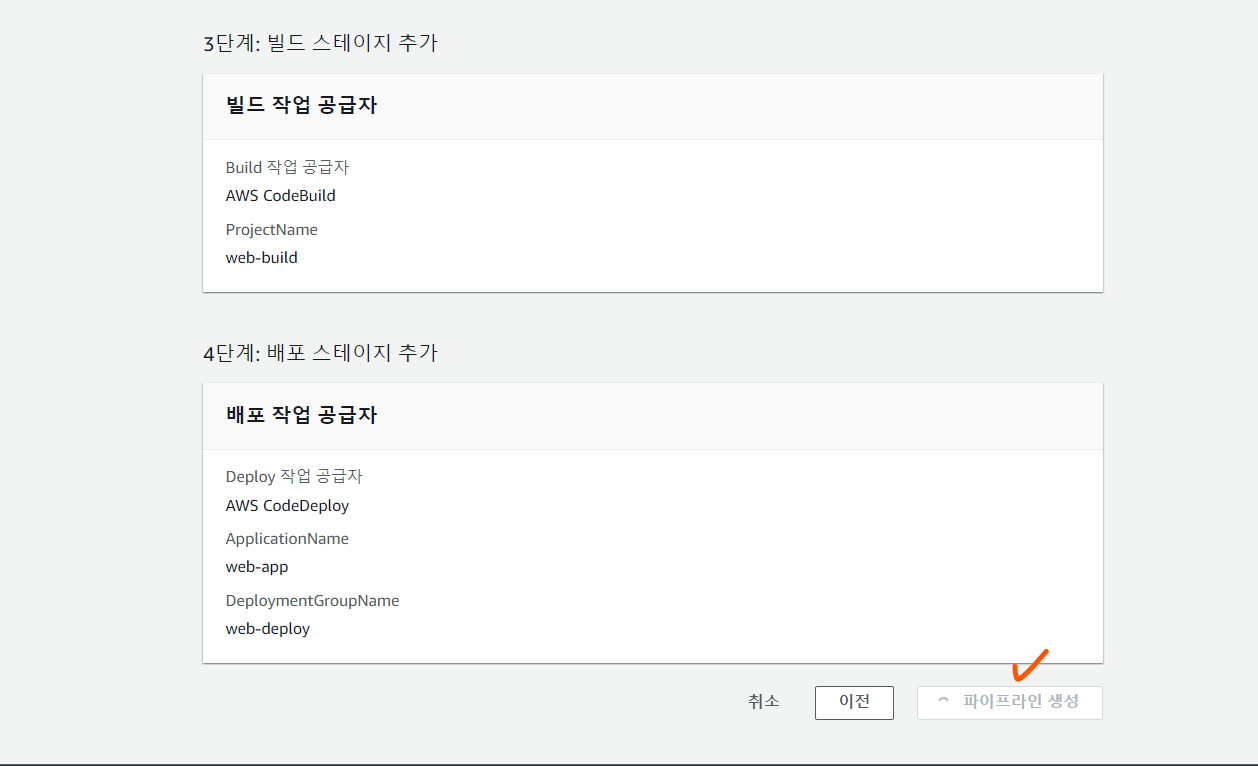
- 파이프라인(pipeline) 생성


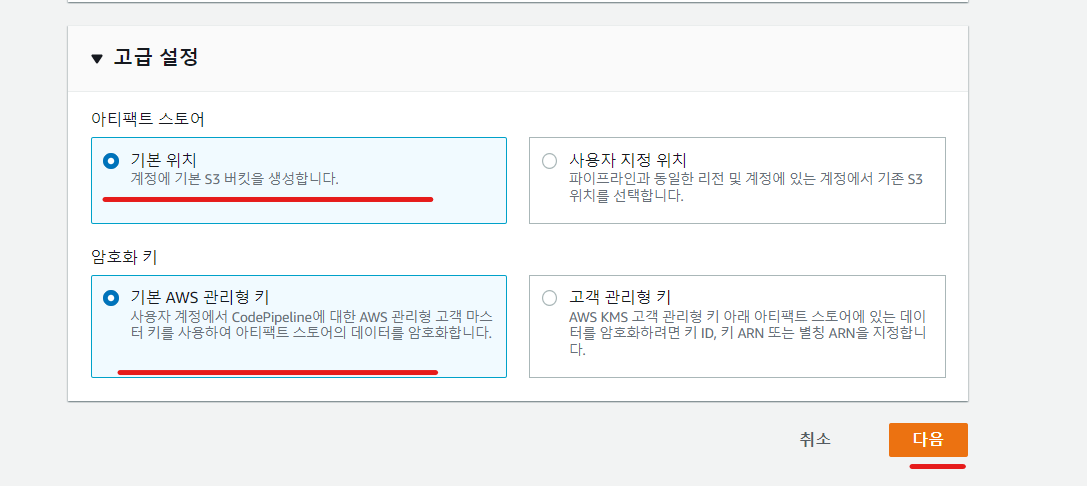
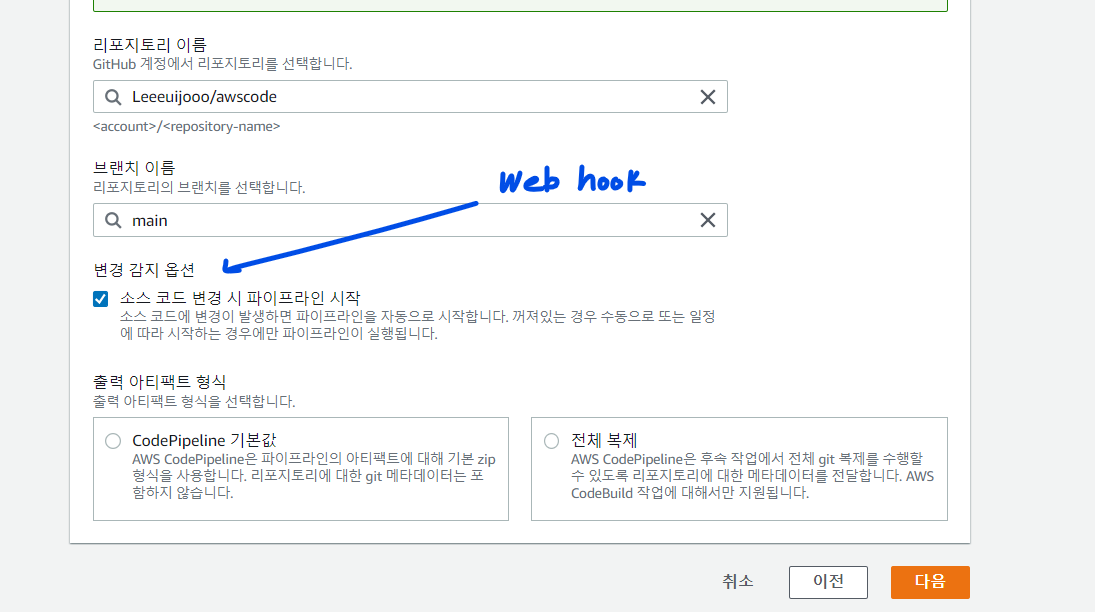
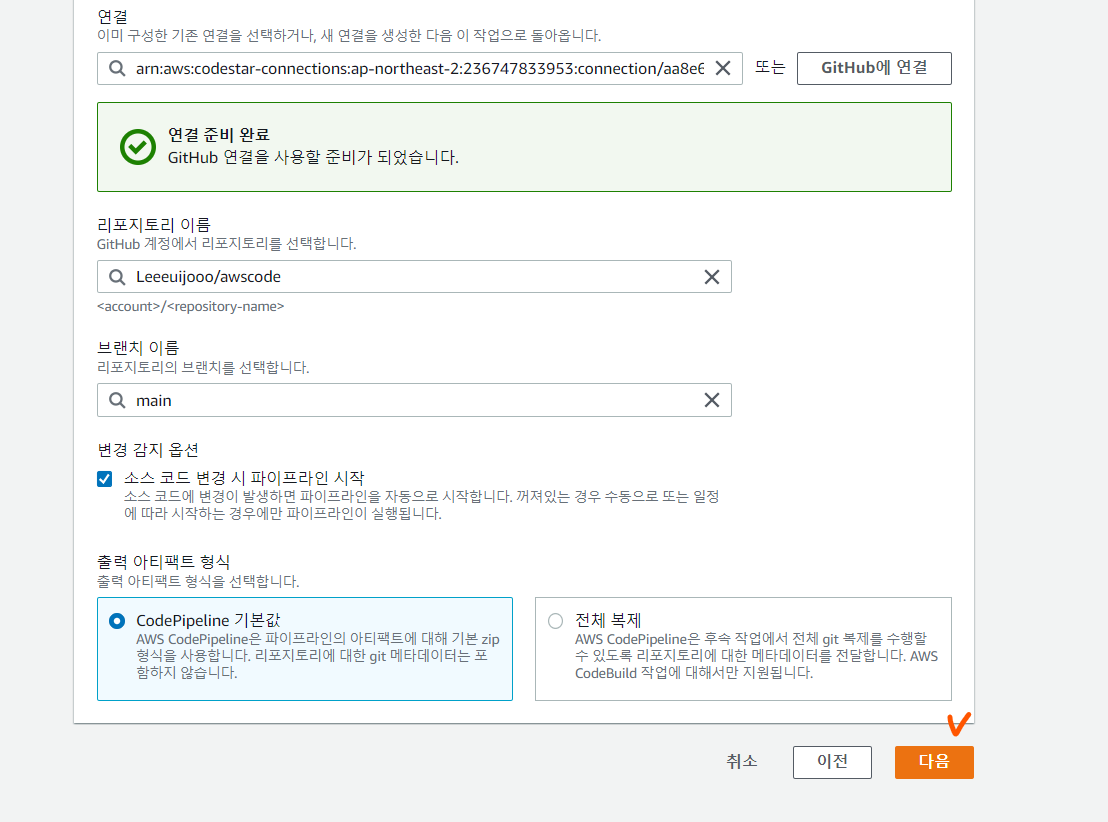

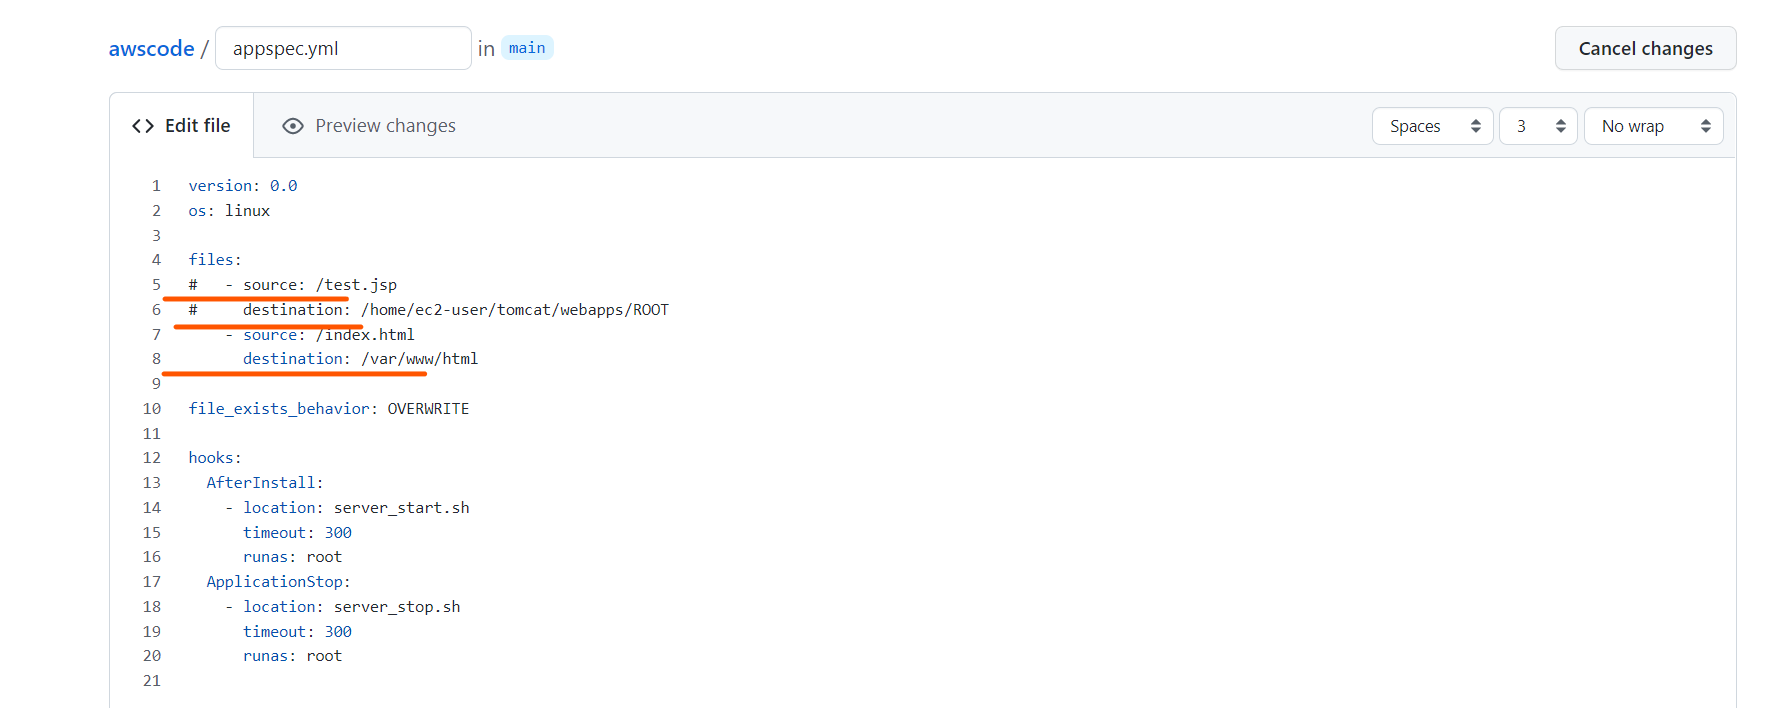
- Github에서 우리는 web서버만을 테스트할 것이기 때문에 appspec 과 buildspec을 수정

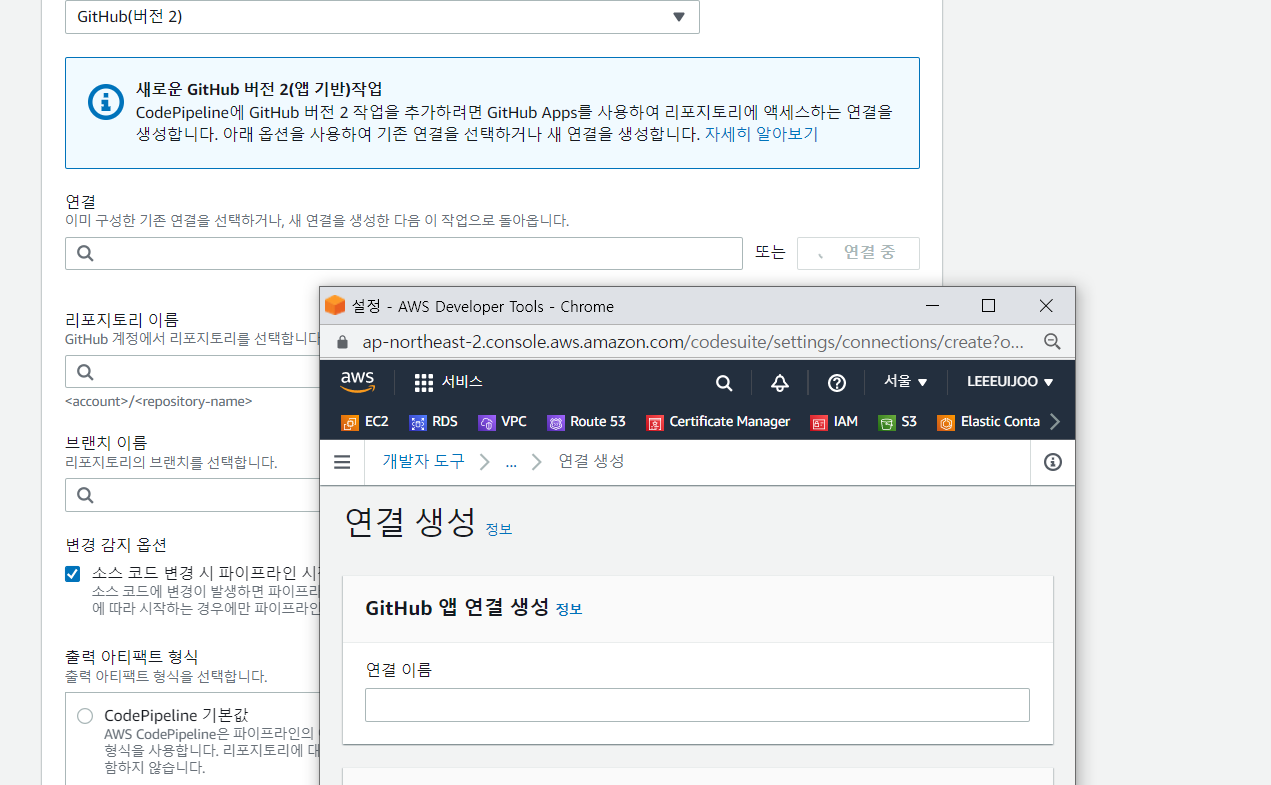
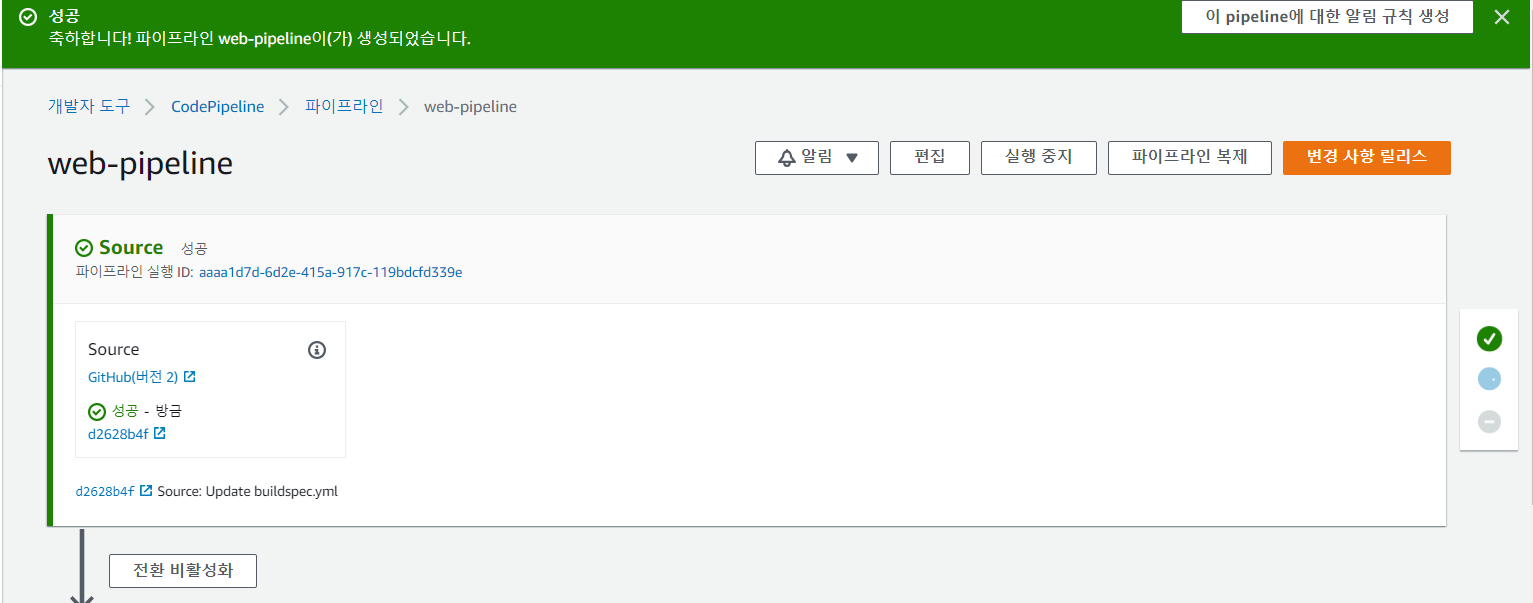
- 파이프라인 콘솔로 다시 이동하여 파이프라인 생성
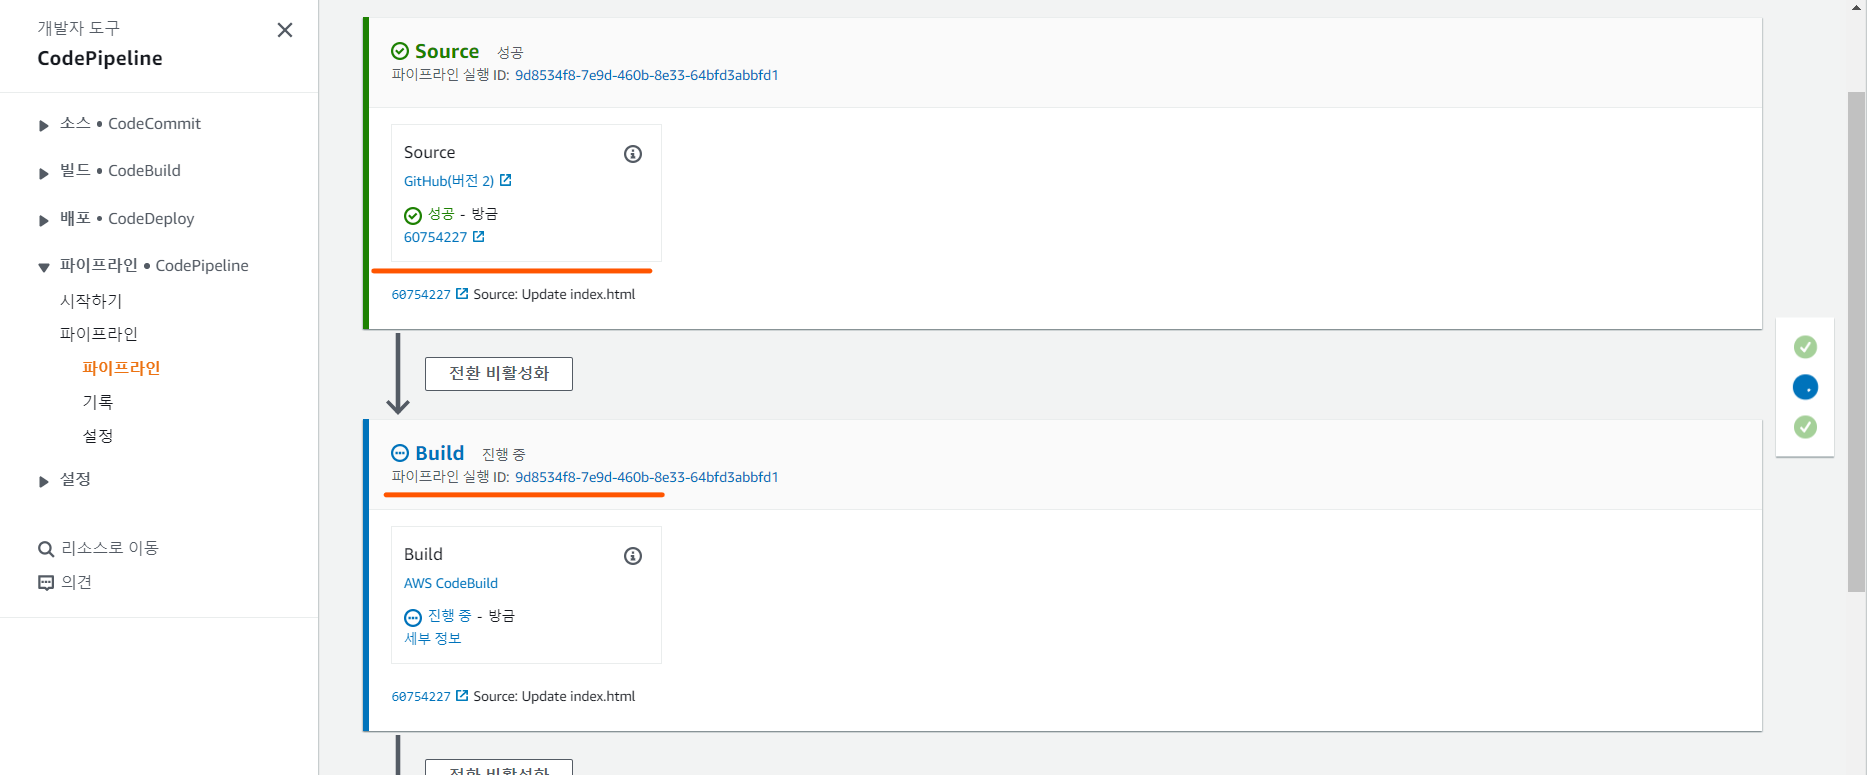
- 스테이지 별로 진행상황을 볼 수 있고 로그를 확인하면서 트러블 슈팅도 가능하다
- Source 스테이지
- Build 스테이지
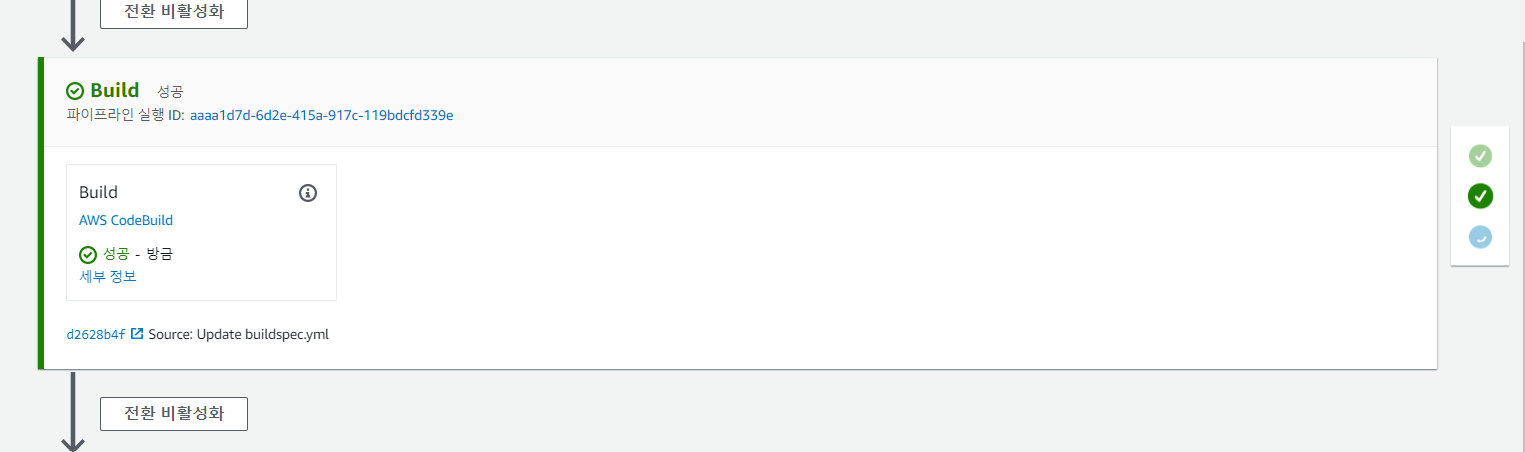
- Deploy 스테이지

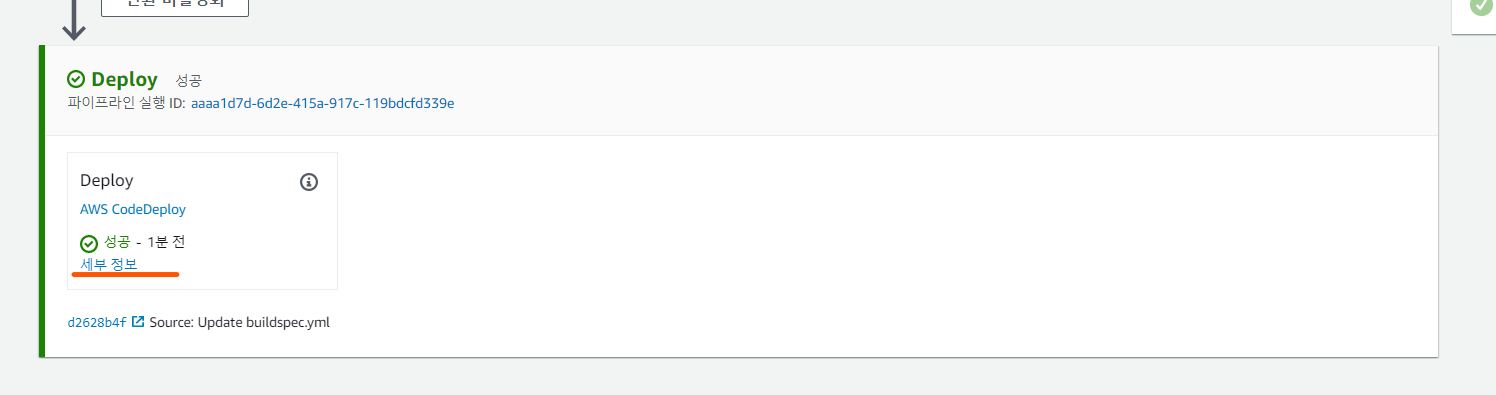
- 인스턴스 찍고 들어가서 배포가 성공적으로 됐는지 확인

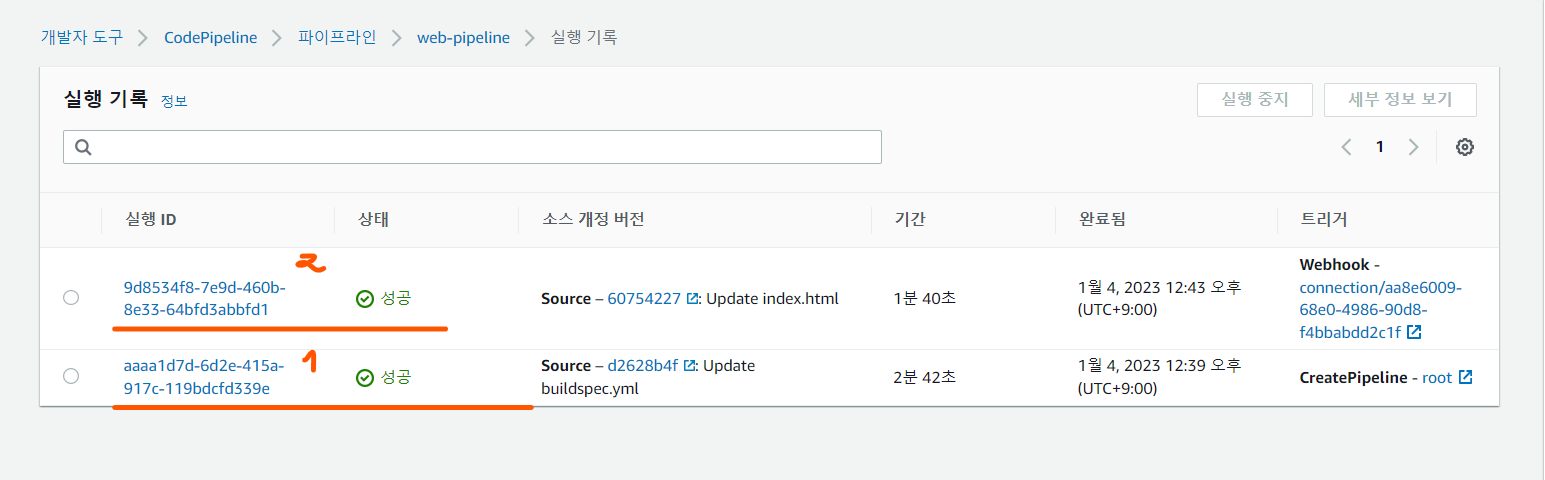
- 파이프라인 테스트를 위해 index.html 파일을 수정해보자
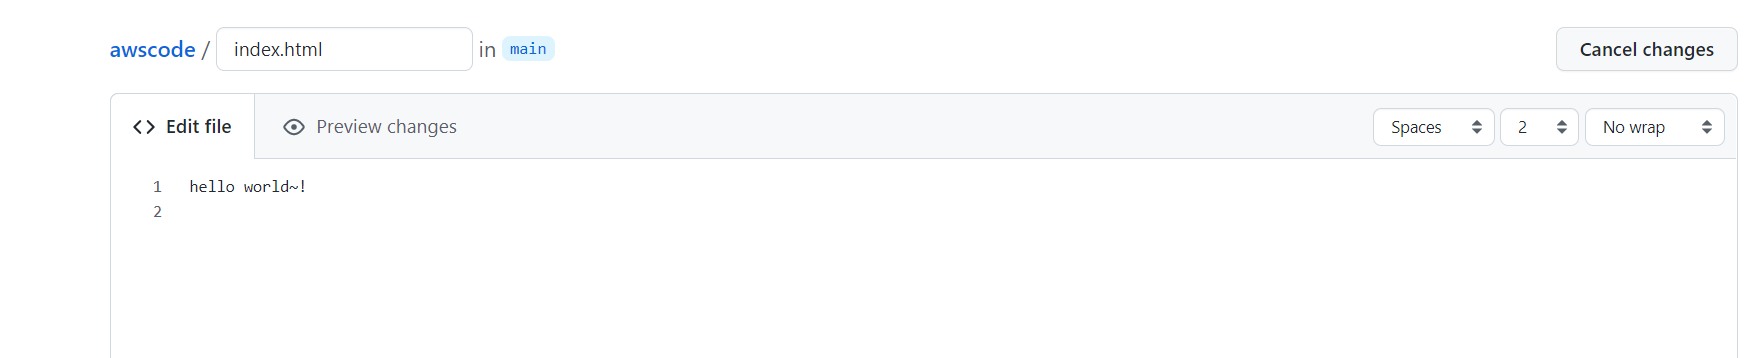
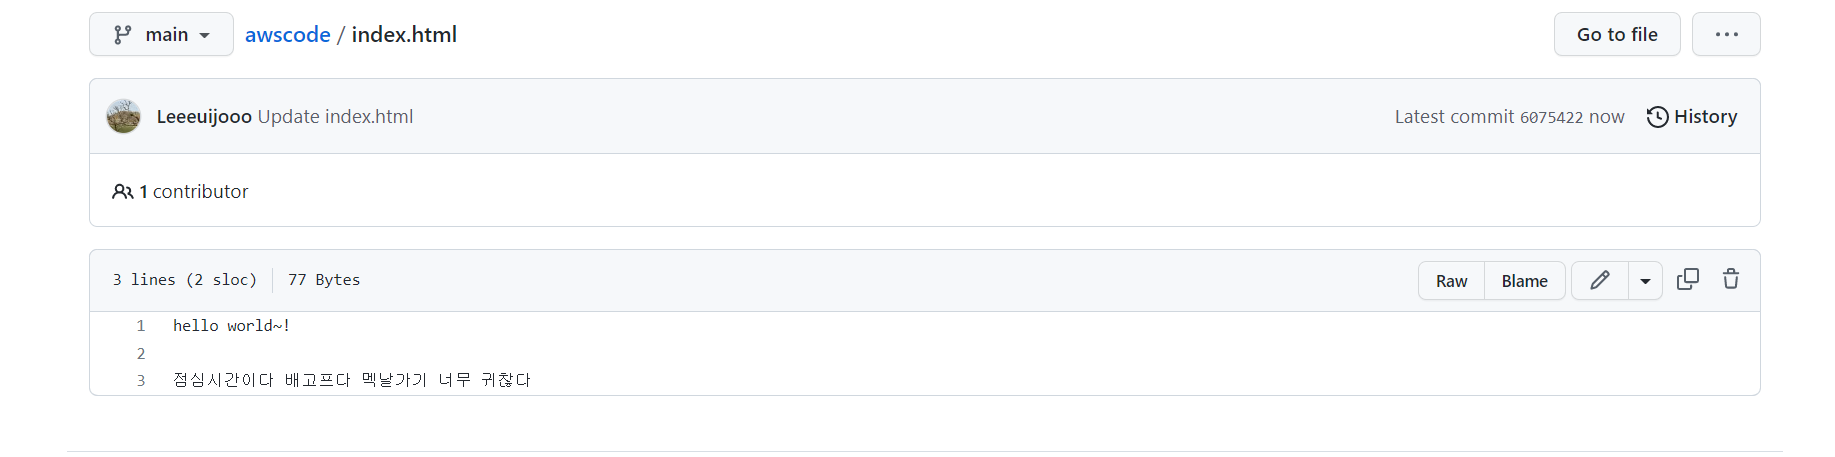
- 파이프라인이 자동으로 변경을 감지하여 deploy를 자동으로 시작한다
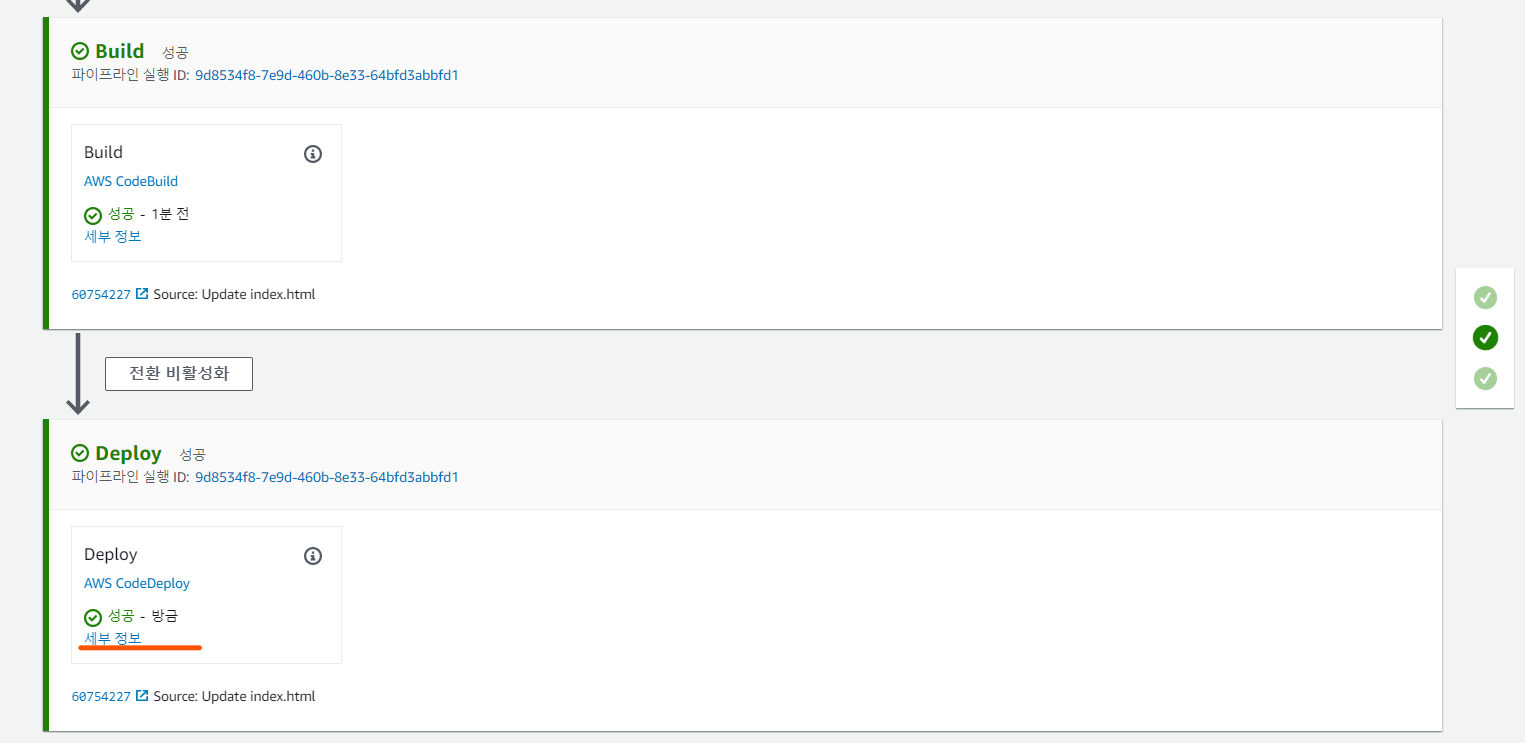
- 정상적으로 배포가 완료 됐음을 확인

- 문제가 생겼을 때 트러블 슈팅
[ec2-user@ip-10-10-1-113 ~]$ ls /opt/codedeploy-agent/deployment-root/
ab707106-ee73-42e1-835c-b777a8144ca6  deployment-instructions  deployment-logs  ongoing-deployment

[ec2-user@ip-10-10-1-113 ~]$ ls /opt/codedeploy-agent/deployment-root/ab707106-ee73-42e1-835c-b777a8144ca6/
d-6EK75XI3L  d-MPNURSI3L

[ec2-user@ip-10-10-1-113 ~]$ ls /opt/codedeploy-agent/deployment-root/ab707106-ee73-42e1-835c-b777a8144ca6/d-6EK75XI3L/
bundle.tar  deployment-archive  logs

[ec2-user@ip-10-10-1-113 ~]$ ls /opt/codedeploy-agent/deployment-root/ab707106-ee73-42e1-835c-b777a8144ca6/d-6EK75XI3L/deployment-archive/
appspec.yml  index.html  server_start.sh  server_stop.sh  test.jsp

무럭무럭 자라볼까