1. 리뷰
eclipse : 자바 통합 개발 환경 (spring - Web App)
sts : spring boot
2. S3 (Simple Storage Service)
종류가 매우 다양하고 간단한 정적인 파일을 올려서 웹서버를 구성할 수 있다.
예를 들면 미국에 있는 리전에 웹서버가 있고, 웹서버로 접근 하려면 미국 리전으로 가서 작업해야 할 것이다. 하지만, 리전마다 엣지 포인트라는 것이 있고 엣지포인트에 정적파일을 캐싱할 수 있다
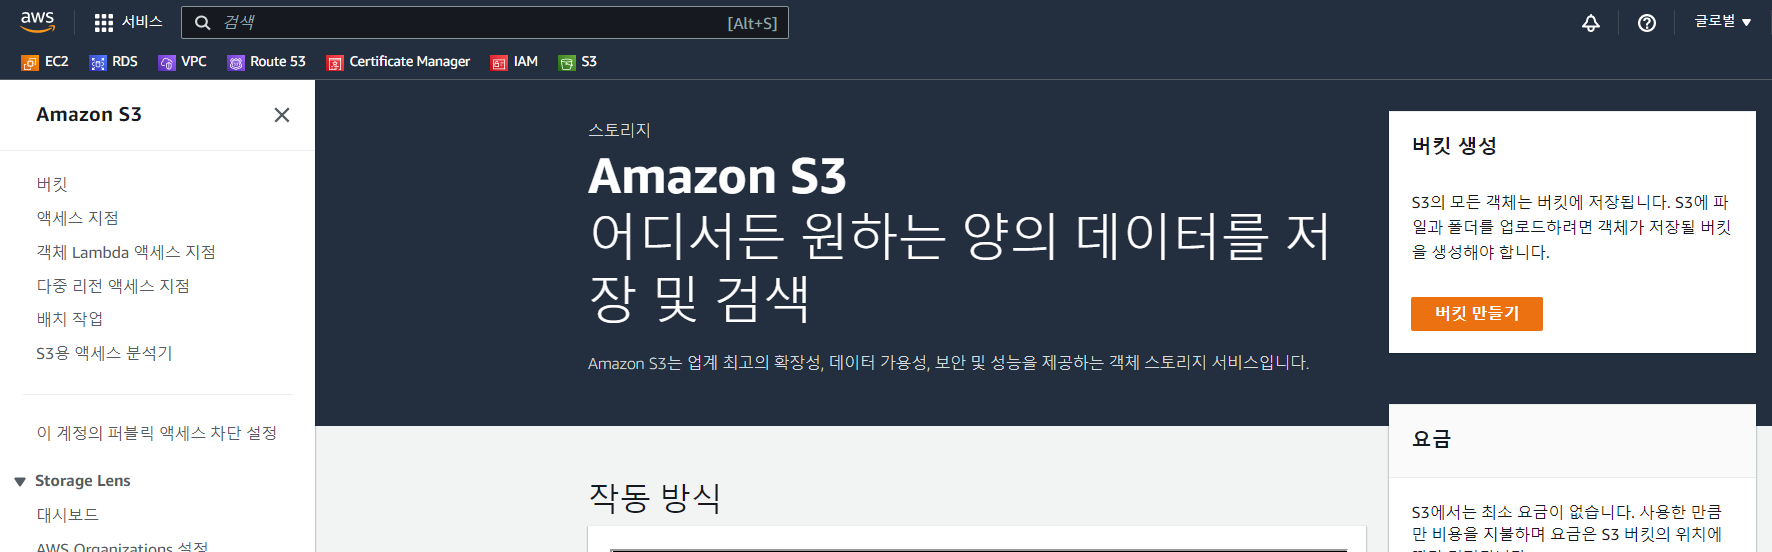
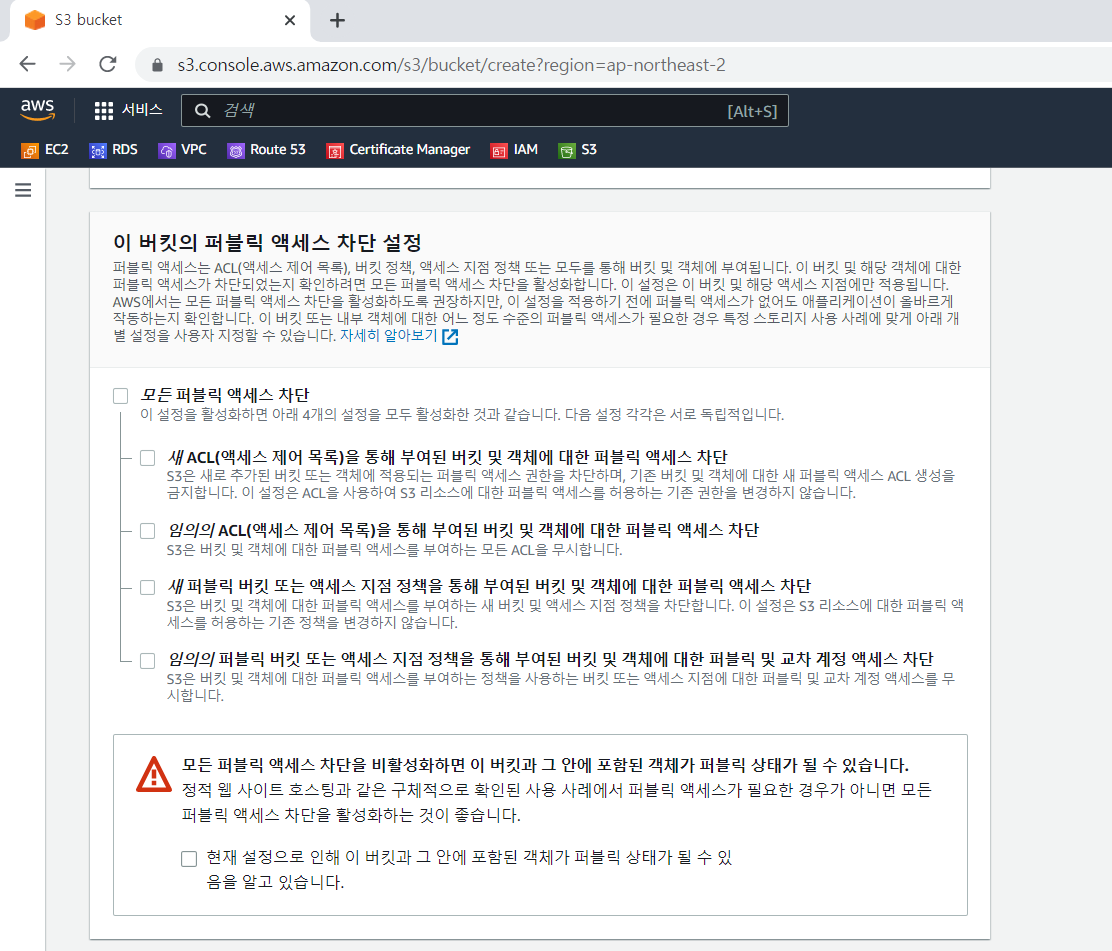
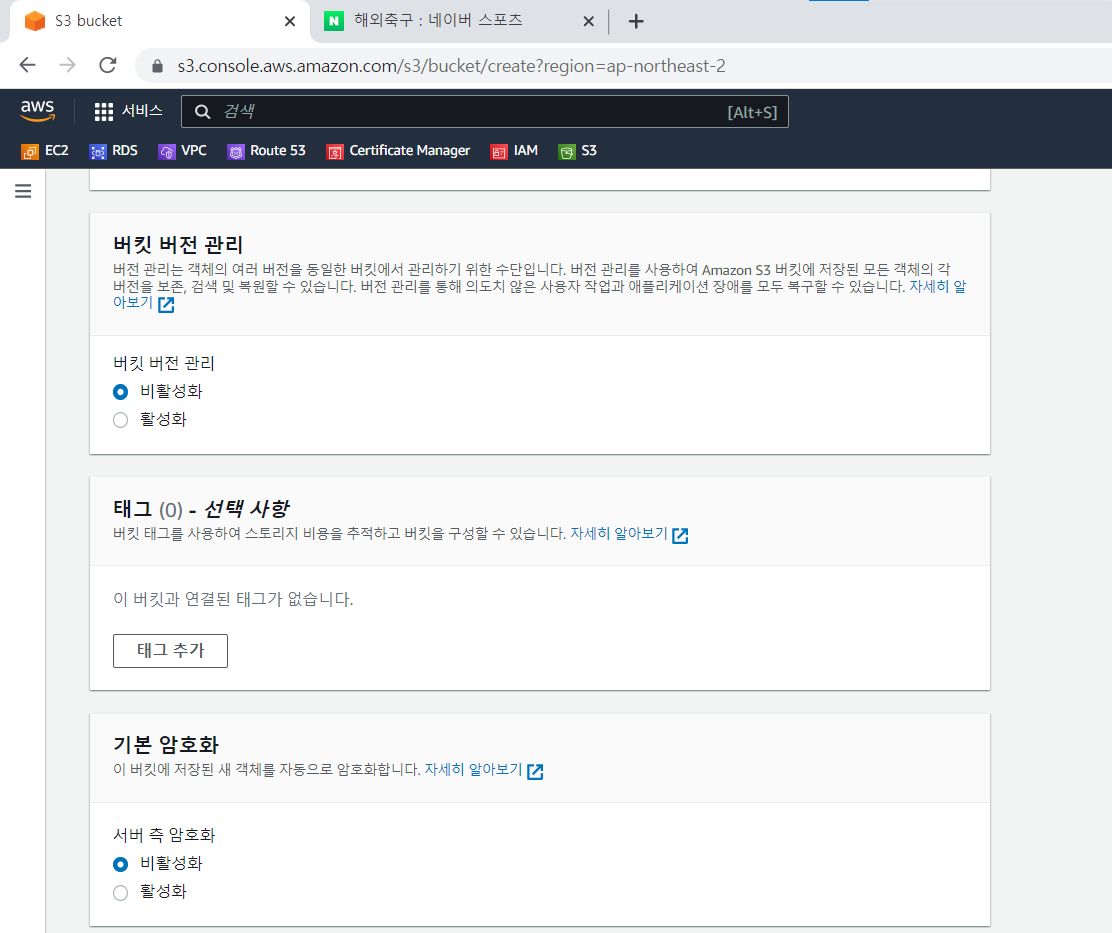
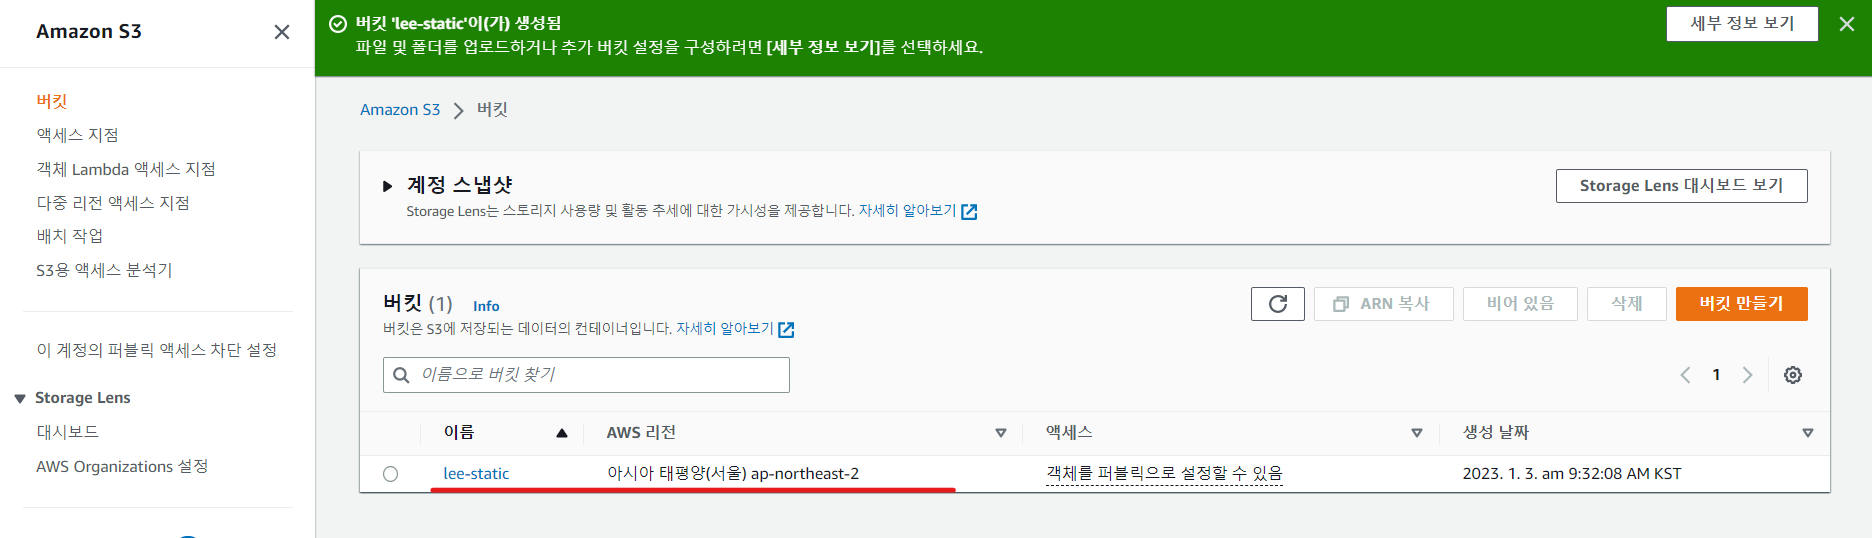
- 버킷 생성
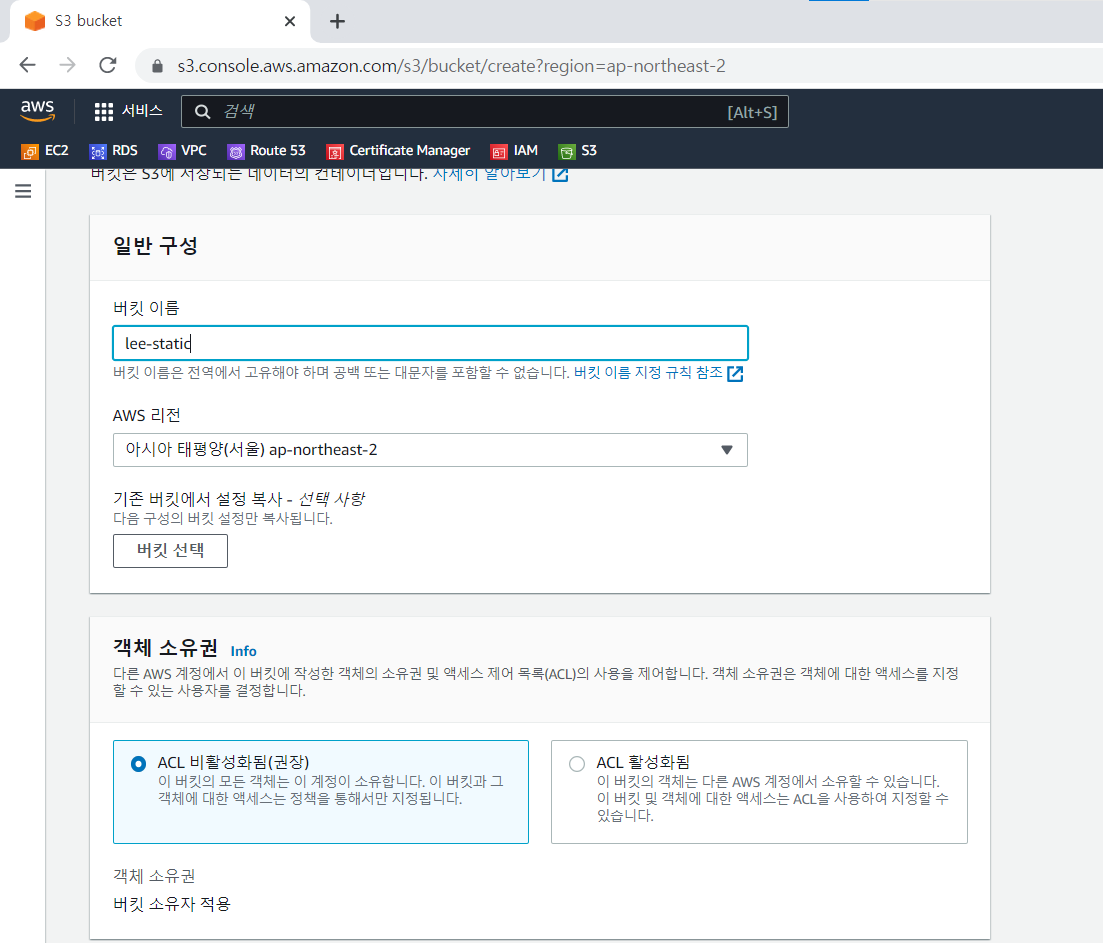
- 퍼블릭 액세스 허용
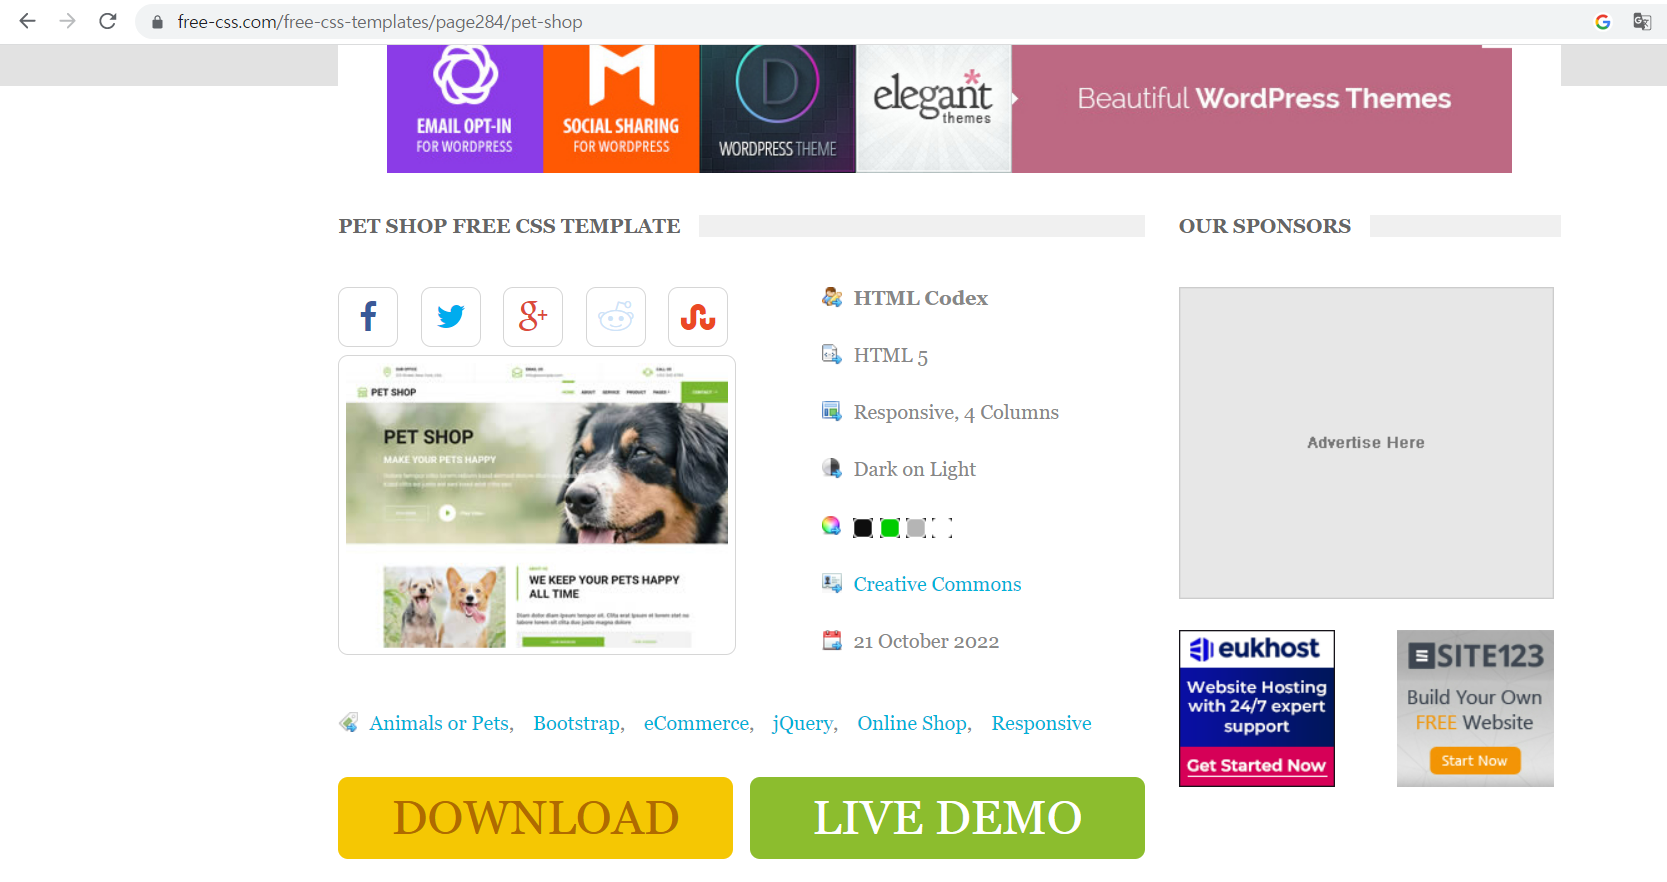
- 테스트를 위해 로컬PC 에서 free Template 다운받아 압축 해제
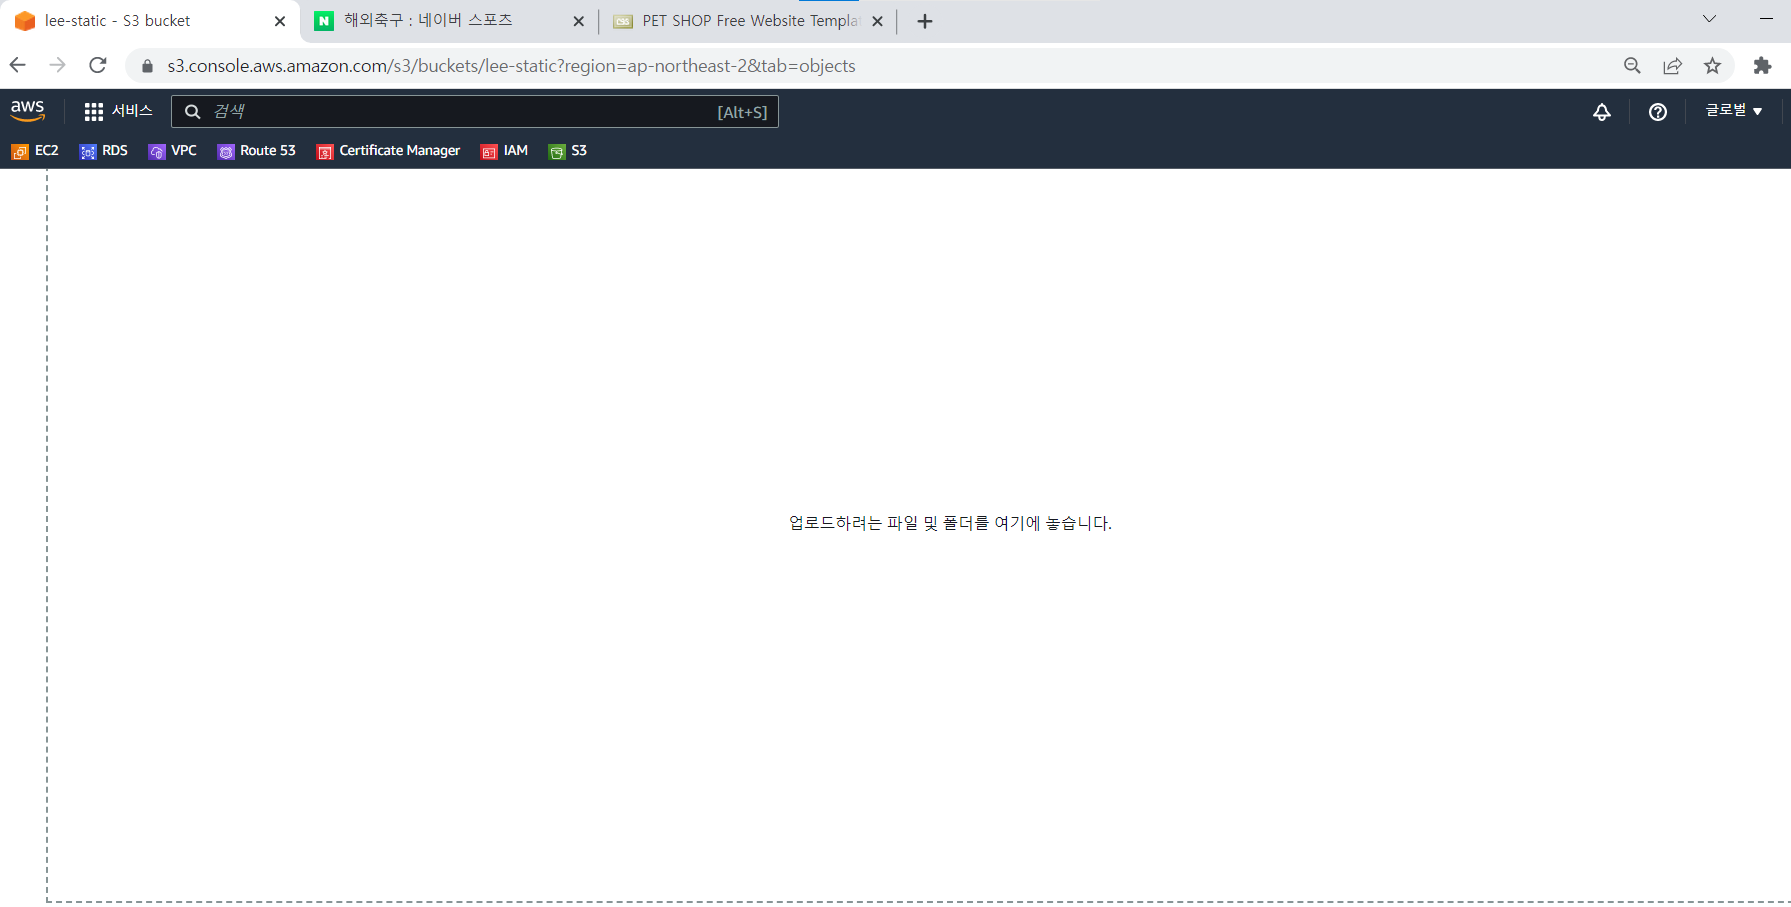
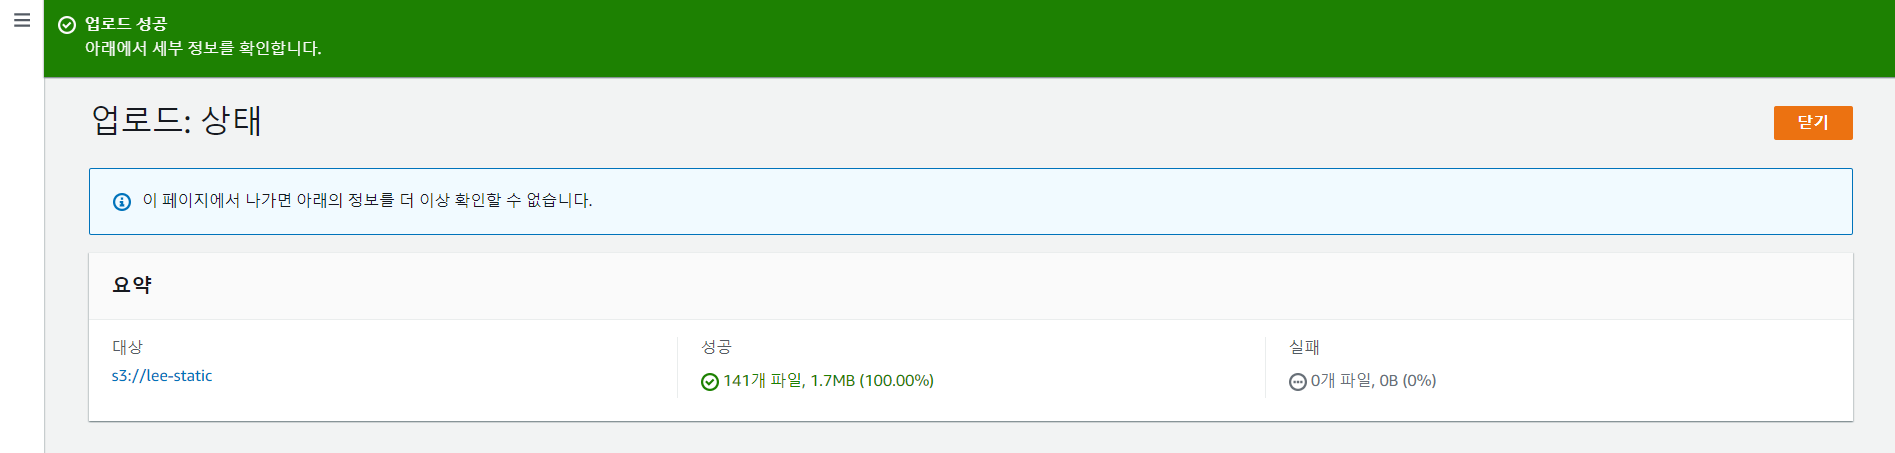
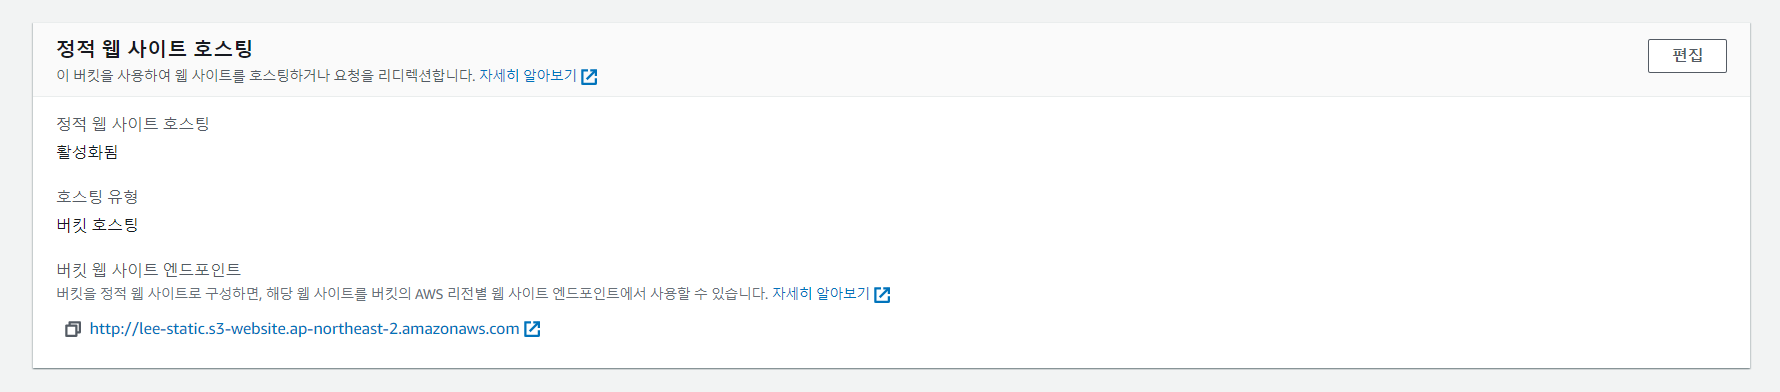
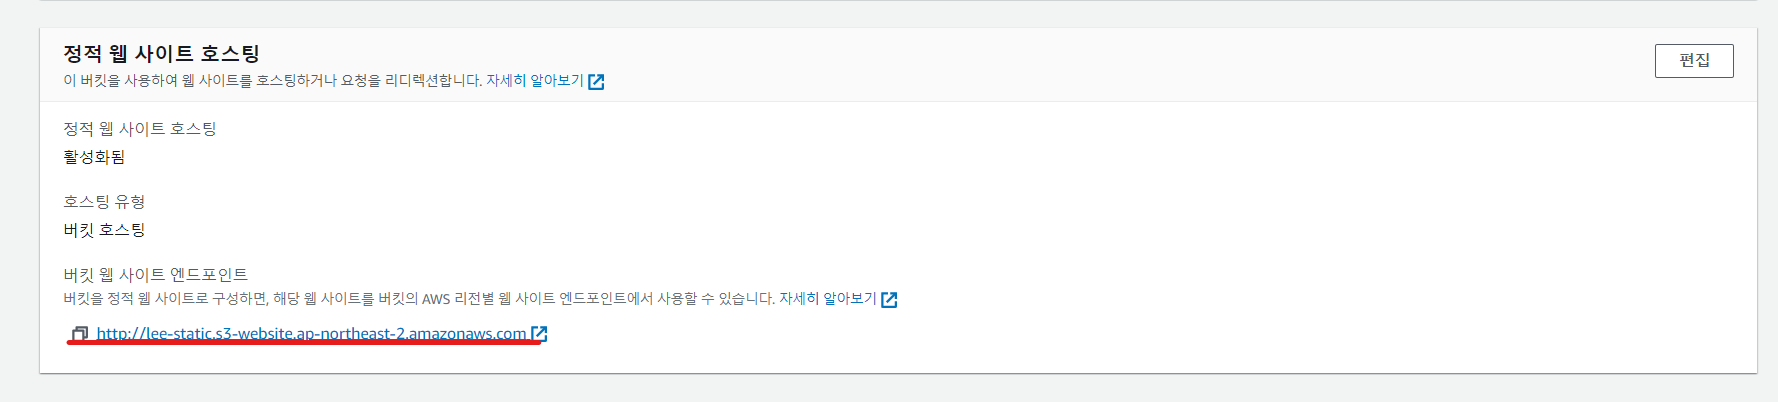
- 정적 웹사이트 호스팅 활성화
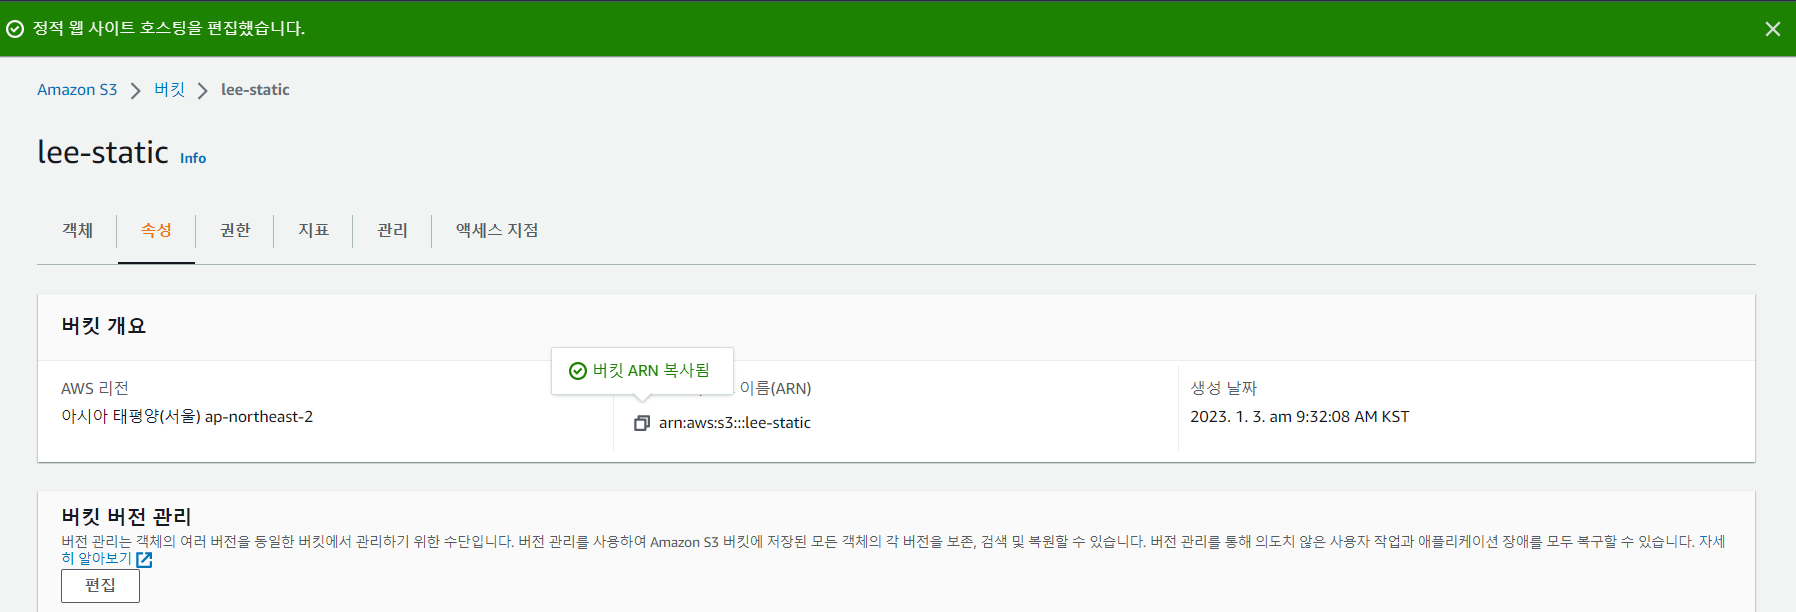
- ARN 복사
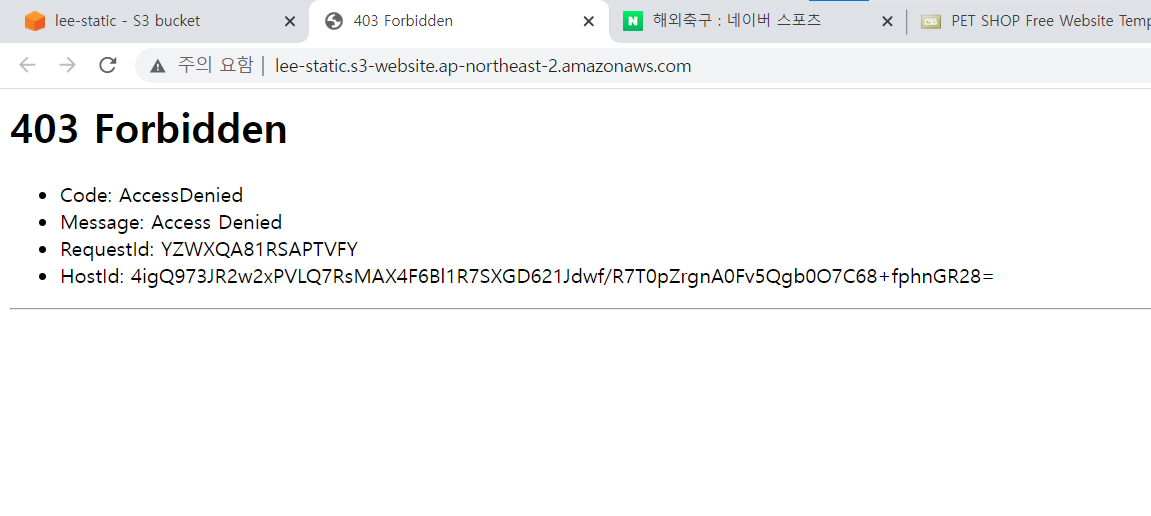
하지만 403 오류를 뿜는데, Message 를 보면 'Acess Denied' 를 볼 수 있다.
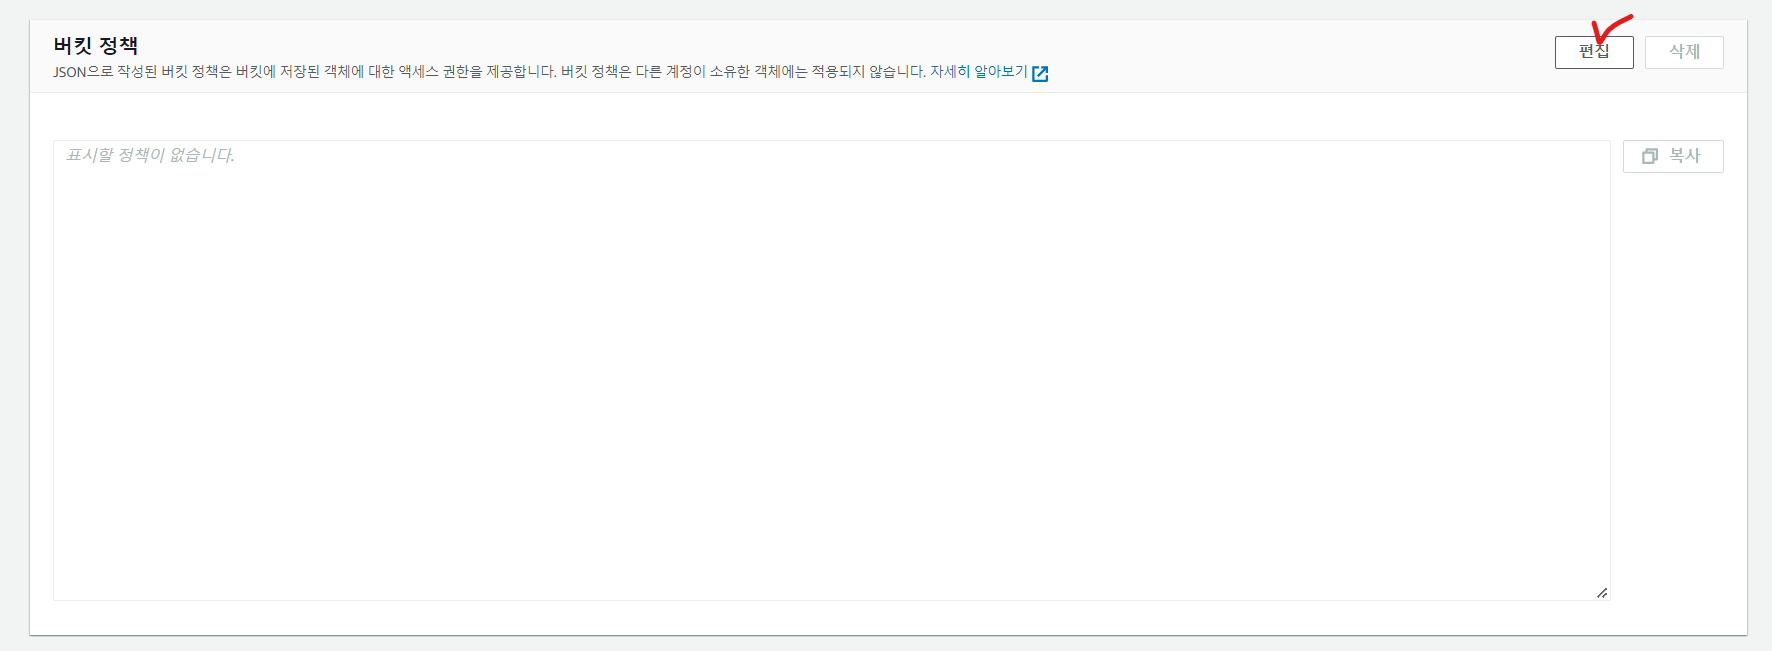
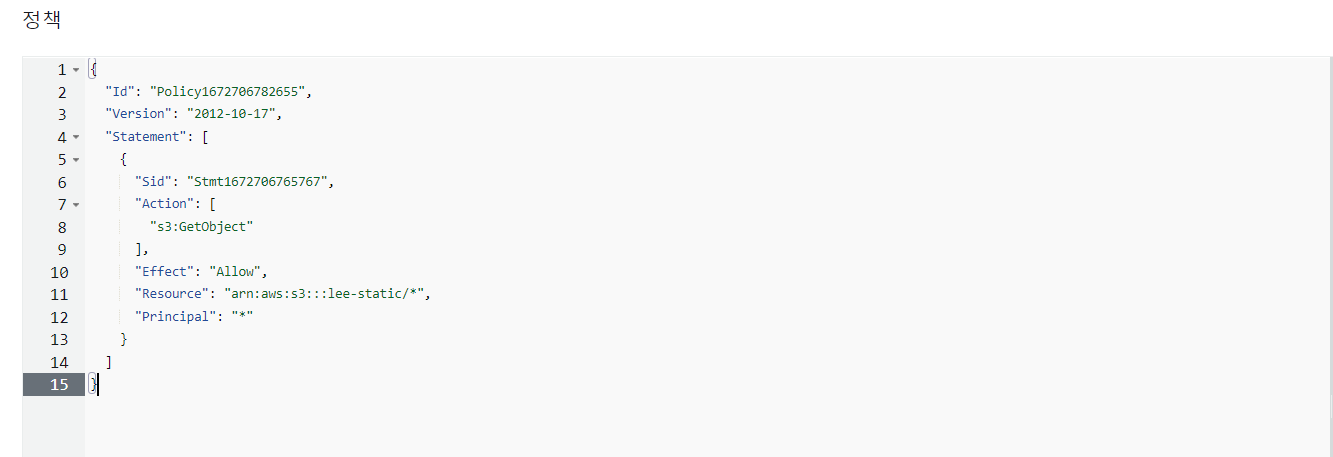
우리는 버킷 정책을 세워줘야 한다.

- AWS 에서 제공하는 AWS Policy Generator 에 접속

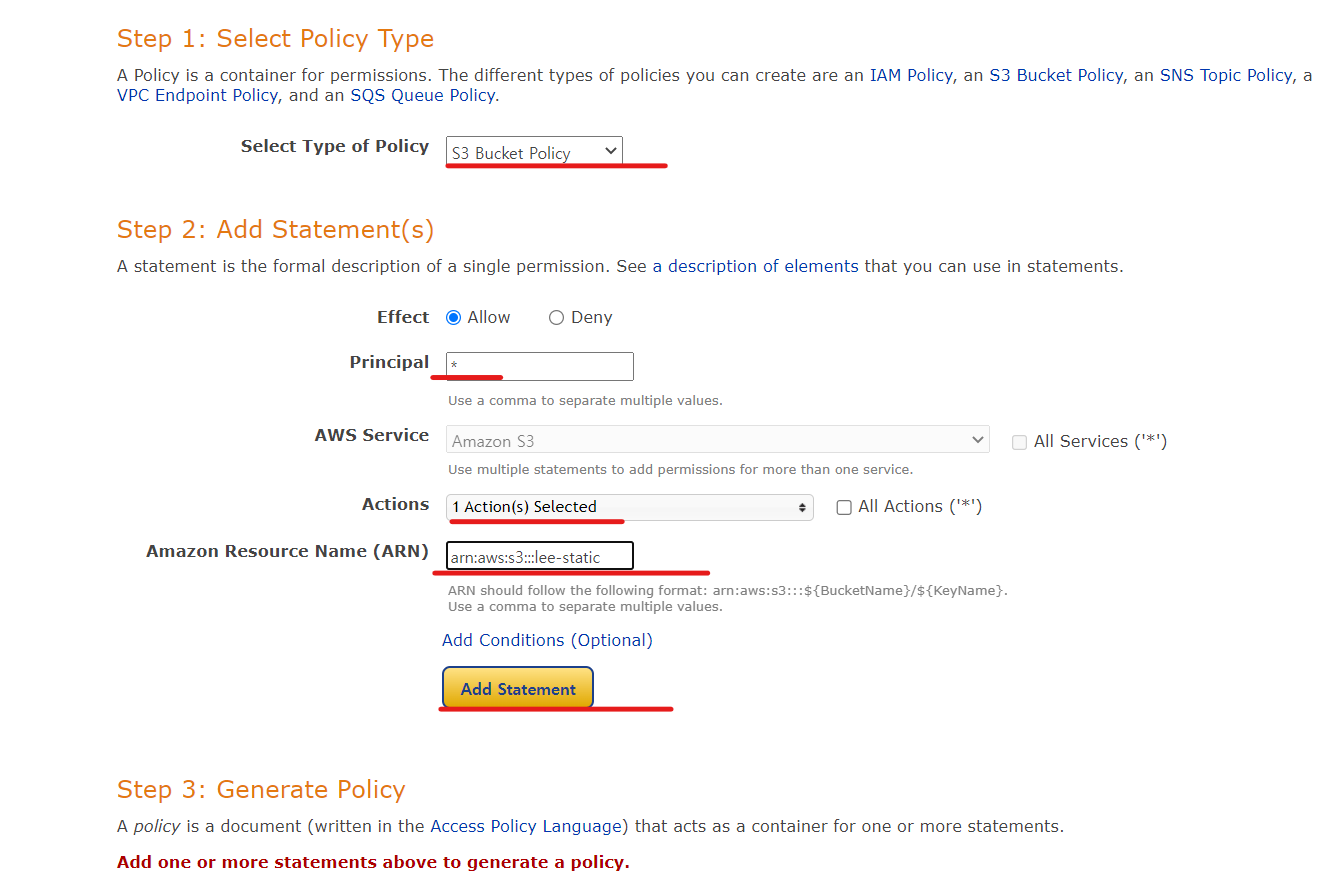
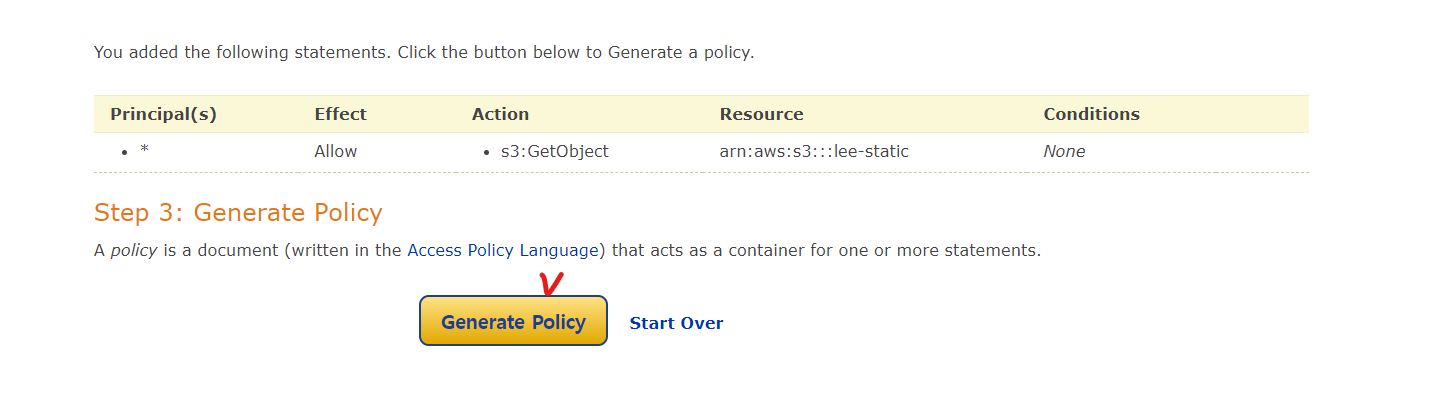
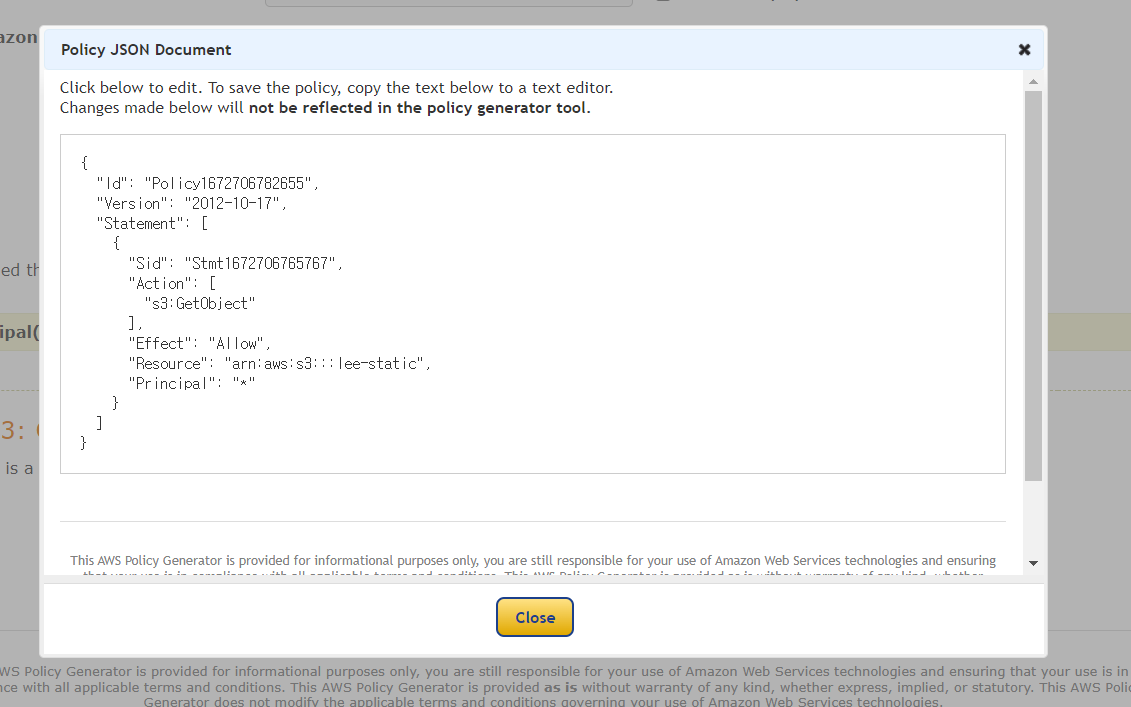
- 정책이 생성되었다면, 정책파일(JASON)을 복사
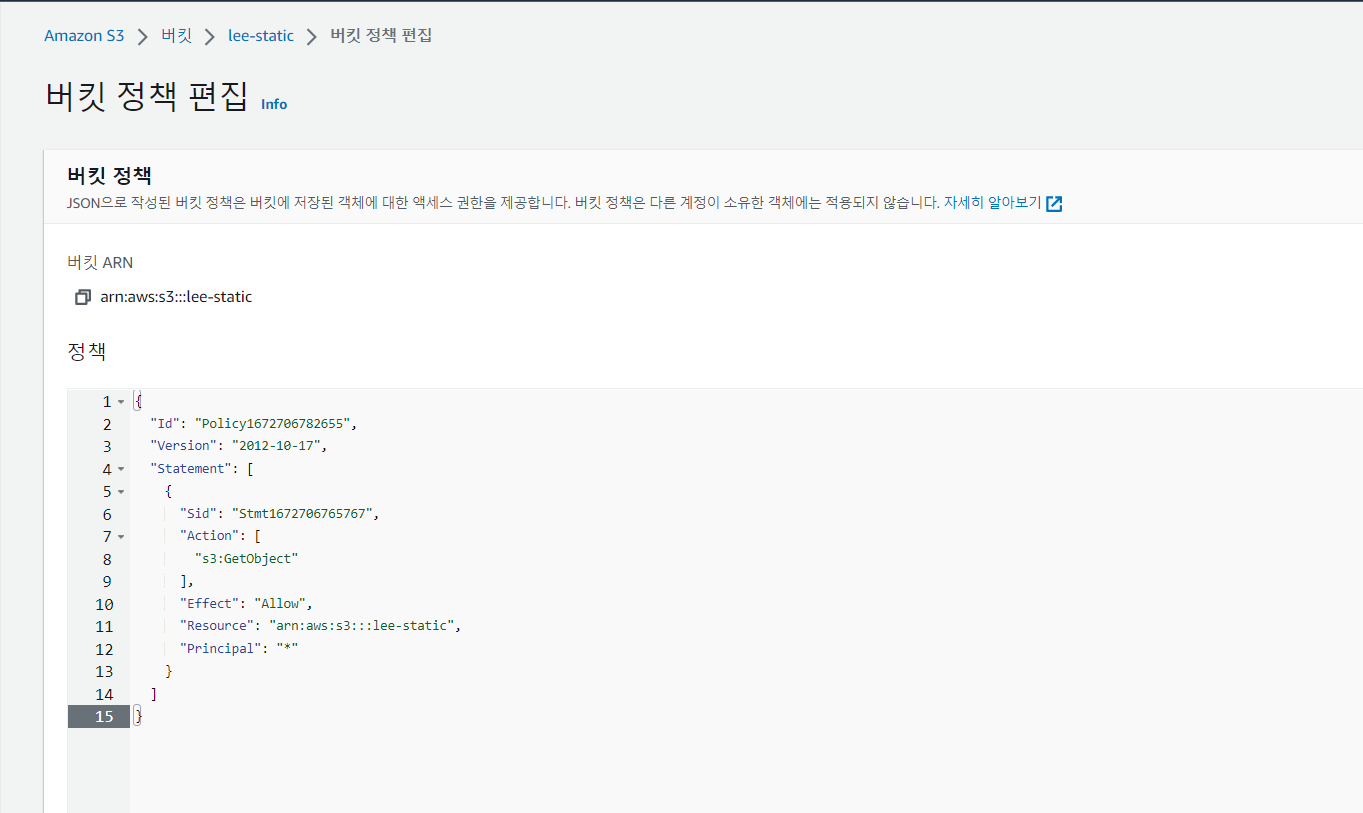
- 버킷 정책 화면으로 접속해 jason 파일의 내용을 넣어준다
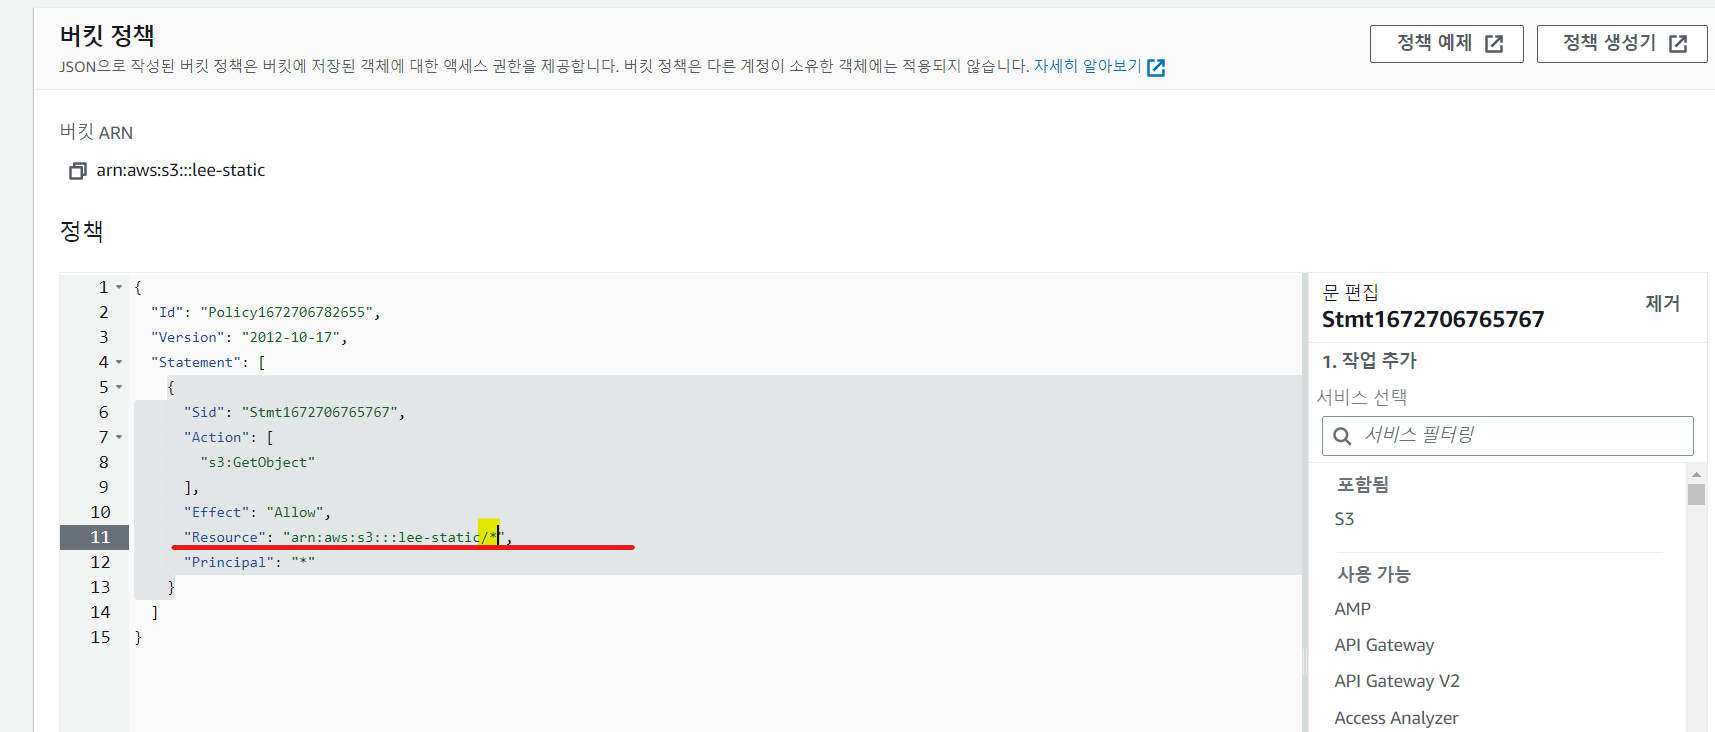
- Resource 부분 수정
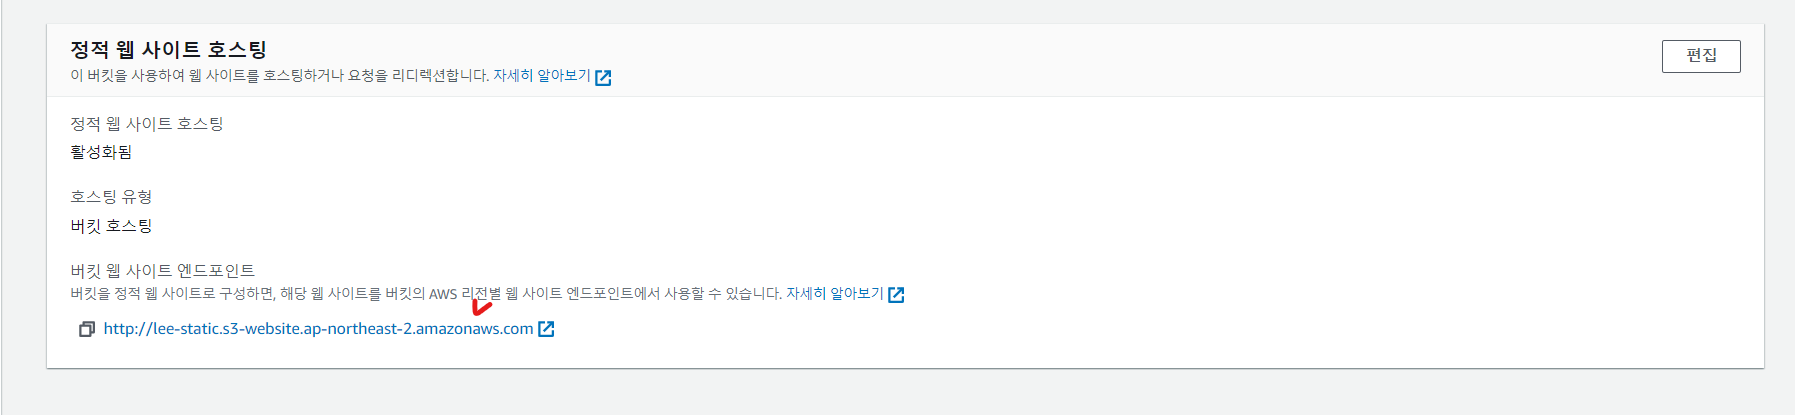
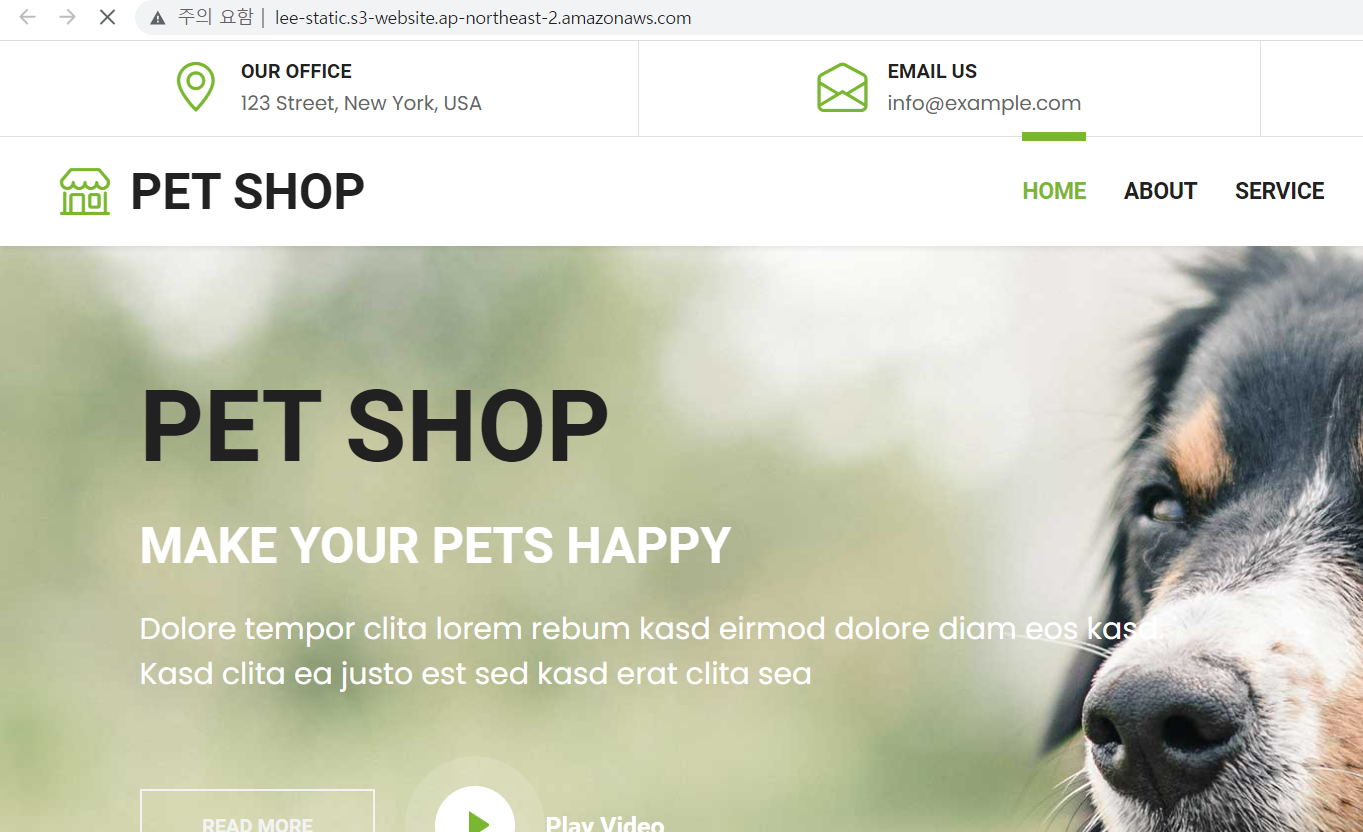
- 정적 웹 사이트 호스팅 화면의 엔트포인트를 복사하여 크롬 접속창에 접속해 확인
- 버킷의 파일과 버킷을 영구 삭제 - 과금 요소
3. ECR (Elastic Container Registry) & ECS (Elastic Container Service)
ECR (Elastic Container Registry) - 도커 허브, 사설 저장소
ECS (Elastic Container Service) - 컨테이너
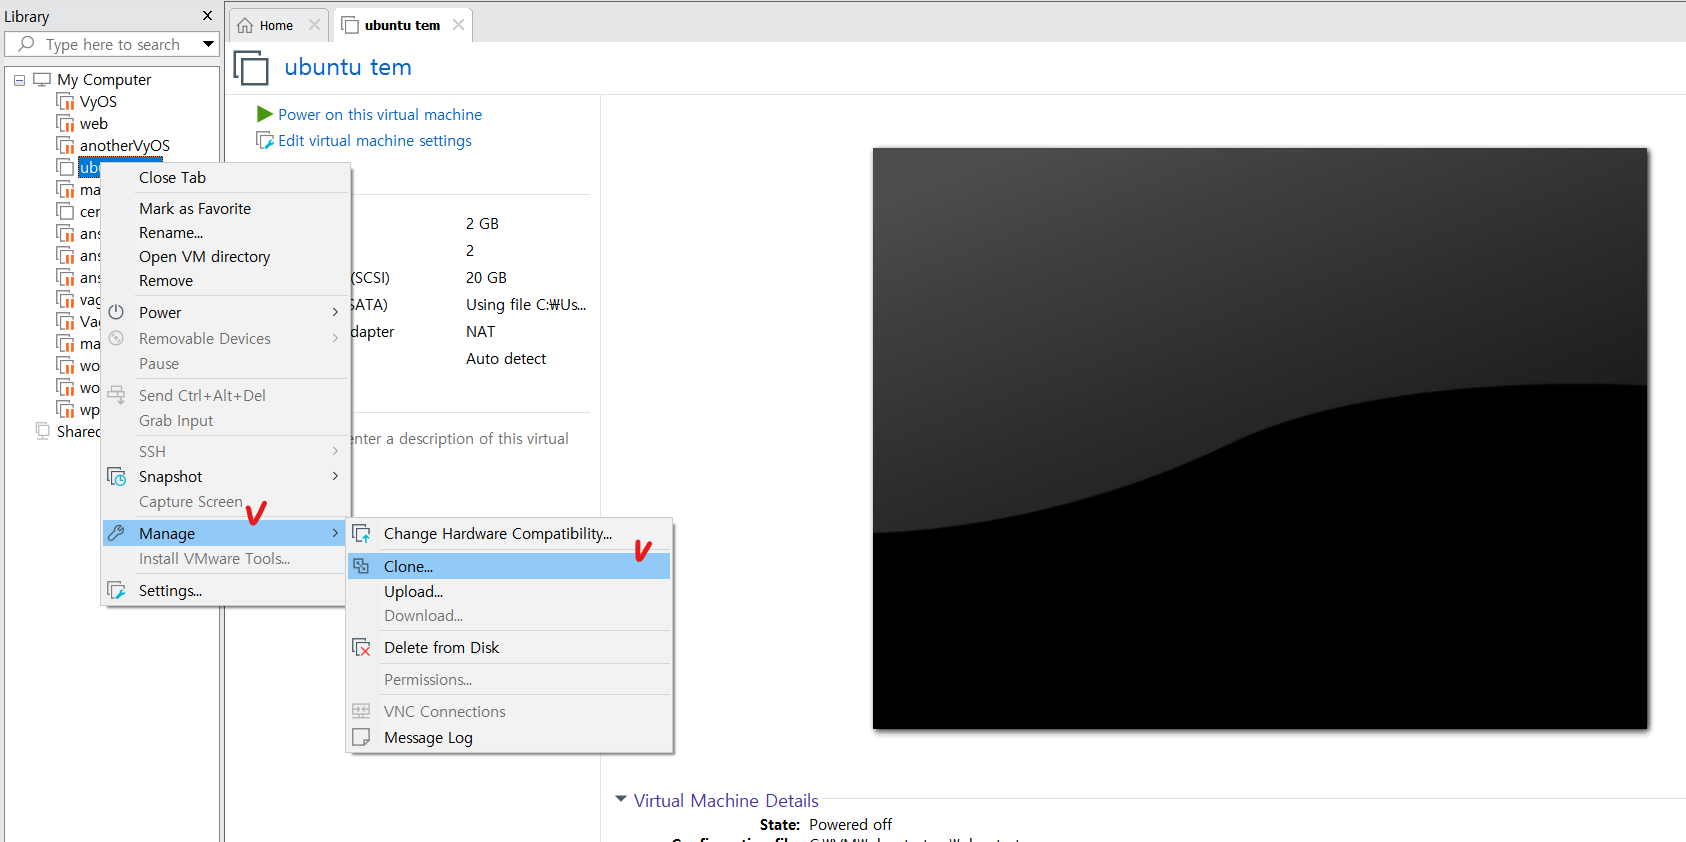
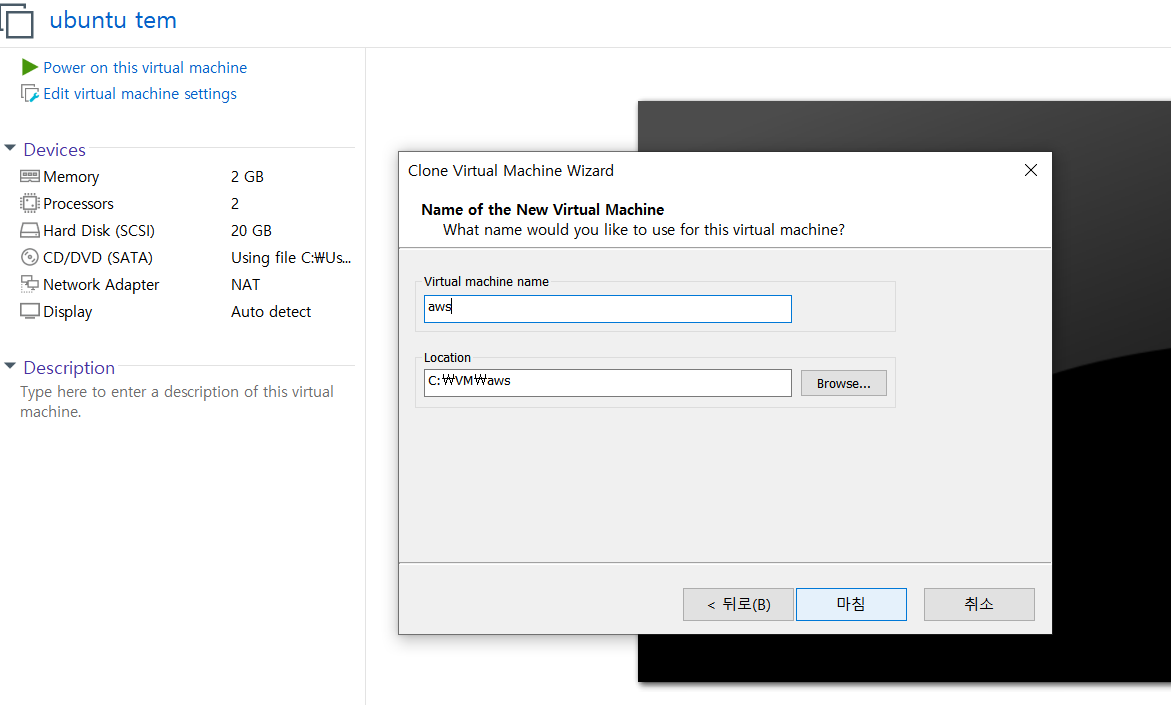
Ubuntu 템플릿 클론 - IP 211.183.3.110
#aws CLI 환경 구성을 위한 설치
root@ubuntu:~# curl "https://awscli.amazonaws.com/awscli-exe-linux-x86_64.zip" -o "awscliv2.zip"
root@ubuntu:~# apt-get -y install unzip
root@ubuntu:~# unzip awscliv2.zip
root@ubuntu:~# sudo ./aws/install
You can now run: /usr/local/bin/aws --version
root@ubuntu:~# aws configure
AWS Access Key ID [None]: 액세스 키
AWS Secret Access Key [None]: 시크릿 액세스 키
Default region name [None]: ap-northeast-2
Default output format [None]:
root@ubuntu:~# ls
aws awscliv2.zip snap
root@ubuntu:~# mkdir ecs
root@ubuntu:~# cd ecs/
<도커 설치>
root@ubuntu:~/ecs# curl -fsSL get.docker.com -o get-docker.sh
root@ubuntu:~/ecs# sh get-docker.sh
root@ubuntu:~/ecs# systemctl restart docker
root@ubuntu:~/ecs# systemctl enable docker
Synchronizing state of docker.service with SysV service script with /lib/systemd/systemd-sysv-install.
Executing: /lib/systemd/systemd-sysv-install enable docker
root@ubuntu:~/ecs# vi Dockerfile
<Dockerfile>
******************************************************
FROM centos:7
RUN yum -y install httpd
ADD index.html /var/www/html
ENTRYPOINT ["/usr/sbin/httpd","-D","FOREGROUND"]
******************************************************
root@ubuntu:~/ecs# vi index.html
<빌드 진행>
root@ubuntu:~/ecs# docker build -t webtest .
<컨테이너 생성>
root@ubuntu:~/ecs# docker run -d --name webtest -p 7070:80 webtest
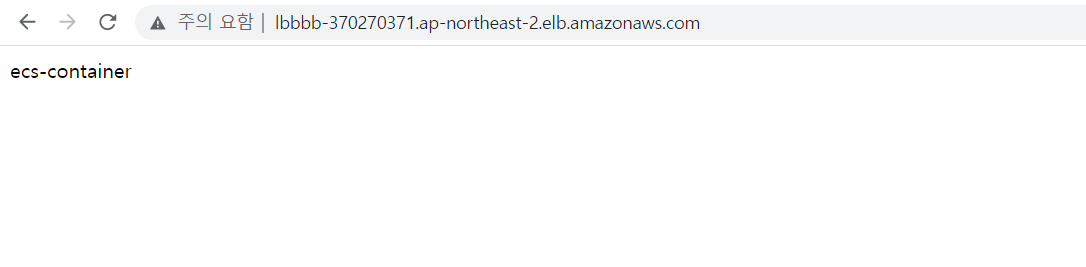
<이미지 생성 테스트>
root@ubuntu:~/ecs# curl localhost:7070/index.html
ecs-container
- AWS CLI 명령어 이용
<레포지토리 생성>
root@ubuntu:~/ecs# aws ecr create-repository --repository-name webtest --region ap-northeast-2
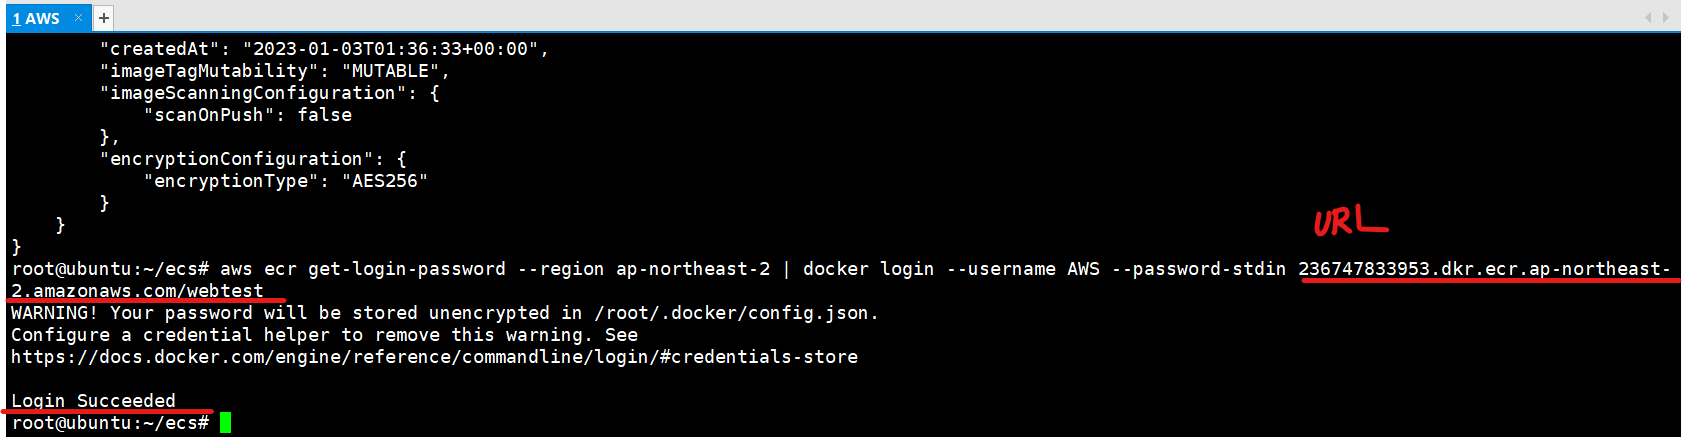
# ECS 레포지토리 URL 복사
root@ubuntu:~/ecs# aws ecr get-login-password --region ap-northeast-2 | docker login --username AWS --password-stdin <URL>
<이미지 푸쉬>
root@ubuntu:~/ecs# docker tag webtest 236747833953.dkr.ecr.ap-northeast-2.amazonaws.com/webtest
root@ubuntu:~/ecs# docker image ls
REPOSITORY TAG IMAGE ID CREATED SIZE
236747833953.dkr.ecr.ap-northeast-2.amazonaws.com/webtest latest 71ddf232223c 13 minutes ago 430MB
webtest latest 71ddf232223c 13 minutes ago 430MB
211.183.3.100:5000/httpd 2.0 157dcdf23d6c 3 weeks ago 145MB
httpd 1.0 157dcdf23d6c 3 weeks ago 145MB
httpd latest 157dcdf23d6c 3 weeks ago 145MB
centos 7 eeb6ee3f44bd 15 months ago 204MB
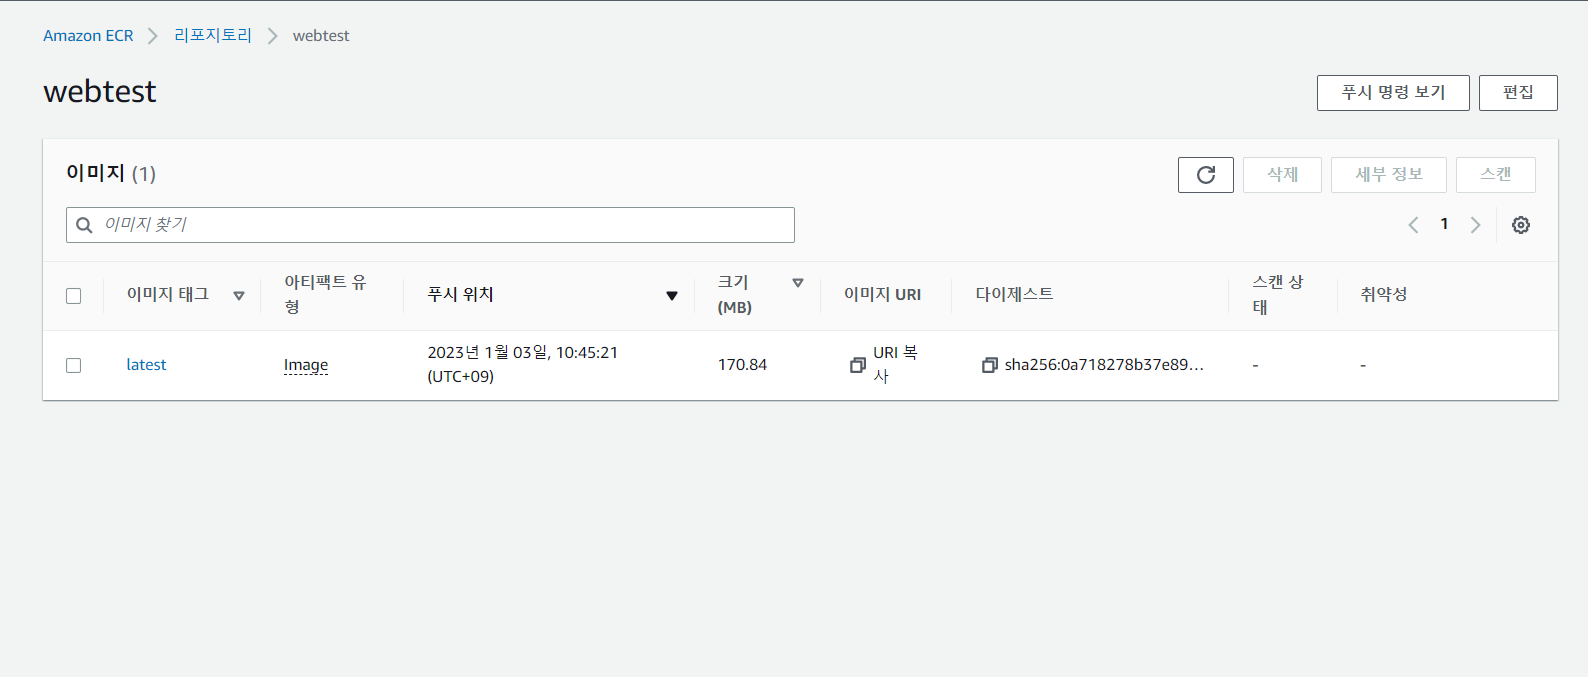
<이미지 푸쉬>
root@ubuntu:~/ecs# docker image push 236747833953.dkr.ecr.ap-northeast-2.amazonaws.com/webtest
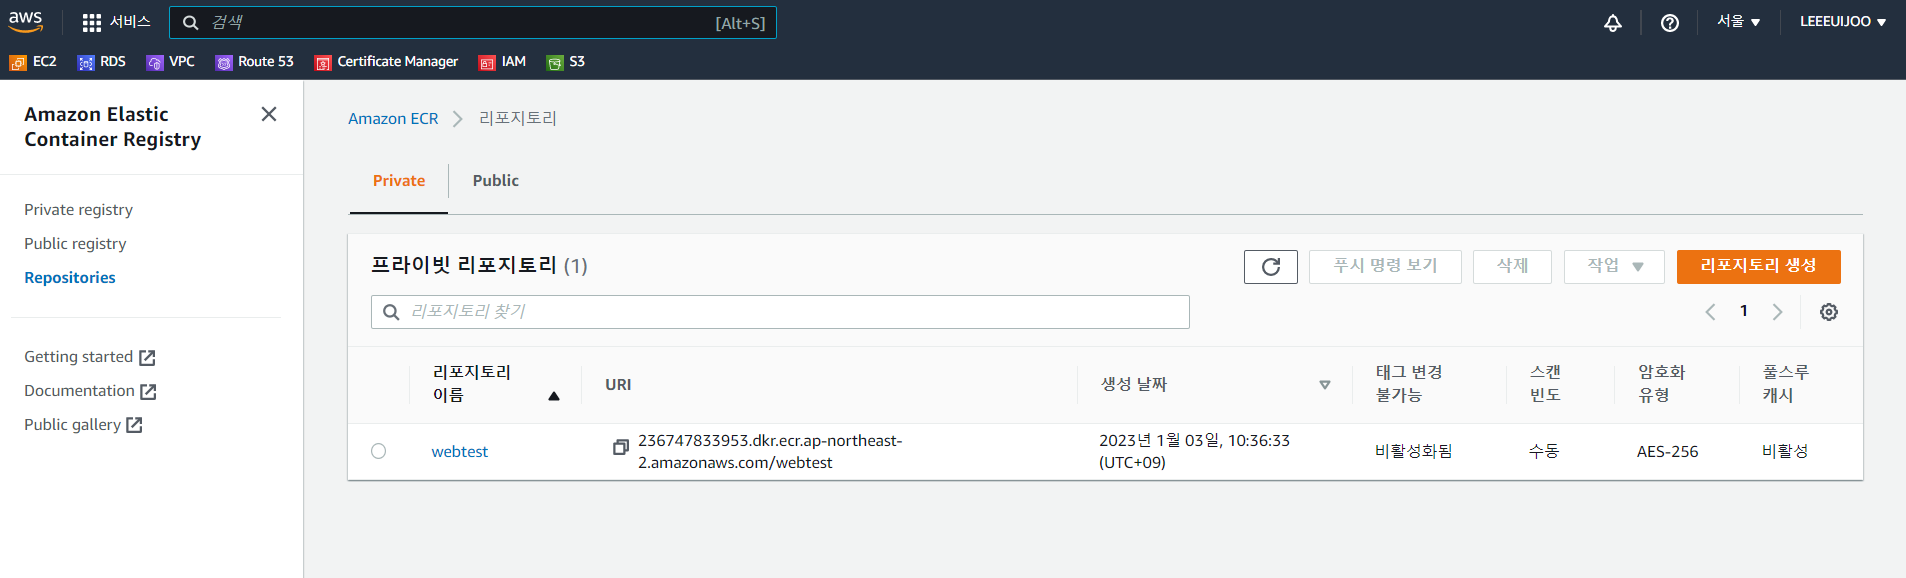
- 레포지토리 생성 확인

- 이미지 PUSH 성공
- ECS 콘솔로 이동
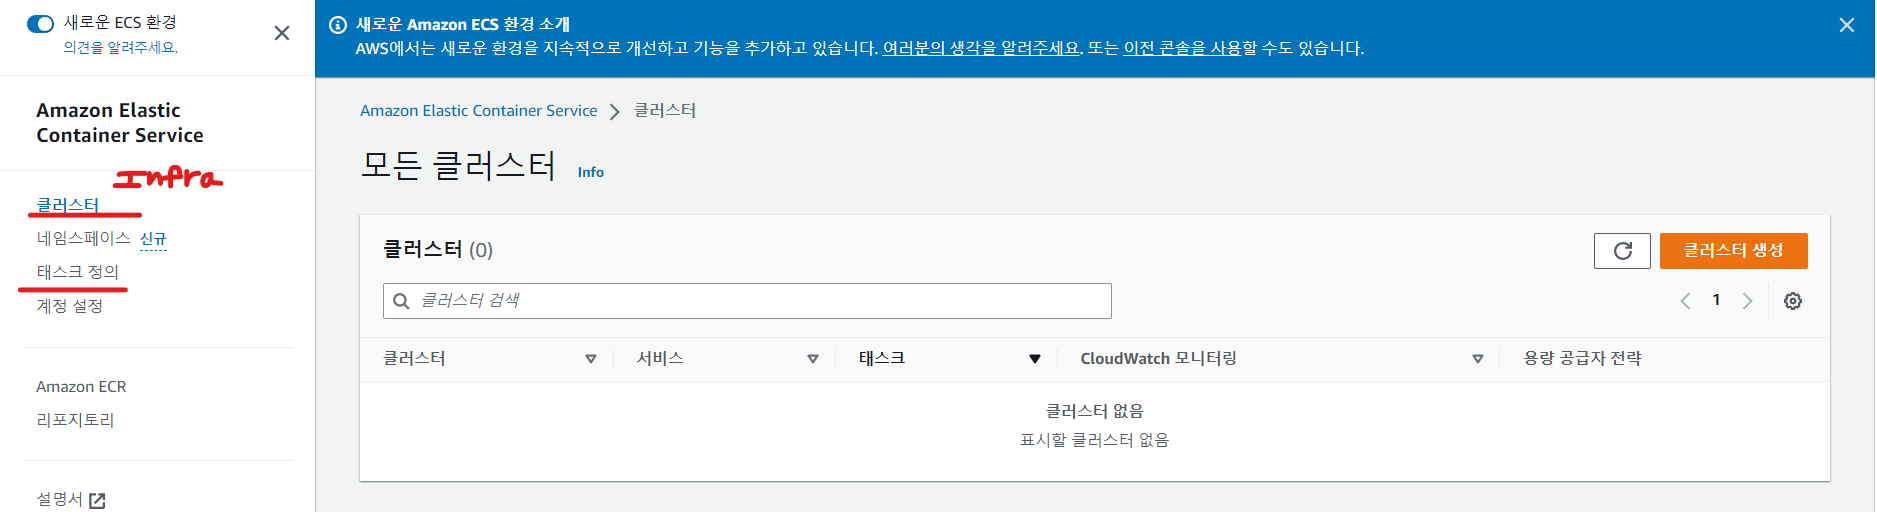
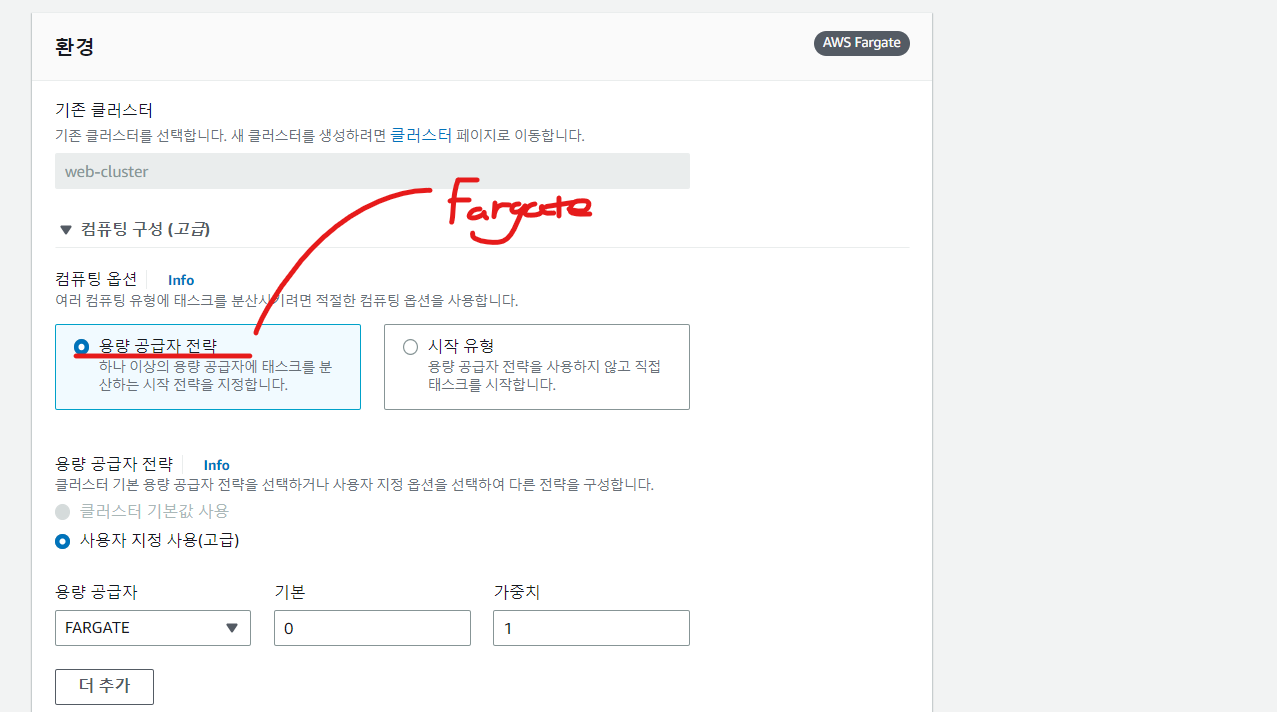
클러스터 - 컨테이너를 생성할 인프라 환경
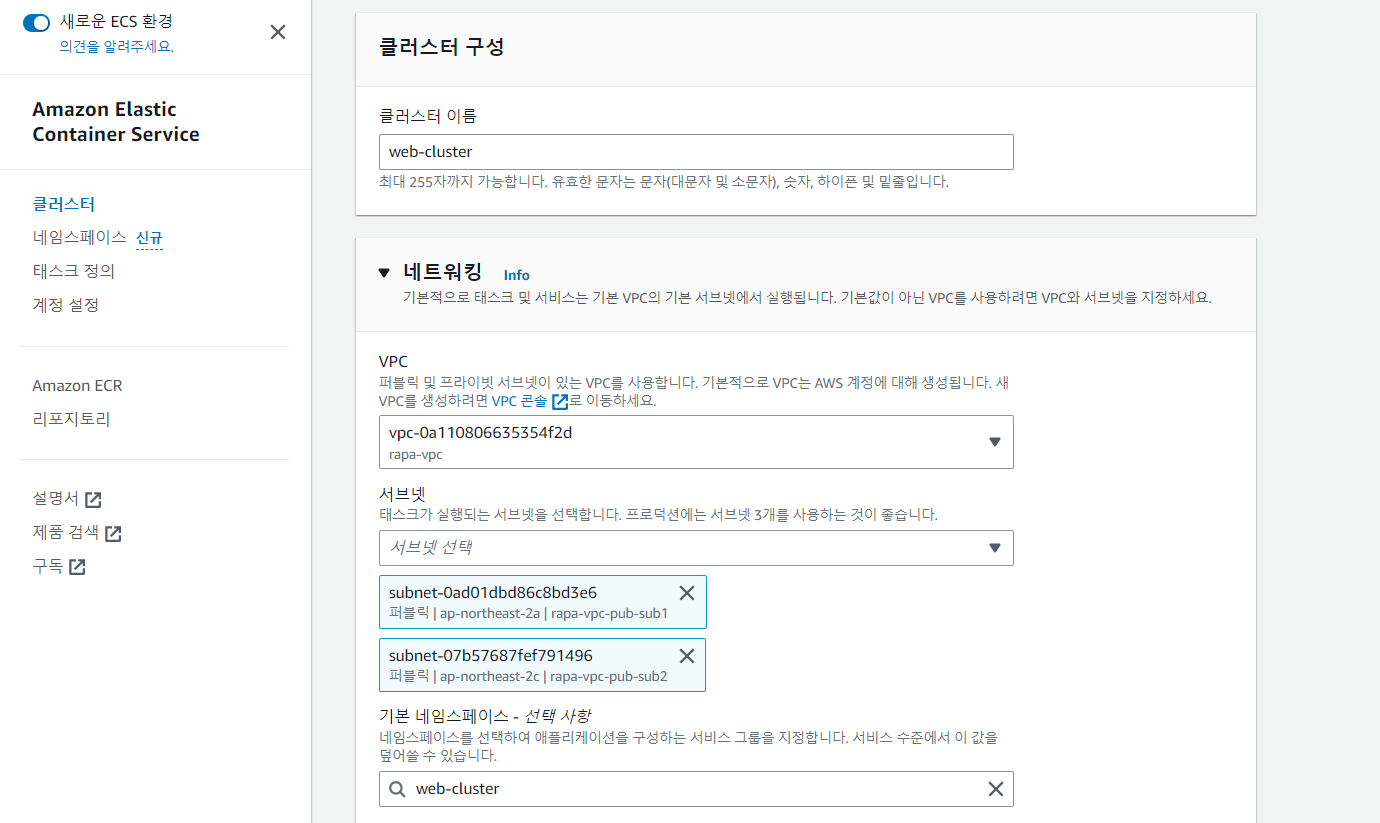
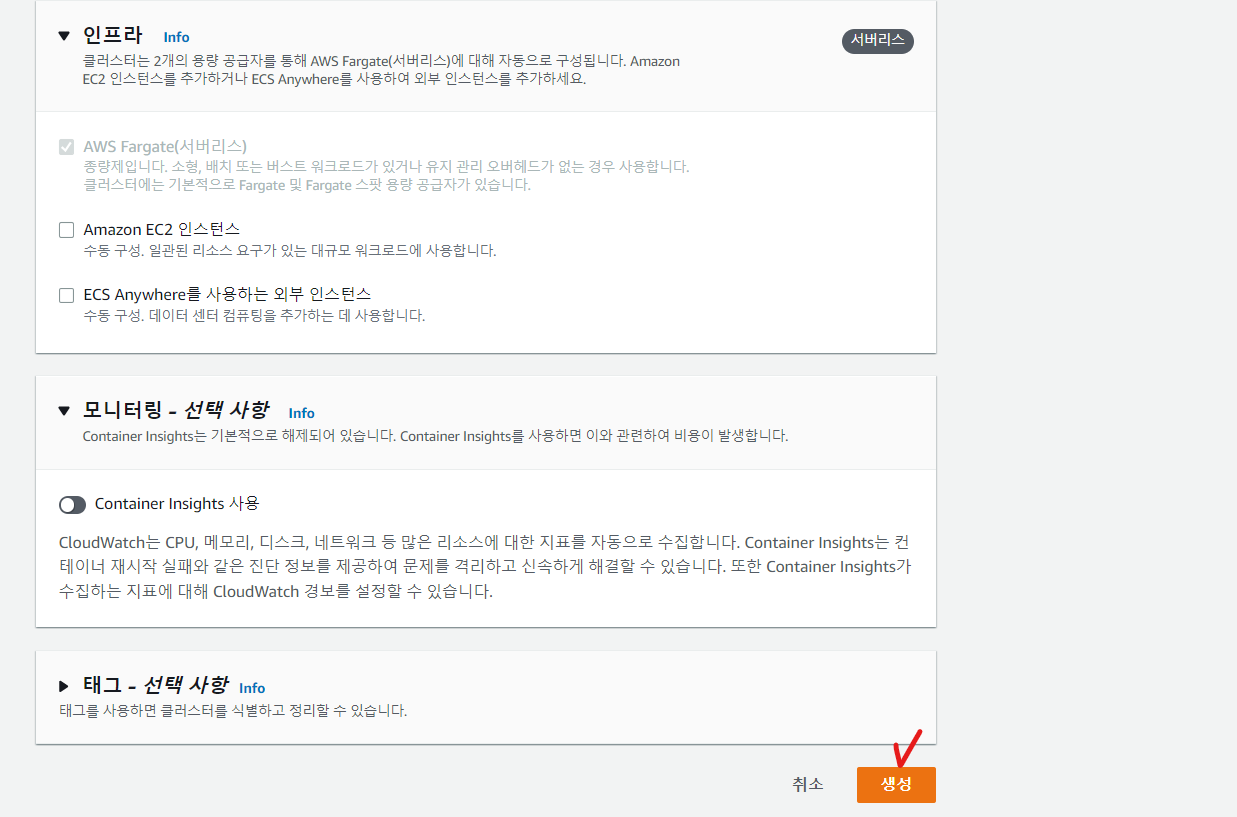
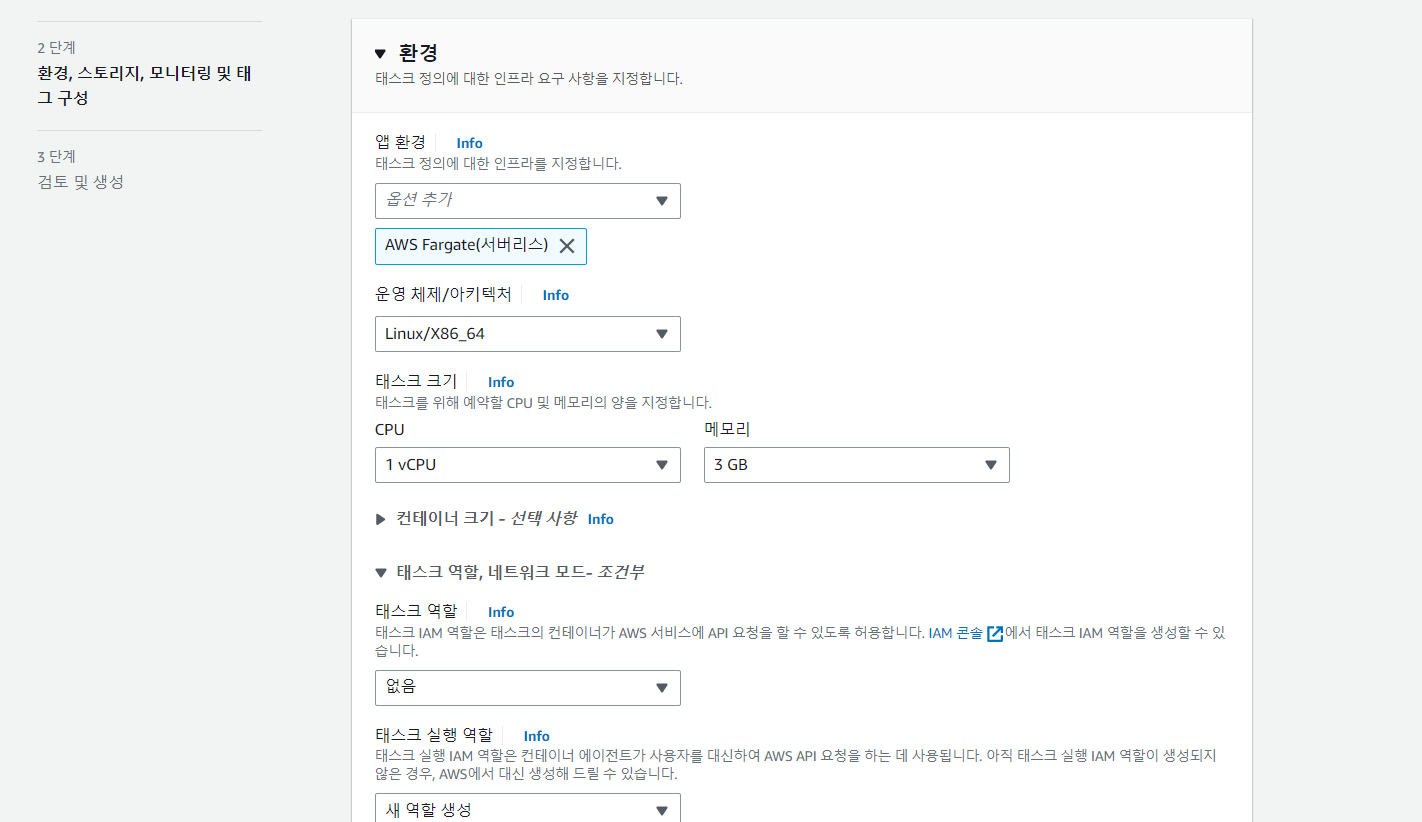
- Fargate - 서버리스 환경 (자동 구성)
- EC2
- 외부
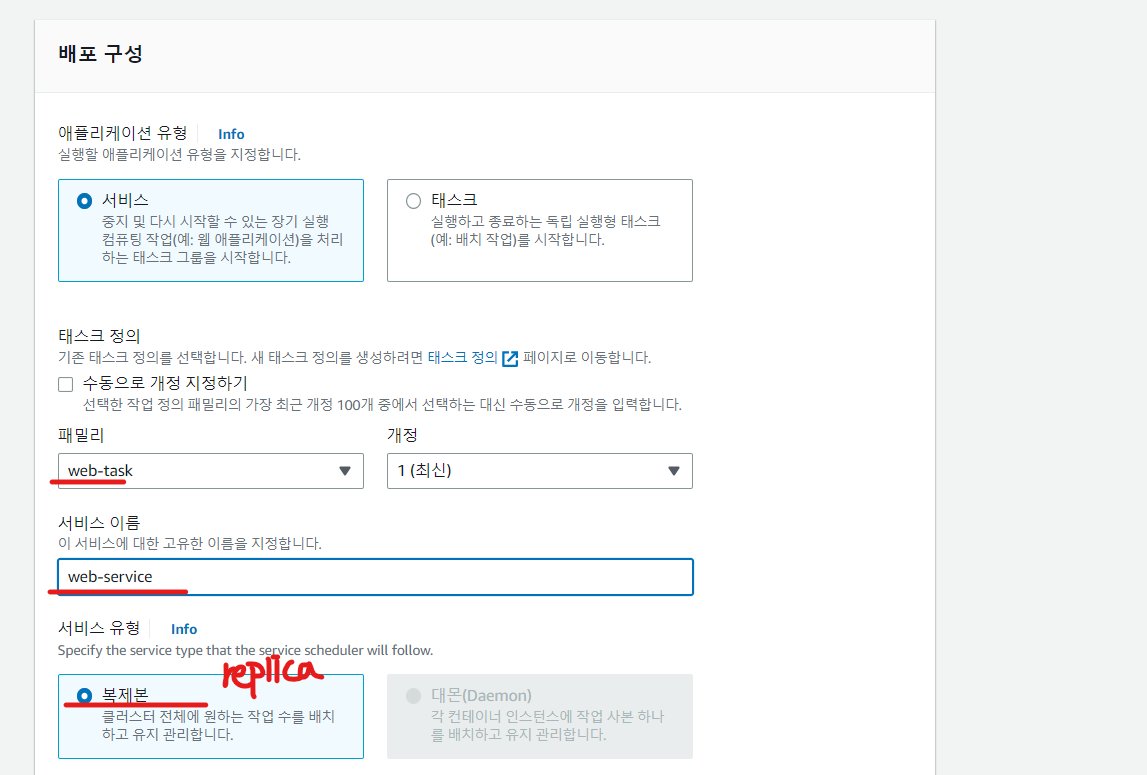
테스크 - 컨테이너 정의
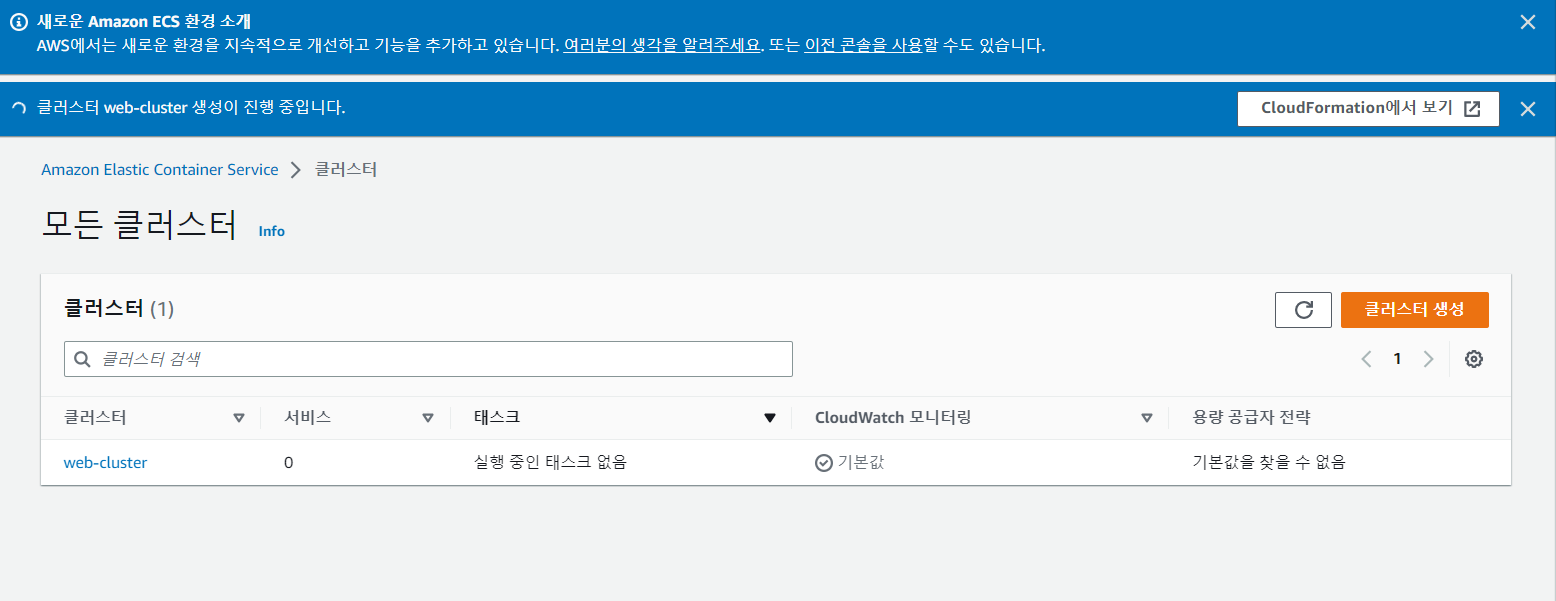
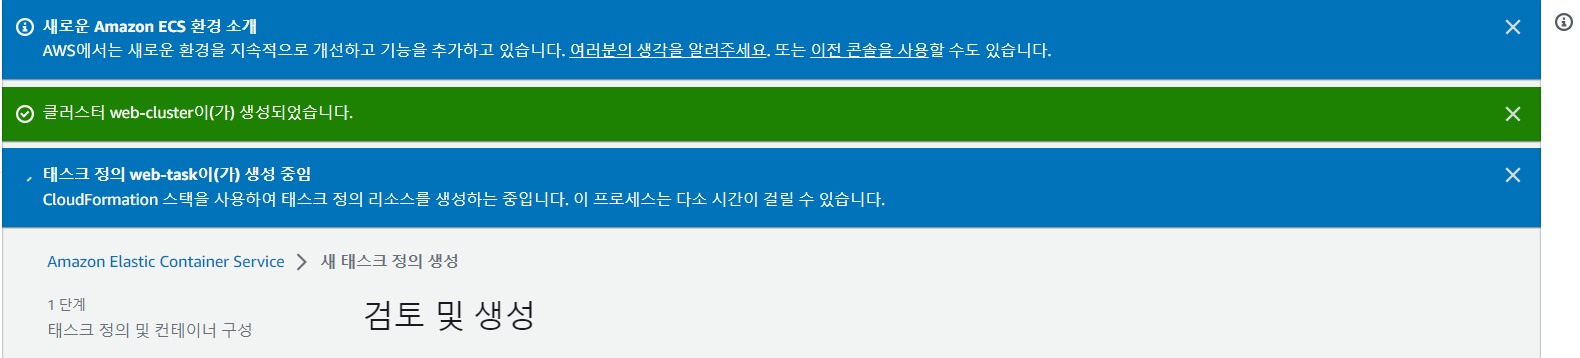
- 클러스터 생성
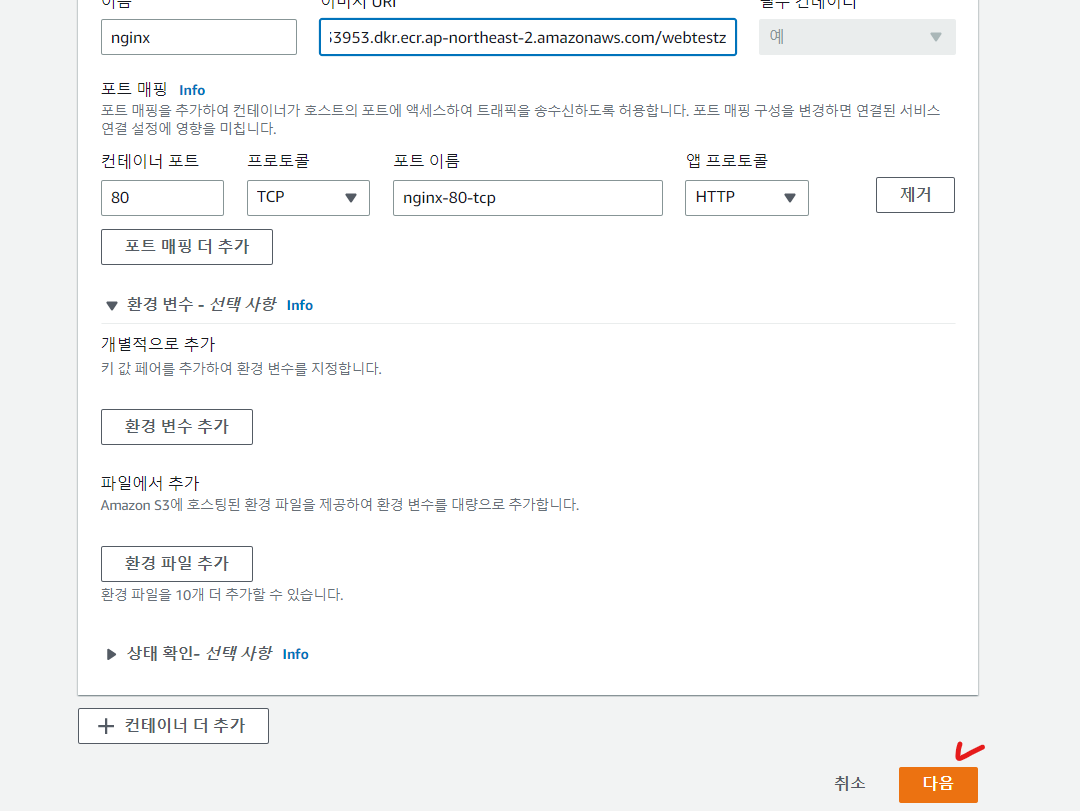
- 태스크 정의
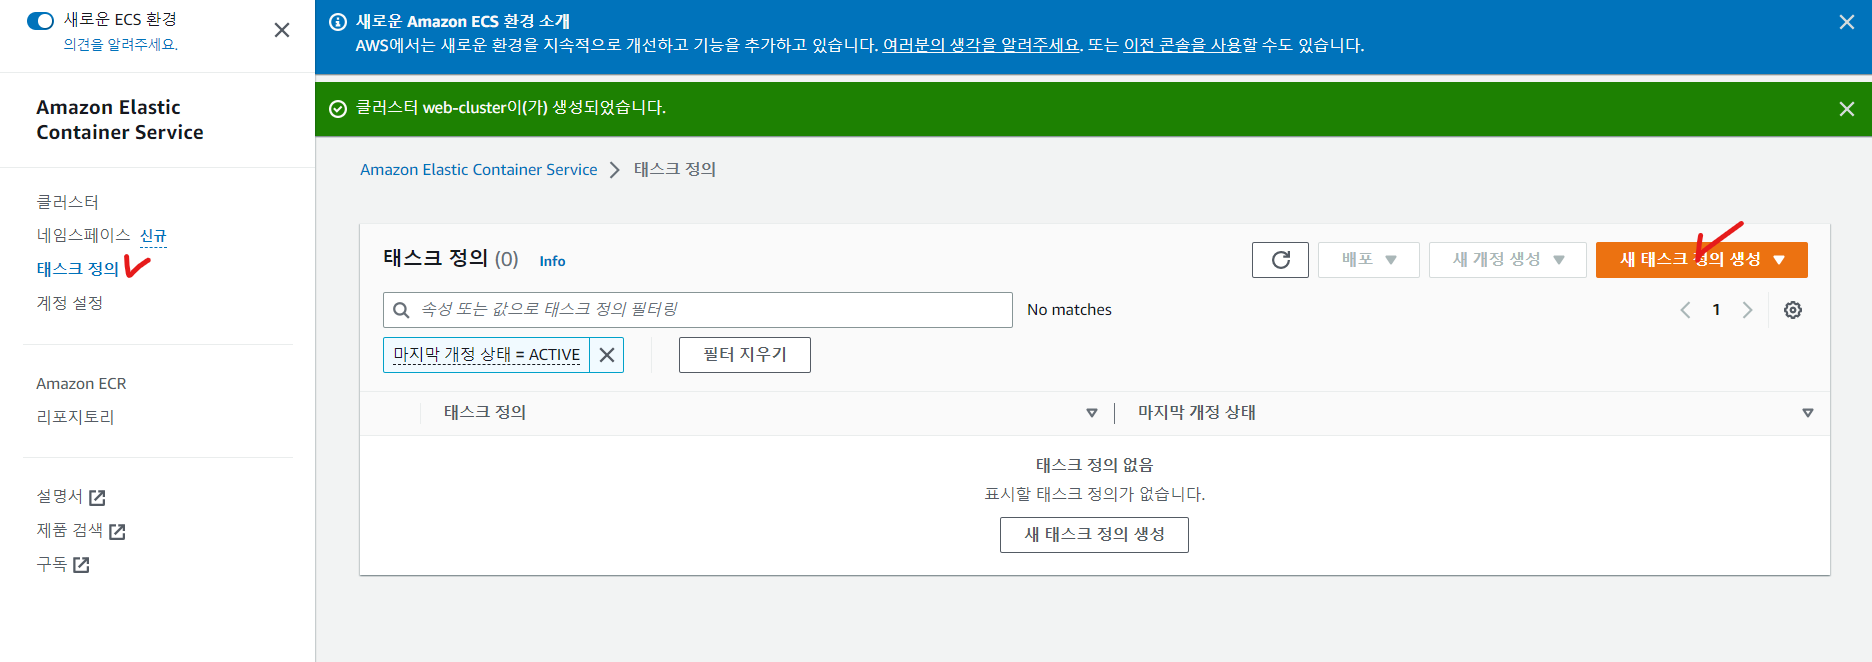
- 이미지 URI를 기반으로 하는 태스크 정의

- 클러스터를 Fargate 로 설정했다면, 태스크도 Fargate 로 따라가야 한다
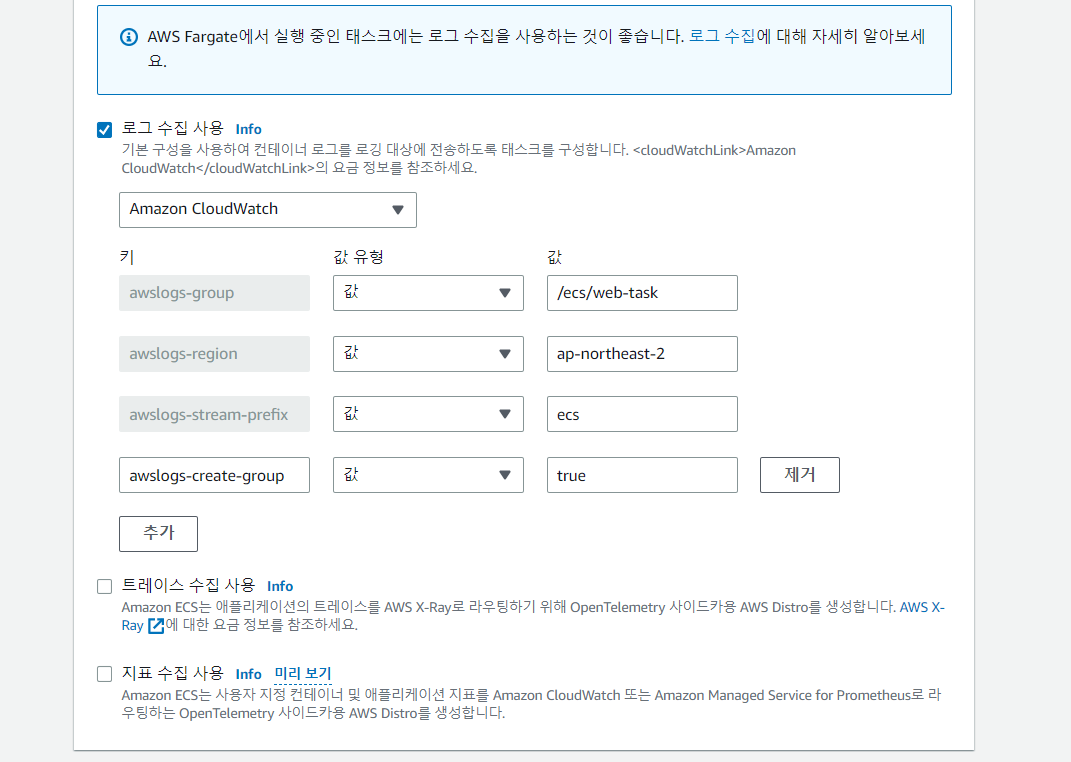
- 검토 후 생성
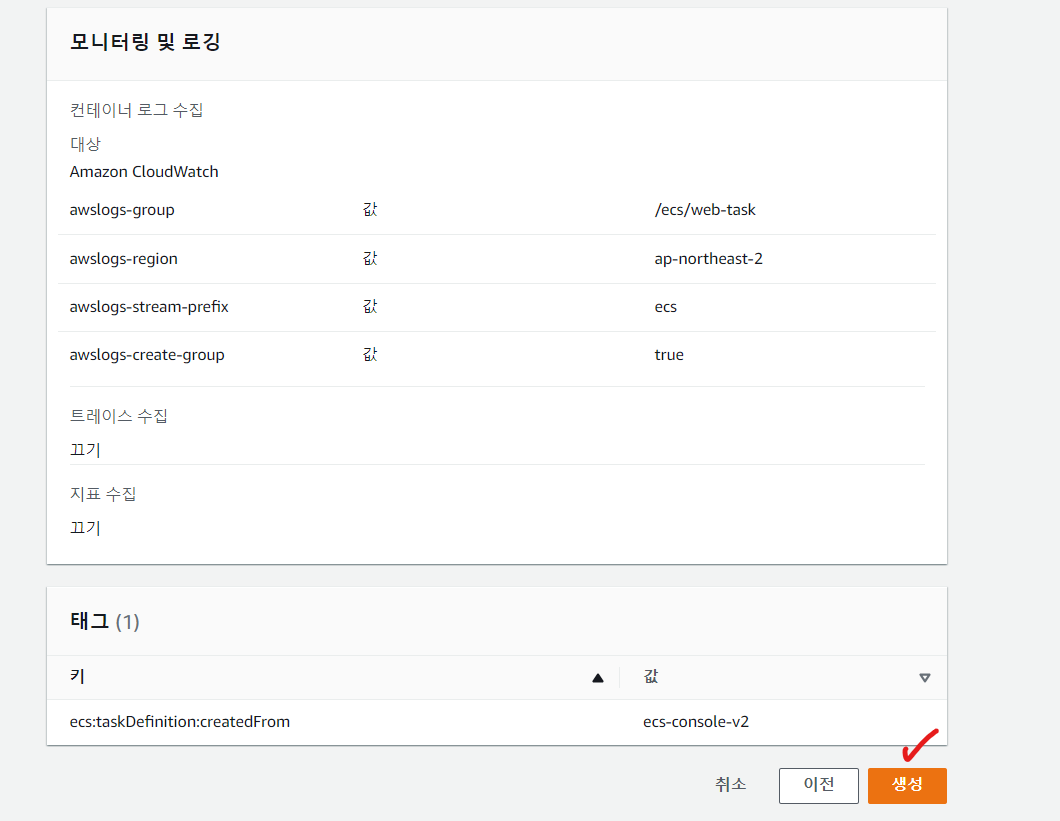
- 클라우드 포메이션 - 앤서블 처럼 CLI 로 구성가능하다
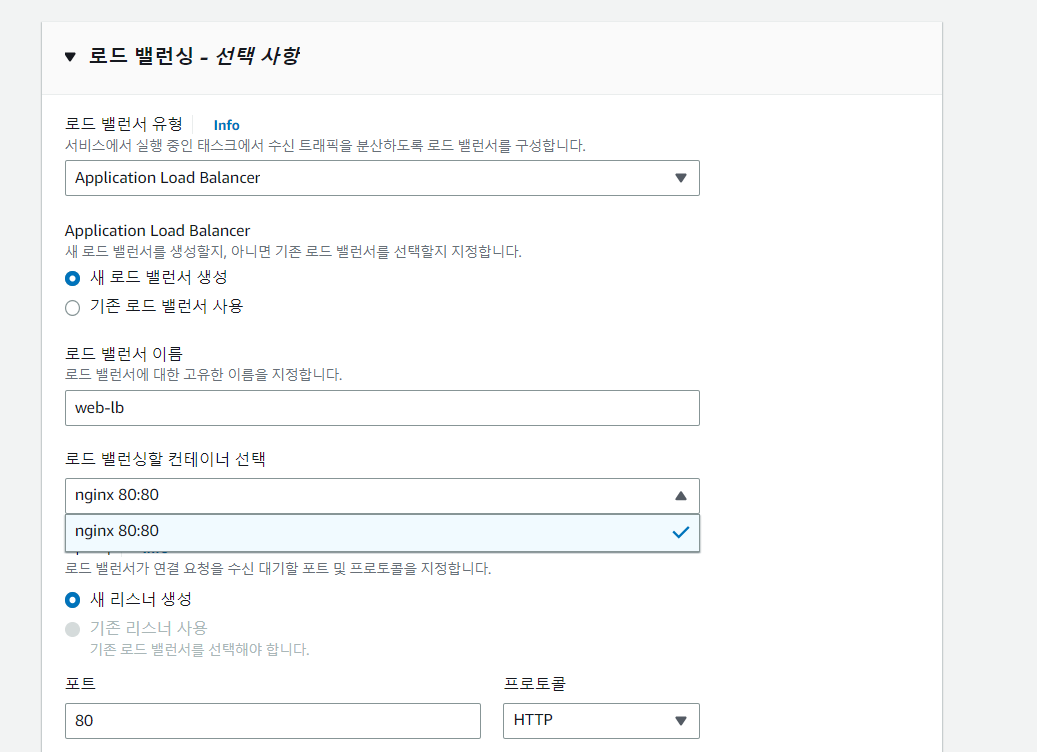
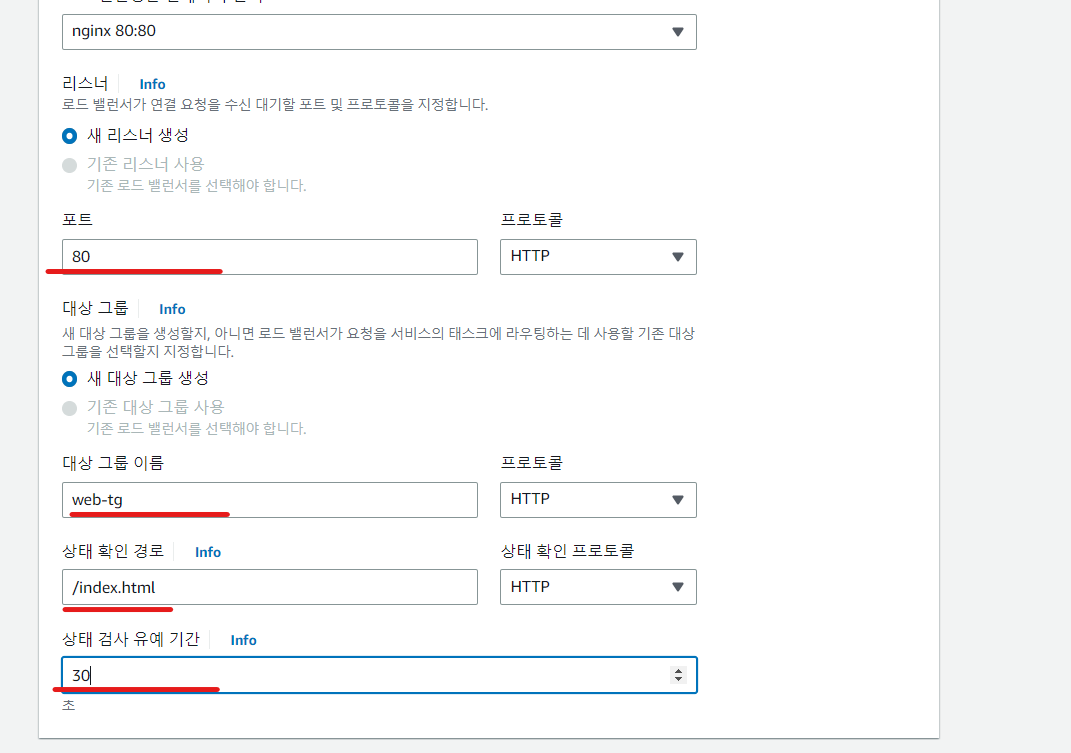
- 클러스터 서비스에서 정의한 태스크를 가지고 로드밸런싱을 수행할 수 있다.
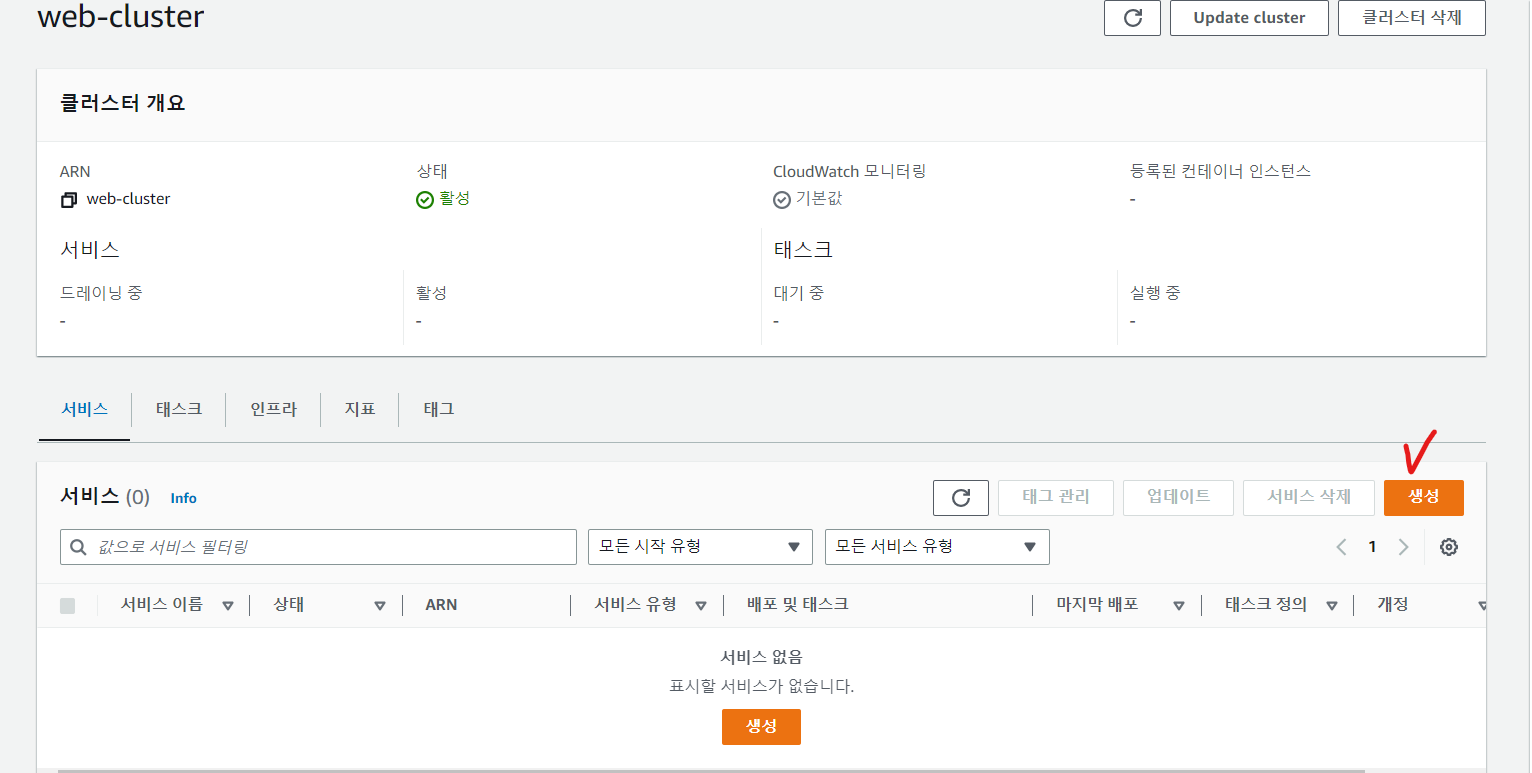
- 방금 정의했던 태스크를 선택
- 로드밸런서 생성 & 로드 밸런싱 할 컨테이너 선택
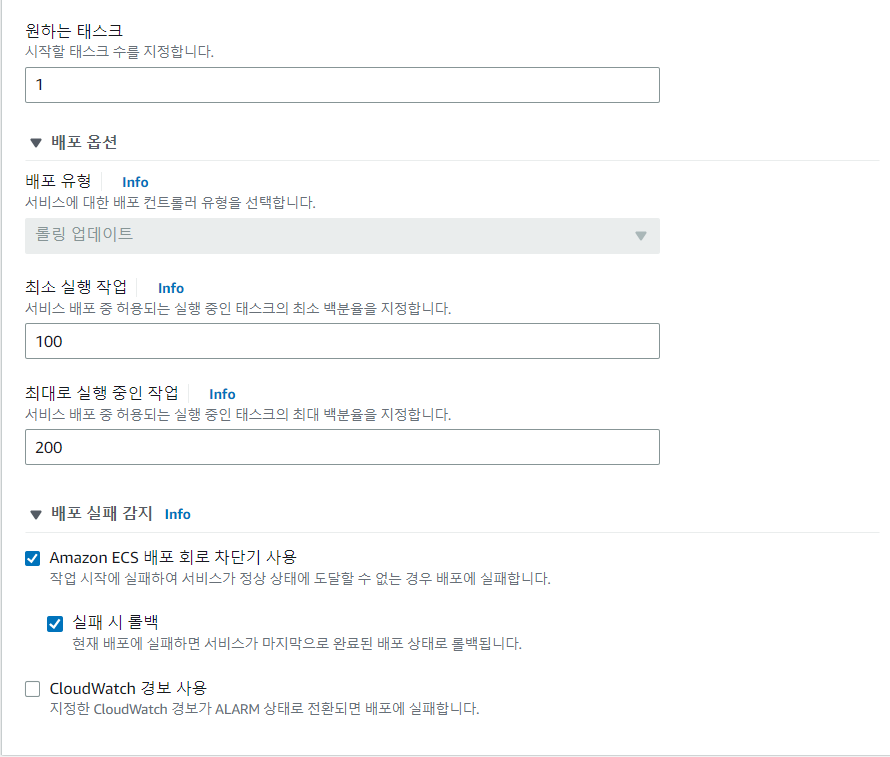
- 스케일인 : 태스크가 줄어드는 것은 원하지 않는다 - 전에 실습했던 정책 cpulow 와 같은 역할
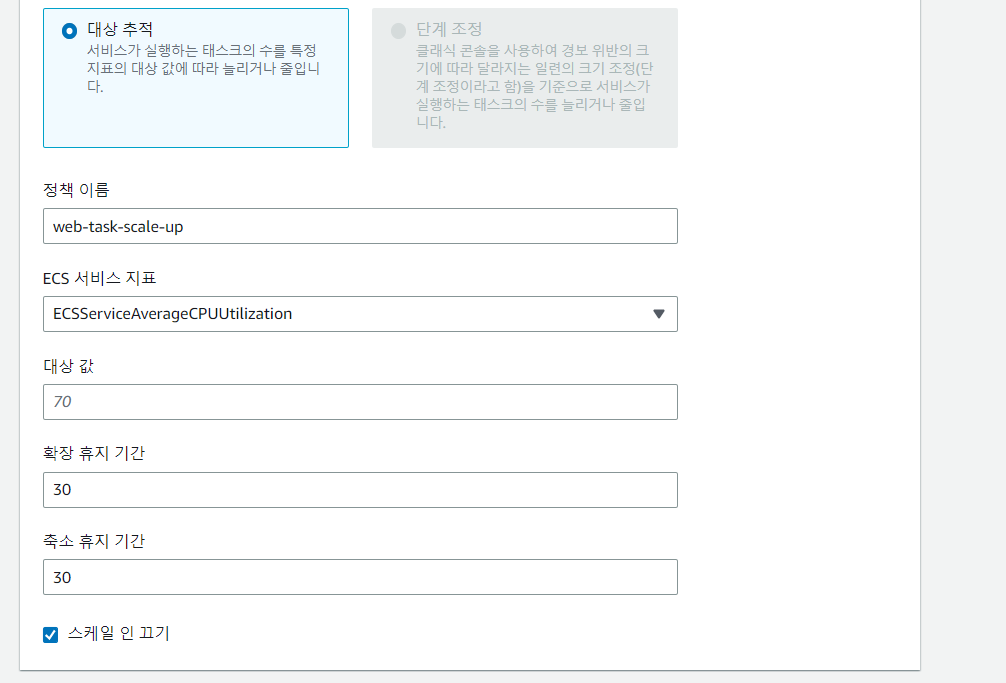
-
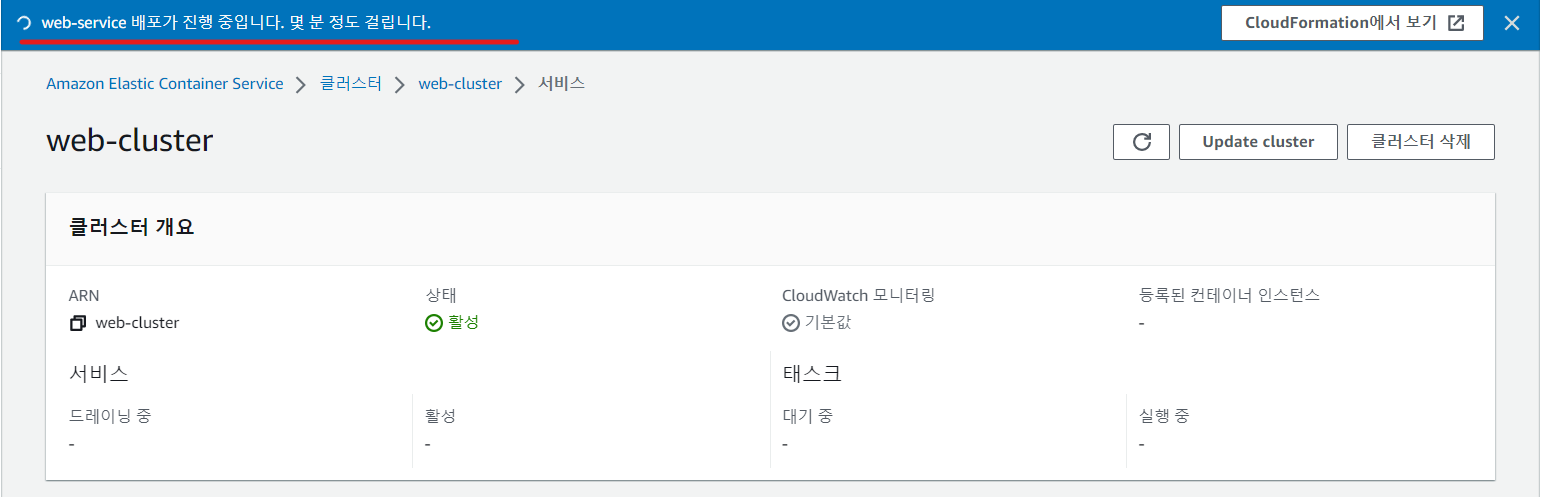
web-service 가 배포 완료됐다면 로드밸런서 콘솔로 접속해 DNS 앤드포인트로 접속하여 완료됐는지 확인
-
확인했다면 강제 삭제 - 과금 요소
4. 실습
ec2에 인스턴스를 하나생성, aws cli 및 docker 설치
nginx 이미지를 베이스로 'hello' 라는 내용의 index.html 파일을 배포하는 컨테이너를 ecs 에 띄어 보시오
풀이
-
인스턴스 하나 생성
-
인스턴스 Shell 에 접속
[ec2-user@ip-10-10-1-53 ~]$ sudo curl "https://awscli.amazonaws.com/awscli-exe-linux-x86_64.zip" -o "awscliv2.zip"
[ec2-user@ip-10-10-1-53 ~]$ sudo yum -y install unzip
[ec2-user@ip-10-10-1-53 ~]$ ls
aws awscliv2.zip
[ec2-user@ip-10-10-1-53 ~]$ sudo mkdir ecs/
[ec2-user@ip-10-10-1-53 ~]$ cd ecs/
[ec2-user@ip-10-10-1-53 ecs]$ sudo yum -y install docker
[ec2-user@ip-10-10-1-53 ecs]$ sudo systemctl restart docker
[ec2-user@ip-10-10-1-53 ecs]$ sudo systemctl enable docker
[ec2-user@ip-10-10-1-53 ecs]$ sudo vi Dockerfile
<Dockerfile>
**************************
FROM nginx:latest
COPY index.html /usr/share/nginx/html/index.html
WORKDIR /usr/share/nginx/html
**************************
[ec2-user@ip-10-10-1-53 ecs]$ sudo vi index.html
[ec2-user@ip-10-10-1-53 ecs]$ ls
Dockerfile get-docker.sh index.html
<빌드>
[ec2-user@ip-10-10-1-53 ecs]$ sudo docker build -t nginxtest .
Sending build context to Docker daemon 23.55kB
Step 1/3 : FROM nginx:latest
latest: Pulling from library/nginx
3f4ca61aafcd: Pull complete
50c68654b16f: Pull complete
3ed295c083ec: Pull complete
40b838968eea: Pull complete
88d3ab68332d: Pull complete
5f63362a3fa3: Pull complete
Digest: sha256:0047b729188a15da49380d9506d65959cce6d40291ccfb4e039f5dc7efd33286
Status: Downloaded newer image for nginx:latest
---> 1403e55ab369
Step 2/3 : COPY index.html /usr/share/nginx/html/index.html
---> 0426391019b6
Step 3/3 : WORKDIR /usr/share/nginx/html
---> Running in 43456b6e6c41
Removing intermediate container 43456b6e6c41
---> 80efa4086f5d
Successfully built 80efa4086f5d
Successfully tagged nginxtest:latest
[ec2-user@ip-10-10-1-53 ecs]$ sudo docker image ls
REPOSITORY TAG IMAGE ID CREATED SIZE
nginxtest latest 80efa4086f5d About a minute ago 142MB
nginx latest 1403e55ab369 12 days ago 142MB
<컨테이너 시작>
[ec2-user@ip-10-10-1-53 ecs]$ sudo docker run -d --name nginxtest -p 3231:80 80efa4086f5d
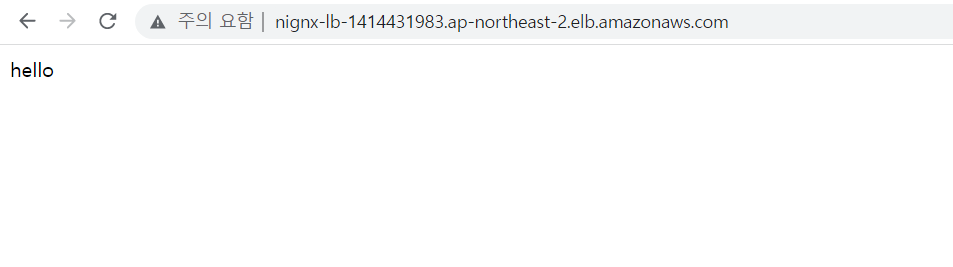
[ec2-user@ip-10-10-1-53 ecs]$ sudo curl localhost:3231
hello
<레포지토리 생성>
[ec2-user@ip-10-10-1-53 ecs]$ aws ecr create-repository --repository-name nignxtest --region ap-northeast-2
<docker 로그인>
[ec2-user@ip-10-10-1-53 ecs]$ sudo aws ecr get-login-password --region ap-northeast-2 | sudo docker login --username AWS --password-stdin 236747833953.dkr.ecr.ap-northeast-2.amazonaws.com/nignxtest
#### 혹시 위 방식으로 로그인이 안되는경우
docker login -u AWS -p $(aws ecr get-login-password --region ap-northeast-2 <내 레포지토리 주소>
<이미지 태그 변경>
[ec2-user@ip-10-10-1-53 ecs]$ sudo docker tag nginxtest 236747833953.dkr.ecr.ap-northeast-2.amazonaws.com/nignxtest
[ec2-user@ip-10-10-1-53 ecs]$ sudo docker image ls
REPOSITORY TAG IMAGE ID CREATED SIZE
236747833953.dkr.ecr.ap-northeast-2.amazonaws.com/nignxtest latest 80efa4086f5d About an hour ago 142MB
nginxtest latest 80efa4086f5d About an hour ago 142MB
nginx latest 1403e55ab369 12 days ago 142MB
<이미지 push>
[ec2-user@ip-10-10-1-53 ecs]$ sudo docker image push 236747833953.dkr.ecr.ap-northeast-2.amazonaws.com/nignxtest
Using default tag: latest
The push refers to repository [236747833953.dkr.ecr.ap-northeast-2.amazonaws.com/nignxtest]
f8e235254727: Pushed
c72d75f45e5b: Pushed
9a0ef04f57f5: Pushed
d13aea24d2cb: Pushed
2b3eec357807: Pushed
2dadbc36c170: Pushed
8a70d251b653: Pushed
latest: digest: sha256:d011144c2e122bc186d42a7b00b2d2332c2e094e6682cc77ac01ec0df9c5eeca size: 1777
-
nignx 클러스터 생성
-
nignx 태스크 생성
-
클러스터에서 서비스 생성
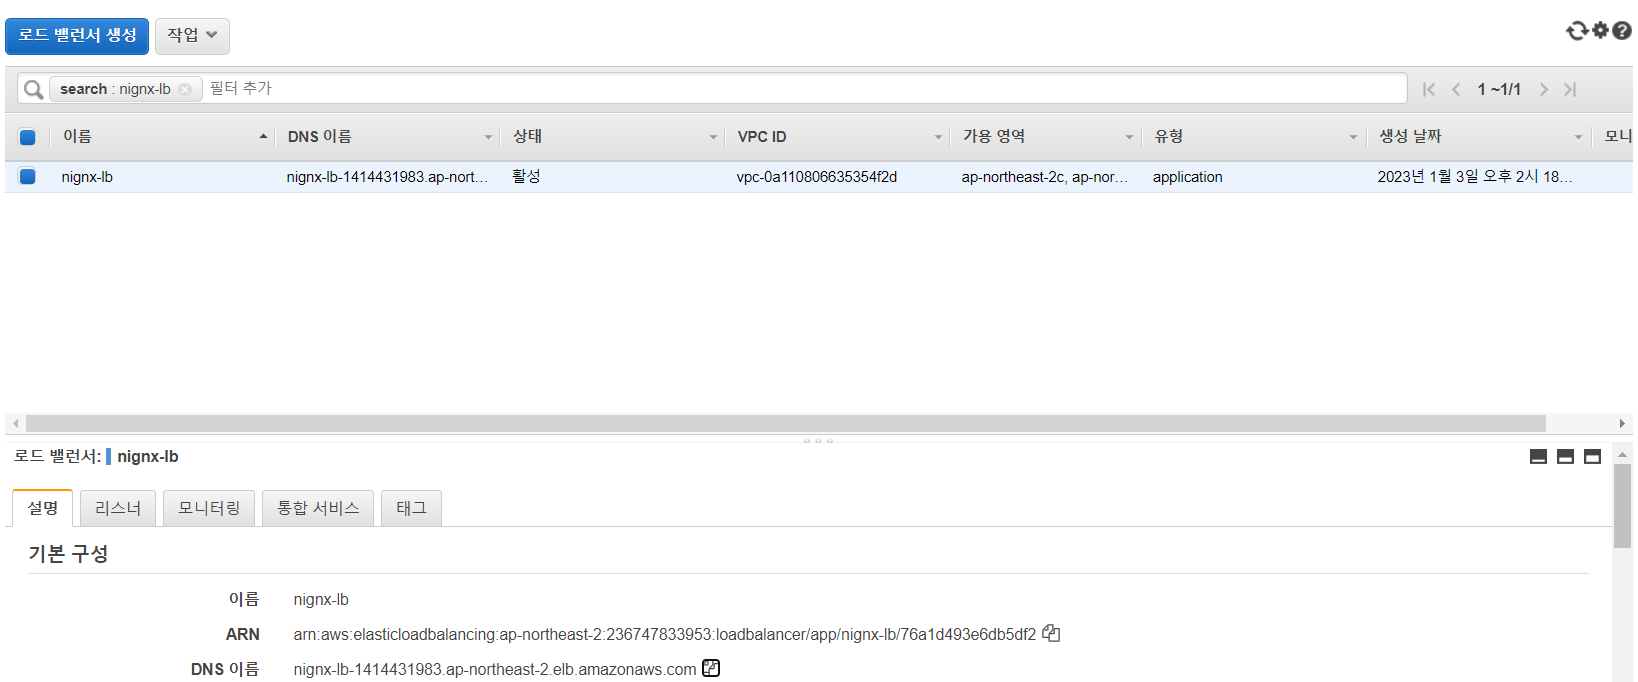
- 크롬 접속창에 로드 밸런서 엔드포인트에 접속해 접속을 확인
5. Ansible & AWS
- 플레이북 작성 & 프로비저닝
<앤서블 설치>
root@ubuntu:~# apt-get -y install ansible
root@ubuntu:~# apt-get -y install ansible python3-pip
<boto 설치>
root@ubuntu:~# pip install boto
root@ubuntu:~# pip install boto3
# ansible cli 환경 - 이미 구성해놓음
root@ubuntu:~# mkdir ansible
root@ubuntu:~# cd ansible/
root@ubuntu:~/ansible# vi provision.yml
<VPC 생성>
*******************
---
- name: aws provision
hosts: localhost
become: yes
gather_facts: no
tasks:
- name: VPC create #태스크 이름 정의
ec2_vpc_net: # ec2 VPC 생성 모듈
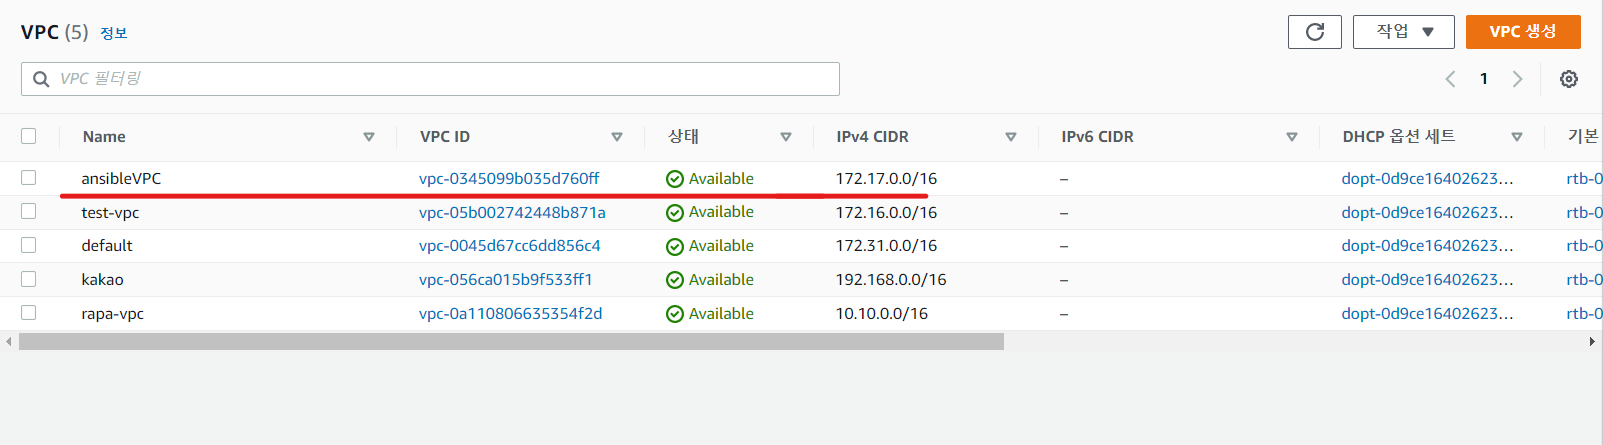
name: ansibleVPC # VPC 이름 정의
cidr_block: 172.17.0.0/16 # VPC 대역대 정의
state: present
*******************
<프로비저닝>
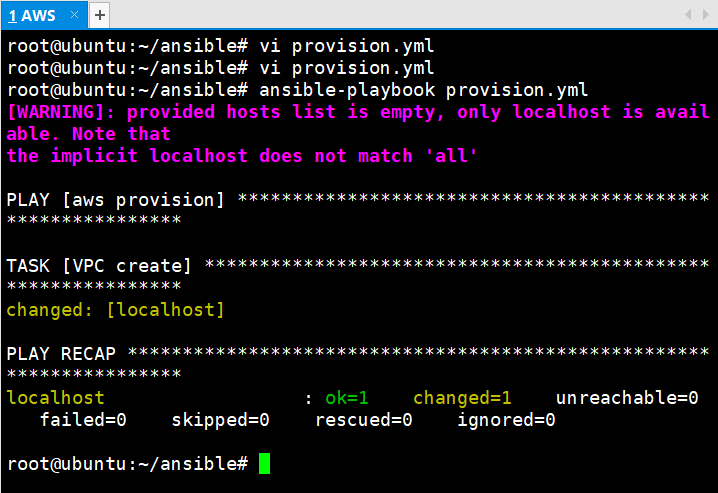
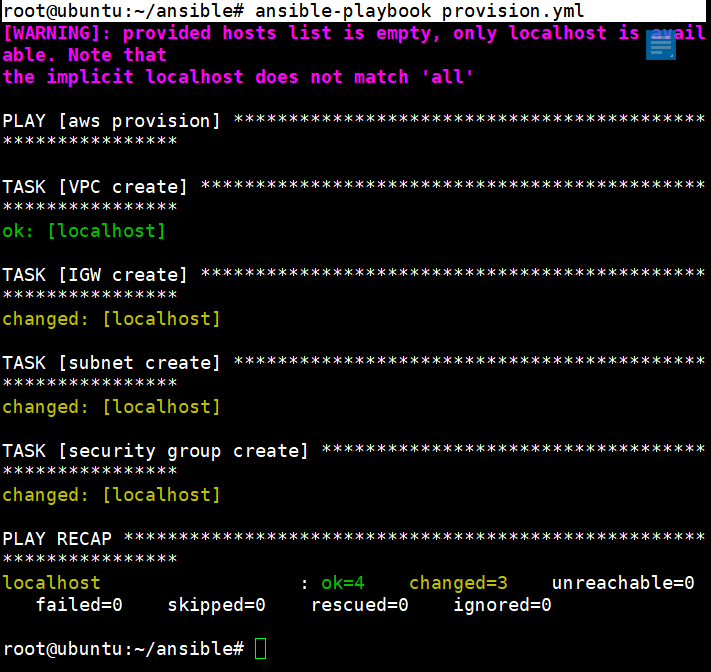
root@ubuntu:~/ansible# ansible-playbook provision.yml playbook 명령을 local에 명령을 내리는 것과 같다.
- VPC 콘솔로 접속
-
인터넷 게이트 웨이를 생성하고 VPC 와 연결을 해야한다.
-
과정들의 결과를 보기 위해서 각 과정 마다 register를 붙여준다.
- name: aws provision
hosts: localhost
become: yes
gather_facts: no
tasks:
- name: VPC create
ec2_vpc_net:
name: ansibleVPC
cidr_block: 172.17.0.0/16
state: present
register: vpc_create_result
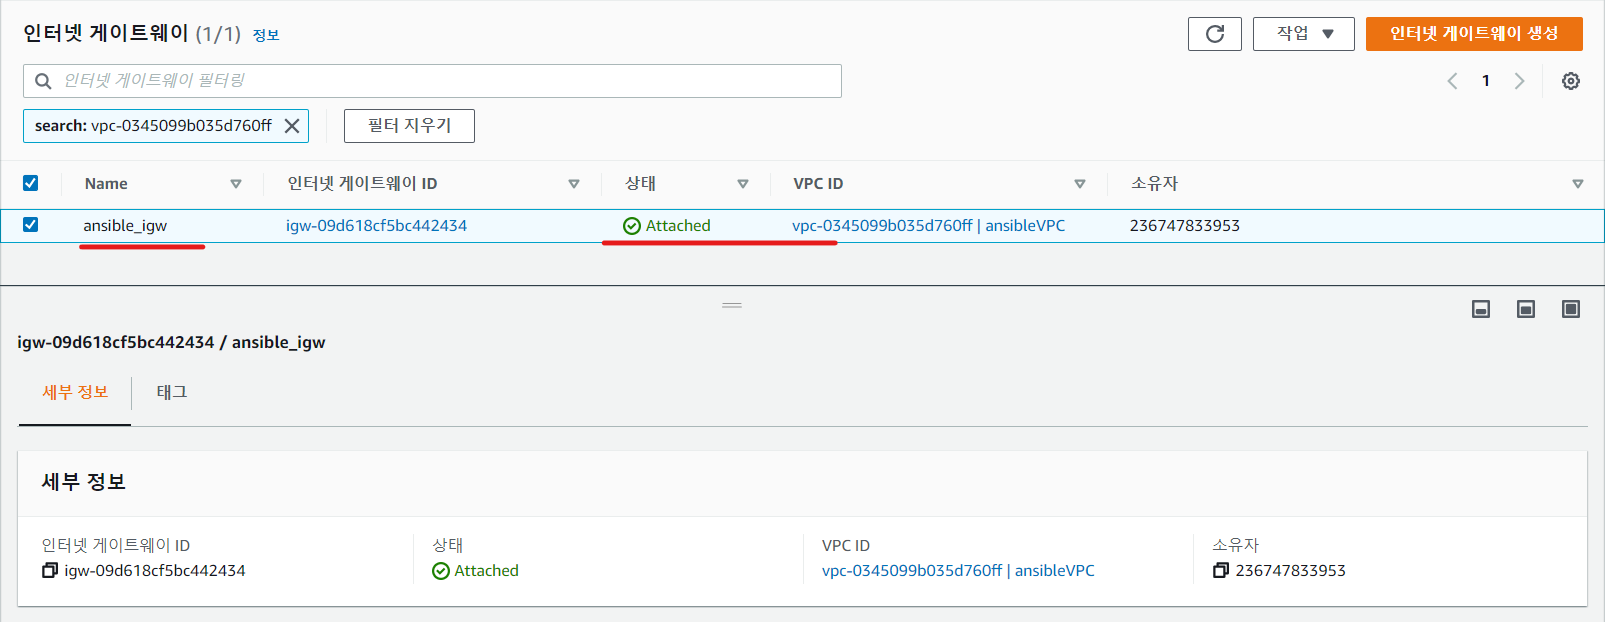
- name: IGW create # 태스크 이름 정의
ec2_vpc_igw: # ec2 인터넷 게이트웨이 모듈 정의
vpc_id: "{{ vpc_create_result.vpc.id }}" # 인터넷 게이트웨이에 연결할 VPC 의 ID (register - result)
state: present
tags: # 태그 생성
Name: ansible_igw # N(대문자 주의)ame 태그 이름 정의
register: igw_create_result # 인터넷 게이트웨이 생성 결과 저장
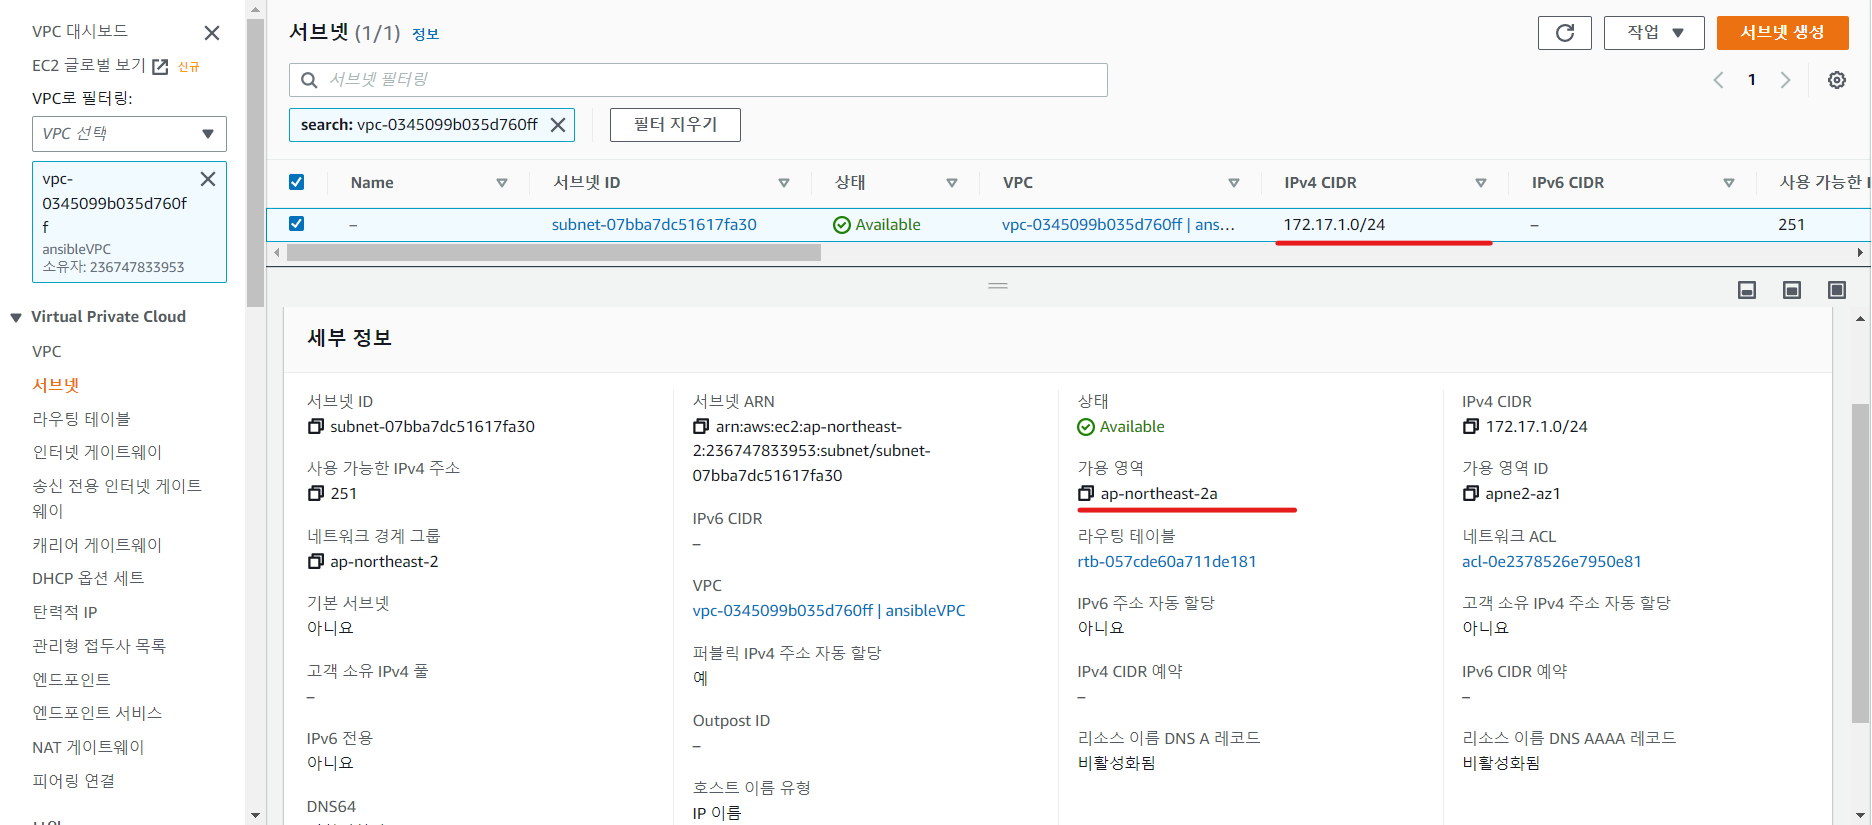
- name: subnet create # 서브넷 생성하는 태스크 이름 정의
ec2_vpc_subnet: # ec2-vpc 서브넷 모듈 정의
cidr: 172.17.1.0/24 # 서브넷 하나를 생성하고 대역대를 정의
vpc_id: "{{ vpc_create_result.vpc.id }}" # 서브넷을 가지는 VPC id 가져오기
az: ap-northeast-2a # 서브넷의 가용영역 정의
map_public: yes # 인스턴스의 퍼블릭 IP 자동할당 yes
state: present
register: subnet_create_result # 서브넷이 생성이 완료됐다면 결과를 저장
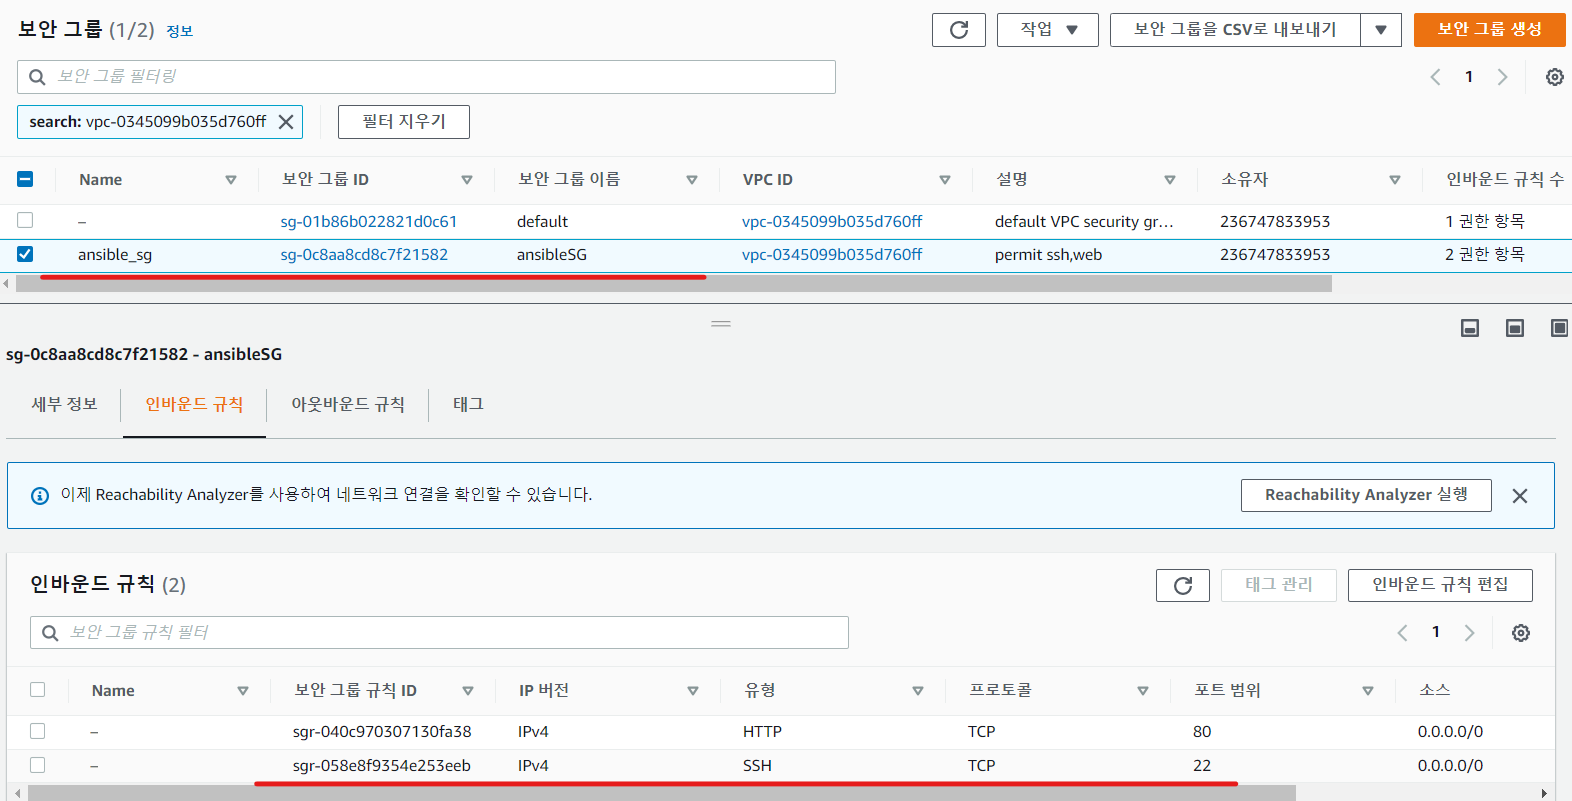
- name: security group create # 보안 그룹 생성 태스크 정의
ec2_group: # ec2 보안 그룹 모듈
name: ansibleSG # 보안 그룹의 이름 정의
vpc_id: "{{ vpc_create_result.vpc.id }}" # VPC 내의 보안 그룹을 정의하므로 VPC 명시
state: present
description: permit ssh,web # 어떤 보안그룹인지 설명
tags: # 보안 그룹 태그 생성
Name: ansible_sg # 태그 이름 정의
rules: # 보안 그룹의 정책 생성 ssh 22번 http 80 번 포트를 허용하겠다.
- proto: tcp # 프로토콜 tcp 적용
ports:
- 22
- 80
cidr_ip: 0.0.0.0/0 # 인바운드 규칙 소스를 수정
<프로비저닝>
root@ubuntu:~/ansible# ansible-playbook provision.yml
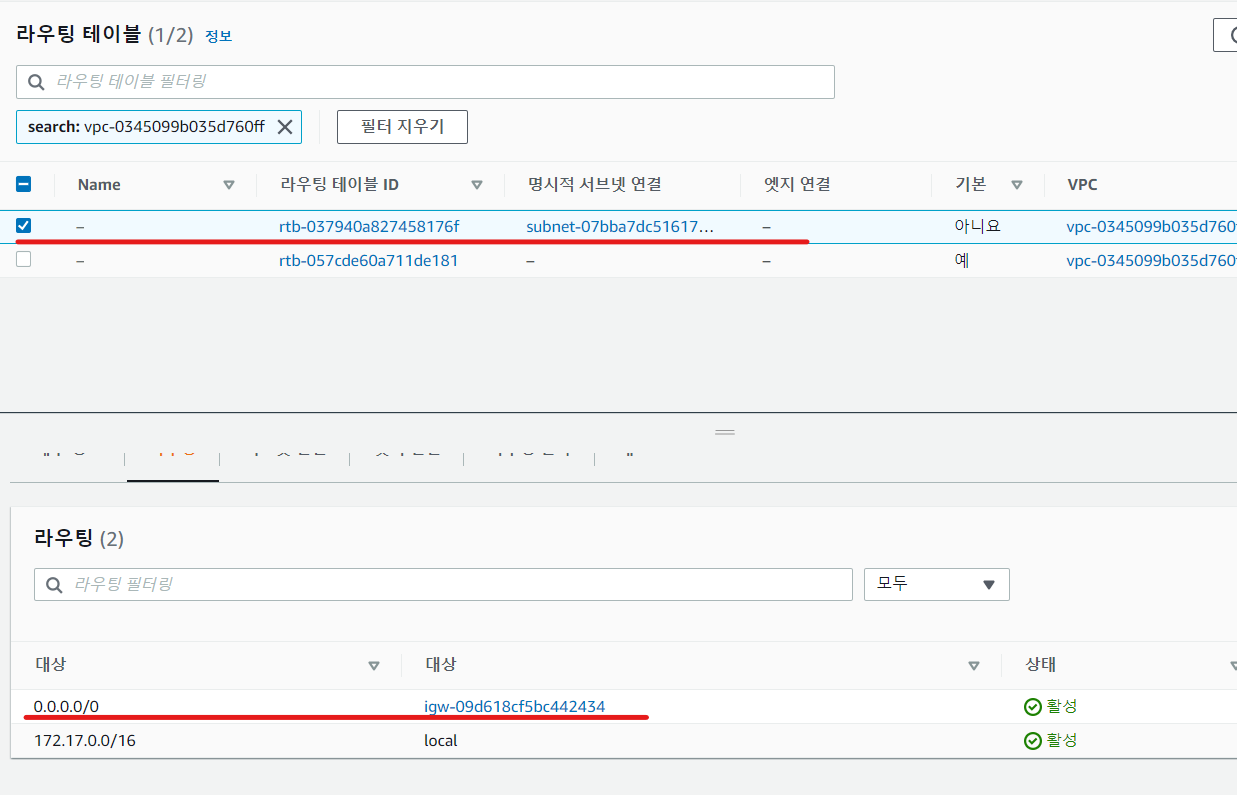
- VPC 콘솔로 이동 하여 서브넷 생성 확인
- 인터넷 게이트웨이 생성 확인 - attached 됐는지도 확인할 필요가 있다.
- 보안 그룹 생성 확인
<provision.yml>

*******************
- name: aws provision
  hosts: localhost
  become: yes
  gather_facts: no

  tasks:
    - name: VPC create
      ec2_vpc_net:
        name: ansibleVPC
        cidr_block: 172.17.0.0/16
        state: present
      register: vpc_create_result

    - name: IGW create
      ec2_vpc_igw:
        vpc_id: "{{ vpc_create_result.vpc.id }}"
        state: present
        tags:
          Name: ansible_igw
      register: igw_create_result

    - name: subnet create
      ec2_vpc_subnet:
        cidr: 172.17.1.0/24
        vpc_id: "{{ vpc_create_result.vpc.id }}"
        az: ap-northeast-2a
        map_public: yes
        state: present
       register: subnet_create_result

    - name: security group create
      ec2_group:
        name: ansibleSG
        vpc_id: "{{ vpc_create_result.vpc.id }}"
        state: present
        description: permit ssh,web
        tags:
          Name: ansible_sg
        rules:
          - proto: tcp
            ports:
              - 22
              - 80
            cidr_ip: 0.0.0.0/0

    - name: public routing table create		# 퍼블릭 라우팅 테이블 생성하는 태스크 정의
      ec2_vpc_route_table:		# ec2 라우팅 테이블 생성 모듈
        vpc_id: "{{ vpc_create_result.vpc.id }}"		# VPC 명시
        state: present
        subnets: ["{{ subnet_create_result.subnet.id }}"]	# 라우팅 테이블의 서브넷 명시적 연결 - 리스트가능
        routes:
          - dest: 0.0.0.0/0		# 목적지는 전체 대역대 정의
            gateway_id: "{{ igw_create_result.gateway_id }}"	# 넥스트홉 인터넷 게이트웨이

*******************


root@ubuntu:~/ansible# ansible-playbook provision.yml
<provision.yml>
***************
---
- name: aws provision
  hosts: localhost
  become: yes
  gather_facts: no

  tasks:
    - name: VPC create
      ec2_vpc_net:
        name: ansibleVPC
        cidr_block: 172.17.0.0/16
        state: present
      register: vpc_create_result

    - name: IGW create
      ec2_vpc_igw:
        vpc_id: "{{ vpc_create_result.vpc.id }}"
        state: present
        tags:
          Name: ansible_igw
      register: igw_create_result

    - name: subnet create
      ec2_vpc_subnet:
        cidr: 172.17.1.0/24
        vpc_id: "{{ vpc_create_result.vpc.id }}"
        az: ap-northeast-2a
        map_public: yes
        state: present
      register: subnet_create_result

    - name: security group create
      ec2_group:
        name: ansibleSG
        vpc_id: "{{ vpc_create_result.vpc.id }}"
        state: present
        description: permit ssh,web
        tags:
          Name: ansible_sg
        rules:
          - proto: tcp
            ports:
              - 22
              - 80
            cidr_ip: 0.0.0.0/0
    - name: public routing table create
      ec2_vpc_route_table:
        vpc_id: "{{ vpc_create_result.vpc.id }}"
        state: present
        subnets: ["{{ subnet_create_result.subnet.id }}"]
        routes:
          - dest: 0.0.0.0/0
            gateway_id: "{{ igw_create_result.gateway_id }}"

    - name: key_pair create # ec2 인스턴스를 생성하기 위해 키페어 생성 태스크
      ec2_key:		# ec2 키페어 모듈
        name: ansiblekey	# 키페어의 이름 정의
      register: key_create_result	# 키페어 생성 결과를 저장

    - name: save key		# 키페어를 생성 하고 저장하는 태스크
      copy: content="{{ key_create_result.key.private_key }}" dest="/root/.ssh/ansiblekey.pem" mode=400
      # 생성한 키페어를 /root/.ssh/ 경로에 저장하고 chmod 400 먹인다.
      when: key_create_result.changed	# 조건 - 만약 키페어가 생성 되었다면 태스크를 실행하겠다.

    - name: create instance 	# 인스턴스 생성하는 태스크 정의
      ec2:				# ec2 모듈 정의
        region: ap-northeast-2		# 리전 정의
        key_name: ansiblekey		# 키페어는 방금 생성한 키페어 이름
        instance_tags:				# 인스턴스 태그 생성
          Name: ansibleEC2			# 태그 설명 명시
        instance_type: t2.micro		# 인스턴스 타입 명시
        image: ami-035233c9da2fabf52	# 인스턴스 베이스 AMI (콘솔로 접속해 복사 가능)
        group: ansibleSG			# 보안 그룹은 방금 생성한 앤서블 보안 그룹 명시
        count: 1				# 생성할 인스턴스는 1개
        vpc_subnet_id: "{{ subnet_create_result.subnet.id }}"	# VPC 명시
        assign_public_ip: yes		# 퍼블릭 IP 자동 할당 yes

***************

root@ubuntu:~/ansible# ls /root/.ssh	# 키페어 정상적으로 존재하는지 확인
ansiblekey.pem  authorized_keys

root@ubuntu:~/ansible# ansible-playbook provision.yml

::::::::::::::::::::::::: 주석 없는 플레이 북 :::::::::::::::::::::::::
---
- name: aws provision
  hosts: localhost
  become: yes
  gather_facts: no

  tasks:
    - name: VPC create
      ec2_vpc_net:
        name: ansibleVPC
        cidr_block: 172.17.0.0/16
        state: present
      register: vpc_create_result

    - name: IGW create
      ec2_vpc_igw:
        vpc_id: "{{ vpc_create_result.vpc.id }}"
        state: present
        tags:
          Name: ansible_igw
      register: igw_create_result

    - name: subnet create
      ec2_vpc_subnet:
        cidr: 172.17.1.0/24
        vpc_id: "{{ vpc_create_result.vpc.id }}"
        az: ap-northeast-2a
        map_public: yes
        state: present
      register: subnet_create_result

    - name: security group create
      ec2_group:
        name: ansibleSG
        vpc_id: "{{ vpc_create_result.vpc.id }}"
        state: present
        description: permit ssh,web
        tags:
          Name: ansible_sg
        rules:
          - proto: tcp
            ports:
              - 22
              - 80
            cidr_ip: 0.0.0.0/0
    - name: public routing table create
      ec2_vpc_route_table:
        vpc_id: "{{ vpc_create_result.vpc.id }}"
        state: present
        subnets: ["{{ subnet_create_result.subnet.id }}"]
        routes:
          - dest: 0.0.0.0/0
            gateway_id: "{{ igw_create_result.gateway_id }}"

    - name: key_pair create
      ec2_key:
        name: ansiblekey
      register: key_create_result

    - name: save key
      copy: content="{{ key_create_result.key.private_key }}" dest="/root/.ssh/ansiblekey.pem" mode=400
      when: key_create_result.changed

    - name: create instance
      ec2:
        region: ap-northeast-2
        key_name: ansiblekey
        instance_tags:
          Name: ansibleEC2
        instance_type: t2.micro
        image: ami-035233c9da2fabf52
        group: ansibleSG
        count: 1
        vpc_subnet_id: "{{ subnet_create_result.subnet.id }}"
        assign_public_ip: yes

::::::::::::::::::::::::::::::::::::::::::::::::::::::::::::::::::
실습 문제
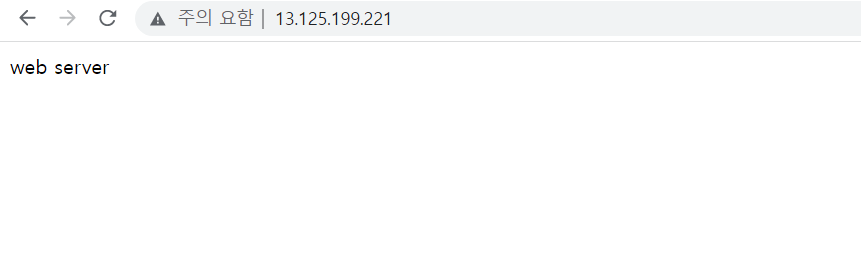
ec2.yml 을 생성해서 접속되는 웹서버를 한개 띄우시오.
http://<퍼블릭 주소>
=> ansible-webserver 이 내용이 뜨도록
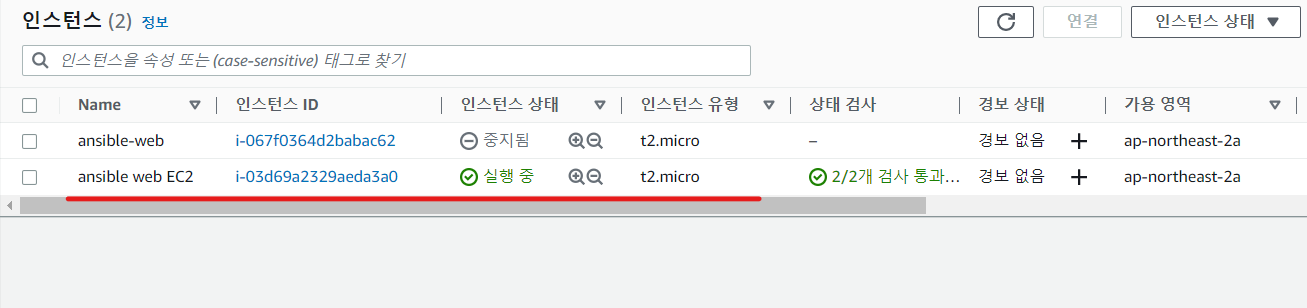
웹서버가 설치된 인스턴스를 이미지로 생성하여
해당 이미지로 인스턴스를 생성
- name: ansible web create
  hosts: localhost
  become: yes
  gather_facts: no

  tasks:
    - name: ansible create instance
      ec2:
        region: ap-northeast-2
        key_name: rapa
        instance_tags:
          Name: ansible web EC2
        instance_type: t2.micro
        image: ami-03224c6ed8a5426a5
        group: ansibleSG
        count: 1
        vpc_subnet_id: subnet-07bba7dc51617fa30
        assign_public_ip: yes