1. 내장함수
자바스크립트에서 기본적으로 제공하는 함수
- alert(), prompt(), confirm()
- console.log()
- setTimeout(), clearTimeout()
- setInterval(), clearInterval()
- eval()
1-1. setTimeout()
var timeoutId = setTimeout(function () {
            alert("3초 후 팝업창 출력");
        }, 3000);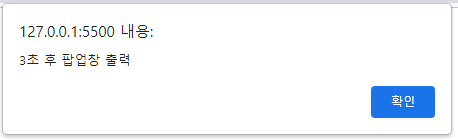
1-2. setInterval()
        var intervalId = setInterval(function () {
            console.log("2초마다 콘솔에 출력");
        }, 2000);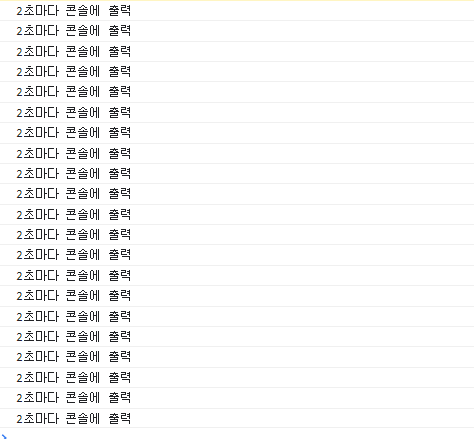
1-3. clearInterval()
        var printTimeoutId = setTimeout(function () {
            clearInterval(pritnIntervalId);
            console.log("종료")
        }, 7000);

        var pritnIntervalId = setInterval(function () {
            console.log('*');
        }, 2000);
- printIntervalId : 2초마다 setInterval로 별 찍기 실행
- printTimeoutId : 7초 후에 setTimeout으로 clearInterval 실행
- 2초 출력 - 4초 출력 - 6초 출력 - 7초 인터벌 클리어(종료)
1-4. eval()
        var varEval = "console.log('eval function')";
        eval(varEval);

		var varEval = "document.write('<p>eval 함수</p>')";
eval(varEval);- 문자열 소스코드를 그대로 해석한 다음, eval에서 소스코드를 실행한다.
- 되도록이면 사용 금지 (해킹의 주 대상)
2. JavaScript의 객체
2-1. 객체의 속성
        var objData = {
            num: 123,
            str: "abc",
            boo: true,
            fun: function () { },
            obj: {},
            arr: [1, 2, 3],
            ude: undefined
        };

        console.log(typeof objData); // object
        console.log("objData > num : " + objData.num);
        console.log("objData > str : " + objData.str);
        console.log("objData > boo : " + objData.boo);
        console.log("objData > fun : " + objData.fun);
        console.log("objData > obj : " + objData.obj);
        console.log("objData > arr : " + objData.arr);
        console.log("objData > ude : " + objData.ude);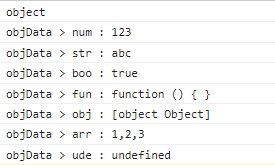
- 객체 안의 속성을 넣을 때는 var가 생략될 수도 있다. (원래는 var num, var str ... 같은 형태)
- 객체 안의 속성은 '객체.속성'으로 접근하면 된다.
2-2. 객체 만들기 : 차
- 가로길이, 세로길이, 연료통, 에너지, 스피드(함수)
        // 객체는 익명함수로 만든다.
        var objCar = {
            width: "3m",
            height: "2m",
            cc: "2000cc",
            energy: 100,
            speed: function (power) {
                return this.energy * power;
            }
        };

        console.log("objCar.speed : " + objCar.speed(2)); // 2 * 100
console.log("objCar.width : " + objCar.width); // 3m- 자신이 만든 객체 안의 속성을 활용할 것이라면 this.속성을 붙여준다.
2-3. 객체 만들기 : 점수표
- 국어, 영어, 수학 입력받기
- 총점과 평균 출력
        var grade = {
            kor: 0,
            math: 0,
            eng: 0,
            sum: function () {
                return ((this.kor) + (this.eng) + (this.math));
            },
            avg: function () {

                return ((this.kor) + (this.eng) + (this.math)) / 3;
            },
            getGrade: function () {
                if (this.avg() >= 90) { return "수"; }
                else if (this.avg() >= 80) { return "우"; }
                else if (this.avg() >= 70) { return "미"; }
                else if (this.avg() >= 60) { return "양"; }
                else { return "가"; }
            }
        }
        grade.kor = Number(prompt("국어 점수", "입력"));
        document.write("<h1> 국어 점수 : " + grade.kor + "<h1>");
        grade.eng = Number(prompt("영어 점수", "입력"));
        document.write("<h1> 영어 점수 : " + grade.eng + "<h1>");
        grade.math = Number(prompt("수학 점수", "입력"));
        document.write("<h1> 수학 점수 : " + grade.math + "<h1>");

        document.write("<h1> 총점 : " + grade.sum() + "<h1>");
        document.write("<h1> 평균 : " + grade.avg() + "<h1>");

        document.write("<h1> 학점 : " + grade.getGrade() + "<h1>")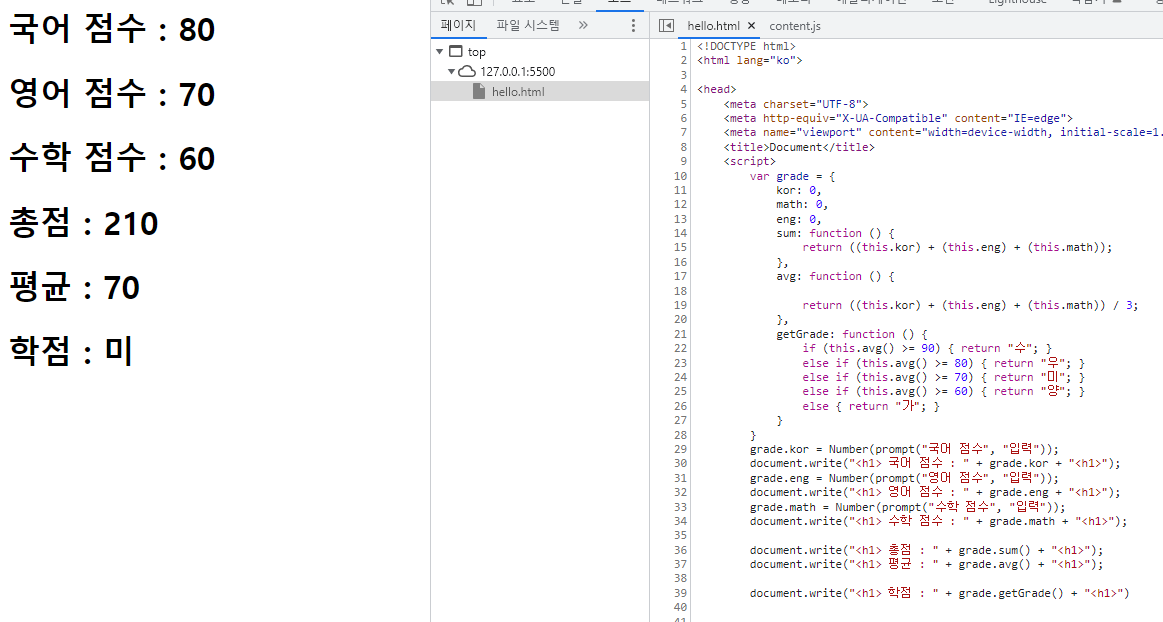
3. setInterval 시계
        setInterval(function () {
            date = new Date();
            document.write("<h1>" + date.getHours() + " : " + date.getMinutes() + " : " + date.getSeconds() + "</h1>");
        }, 1000);
- new Date() 함수를 date라는 변수에 담는다.
- Date()에서 쓸 수 있는 속성을 골라서 쓴다.
- getHours() : 시, getMinutes() : 분, getSeconds() : 초
- getDate() : 일, getDay() : 요일
- getMonth() : 월, getFullYear : 연도
4. 객체 속성 다루기
4-1. 속성 추가, 삭제
    <script>
        var objName = {
            name: "Lee sun sin",
            nation: "Korea",
            gender: "men",
            character: "good"
        };

      	// 1. 속성 출력
        var print = "";
        for (var key in objName) {
            print += key + " : " + objName[key] + "\n"
        }
        console.log(print);

        // 2. 속성 추가
        objName.talent = "fencing";
        print = "";
        for (var key in objName) {
            print += key + " : " + objName[key] + "\n"
        }
        console.log(print);

        // 3. 속성 삭제
        delete (objName.talent);
        print = "";
        for (var key in objName) {
            print += key + " : " + objName[key] + "\n"
        }
        console.log(print);
    </script>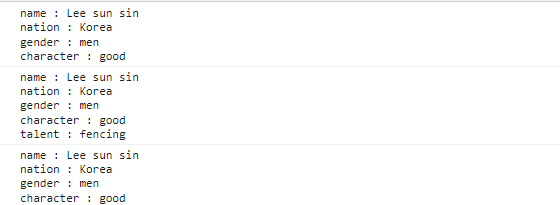
- 속성 출력 : print 변수에 key를 담는다. (배열 형식으로도 접근 가능하다)
print = print + key값 + \n(개행) - 속성 추가 : '객체.속성'으로 속성을 추가할 수 있다.
- 속성 삭제 : delete(객체.속성)으로 속성을 삭제할 수 있다.
4-2. 객체 확인하기 (in)
        console.log("nation" in objName); // true
        console.log("age" in objName); // false
4-3. 객체 접근 간소화(with)
        with (objName) {
            console.log("name : " + name);
            console.log("nation : " + nation);
            console.log("gender : " + gender);
            console.log("character : " + character);
        }
5. 객체 만들기
- 중괄호 :: var obj = { };
- new 객체 :: var obj = new 생성자함수();
5-1. 생성자를 이용한 객체 생성하기
        function Stock(name, price) {
            this.company = name;
            this.cost = price;
        }

        var samsung = new Stock("삼성전자", 45000);
        console.log(samsung.company);
        console.log(samsung.cost);
- 생성자 함수를 하나로 만들고, 객체로 만들어 쓸 수 있다.
- 일반 함수의 성질을 잃어버린다.
        function Stock(name, price) {
            this.company = name;
            this.cost = price;
            this.showPrice = function () {
                console.log(this.cost);
            }
        }

        var samsung = new Stock("삼성전자", 45000);
        console.log(samsung.company);
        console.log(samsung.cost);

        var apple = new Stock("애플", 150000);
        console.log(apple.company);
        console.log(apple.cost);

        var lg = new Stock("엘지전자", 75000);
        console.log(lg.company);
        console.log(lg.cost);
5-2. 생성자 함수로 국영수 - 총점평균학점
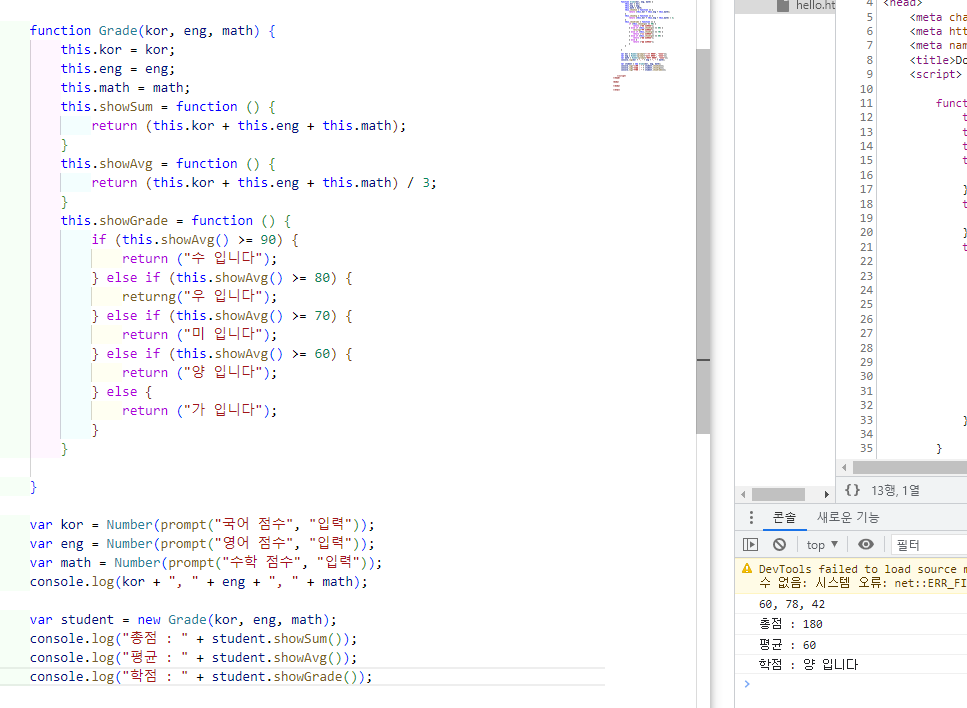
        function Grade(kor, eng, math) {
            this.kor = kor;
            this.eng = eng;
            this.math = math;
            this.showSum = function () {
                return (this.kor + this.eng + this.math);
            }
            this.showAvg = function () {
                return (this.kor + this.eng + this.math) / 3;
            }
            this.showGrade = function () {
                if (this.showAvg() >= 90) {
                    return ("수 입니다");
                } else if (this.showAvg() >= 80) {
                    returng("우 입니다");
                } else if (this.showAvg() >= 70) {
                    return ("미 입니다");
                } else if (this.showAvg() >= 60) {
                    return ("양 입니다");
                } else {
                    return ("가 입니다");
                }
            }

        }

        var kor = Number(prompt("국어 점수", "입력"));
        var eng = Number(prompt("영어 점수", "입력"));
        var math = Number(prompt("수학 점수", "입력"));
        console.log(kor + ", " + eng + ", " + math);

        var student = new Grade(kor, eng, math);
        console.log("총점 : " + student.showSum());
        console.log("평균 : " + student.showAvg());
        console.log("학점 : " + student.showGrade());
6. BOM (Browser Object Model)
- 브라우저 객체 > Window 객체 > History, Location, Screen, Navigator
6-1. window 객체
- 객체를 생략해도 사용 가능하다.
(window.alert == alert, window.console.log == console.log, window.open == open)
    <script>
        window.open(
            "http://www.google.com", "openwindow", "width=800, height=800"
        );

</script>- 팝업 차단을 해제하고 실행한다.

6-2. 팝업창 이동하기 / 사이즈 조정하기
        var newWindow = window.open("http://www.google.com", "google", "width=500, height=600");

        //위치 조정
        newWindow.moveTo(50, 50);

        for (var i = 0; i < 1000; i++) {
            newWindow.moveBy(1, 1);
        }

        //사이즈 조정
        newWindow.resizeTo(500, 600);

        for (var i = 0; i < 200; i++) {
            newWindow.resizeBy(-1, -1);
        }
6-3. onload()
- onload가 선언되면, 모든 객체의 호출이 끝나면 제일 마지막에 실행한다.
<head>
    <script>
        window.onload = function () {
            console.log("첫번째");
        }
    </script>
</head>

<body>
    <script>
        console.log("두번째");
    </script>
    <script>
        console.log("세번째");
    </script>
</body>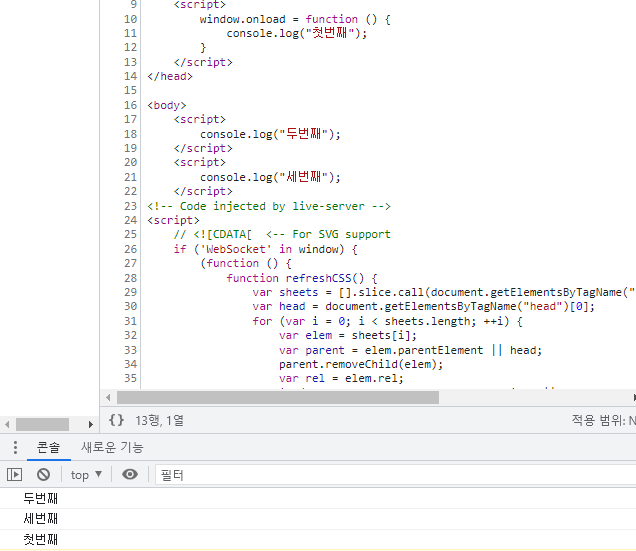
6-4. screen
        function openWin(url, width, height) {
            console.log(screen.width + ", " + screen.height);

            var left = screen.width / 2 - width / 2;
            var top = screen.height / 2 - height / 2;
            var opt = width + ", " + height + ", " + left + ", " + top;

            open(url, "newWin", opt);
        }

        openWin("https://www.google.com", 800, 500);
6-5. location href, replace
<head>
    <meta charset="UTF-8">
    <meta http-equiv="X-UA-Compatible" content="IE=edge">
    <meta name="viewport" content="width=device-width, initial-scale=1.0">
    <title>Document</title>
    <script>
        window.onload = function () {
            location.href = "http://www.yahoo.com";
            location.replace("https://www.daum.net");
        };
    </script>
</head>

<body>
    location object
</body>- href = 히스토리가 남는다. 변수로 넣어서 문자열 값을 할당
- replace = 히스토리가 남지 않는다. 함수 안에 넣어서 실행
7. DOM 객체 (Document Object Model)
- 윈도우 객체 안에 있는 내장 객체.
- 내가 작업하고 있는 document를 관리한다.
7-1. DOM 객체에서 부모 - 자식 간의 관계 설정하기
        var elementNode = document.createElement("p"); // <p></p> 태그를 생성할 요소 노드
        var textNode = document.createTextNode("javascript & node.js"); // 글이 담긴 노드

        elementNode.appendChild(textNode); // 요소 안에 text 넣기 (<p>javascript & node.js</p>)
document.body.appendChild(elementNode); // body에 elementNode 넣기-
body 밑에 쓰면 잘 보인다.
-
head 안에 쓰면 body가 할당되지 않은 상태이므로, Error가 표시된다.
window.onload에 넣고 쓰면 맨 마지막에 실행된다.
<head>
    <script>
        window.onload = function () {
            var elementNode = document.createElement("p");
            var textNode = document.createTextNode("javascript & node.js");

            elementNode.appendChild(textNode);
            document.body.appendChild(elementNode);
        }
    </script>
</head>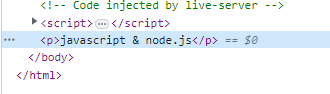
7-2. imgNode 삽입하기
        window.onload = function () {
            var imgNode = document.createElement("img");
            imgNode.src = "./logo.png";
            imgNode.width = "170";
            imgNode.height = "67";

            document.body.appendChild(imgNode);
        }
7-3. setAttribute
- 7-2의 내용에 있는 속성을 설정한다.
            var imgNode = document.createElement("img");

            imgNode.setAttribute("src", "./logo.png");
            imgNode.setAttribute("width", 170);
            imgNode.setAttribute("height", 67);

            document.body.appendChild(imgNode);
7-4. innerHTML
document.body.innerHTML = "<h1>Javascript</h1>"; window.onload = function () {
var str = "";
str += "<p> javascript & node.js </p>";
str += " <img src='./logo.png', ";
str += " width='170', height='67', tempData='logoImg'> ";
document.body.innerHTML = str;
};7-5. getElementById
<head>
    <title>Javascript</title>
    <script>
        window.onload = function () {
            var name = document.getElementById("name");
            console.log(name); // <p id="name">홍길동</p>
            name.innerText = "Hello"; // <p id="name">Hello</p>
        }

    </script>
</head>

<body>
    <p id="name">홍길동</p>
</body>- 글과 이미지 생성 후 바꿔치기 하기
        window.onload = function () {
            var str = "";
            str += "<p id='jsTitle'> javascript & node.js </p>";
            str += "<img id='logoImg', src='./logo.png',";
            str += "width='170', height='67'>";
            document.body.innerHTML = str;

            var titleNode = document.getElementById("jsTitle");
            titleNode.innerHTML = "JS & NODE";

            var logoNode = document.getElementById("logoImg");
            logoNode.setAttribute("src", "./arm_mbed.png");
            logoNode.setAttribute("width", 297);
            logoNode.setAttribute("height", 124);
};- 10초 후에 이미지 바꾸기
    <script>
        window.onload = function () {
            var str = "";
            str += "<img id='logoImg', src='./logo.png',";
            str += "width='170', height='67'>";
            document.body.innerHTML = str;


            var logoNode = document.getElementById("logoImg");
            setTimeout(function () {
                logoNode.setAttribute("src", "./arm_mbed.png");
                logoNode.setAttribute("width", 297);
                logoNode.setAttribute("height", 124);
            }, 10000);
        };
    </script>
velog, GitHub, Notion 등에 작업물을 정리하고 있습니다.