📌 Sign-cms PC
- 사이트명 : Sign-cms PC
- 작업기간 : 4일
- 사용언어 : HTML5,CSS3,Jquery, javascript
- 라이브러리 : Swiper, GSAP
- 분류 : PC 적응형 웹사이트
- URL : https://yunazzi.github.io/sign-cms/
Point ✅
✔️ 로딩페이지
✔️ 햄버거바 메뉴
✔️ 마우스움직임에 따라 움직이는 마우스커서
✔️ batch문 이용
✔️ 클릭시 해당 섹션으로 이동하는 네비게이션
✔️ each반복문 (+swiper)
✔️ 입력란 공란일때, alert문 띄우기
🔖 로딩페이지
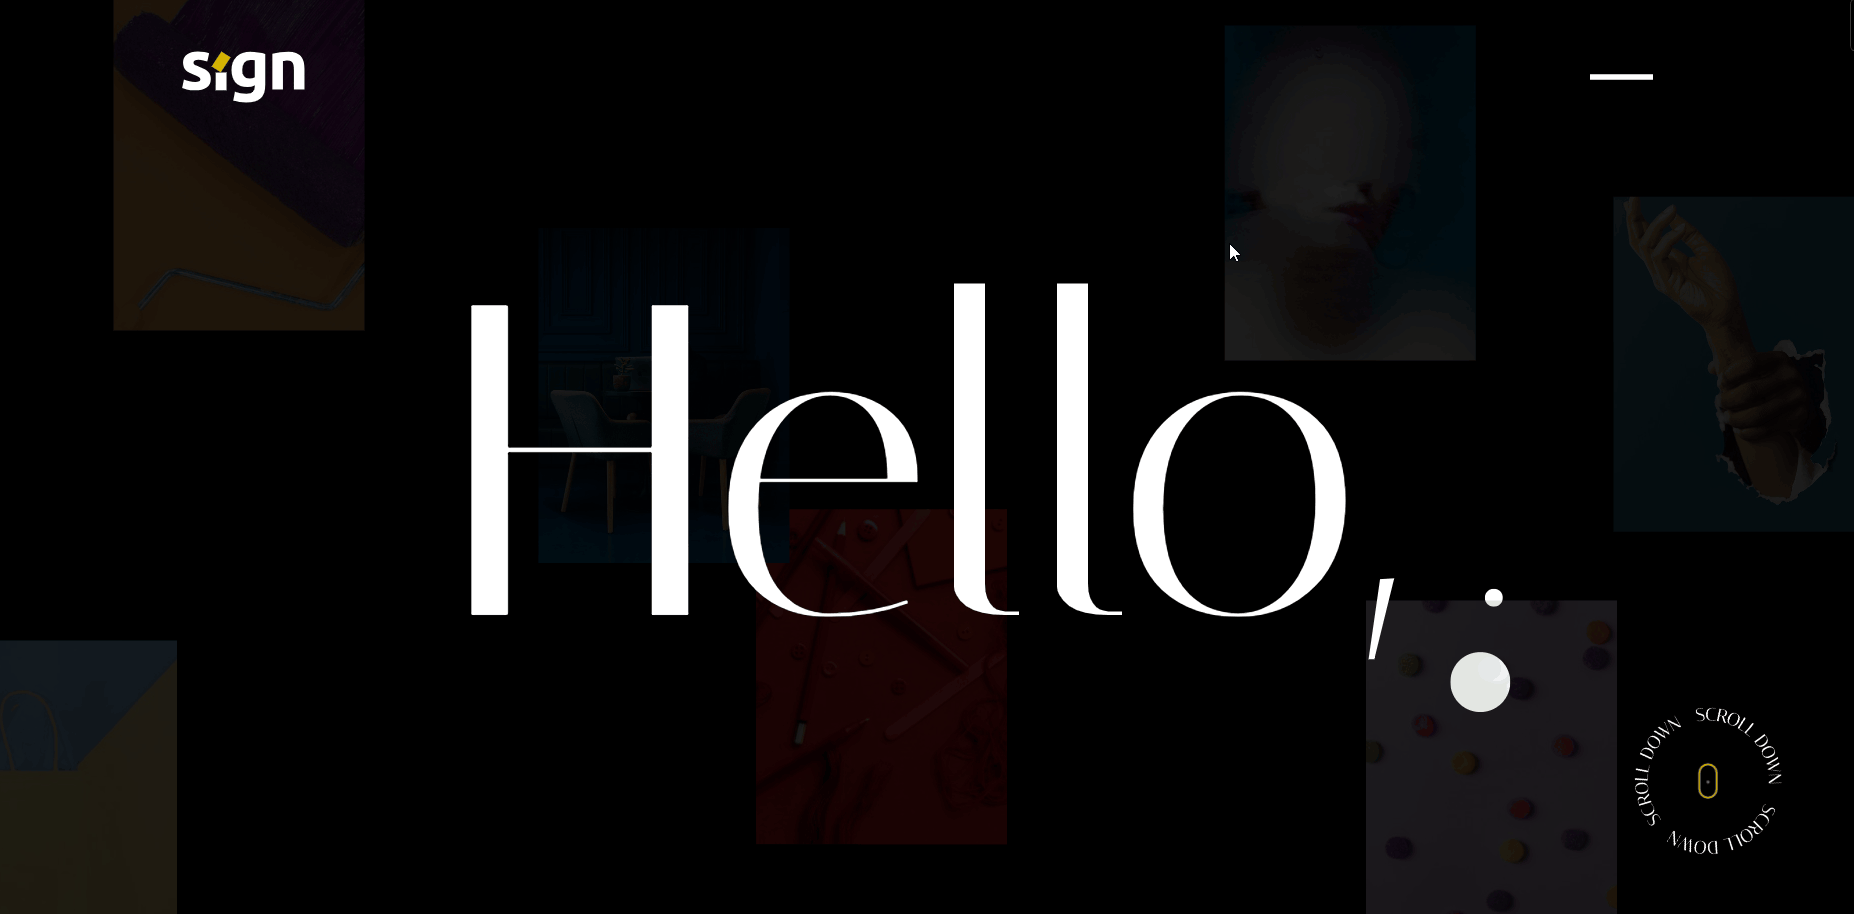
sign-cms의 로딩페이지는 타임라인 시간순서대로
- 노랑선의 height값과 top값이 올라가고
- 배경색의 투명도가 옅어지고,
- 헤드라인의 글자의 불투명도를 1로 바꿔 텍스트가 보이게하고
- 여러장의 이미지를 하나의 라벨로 묶어 중앙에 위치시킨 후, Dataset에 저장해둔 x, y의 각 위칫값으로 동시에 흩어지게한다.
const visualTl = gsap.timeline({})

visualTl.to('.sc-visual .area1 .line',1,{top:0,height:0})
visualTl.to('.sc-visual .area1 .filter',1,{backgroundColor:'rgba(0, 0, 0, .88)'})
visualTl.to('.sc-visual .area1 .headline',{opacity:1})

visualTl.addLabel('a')

//js에서 for문 = each
$('.sc-visual .area1 .visual-img').each(function(i,el){
	visualTl.to(el,{
		x:el.dataset.x,
		y:el.dataset.y
	},'a')
})
🔖 햄버거바 메뉴
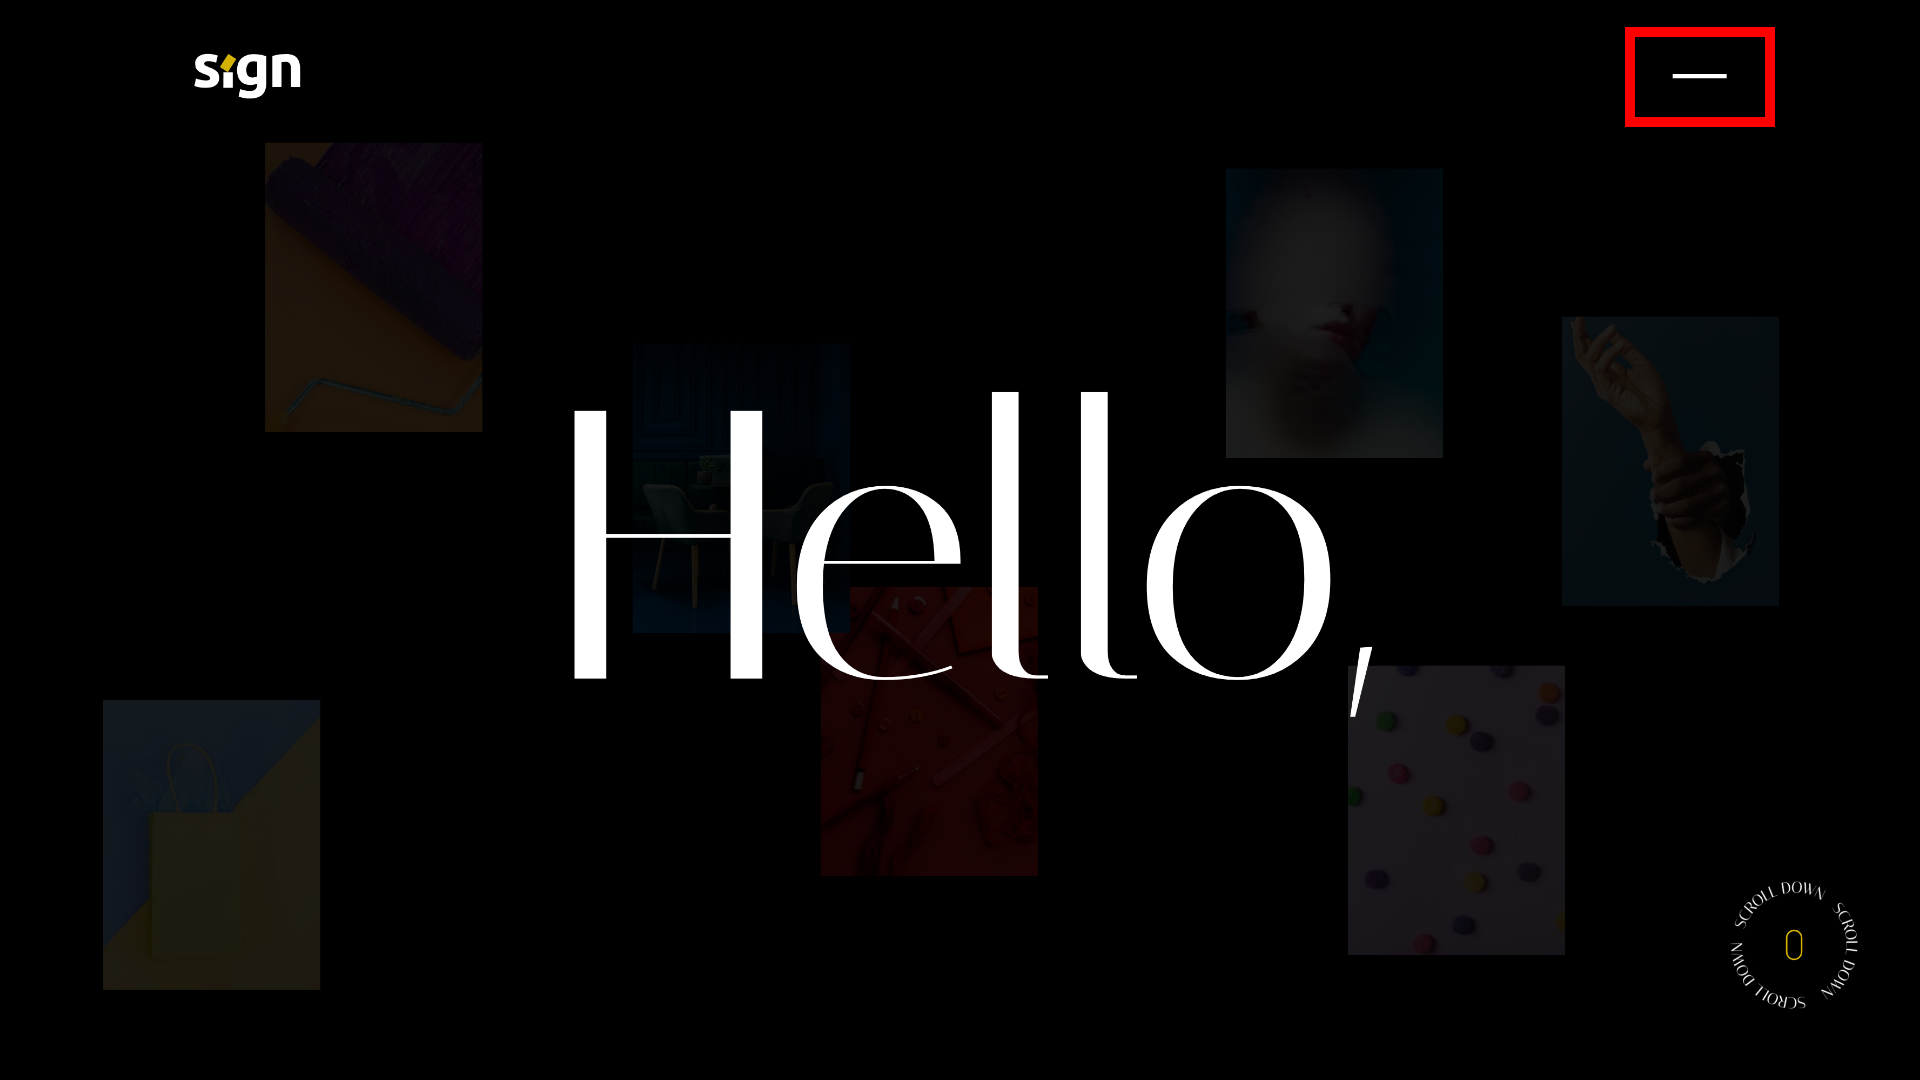
.btn-nav를 클릭하면 -에서 x로 바뀌고, 네비게이션 컨텐츠창이 내려온다.

.header .btn-nav{ display: flex; position: relative; flex-direction: column; justify-content: center; align-items: center; width: 80px; height: 80px; z-index: 9; }
.header .btn-nav span{ display: inline-block; position: absolute; transition: all .4s; box-sizing: border-box; top: 50%; transform: translateY(-50%); }
.header .first-on{ display: block; width: 50px; height: 4px; background-color: #fff; }
.header .on{ display: block; width: 50px; height: 4px; background-color: #fff; }
.btn-nav.active span:nth-of-type(1){ animation-name: active; animation-duration: 0.5s; animation-duration: leaner; animation-fill-mode: forwards; }
.btn-nav.active span:nth-of-type(2){ animation-name: move; animation-duration: 1.5s; animation-duration: leaner; animation-delay: 0s; animation-fill-mode: forwards; }
@keyframes active{
    from{ transform: 0; }
    to{ transform: translate3d(0px, 0px, 0px) scale3d(1, 1, 1) rotateX(0deg) rotateY(0deg) rotateZ(45deg) skew(0deg, 0deg); }
}
@keyframes move{
    from{ width: 0; height: 4px; transform: 0; }
    to{ width: 50px; height: 4px; transform:translate3d(0px, 0px, 0px) scale3d(1, 1, 1) rotateX(0deg) rotateY(0deg) rotateZ(-45deg) skew(0deg, 0deg); }
}

.menu{position: fixed; top: -100%; left: 0; width: 100%; height: 100%; background-color: rgba(0, 0, 0, 1); transition: 1s; z-index: 9;}
.menu.on{top: 0;}
.menu .menu-inner{z-index: 4; width: 100%; height: 100%; background-color: rgba(0, 0, 0, 0); flex-direction: column; justify-content: center; padding-left: 13vw; display: flex; position: relative;}
//컨텐츠창 내려옴
$('.btn-nav').click(function(){
$(this).toggleClass('active')
let on = $('.menu')
if (on.hasClass('on')) {
on.removeClass('on')
} else {
on.addClass('on')
}
})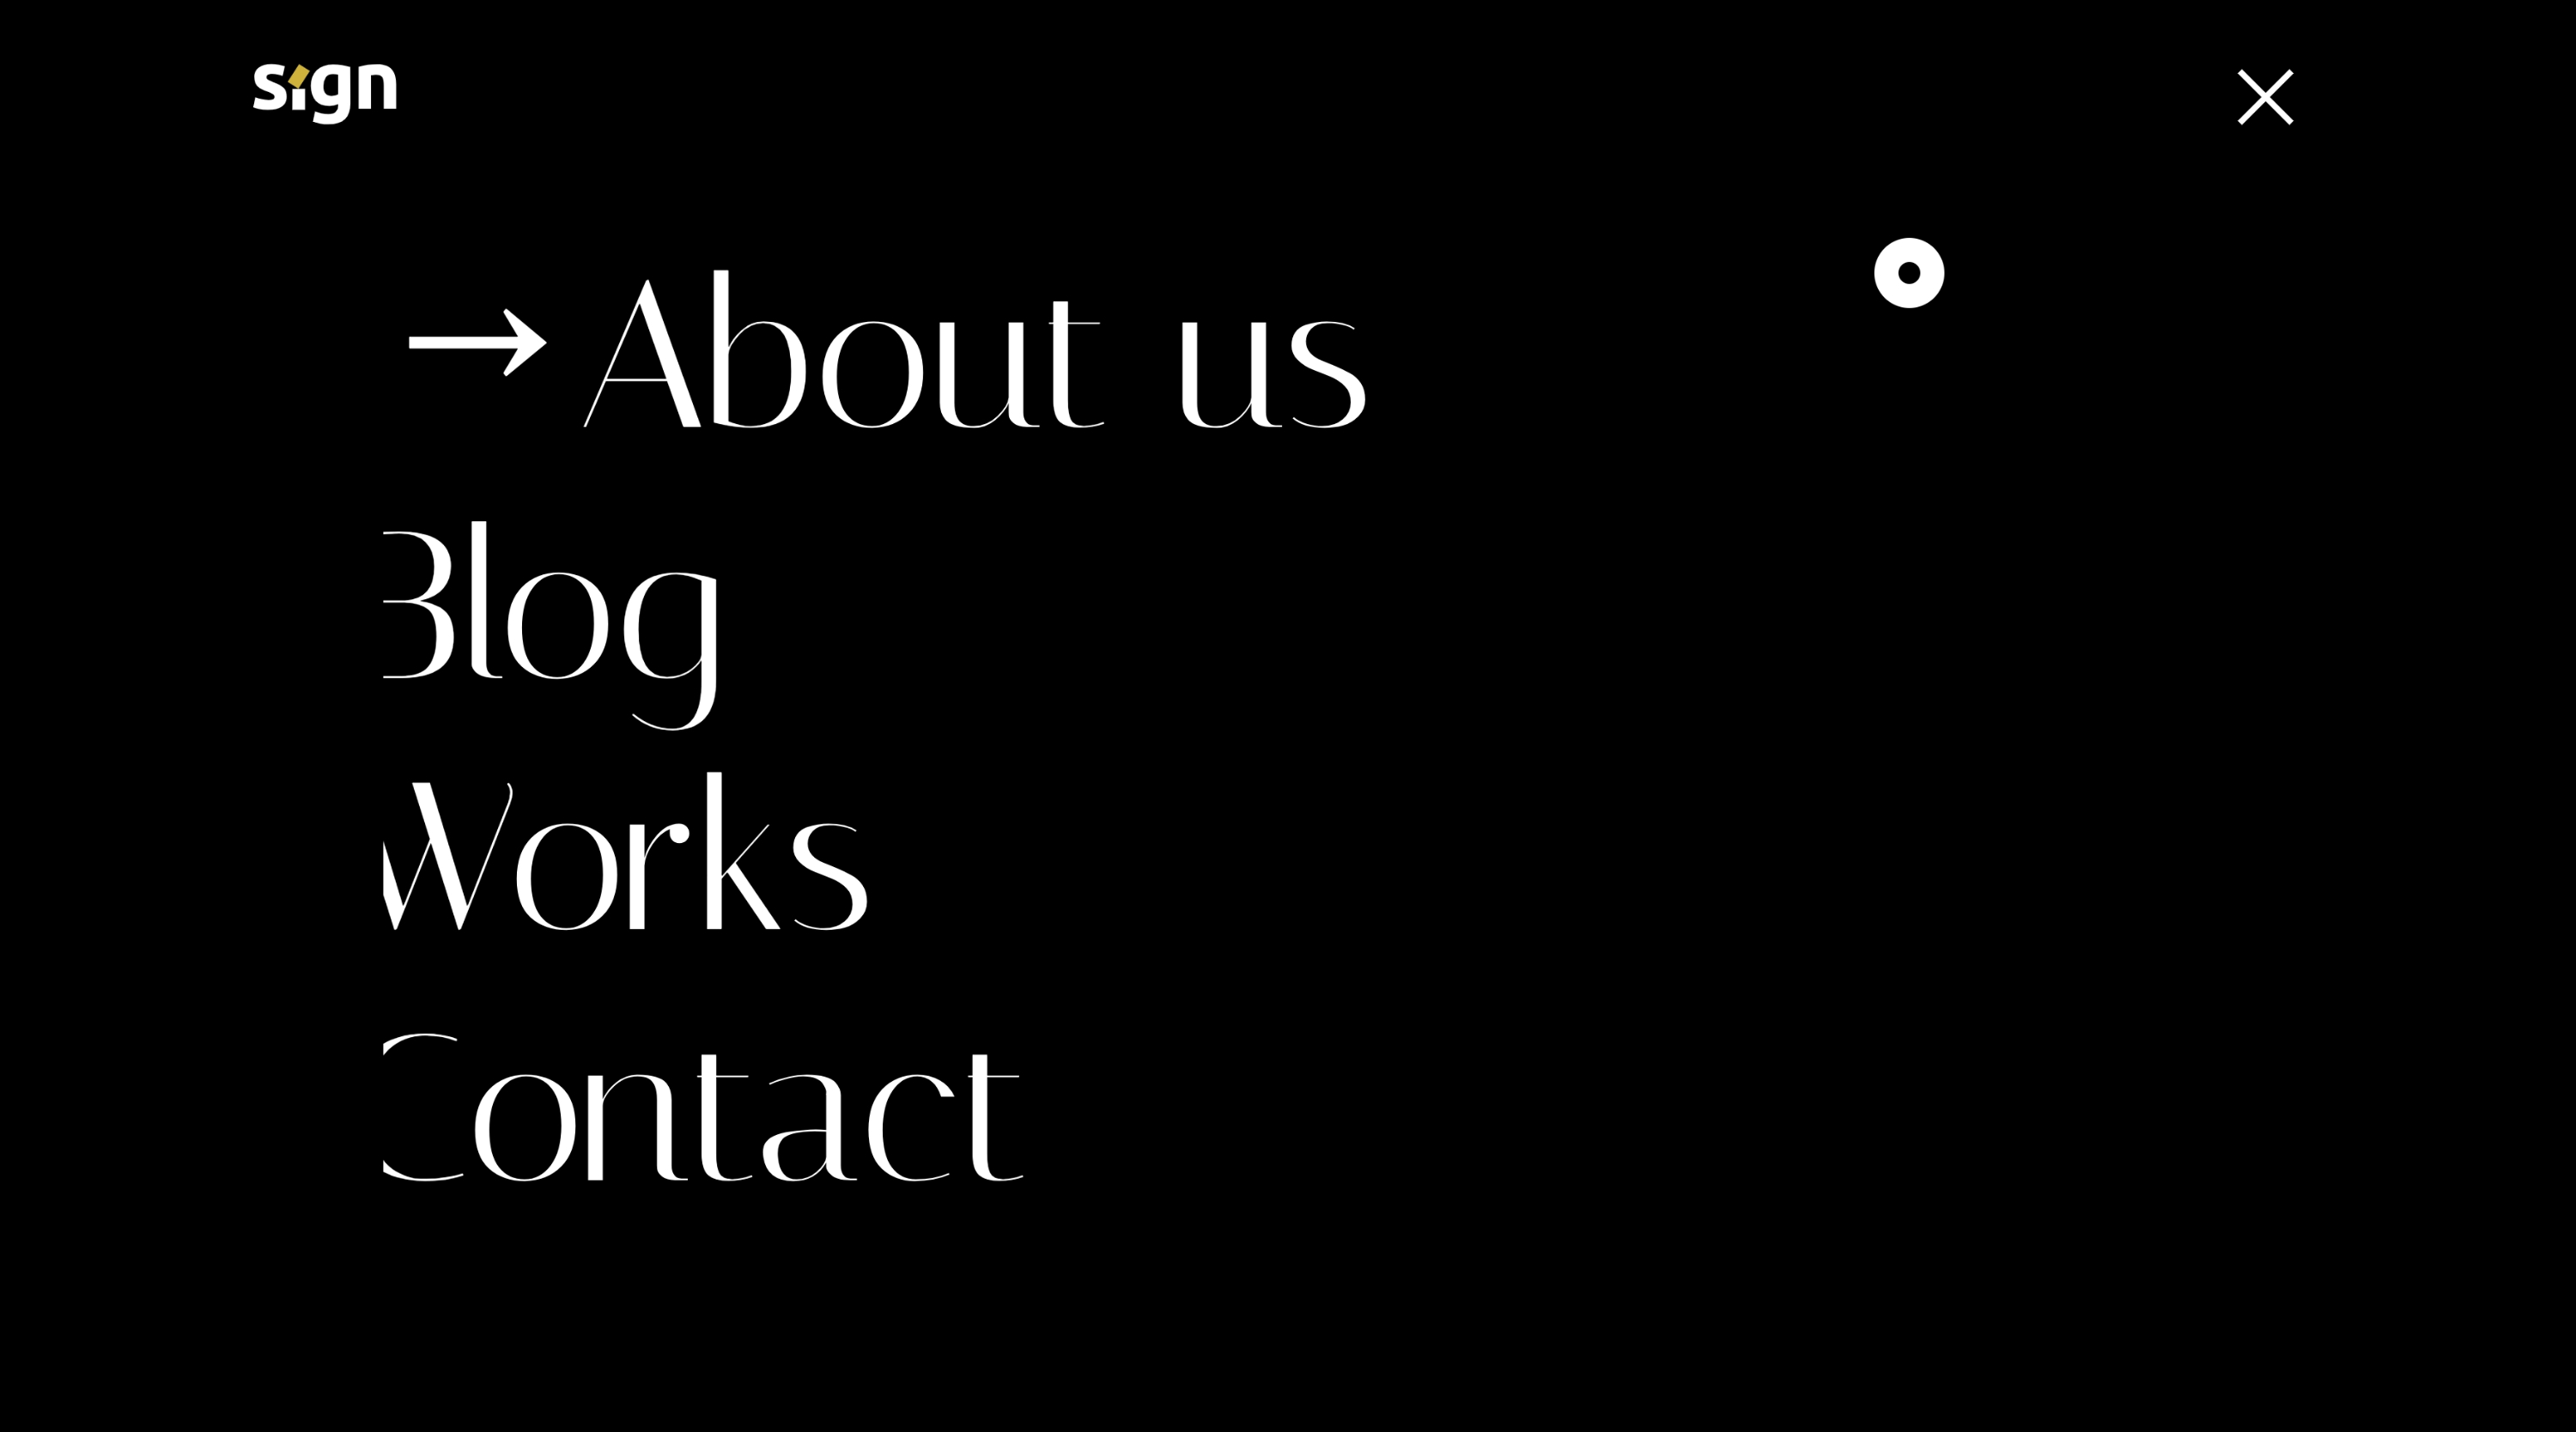
.menu .nav에 hover시 해당메뉴가 오른쪽으로 나오게 marginleft값을 지정한다.
hover하지않는다면, 다시 본래값인 왼쪽으로 들어가게 값을 지정한다.
.menu .nav{display: flex; font-size: 8vw; font-family: 'Italiana'; line-height: 1.2; margin-left: -6vw;}
.menu .menu-hide{background: #000; width: 15vw; height: 100%; margin: 0; z-index: 5; position: absolute;}
.menu .nav::before{content: "→ "; display: block; margin-right: 14px; transform: none;}$('.menu .nav').hover(
function(){
$(this).stop().animate({"marginLeft":"3vw"},500)
},
function(){
$(this).stop().animate({"marginLeft":"-6vw"},500)
})🔖 마우스 움직임에 따라 움직이는 마우스커서

두개의 동그라미를 만들어 화면에 고정되게끔 css로 설정한후, mousemove이벤트에 clientX,clientY로 현재보이는 화면 영역 내 마우스 좌푯값을 가져오게 설정한다.
.big-circle{ position: fixed; top: 0; left: 0; width: 48px; height: 48px; z-index: 20; pointer-events: none; margin-left: -24px; margin-top: -24px; background-color: rgba(0, 0, 0, 0); border-radius: 50%; backdrop-filter: invert(); will-change: transfrom; }
.small-circle{ position: fixed; top: 0; left: 0; width: 15px; height: 15px; z-index: 20; pointer-events: none; margin-left: -7.5px; margin-top: -7.5px; backdrop-filter: invert(); color: #fff; background-color: rgba(255, 255, 255, 0); border-radius: 50%; will-change: transfrom;}$(window).mousemove(function(e){
console.log('x'+ e.clientX + 'y'+ e.clientY) //내가 보고있는 화면의 좌표
gsap.to('.big-circle',1,{
x:e.clientX,
y:e.clientY
})
gsap.to('.small-circle',{
x:e.clientX,
y:e.clientY
})
})🔖 batch문 이용

ScrollTrigger.batch문을 사용하여 .sc-work p에 도달하면, p의 transform:translateY(100%)에서 transform:translateY(-100%)로 아래에서 위로 떠오르게 했다.
.sc-work{ margin-top: 100px; font-size: 6vw; line-height: 1; text-transform: uppercase; padding: 24px 15vw; }
.sc-work li{ overflow: hidden; transition: .3s; }
.sc-work p{ transform: translateY(100%); }
.sc-work .point{ display: block; content: ""; width: 30px; height: 30px; background-color: #d3b203; border-radius: 50%; margin-left: 9vw; }ScrollTrigger.batch(".sc-work p", {
start: "0 80%",
onEnter: batch => {//.sc-work p에 도달했을때 나오게 하기
gsap.to(batch, {
yPercent:-100,
});
},
});🔖 클릭시 해당 섹션으로 이동하는 네비게이션
이동할 영역과 네비게이션이 이어질 수 있게 네비게이션의 href에 이동영역 id를 넣고, 또다른 클래스명을 부여하여 스크립트에서 다루기 쉽게 초기작업을 해준다.
.scroll-move를 클릭하면 해당 id의 top값으로 이동하게끔 설정해준다.
🖍 이때, a태그로 묶었으니 클릭시 링크 이동방지를 위해 e.preventDefault()까지 넣어준다.
//이동할 영역
<div class="group-images">
	<a id="scroll1" href=""><img class="image-01" src="이미지"alt></a>
	<a id="scroll2" href=""><img class="image-02" src="이미지" alt></a>
	<a id="scroll3" href=""><img class="image-03" src="이미지" alt></a>
	<a id="scroll4" href=""><img class="image-04" src="이미지" alt></a>
</div>
//네비게이션 (클릭할 곳)
<ul class="group-nav">
	<a href="#scroll1" class="scroll-move">01</a>
	<a href="#scroll2" class="scroll-move">02</a>
	<a href="#scroll3" class="scroll-move">03</a>
	<a href="#scroll4" class="scroll-move">04</a>
</ul>$('.scroll-move').click(function(e){
e.preventDefault();
$('html,body').animate({scrollTop:$(this.hash).offset().top})
})🔖 each반복문 (+swiper)
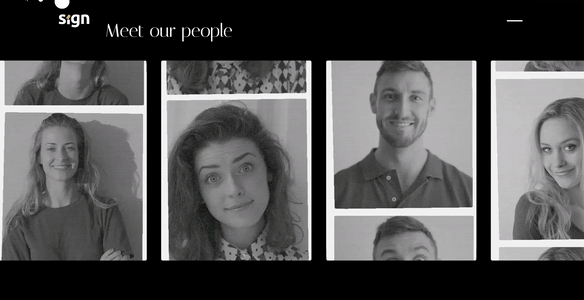
[each반복문]
🖍 기존이미지에 호버시 새이미지로 바뀌게 효과를 주려고한다.
먼저, 작업의 간편화를 위해 each반복문을 사용 할 것이다.
- 현재 반복되고 있는 요소의 src속성값을 가져와서 oriSrc 변수에 저장한다.
- oriSrc 값을 data-ori-src라는 이름의 데이터 속성으로 설정한다.
(html에 있는 data-new-src와 동일하게 밑작업해줌 -- data-ori-src="기존이미지")
.img-ori에 호버시
참고
🖍 img-ori에 호버시 새로운 이미지가 나오고, 호버에 벗어나면 기존이미지로 대체되게끔 설정해준다.
-
① data-new-src속성값을 newSrc 변수에 저장한 뒤, img-ori의 속성을 바꿔준다.
② .img-ori의 형제인 .intro-area의 내용이 호버시 나오게 설정 (Ypercent 및 opacity CSS속성을 설정) -
마우스가 요소를 벗어나면, 요소의 src속성을 원래의 값으로 되돌린다.
① .img-ori의 img태그 src속성이 data-ori-src인 기존 이미지로 변경
② .img-ori의 형제인 .intro-area의 내용의 스타일링도 복원 (Ypercent 및 opacity CSS속성을 설정)
<div class="swiper meet-slide" dir="ltr">
	<ul class="swiper-wrapper group-content">
		<li class="swiper-slide card-item">
			<div class="img-area">
				<img class="img-ori"
					src="기존이미지"
					data-new-src="바꿀이미지" alt>
			</div>
          	<div class="intro-area">
				<p>Lorel Stone <br><span>Social Media Menager</span></p>
			</div>
		</li>
	</ul>
</div>$('.sc-meet .group-content .img-ori').each(function(){
var oriSrc = $(this).attr('src')
$(this).data('ori-src',oriSrc)
})
//마우스호버시 이벤트
$('.sc-meet .group-content .img-ori').hover(function(){
var newSrc = $(this).data('new-src')
$(this).attr('src', newSrc)
$(this).parent().siblings().css({Ypercent:0,opacity:1})
},function(){
var oriSrc = $(this).data('ori-src')
$(this).attr('src',oriSrc)
$(this).parent().siblings().css({Ypercent:-150,opacity:0})[swiper]
var swiper1 = new Swiper('.meet-slide',{
	slidesPerView:'3.6',
	spaceBetween:25,
	speed:10000,
	loop:true,
	allowTouchMove:false,
	autoplay:{
		delay : 0,
		disableOnInteraction : false
	},
})
slidesPerView : '3.6' - 한 번에 보여지는 슬라이드의 개수를 설정 (브라우저에 3.6만큼 보임)
spaceBetween : 25 - 슬라이드 간의 간격을 설정 (25px의 간격)
speed : 10000 - 슬라이드가 자동으로 전환되는 속도를 설정 (10초마다 슬라이드 전환)
loop : true - 슬라이드 쇼가 무한 루프로 동작하도록 설정 (마지막 슬라이드에 도달했을 때 다시 첫 번째 슬라이드로 이동)
allowTouchMove : false - 터치 슬라이드 기능을 비활성화 (사용자가 터치로 슬라이드 이동불가)
autoplay : { delay: 0, disableOnInteraction: false } - 자동 재생 옵션을 설정
① delay: 0 - 슬라이드간의 전환지연시간을 0으로 설정하여 즉시 전환
② disableOnInteraction: false - 사용자의 상호작용에 의해 자동재생이 비활성화되지않도록 설정
🔖 입력란 공란일때, alert문 띄우기
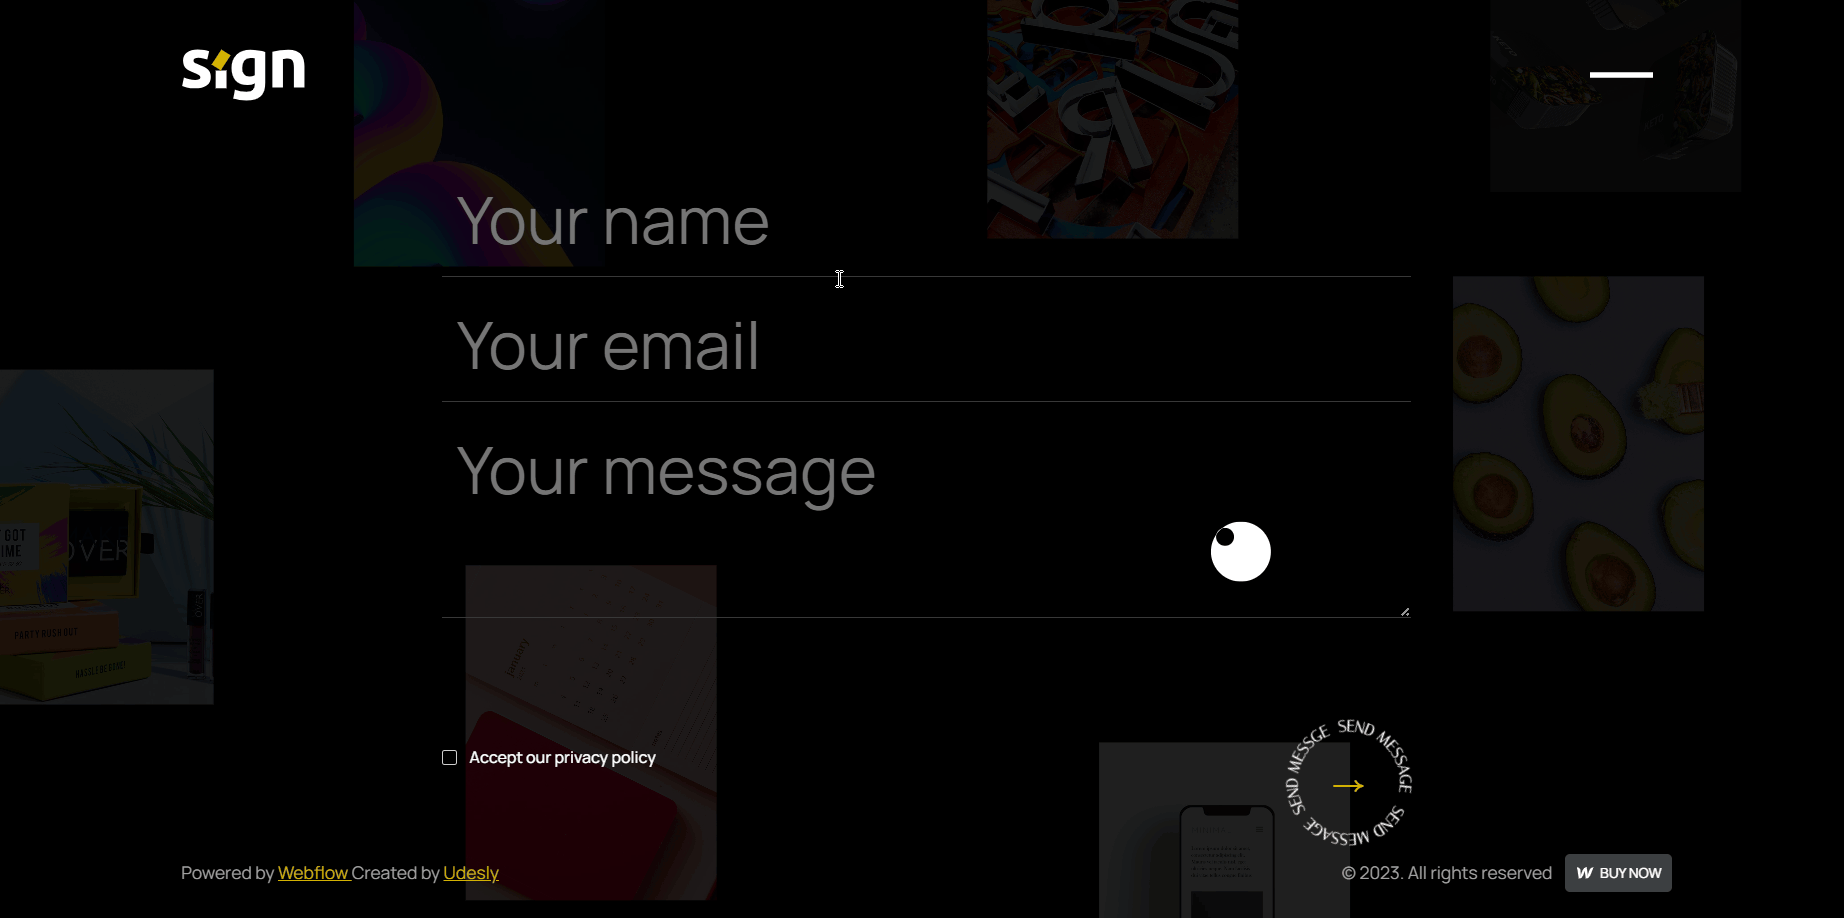
🖍 submit버튼을 클릭했을때, email이 공란이면 alert문을 띄우기
① submit버튼에 함수명을 정해주고 (erchk()-에러체크)
② if(document.getElementById('email').value == "")
-만약에 id의 email의 값이 공란("")과 같다면, alert창을 띄우고
③ else{document.form.submit();}
-만약에 id의 email의 값이 공란("")과 같지않다면, form을 제출함 (값이 있음)
<div class="form">
	<form method="get" action="" name="form">
		<input class="common-input" id="name" type="text" placeholder="Your name">
		<input class="common-input" id="email" type="email" placeholder="Your email" required="required" >
		<textarea class="common-input" id="message" name="field"  maxlength="5000" placeholder="Your message"></textarea>
	</form>
	<div class="spacer-medium"></div>
	<div class="row">
		<label for="" class="common-checkbox">
			<input type="checkbox" class="checkbox" id="chk-box">
			<label for="chk-box" class="comm-chk"></label>
			<span>Accept our privacy policy</span>
		</label>
		<div class="submit-button">
			<button type="submit" onclick="erchk()">→</button>
			<img src="이미지" alt>
		</div>
	</div>
</div>
function erchk(){
if(document.getElementById('email').value == ""){
alert("이 입력란을 작성하세요.");
return false;
}else{
document.form.submit();
}
}참고사이트
https://stickode.tistory.com/762
https://hianna.tistory.com/493
https://gsap.com/community/forums/topic/27991-scrolltrigger-batch-and-child-animations/
https://devscb.tistory.com/163
https://webclub.tistory.com/455
https://ifuwanna.tistory.com/195
https://enai.tistory.com/33
https://www.codingfactory.net/10208
https://amongthestar.tistory.com/107