1. TableView Cell에 클릭 이벤트 만들기
func tableView(_ tableView: UITableView, didSelectRowAt indexPath: IndexPath) {
        tableView.deselectRow(at: indexPath, animated: true)

        print("tableview cell selected!")
        print(indexPath)
    }
didSelectRowAt: 매개변수를 가지고 있는 tableView 함수를 선언하면 touch up inside 이벤트가 cell위에서 발생할 때, 해당 cell의 indexPath를 반환하고 수행할 동작들을 작성할 수 있더라. 이를 사용해서 현재 만들고있는 할 일 목록 어플의 할 일 부분을 터치하면 세부내용을 볼 수 있는 DetailView를 불러낼 수 있게 되었다.
코드에는 작성하지 않고, 할 일을 표시하는 UILabel과 DetailView사이에 segue를 설정해서 뷰의 이동을 구현했다.
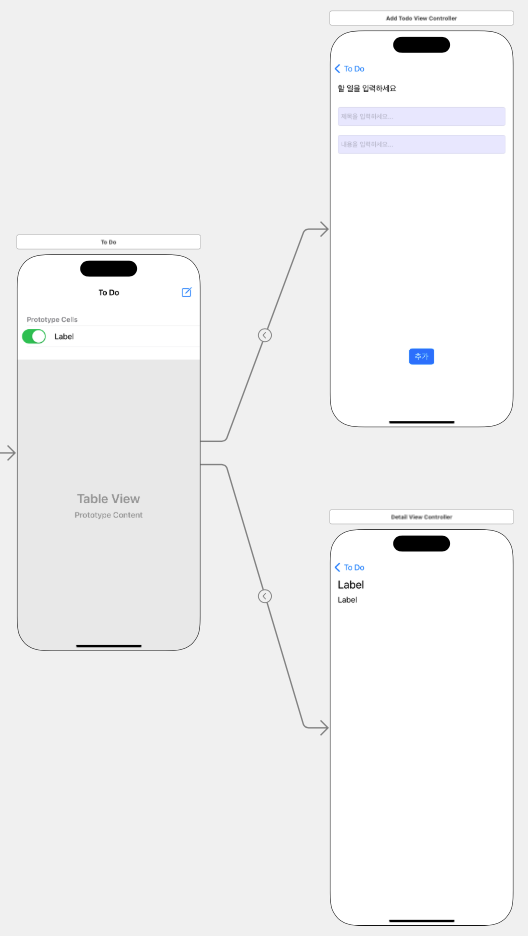
현재는 위의 사진과 같이 설정이 되어있는 내 할일 어플...
2. TableViewCell과 해당 Cell에 할당된 데이터 삭제
func tableView(_ tableView: UITableView, editingStyleForRowAt indexPath: IndexPath) -> UITableViewCell.EditingStyle {
        return .delete
    }

func tableView(_ tableView: UITableView, commit editingStyle: UITableViewCell.EditingStyle, forRowAt indexPath: IndexPath) {
    if editingStyle == .delete {
        tableView.beginUpdates()
        MainViewController.todoList.remove(at: indexPath.row)
        tableView.deleteRows(at: [indexPath], with: .fade)
        tableView.endUpdates()
    }
}
코드 상단의 tableView 함수에서는 UITableViewCell.EditingStyle을 UITableViewCell.EditingStyle.delete 로 반환한다.(EditingStyle은 none, delete, insert 세 가지가 있음.)
하단의 tableView 함수에서 editingStyle이 .delete일 때, tableView.beginUpdates() 메소드로 하여금 테이블 뷰의 데이터를 편집하겠다는 신호를 주고 그 아래 코드를 사용하여 선택된 indexPath.row를 인덱스로 가지는 배열의 원소값을 삭제한다.(데이터 삭제)
그 후에 tableView.deleteRows(at: [indexPath], with: .fade) 메소드로 테이블 뷰 자체에 있는 cell을 .fade 효과로 삭제한다.
이 후 tableView.endUpdates() 메소드로 업데이트 종료 신호를 보내주면 끝!
tableView.beginUpdates() 메소드는 삽입, 삭제, 선택 등의 행위를 수행할 예정일 때 호출하면 되는 메소드이다.
tableView.endUpdates() 메소드는 모든 행위가 끝나고 호출하는 메소드.
