위 링크의 튜토리얼대로 REST API 디자인을 해보았다.
- 먼저 터미널에서 strapi 설치를 한다.
npx create-strapi-app@latest my-project --quickstart-
자동으로 열리는 회원가입 창에서 가입을 한다.
http://localhost:1337/admin
이제 관리자 패널에 접속할 수 있게 된다. -
Content-Type Builder 탭에서 새 Collection Type을 만든다.
Create a "Restaurant" collection type
Go to Plugins Content-type Builder icon Content-type Builder (opens new window)in the main navigation.
Click on Create new collection type.
TypeRestaurantfor the Display name, and click Continue.
Click the Text field.
Typenamein the Name field.
Switch to the Advanced Settings tab, and check the Required field and the Unique field settings.
Click on Add another field.
Choose the Rich text field.
Type description under the Name field, then click Finish.
Finally, click Save and wait for Strapi to restart.
Create a "Category" collection type
Go to Plugins Content-type Builder icon Content-type Builder (opens new window)in the main navigation.
Click on Create new collection type.
TypeCategoryfor the Display name, and click Continue.
Click the Text field.
Typenamein the Name field.
Switch to the Advanced Settings tab, and check the Required field and the Unique field settings.
Click on Add another field.
Choose the Relation field.
On the right side, click the Category relational fields box and select "Restaurant".
In the center, select the icon that represents "many-to-many" icon many-to-many. The text should readCategories has and belongs to many Restaurants.
- 만든 Collection type에 맞는 entry를 만든다.
Create an entry for the "Restaurant" collection type
Go to Content Manager icon Content Manager > Collection types - Restaurant (opens new window)in the navigation.
Click on Add new entry.
Type the name of your favorite local restaurant in the Name field. Let's say it'sBiscotte Restaurant.
In the Description field, write a few words about it. If you're lacking some inspiration, you can use Welcome to Biscotte restaurant! Restaurant Biscotte offers a cuisine based on fresh, quality products, often local, organic when possible, and always produced by passionate producers.
Click Save.
나는 Restaurant collection에 knotted라는 entry를 만들었다.
- Collection types - Category에는 카테고리를 만든다.
create 2 categories:
Click on Add new entry.
Type French Food in the Name field.
Click Save.
Go back to Collection types - Category, then click again on Add new entry.
Type Brunch in the Name field, then click Save.
-
step 4에서 만든 entry에 들어가서 방금 만든 category중 알맞은 것을 select한다.
-
Roles & Permissions를 설정해준다.
API를 통해 데이터를 조회할 수 있게 권한을 설정하는 일이다.
Click on General Settings icon Settings at the bottom of the main navigation.
Under Users & Permissions Plugin, choose Roles (opens new window).
Click the Public role.
Scroll down under Permissions.
In the Permissions tab, find Restaurant and click on it.
Click the checkboxes next to find and findone.
Repeat with Category: click the checkboxes next to find and findone.
Finally, click Save.
-
만든 Collections를 각각의 탭에서
publish해준다. -
http://localhost:1337/api/`collection이름` 에서 조회할 수 있다.

문제(였던 것)들
- 뭐가 잘못된 건지, collections만 publish 해주면 되는 줄 알았는데
데이터 조회가 되지 않아서 entry 또한 publish 해주니까 그제서야 조회가 됐다.
- 구글링 했을 때는 postman으로도 확인이 가능한 것처럼 보이는데, 내가 postman 웹 앱에서 GET method로 요청을 보내면
Cloud Agent Error: Can not send requests to localhost. Select a different agent.
라고 나왔다.
현재 웹 앱을 사용 중이니 desktop agent를 사용하라는 것 같아서 postman desktop app 을 다운로드했다.
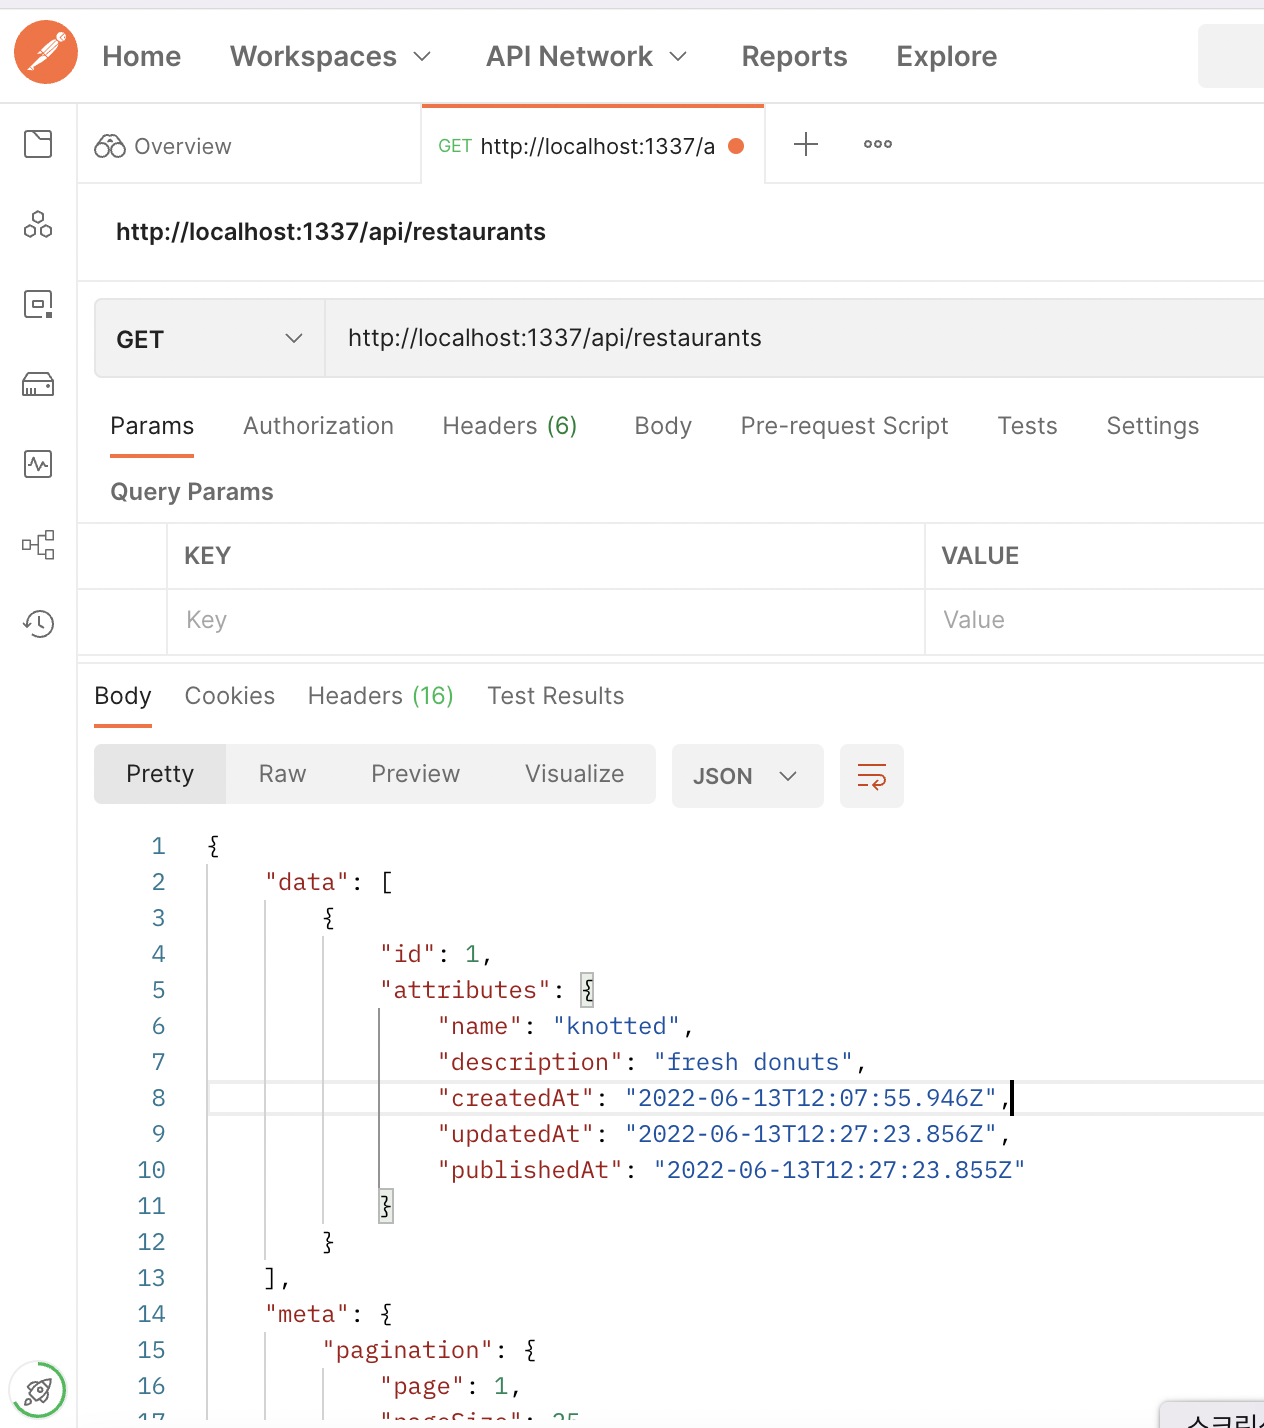
두둥. 잘 나온다!