이 글은 기존 운영했던 WordPress 블로그인 PyxisPub: Development Life (pyxispub.uzuki.live) 에서 가져온 글 입니다. 모든 글을 가져오지는 않으며, 작성 시점과 현재 시점에는 차이가 많이 존재합니다.
작성 시점: 2017-08-30
Android Oreo에서 새로 나온 기능 중 Fonts in XML (커스텀 폰트 in XML)이 있다.
즉, 다른 리소스 (.jpg, .png 와 같은 이미지 리소스, strings.xml 같은 문자열 리소스 등) 과 같이 폰트 자체를 그 하나의 리소스로 취급, 폴더로 관리할 수 있게 하는 것이다.
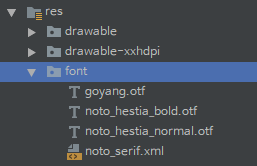
font 폴더를 만들고 그 안에 ttf, otf 폰트 파일을 넣으면 R.font.goyang 로서 바로 사용할 수 있다.
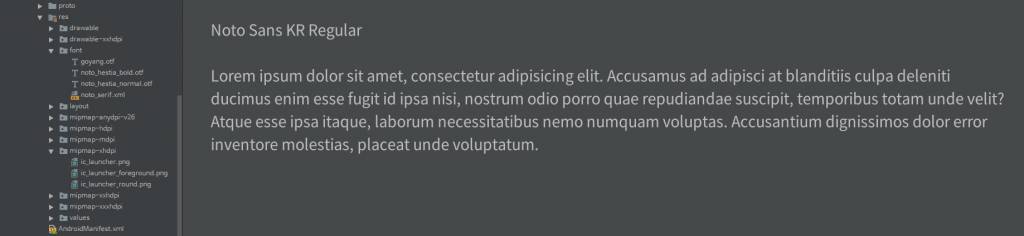
파일을 더블 클릭하면 익숙한 로렘 입숨을 보여주는데, 표시되는 곳에 추가로 글자를 작성할 수 있어 언어가 제대로 표시하는지도 테스트 할 수 있다.
사용법도 매우 간단하다.
<TextView
        android:layout_width="wrap_content"
        android:layout_height="wrap_content"
        android:fontFamily="@font/goyang"/>
또는
Typeface typeface = getResources().getFont(R.font.goyang);
textView.setTypeface(typeface);
이런 식으로, 더 이상 assets에 넣고 AssetsManager로부터 불러와서 LruCache에 넣고 캐시를 해서 적용시키는 그런 작업이 필요 없게 되었다.
지금 하는 프로젝트는 기본 앱 폰트가 노토 산스였는데, android:fontFamily 를 사용하면 스타일에 정의하는 것 만으로도 전체에 적용될 것 같았다.
0. 들어가기 앞서..
구글이 배포하는 노토 산스를 그대로 넣으면 앱의 용량이 매우 늘어나게 된다.
안 그래도 PDF 모듈 등 다소 JNI 떡칠 + protobuf 떡칠이 되어있어 앱의 용량이 기하급수적인데, 여기에 폰트까지 합치면... 생각하기도 무섭다.
그래서, 한글 웹 폰트용으로 경량화된 NotoSansKR-Hestia 의 otf 파일만 가져왔다. (실제는 한글 웹 폰트 경량화해 사용하기 에서 온 것이다.)
어디선가 파란 줄의 여신님이 벨 군~ 하면서 달려오는 것 같지만, 무시하기로 한다.
1. Noto Sans Font-Family 만들기
<?xml version="1.0" encoding="utf-8"?>
<font-family xmlns:android="http://schemas.android.com/apk/res/android"
             xmlns:app="http://schemas.android.com/apk/res-auto"
             xmlns:tools="http://schemas.android.com/tools">
    <font
        android:font="@font/noto_hestia_normal"
        android:fontStyle="normal"
        android:fontWeight="400"
        app:font="@font/noto_hestia_normal"
        app:fontStyle="normal"
        app:fontWeight="400"
        tools:ignore="UnusedAttribute"/>

    ...
</font-family>
Android Oreo 보다 낮은 버전에서도 폰트를 제대로 불러오기 위해, 별도의 app namespace를 사용했다. (구글의 설계상 API 14부터 되는 것 같다.)
android:font 에는 사용할 실제 폰트 리소스를, fontStyle에는 해당 폰트 스타일(normal 등) , fontWeight는 글꼴의 굵기이다.
적절히 이 3개 값을 설정하고 똑같은 값을 app namespace에도 대응시킨다.
이렇게 사용할 폰트를 정리하고, styles.xml을 수정하면 된다.
2. Styles.xml 적용하기
적용시킬 위젯은 총 5개로, 텍스트뷰, 버튼, 에디트 텍스트, 라디오 버튼, 체크 박스 등이다.
각각의 DeviceDefault 테마를 상속받아 fontFamily를 적용시킨다.
<style name="NotoSansTextViewStyle" parent="@android:style/Widget.DeviceDefault.TextView">
        <item name="android:fontFamily">@font/noto_serif</item>
</style>

<style name="NotoSansButtonStyle" parent="@android:style/Widget.DeviceDefault.Button.Borderless">
        <item name="android:fontFamily">@font/noto_serif</item>
</style>

<style name="NotoSansEditTextStyle" parent="@android:style/Widget.DeviceDefault.EditText">
        <item name="android:fontFamily">@font/noto_serif</item>
</style>

<style name="NotoSansRadioButtonStyle" parent="@android:style/Widget.DeviceDefault.CompoundButton.RadioButton">
        <item name="android:fontFamily">@font/noto_serif</item>
</style>

<style name="NotoSansCheckboxStyle" parent="@android:style/Widget.DeviceDefault.CompoundButton.CheckBox">
        <item name="android:fontFamily">@font/noto_serif</item>
</style>
3. 테마 Styles.xml 적용하기
<!-- Base application theme. -->
<style name="AppTheme" parent="Theme.AppCompat.NoActionBar">
 <!-- Customize your theme here. -->
 <item name="colorPrimary">@color/colorPrimary</item>
 <item name="colorPrimaryDark">@color/colorPrimaryDark</item>
 <item name="colorAccent">@color/colorAccent</item>
 <item name="android:buttonStyle">@style/NotoSansButtonStyle</item>
 <item name="android:editTextStyle">@style/NotoSansEditTextStyle</item>
 <item name="android:radioButtonStyle">@style/NotoSansRadioButtonStyle</item>
 <item name="android:checkboxStyle">@style/NotoSansCheckboxStyle</item>
 <item name="android:textViewStyle">@style/NotoSansTextViewStyle</item>
</style>
각각 buttonStyle, editTextStyle, radioButtonStyle, checkboxStyle, textviewStyle 에 위에 만든 스타일을 대응시킨다.
마무리
이거 하나 때문에 프로젝트 시작 단계에서 베타 버전의 Android Oreo를 타겟으로 하고 개발했던 것은 숨겨진 진실이기도 하다.