Sigmoid
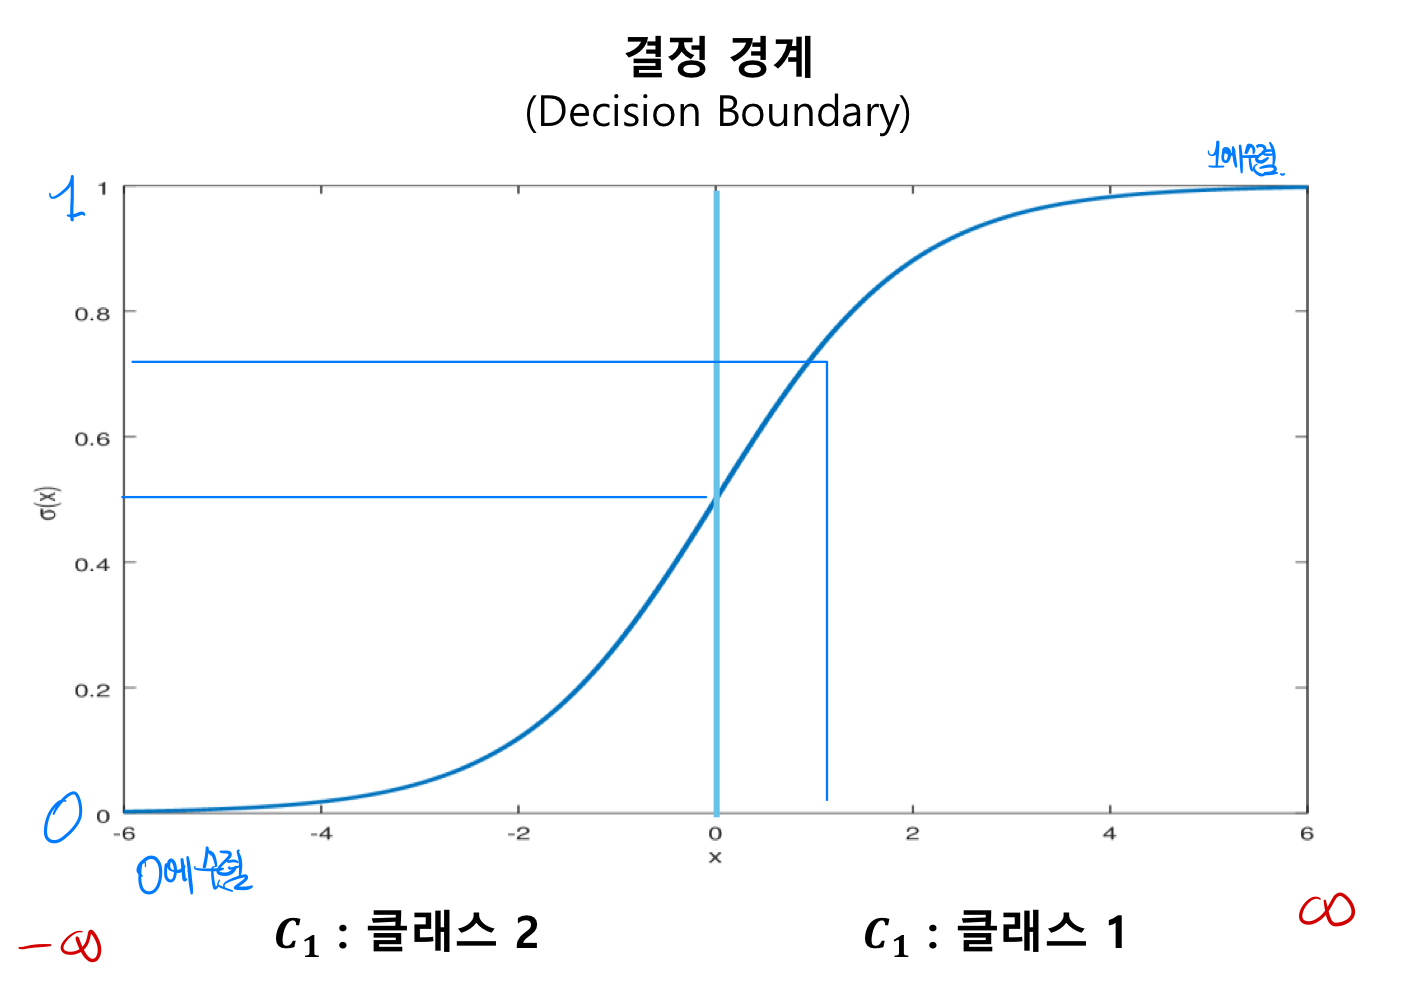
Sigmoid Function이란? 로지스틱 함수에서 선형예측 결과를 확률로 변환하는 함수로, 0과 1 사이의 값으로 값을 변환해준다.
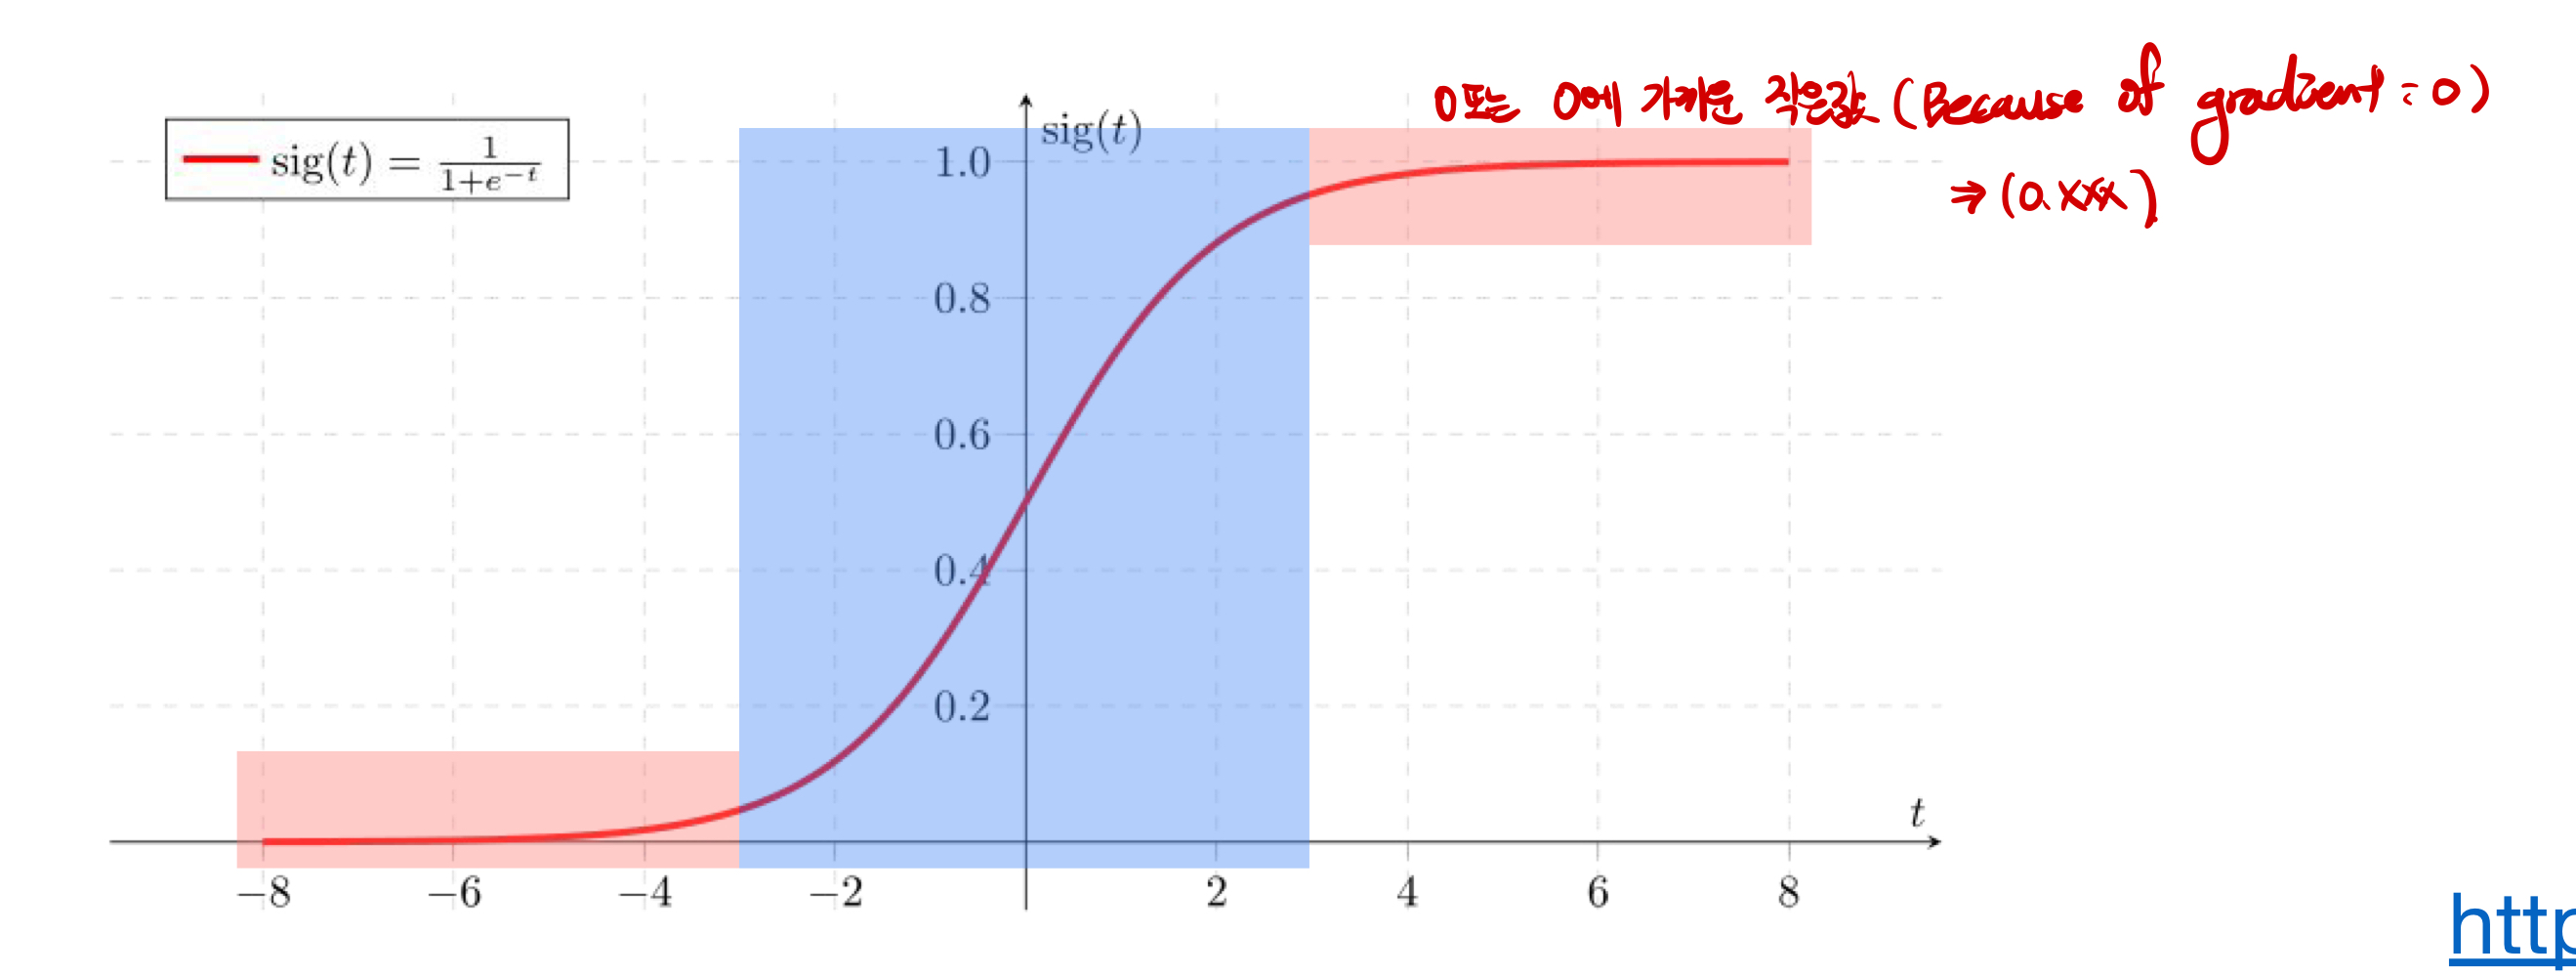
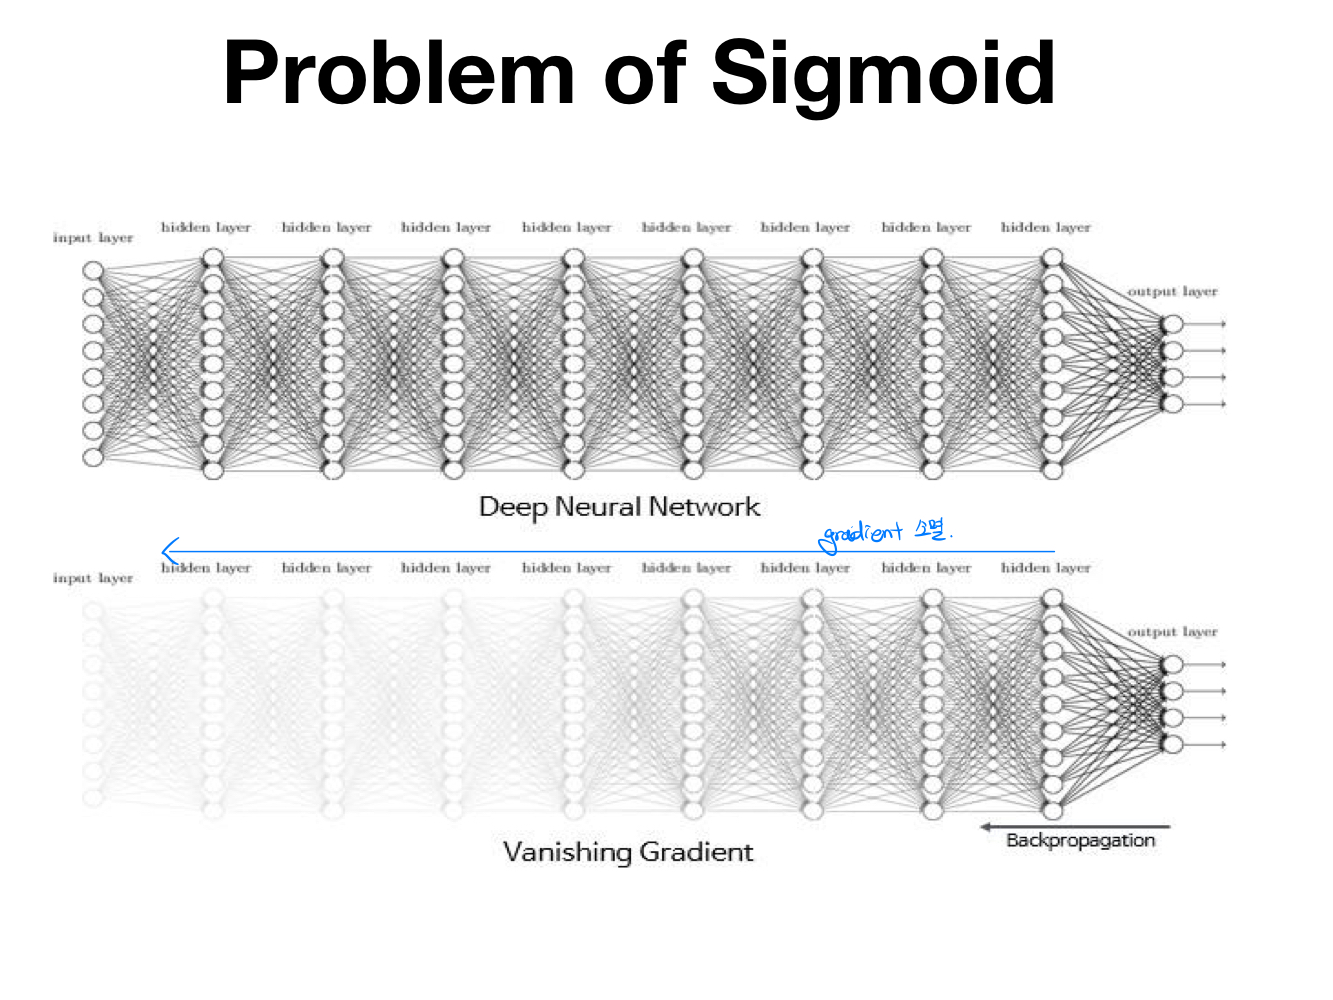
- 문제점: Sigmoid 함수를 사용하면 gradient 함수를 이용해서 back propagation을 진행할때, sigmoid함수를 미분을 해야한다. 이때, 아래 그래프에서 파란색 부분이외에 빨간색부분을 보면 기울기가 0에 가까워질 수 있다. 즉 계속 back propagation을 진행하게 되면, activation function * gradient미분값이 되어 초반의 gradient값이 점차 소멸될 가능성이 크다.
ReLU Function
ReLU function이란,
f(x) = max(0,x)함수로, 정의해보면 "어떤 x가 0보다 크면 x가 출력, 어떤 x가 0보다 작으면 0으로 출력"하는 함수를 의미한다.그래프는 아래와 같다.
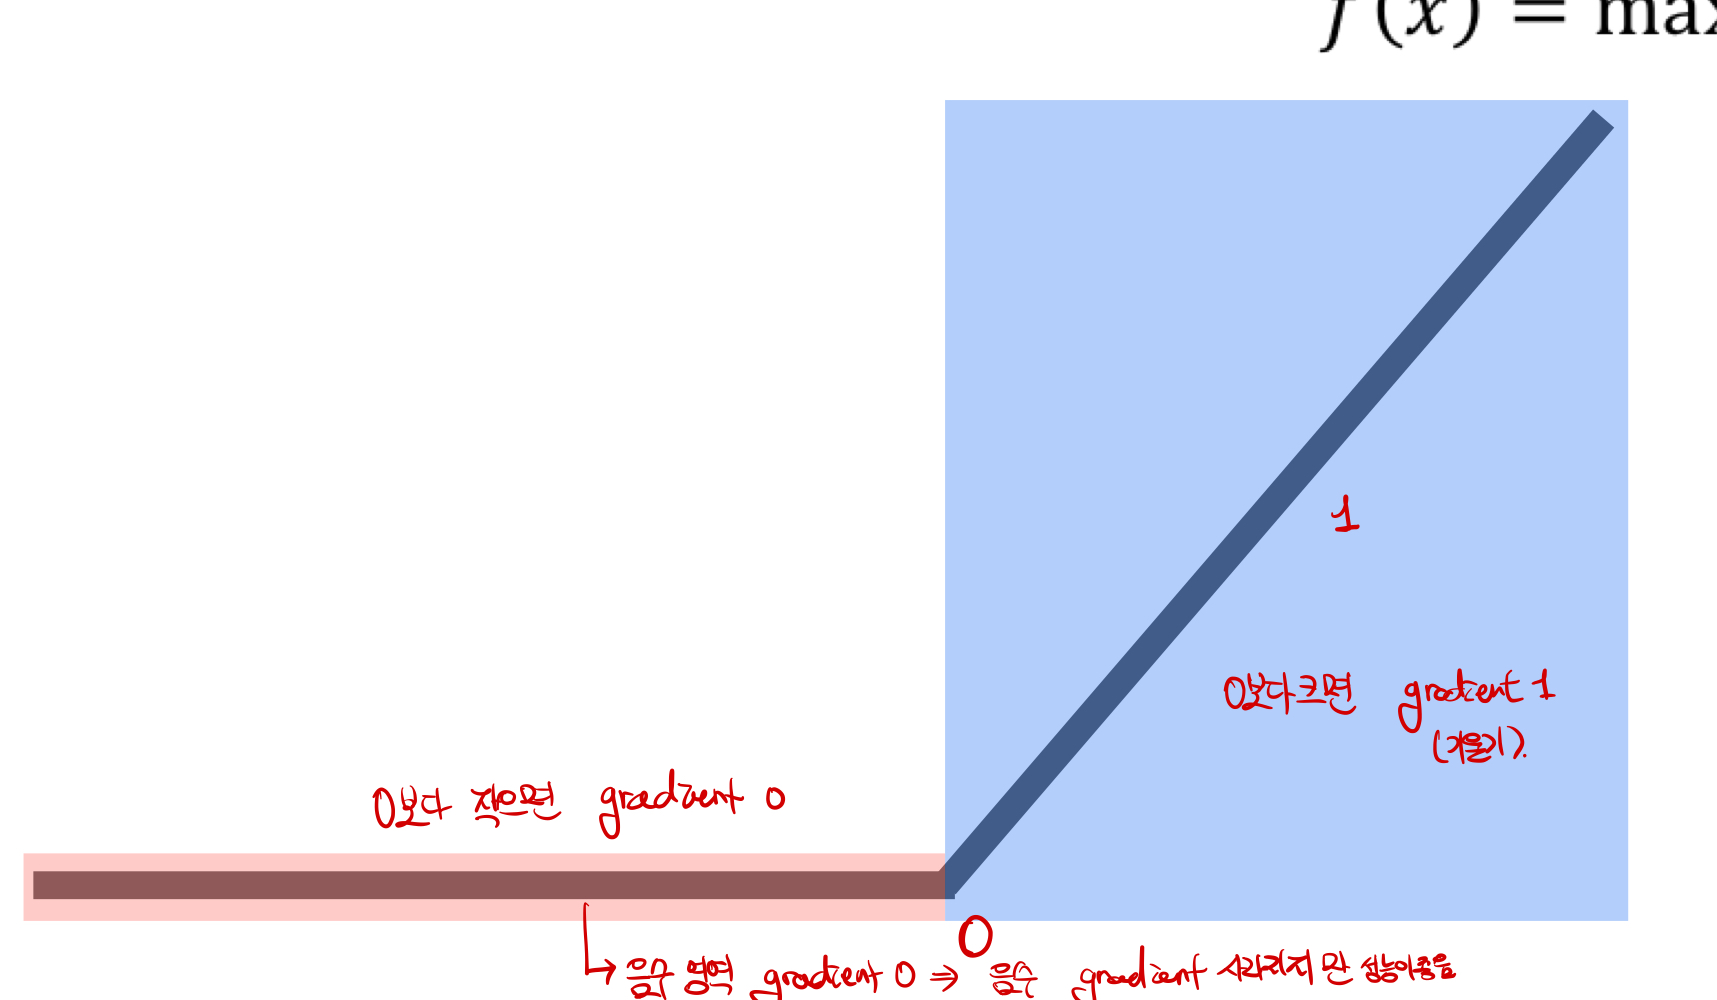
- 장점: 미분값이 0이상의 기울기 값이 되어, 0이상의 값에 모델의 성능을 비약적으로 상승 시킬 수 있었다.
- 이 외의 여러 모델 함수들
torch.nn.sigmoid(x): 로지스틱 함수 모델에서 사용하는 함수
torch.nn.tanh()
torch.nn.relu(x): sigmoid함수의 문제점을 보완한 함수
torch.nn.leaky_relu(x,0.01): 음수의 값 부분을 변형해, 음수의 변수인 값이 와도 활용가능
- 코드 예제: Mnist-nn
# Lab 10 MNIST and softmax
import torch
import torchvision.datasets as dsets
import torchvision.transforms as transforms
import random

device = 'cuda' if torch.cuda.is_available() else 'cpu'

# for reproducibility
random.seed(111)
torch.manual_seed(777)
if device == 'cuda':
    torch.cuda.manual_seed_all(777)

# parameters
learning_rate = 0.001
training_epochs = 15
batch_size = 100

# MNIST dataset
mnist_train = dsets.MNIST(root='MNIST_data/',
                          train=True,
                          transform=transforms.ToTensor(),
                          download=True)

mnist_test = dsets.MNIST(root='MNIST_data/',
                         train=False,
                         transform=transforms.ToTensor(),
                         download=True)

# dataset loader
data_loader = torch.utils.data.DataLoader(dataset=mnist_train,
                                          batch_size=batch_size,
                                          shuffle=True,
                                          drop_last=True)

# nn layers
linear1 = torch.nn.Linear(784, 256, bias=True)
linear2 = torch.nn.Linear(256, 256, bias=True)
linear3 = torch.nn.Linear(256, 10, bias=True)
relu = torch.nn.ReLU()

# Initialization
torch.nn.init.normal_(linear1.weight)
torch.nn.init.normal_(linear2.weight)
torch.nn.init.normal_(linear3.weight)

# model
model = torch.nn.Sequential(linear1, relu, linear2, relu, linear3).to(device)

# define cost/loss & optimizer
criterion = torch.nn.CrossEntropyLoss().to(device)    # Softmax is internally computed.
optimizer = torch.optim.Adam(model.parameters(), lr=learning_rate)

total_batch = len(data_loader)
for epoch in range(training_epochs):
    avg_cost = 0

    for X, Y in data_loader:
        # reshape input image into [batch_size by 784]
        # label is not one-hot encoded
        X = X.view(-1, 28 * 28).to(device)
        Y = Y.to(device)

        optimizer.zero_grad()
        hypothesis = model(X)
        cost = criterion(hypothesis, Y)
        cost.backward()
        optimizer.step()

        avg_cost += cost / total_batch

    print('Epoch:', '%04d' % (epoch + 1), 'cost =', '{:.9f}'.format(avg_cost))

print('Learning finished')

# Check Accuracy
with torch.no_grad():
    X_test = mnist_test.test_data.view(-1, 28 * 28).float().to(device)
    Y_test = mnist_test.test_labels.to(device)

    prediction = model(X_test)
    correct_prediction = torch.argmax(prediction, 1) == Y_test
    accuracy = correct_prediction.float().mean()
    print('Accuracy:', accuracy.item())

    # Get one and predict
    r = random.randint(0, len(mnist_test) - 1)
    X_single_data = mnist_test.test_data[r:r + 1].view(-1, 28 * 28).float().to(device)
    Y_single_data = mnist_test.test_labels[r:r + 1].to(device)

    print('Label: ', Y_single_data.item())
    single_prediction = model(X_single_data)
    print('Prediction: ', torch.argmax(single_prediction, 1).item())
torch.optim
torch.optim이라는 곳에서 다양한 optimization algorithm을 제공함. 상황과 목적에 따라 다른 것들이 쓰임
ex)torch.optim.SGD,torch.optim.Adadeltatorch.optim.Adagard,torch.optim.Adamtorch.optim.SparseAdam,torch.optim.Adamax,torch.optim.SPGD,torch.optim.LBFGS,torch.RMSprop,torch.optim.Rpop등
- Optimzer 의 발달 계보
- GD: 모든 자료를 다 검토해서 내 위치의 산 기울기를 계산해서 갈 방향을 찾겠다.
- Momntum: 스텝 계산해서 움직힌 후, 아까 내려오던 관성 방향 또가자
- NAG: 일단 관성 방향 먼저 움직이고, 움직인 자리에 스템을 계산하니 빠르더라.
- NADAM: Adam에 Momentum대신 NAG를 붙이자
- SGD: 전부다봐야 한걸음은 너무 오래 걸리니가 조금만 보고 빨리 판단한다. 같은시간에 더 많이 간다.
- Adagrad: 안 가본 곳은 성큼 빠르게 걸어 훓고 많이 가본 곳은 잘 아니까 갈수록 보폭을 줄여 세밀히 탐색
- RMSProp: 보폭을 줄이는 건 좋은 데 이전 상황봐가며 하자
- AdaDelta:종종걸음 너무 작아져서 정지하는 걸 막아보자
- Adam: RMSProp+Momentuam, 방향도 사이즈도 적절하게


사회적 가치를 실현하는 프로그래머