Lifecycle(앱 상태) 이벤트 2편
Lifecycle(앱 상태) 이벤트 1편
Lifecycle(앱 상태) 이벤트 3편
Lifecycle(앱 상태) 이벤트 4편
Lifecycle(앱 상태) 이벤트 5편
shared_preferences | Flutter Package
App Life Cycle에 대하여 정리해 놓은 인트로 참고하세요 !
App Lifecycle Intro
이번 글에서는 Flutter에서 LifeCycle(앱 상태)을 얻는 방법에 대해서 살펴보려고 한다.
Flutter로 앱 상태를 체크하는 방법으로 StateFul, GetX를 사용할 것인데, 먼저 StateFul에서 어떻게 이벤트를 수신하는지에 대해서 먼저 살펴보도록 하자.
Flutter
앱 상태를 수신 받아 각 앱 상태의 변경에 대해서 UI로 나타내 주고자 로컬 저장소를 사용하여 만들어 보았다.
상태가 변경될 때 상태와 시간을 shared_preferences 라이브러리를 통해 로컬 저장소에 저장한 뒤 화면에 노출 시켜 앱 상태 변화를 확인해 보자.
dependencies
dependencies:
	shared_preferences: ^2.0.17
UI
상태 변경에 대해서 저장된 로컬 저장소에서 상태를 가져와 화면에 보여주는 부분의 코드이다.
Scaffold(
      appBar: appBar(title: "Life Cycle With Stateful"),
      body: lifeCycleUIListView(data: lifeCycle, context: context),
    );
ListView lifeCycleUIListView({
required List<String> data,
required BuildContext context,
}) {
return ListView(
children: [
const SizedBox(height: 12),
...data.map(
(e) => Padding(
padding: const EdgeInsets.symmetric(horizontal: 20, vertical: 8),
child: Row(
crossAxisAlignment: CrossAxisAlignment.center,
children: [
SizedBox(
width: MediaQuery.of(context).size.width * 0.2,
child: Text(
e.split("/")[0],
style: TextStyle(
fontSize: 16,
fontWeight: FontWeight.bold,
color: e.split("/")[0] == "inactive"
? Colors.amber
: e.split("/")[0] == "stop"
? Colors.amber.shade200
: e.split("/")[0] == "detached"
? Colors.deepOrange
: e.split("/")[0] == "restart"
? Colors.blue.shade200
: e.split("/")[0] == "resumed"
? Colors.blue
: Colors.green,
),
)),
const SizedBox(width: 12),
Text(
e.split("/")[1],
style: const TextStyle(
color: Color.fromRGBO(195, 195, 195, 1),
),
),
],
),
),
)
],
);
}StateFul
StateFul로 위젯을 생성해 준뒤, WidgetsBindingObserver 객체를 상속 받자.
class _LifeCycleScreenWithStatefulState
    extends State<LifeCycleScreenWithStateful> with WidgetsBindingObserver {
    ...
  final String _lifeCycleKey = "APP_LIFE_CYCLE_CHECK_WITH_STATEFUL";
  List<String> lifeCycle = [];
    }
최초 위젯이 생성될 때 initState에서 상속받은 WidgetsBindingObserver를 생성해 준다.
로컬 저장소에 저장해 둔 상태 데이터를 가져오는 getLocalStorage 함수는 아래에서 살펴보자.
void initState() {
super.initState();
WidgetsBinding.instance.addObserver(this);
_getLocalStorage();
}위젯이 dispose 될 때 WidgetsBindingObserver를 지워주자.
로컬 저장소에 상태를 저장하는 setLocalStorage 함수는 아래에서 살펴보자.
void dispose() {
super.dispose();
WidgetsBinding.instance.removeObserver(this);
_setLocalStorage("Detached", isDispose: true);
}앱 상태의 변경을 수신하는 라이플 사이클 상태인 didChangeAppLifecycleState에서 AppLifecycleState 객체를 통해 상태를 얻을 수 있다.
setLocalStorage 함수를 만들어 각 상태가 변경될 때 상태 값과 변경된 시간을 로컬 저장소에 저장해 두자.
로컬 저장소에 저장된 값을 가져와 화면에 보여줄 수 있는 기능을 하는 getLocalStorage 함수도 만들어 두자.
void didChangeAppLifecycleState(AppLifecycleState state) {
super.didChangeAppLifecycleState(state);
switch (state) {
case AppLifecycleState.detached:
_setLocalStorage("Detached");
break;
case AppLifecycleState.paused:
_setLocalStorage("Paused");
break;
case AppLifecycleState.inactive:
_setLocalStorage("Inactive");
break;
case AppLifecycleState.resumed:
_setLocalStorage("Resumed");
_getLocalStorage();
break;
default:
}
}해당 함수가 실행되면 로컬 저장소에 저장한 키 값을 통해 데이터를 가져와 lifeCycle 리스트에 할당해 준다.
 Future<void> _getLocalStorage() async {
    SharedPreferences _pref = await SharedPreferences.getInstance();
    List<String> _list = _pref.getStringList(_lifeCycleKey) ?? [];
    setState(() {
      lifeCycle = _list;
    });
}Future<void> _setLocalStorage(
String value, {
bool isDispose = false,
}) async {
String _saveData = "$value/${DateTime.now().toString().substring(0, 19)}";
SharedPreferences _pref = await SharedPreferences.getInstance();
List<String> _list = _pref.getStringList(_lifeCycleKey) ?? [];
if (isDispose) {
_list.add(_saveData);
} else {
setState(() {
_list.add(_saveData);
});
}
_pref.setStringList(_lifeCycleKey, _list);
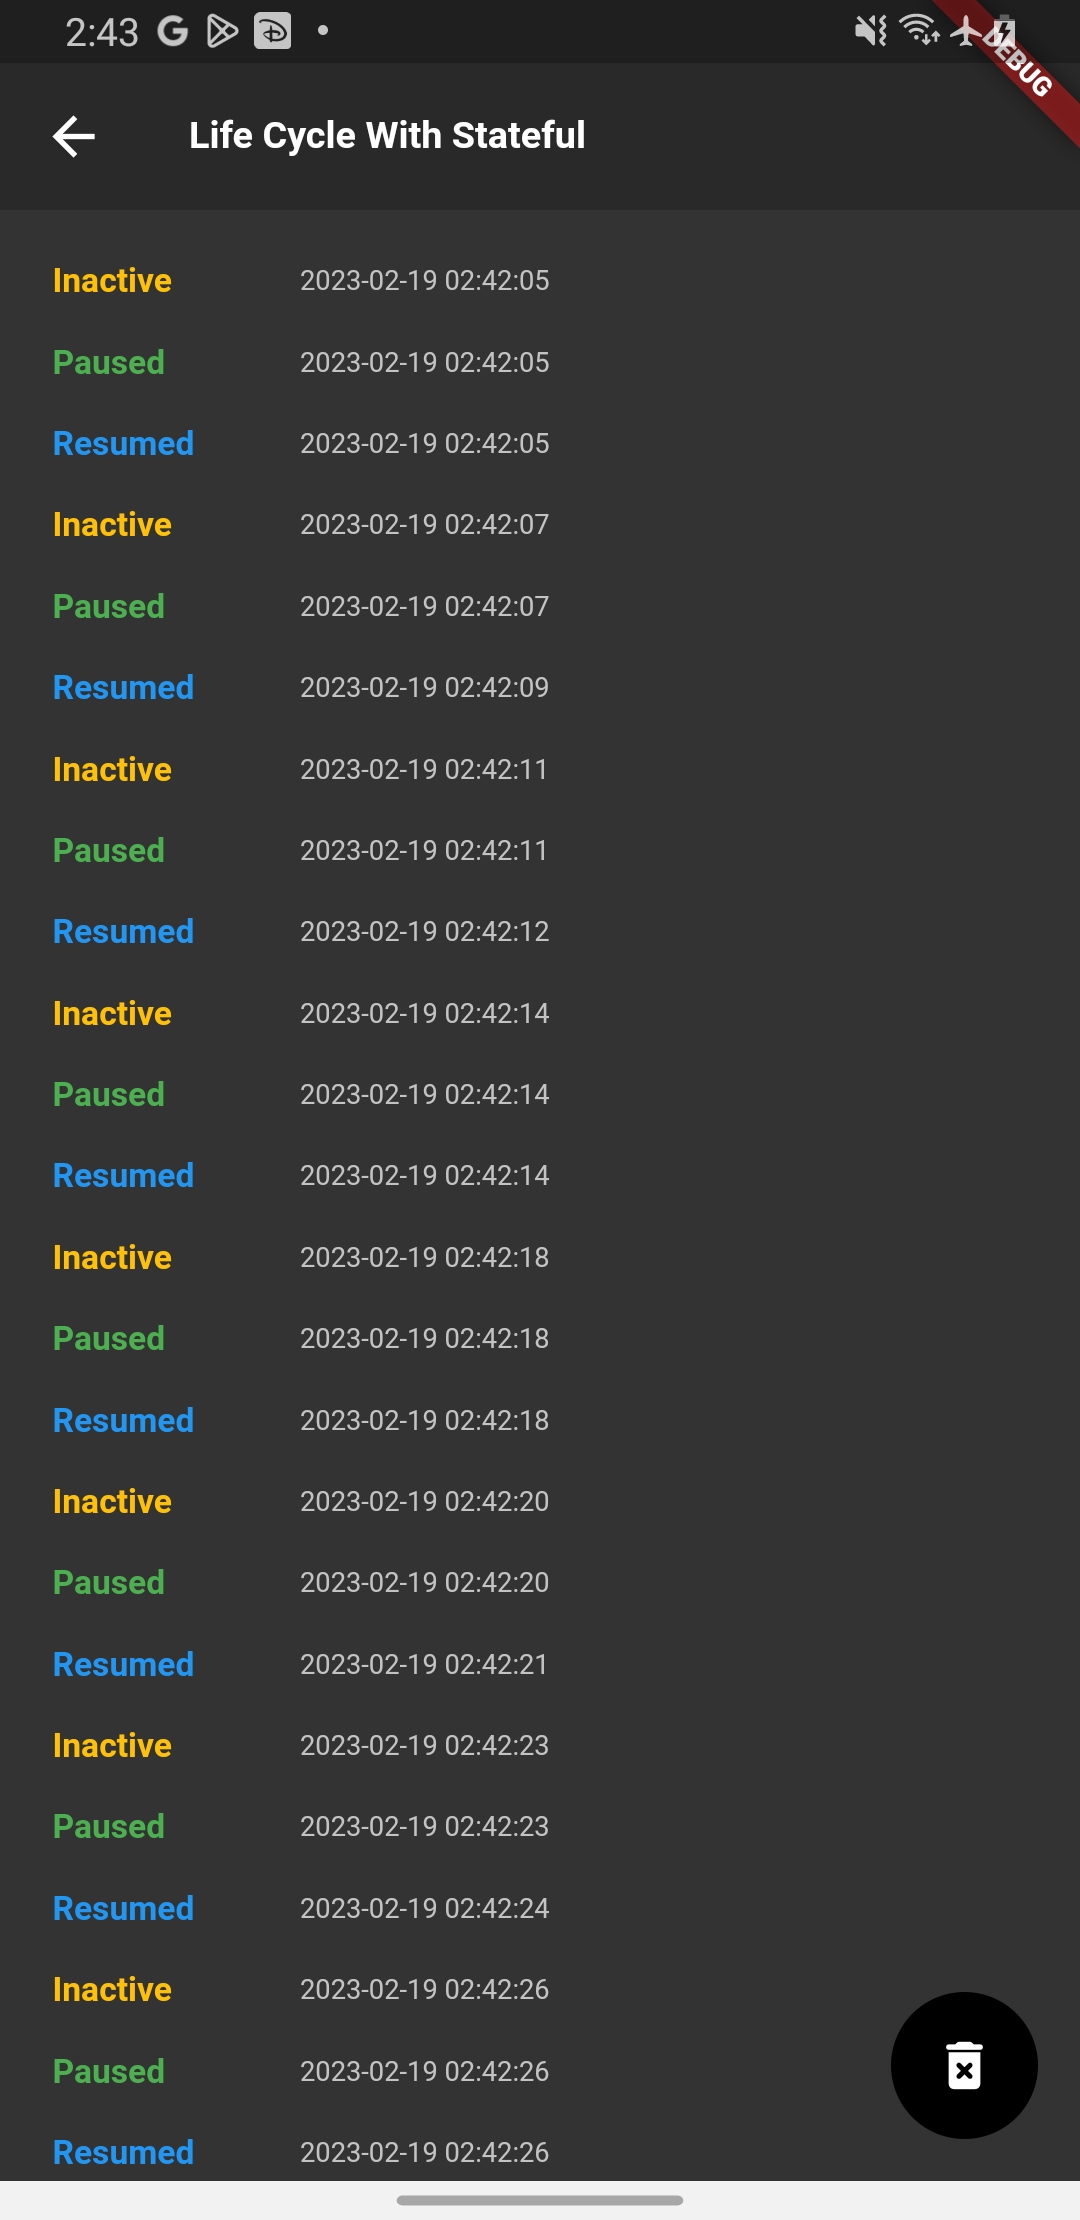
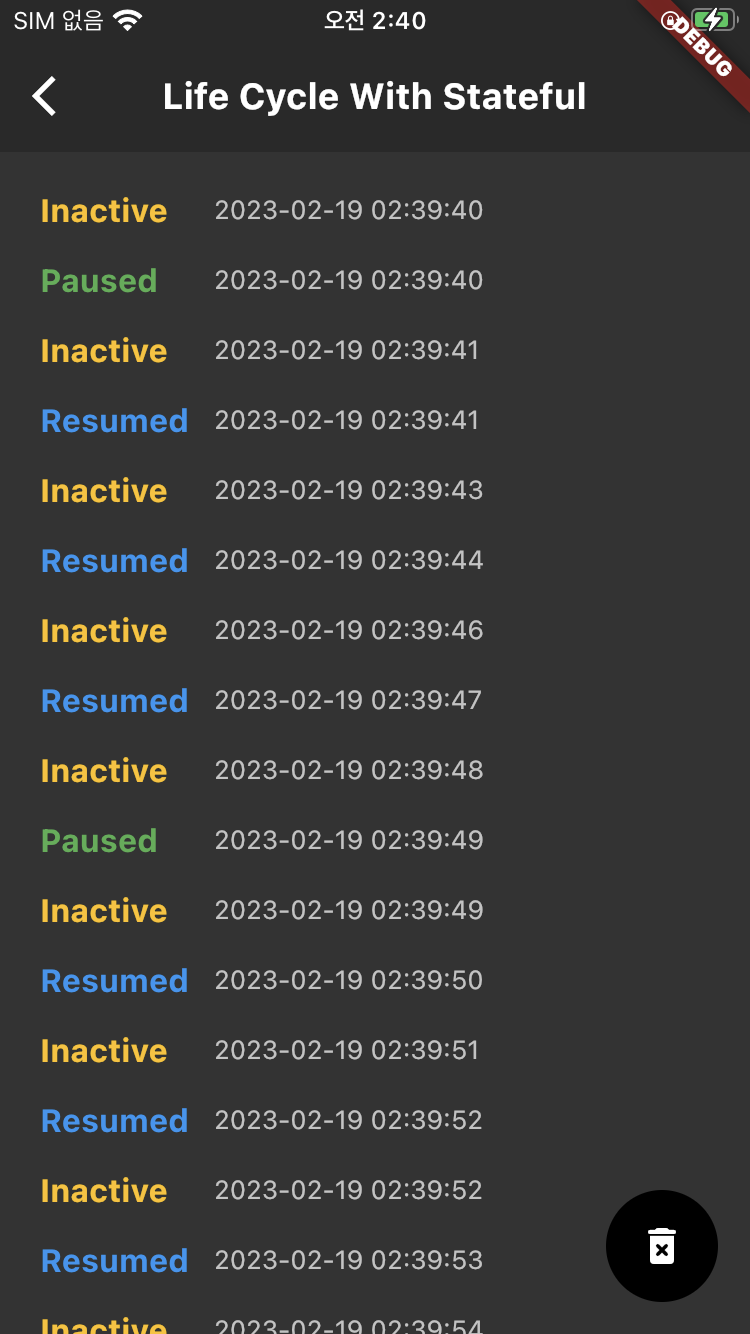
}자 이렇게 생성해 주면 끝이다. 이제 상태 이벤트를 확인해 보자. IOS, Android에서 앱을 백그라운드에 보내고 다시 진입해보면 inactive > paused > resumed 순으로 화면에 노출되는 것을 확인할 수 있다.
이번엔 앱을 백그라운드가 아닌 비활성화를 해보자. Android에서는 백그라운드 상태와 동일한 값이 보여지는데, IOS에서는 inactive > resumed의 상태만 보여진다.
앱을 종료 시키고 다시 진입해 보자. 과연 detached 상태가 로컬 저장소에 저장이 되어있을까 ? 결과는 저장이 되있지 않는다.
앱 상태에 대한 설명을 했을 때 detached가 수신되는 방법은 뷰가 파괴될 때라고 했었다. Flutter에서 뷰를 파괴하는 방법은 Android, IOS가 다르다.
exit(0); // IOS
SystemNavigator.pop(); // Android
버튼을 생성하여 이벤트를 호출해보면 detached 상태에서 log를 호출해 보면 로그는 호출이 되지만 로컬 저장소에 저장은 시키지 못한다.
Result
Android
IOS
Git
마무리
앞서 살펴본 결과대로 Flutter 에서 앱 종료 상태를 받아올 수는 없을까 ? 다른 방법인 GetX에서도 확인을 해보기 위해 다음 글에서 이어서 작성하도록 하겠다.