nest에서는 express와 다르게 jwt도 따로 있어서 아래코드로 다운받아줍니다.
npm i @nestjs/jwt이제 바로 사용할 수 있는게 아닙니다.
특정 패키지나 리포지토리를 사용하기 위해서는 모듈 데코레이터에 있는 imports 속성에 정의를 해야합니다.
@nestjs/config 패키지를 사용해서 비밀키를 캡슐화해봅니다.
.env 파일에 JWT_SECRET 라는 secret 키를 생성해줍니다.
//config/jwt.config.service.ts
import { Injectable } from "@nestjs/common";
import { ConfigService } from "@nestjs/config";
import { JwtModuleOptions, JwtOptionsFactory } from "@nestjs/jwt";

@Injectable()
export class JwtConfigService implements JwtOptionsFactory {
  constructor(private readonly configService: ConfigService) {}

  createJwtOptions(): JwtModuleOptions {
    return {
      secret: this.configService.get<string>("JWT_SECRET"),
      signOptions: { expiresIn: "3600s" },
    };
  }
}
그리고 해당 설정 파일을 UserModule에서 참조
import { Module } from "@nestjs/common";
import { ConfigModule, ConfigService } from "@nestjs/config";
import { JwtModule, JwtService } from "@nestjs/jwt";
import { TypeOrmModule } from "@nestjs/typeorm";
import { Article } from "src/board/article.entity";
import { JwtConfigService } from "src/config/jwt.config.service";
import { Repository } from "typeorm";
import { User } from "./user.entity";
import { UserService } from "./user.service";
import { UserController } from "./user.controller";

@Module({
  imports: [
    TypeOrmModule.forFeature([User]),
    JwtModule.registerAsync({
      //register -> registerAsync
      //secret: 'secret',
      //signOptions: { expiresIn: '3600s' },
      imports: [ConfigModule],
      useClass: JwtConfigService,
      inject: [ConfigService],
    }),
  ],
  providers: [UserService],
  exports: [UserService],
  controllers: [UserController],
})
export class UserModule {}
이제 userService 에서 jwt를 발급해보았습니다.
import {
  Injectable,
  NotFoundException,
  UnauthorizedException,
} from "@nestjs/common";
import { JwtService } from "@nestjs/jwt";
import { InjectRepository } from "@nestjs/typeorm";
import _ from "lodash";
import { Repository } from "typeorm";
import { User } from "./user.entity";

@Injectable()
export class UserService {
  constructor(
    @InjectRepository(User) private userRepository: Repository<User>,
    private jwtService: JwtService
  ) {}

  async login(userId: string, password: string) {
    const user = await this.userRepository.findOne({
      where: { userId, deletedAt: null },
      select: ["id", "password"],
    });

    if (_.isNil(user)) {
      throw new NotFoundException(`User not found. userId: ${userId}`);
    }

    if (user.password !== password) {
      throw new UnauthorizedException(
        `User password is not correct. userId: ${userId}`
      );
    }

    //로그인시 jwt 발급
    const payload = { id: user.id };
    const accessToken = await this.jwtService.signAsync(payload);
    return accessToken;
  }

  async createUser(userId: string, name: string, password: string) {
    const existUser = await this.getUserInfo(userId);
    if (!_.isNil(existUser)) {
      throw new ConflictException(`User already exists. userId: ${userId}`);
    }

    const insertResult = await this.userRepository.insert({
      userId,
      name,
      password,
    });

    //회원가입시 바로 로그인 가능하게 jwt 발급
    const payload = { id: insertResult.identifiers[0].id };
    const accessToken = await this.jwtService.signAsync(payload);
    return accessToken;
  }

  updateUser(userId: string, name: string, password: string) {
    this.userRepository.update({ userId }, { name, password });
  }

  async getUserInfo(userId: string) {
    return await this.userRepository.findOne({
      where: { userId, deletedAt: null },
      select: ["name"], // 이외에도 다른 정보들이 필요하면 리턴해주면 됩니다.
    });
  }
}
jwt 검증
auth middleware 코드부터 작성합니다.
import {
  Injectable,
  NestMiddleware,
  UnauthorizedException,
} from "@nestjs/common";
import { JwtService } from "@nestjs/jwt";

@Injectable()
export class AuthMiddleware implements NestMiddleware {
  constructor(private jwtService: JwtService) {}

  async use(req: any, res: any, next: Function) {
    const authHeader = req.headers.authorization;

    if (!authHeader) {
      throw new UnauthorizedException("JWT not found");
    }

    let token: string;
    try {
      token = authHeader.split(" ")[1];
      const payload = await this.jwtService.verify(token);
      req.user = payload;
      next();
    } catch (err) {
      throw new UnauthorizedException(`Invalid JWT: ${token}`);
    }
  }
}
클라이언트가 헤더에 Authorization 필드로 Bearer {JWT} 를 보내면 ({JWT}에는 서버에서 실제로 받은 JWT를 채워넣어야 합니다) AuthMiddleware는 JWT를 파싱하여 특정 유저임을 파악할 수 있습니다.
app.module에도 추가해줍니다.
...

@Module({
  imports: [
    ConfigModule.forRoot({ isGlobal: true }),
    TypeOrmModule.forRootAsync({
      ...
    }),
    JwtModule.registerAsync({ // AuthMilddleware에서도 사용할 수 있게 import
      imports: [ConfigModule],
      useClass: JwtConfigService,
      inject: [ConfigService],
    }),
    ...
  ],
  ...
})
export class AppModule {}
이제 src 디렉토리로 이동해서 user controller를 추가해줍니다.
nest g co useruser.controller.ts
import { Body, Controller, Post, Put } from '@nestjs/common';
import { UserService } from './user.service';
import { signupUserDto } from './signup-user.dto';
import { UpdateUserDto } from './update-user.dto';
import { LoginUserDto } from './login-user.dto';

@Controller('user')
export class UserController {
  constructor(private readonly userService: UserService) {}

  @Post('/login') // 강의영상엔 @Get으로 되어있는데 @Post가 맞습니다!
  async login(@Body() data: LoginUserDto) {
    return await this.userService.login(data.userId, data.password);
  }

  @Post('/signup')
  async createUser(@Body() data: signupUserDto) {
    return await this.userService.createUser(
      data.userId,
      data.name,
      data.password,
    );
  }

  @Put('/update')
  updateUser(@Body() data: UpdateUserDto) {
    this.userService.updateUser(data.userId, data.name, data.password);
  }
}
현재 user.controller에서는 Dto를 뺀 상태입니다.
저는일단 추가해보았는데 userId도 Dto에 넣어야할지 고민이라 일단 넣고 작성했습니다.
- user signup Dto
import { IsNumber, IsString } from 'class-validator';

export class signupUserDto {
  @IsNumber()
  readonly userId: number;

  @IsString()
  readonly name: string;

  @IsString()
  readonly password: string;
}
- user update Dto
import { PickType } from '@nestjs/mapped-types';
import { signupUserDto } from './signup-user.dto';

export class UpdateUserDto extends PickType(signupUserDto, [
  'name',
  'password',
] as const) {}
- user login Dto
import { PickType } from '@nestjs/mapped-types';
import { signupUserDto } from './signup-user.dto';

export class LoginUserDto extends PickType(signupUserDto, [
  'userId',
  'password',
] as const) {}
/user/update에서는 올바른 jwt를 갖고있는 사용자만이 호출할 수 있도록 appModlue 코드도 고쳐줍니다.
...

@Module({
  imports: [
    ...
  ],
  controllers: [AppController],
  providers: [AppService, AuthMiddleware], // AuthMiddleware 추가해주셔야 해요!
})
export class AppModule implements NestModule { // NestModule 인터페이스 구현
  configure(consumer: MiddlewareConsumer) {
    consumer
      .apply(AuthMiddleware) // 미들웨어 적용!
      .forRoutes({ path: "user/update", method: RequestMethod.PUT });
  }
}
Nest.js에서는 미들웨어를 포함하는 모듈은 NestModule 인터페이스를 구현해야 합니다
위의 코드에서는 PUT /user/update에 해당되는 API에 AuthMiddleware를 적용하겠다는 것입니다! 이렇게 하면 유저 정보를 업데이트를 할 때 올바른 JWT를 넘겨야 유저 정보를 업데이트 할 수 있어요.
수업을 따라갔는데 아래와 같은 오류가 나왔습니다.
[Nest] 14816 - 2023. 08. 14. 오후 12:17:55 ERROR [ExceptionsHandler] No metadata for "User" was found.오류를 찾았습니다.
수업에서는 나오지않았지만 config에서 User를 추가해주지않아 생긴 오류였습니다.
...
import { User } from 'src/user/user.entity';
@Injectable() // 이 키워드 빼놓고 작업하다 DI 안된다고 에러떠서 멘붕 터질 수 있음
export class TypeOrmConfigService implements TypeOrmOptionsFactory {
constructor(private readonly configService: ConfigService) {}
createTypeOrmOptions(): TypeOrmModuleOptions {
return {
...
entities: [Article, User], //User entity 추가
synchronize: true, // Production 환경에서는 false로 설정해야 합니다.
};
}
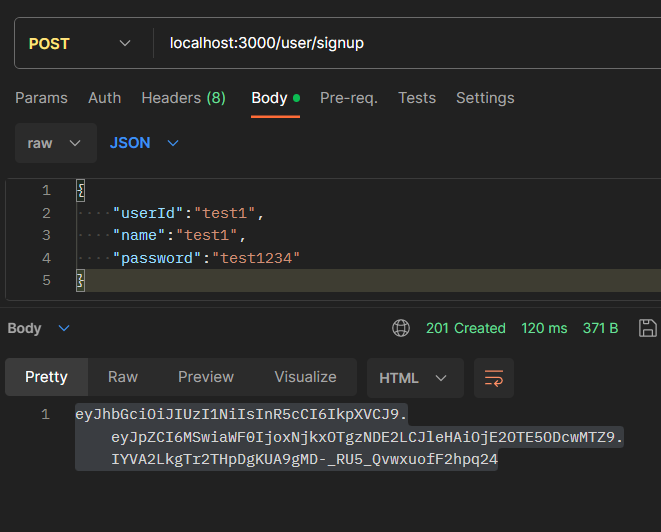
}추가를 해주고 회원가입을 하니 토큰 값이 나왔습니다.