React.js
Today I Learned ... react.js
🙋 My Dev Blog
테스트 위주 개발 방법
jest 도구 사용
- CRA(create-react-app) 기본 테스트 환경
- package.json 파일을 보면, "scripts" 중에
test라는 이름의 항목이 존재한다.
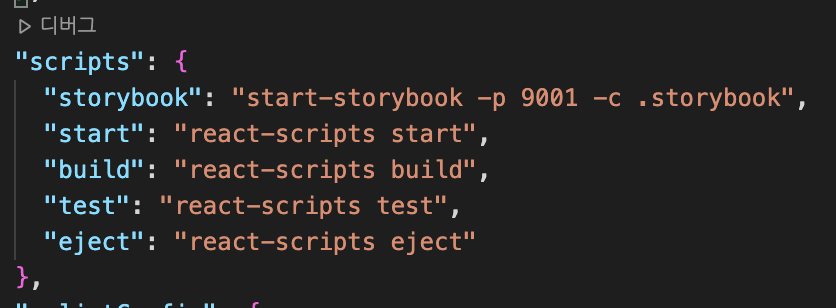
- create-react-app은 jest 라이브러리를 이용해 테스트 환경을 실행한다.
-> 1개의 테스트 파일에 포함된 1개의 테스트 코드가 2초간격으로 통과됨.
- jest는 다른 테스트 도구와 달리 순차적(X),동시에 실행(O)
- 아주 짧은 시간에 여러 테스트 코드의 결과 처리 가능.
> yarn test테스트 코드 작성
-파일명이 .test.js 로 끝나거나, (또는 .spec.js)
-src/__tests__ 폴더에 작성된 js, jsx 파일들을 테스트함.
src/tests/Input.test.jsx
import React from "react";
import ReactDOM from "react-dom"; // React-DOM까지 임포트해야함.
import Input from "../component/Input";

describe("<Input>", () => {   // describe 함수
  it("renders without crashing", () => {  // it 함수
    const div = document.createElement("div");
    ReactDOM.render(<Input />, div);
    ReactDOM.unmountComponentAtNode(div); // unmountComponentAtNode()
  });
});
1) describe()
describe keyword를 사용해서 작은 단위의 테스트 코드를 그룹화할 수 있다.2) it() / test()
작성한 테스트코드가 무엇을 하는지에 대해서 첫번째 param으로 작성해준다.
두번째 param으로는 테스트 통과시 실행할 코드. (여기선, Input을 div로 렌더링함)3) ReactDOM.unmountComponentAtNode()
DOM 노드가 마운트 된 후, 제거하고 이벤트 핸들러와 상태(state)를 정리하기 위해 사용
(뒷정리 함수라고 생각하면 됨.)
참고 - 마운트와 언마운트
| 마운트 | 언마운트 |
|---|---|
| 받아온 props를 객체의 state로 설정 / setInteval, setTimeout 등 | 뒷정리 함수 / clearInterval 등 |
🔻 아래와 같이 warning msg가 뜬다.
- input에 name이 전달되어야 한다는 뜻.
Warning: Failed prop type: The prop `name` is marked as required in `Input`, but its value is `undefined`.

       6 |   it("renders without crashing", () => {
       7 |     const div = document.createElement("div");
    >  8 |     ReactDOM.render(<Input />, div);
         |                     ^
       9 |     ReactDOM.unmountComponentAtNode(div);
      10 |   });
      11 | });
위와 같이 jest를 이용한 yarn test 명령어로 테스트를 할 수 있다.
enzyme 라이브러리
- 앞서 봤던 jest로 테스트하는 경우, ReactDOM() 함수를 이용한다.
ReactDOM함수는 테스트중인 컴포넌트 외에도 연결된 모든 컴포넌트를 출력하는 문제가 있다.
-> 예> App 컴포넌트 테스트시, render()에 포함된 Counter, Input 등도 같이 출력됨.
- 리액트는 요소 추출 함수가 없으므로,
document.getElementById()와 같은 DOM 함수에 의존해야 하는 번거로움이 있음.
- enzyme는 컴포넌트의 '기능'만을 손쉽게 검사해줌.
- enzyme 설치
> yarn add --dev enzyme enzyme-adapter-react-16.3 react-test-renderer- enzyme 설정
- src 폴더에 태스트 설정 코드 추가해야함.
(/src/setupTests.js)
import { configure } from 'enzyme'; // 설정 함수 configure()
import Adapter from 'enzyme-adapter-react-16.3'; // 생명주기 라이브러리

configure({ adpater: new Adapter() }); // 새 버전 생명주기 함수와 함께 추가- 테스트 코드 작성
src/tests/Input_spec.jsx
import React from "react";
import { shallow } from "enzyme";   // shallow() = 현재 컴포넌트의 생명주기만 테스트
// (자식 컴포넌트 생성, 출력은 건너뜀)

import Input from "../component/Input";

describe("<Input>", () => {
  it("renders without crashing", () => {
    expect(() => {
      shallow(<Input />);  // 오류 발생 안하면 테스트 통과
    }).not.toThrow(); // toThrow() = 컴포넌트의 출력 오류를 검사.
  });
});
jest 함수 설명
참고문서 - jest 기본 사용법
toThrow()
- 예외 발생 여부를 테스트해야 할 때 사용.
- 에러가 나타나는지 검증하고, 오류발생 지점을 알 수 있음.
expect()
- 검증 대상을 인수로 넘김.
- 특정 변수를 비교하거나 함수를 실행하여 발생한 결과값을 검증함.
예> shallow()가 반환하는 객체의 개수 검증시
const wrapper = shallow(<Input />);
expect(wrapper.length).toEqual(1); // toEqual()사용
expect(wrapper).toHaveLength(1);  // toHaveLength() 사용
spyOn()
- 경고메시지를 오류로 인식하도록 설정
-> 오류 호출 검사 함수인 toThrow()가 발견하도록 함
beforeEach, afterEach
- 각 테스트 코드가 실행되기 이전과 이후에 특정 설정을 추가 + 변경된 설정을 초기화.
참고
yarn test 뒤에 파일경로 or 디렉터리 경로를 작성하면 해당 경로만 테스트 가능.> yarn test ./src/__tests__/Input_spec.jsx
➰ 교재 p.208-216 생략.
-
shallow() : 컴포넌트 출력 후 컴포넌트를 검사할 수 있는 enzyme 객체 반환
-> enzyme 객체는 find() 메서드를 포함함. -
find() : 엘리먼트 출력 검사 (input, label등 엘리먼트를 인수로)
-
prop(), props() : 프로퍼티에 전달된 값 검증
-> 컴포넌트에 전달된 props가 의도대로 render()에서 할당되었는지 검사.
prop: enzyme가 반환한 컴포넌트의 프로퍼티 이름을 인자로 전달
props: 전체 프로퍼티 값을 객체로 반환
- setProps(): 변경된 프로퍼티값 전달
-> 상위 컴포넌트 구성 후, 상위 컴포넌트의 state를 변경해 테스트 했어야 했음 - setProps()를 이용하면 바로 프로퍼티 값 변경 가능
const wrapper = shallow(<Input />);
wrapper.setProps({ errorMsg: expectedErrorMessage });- simulate() : 가상의 이벤트 검사
- 가상 이벤트 작동 가능.
- 콜백함수가 제대로 동작하는지 검사 가능.
wrapper.find('input').simulate('change', { target: {value: expectedTargetValue} });-> target.value가 실제 브라우저가 전달하는 값이므로, 객체로 재현해야함.
- mount() : 하이어오더 컴포넌트 출력시 사용. (withStyles()함수와 같이)
-> 커링(함수에서 함수를 리턴하는 것)
- dive() : 하위 컴포넌트 출력
- mount() 함수는 render()에 포함된 모든 컴포넌트를 생성/출력하므로 성능 저하.
- 특정 하위 컴포넌트만 선택헤 테스트 할 수 있게 해줌.
-> shallow() 는 현재 컴포넌트의 생명주기만 테스트 해주는 것이고,
dive는 하위 컴포넌트를 지정해 테스트 해주는 것.
복습 - CheckBox Component
import React, { PureComponent } from "react";
import PropTypes from "prop-types";
import withStyles, { css } from "./withStyles";

class CheckBox extends PureComponent {
  constructor(props) {
    super(props);
    this.setRef = this.setRef.bind(this);
    this.handleClick = this.handleClick.bind(this);
  }

  componentDidMount() {
    if (this.props.autoFocus) {
      this.ref.focus();
    }
  }

  handleClick(e) {
    const { name, onChange } = this.props;
    onChange(name, e.target.checked);
  }

  setRef(ref) {
    this.ref = ref;
  }

  render() {
    const { errorMsg, label, children, styles, checked } = this.props;

    return (
      <label>
        {label}
        <div>
          <input
            ref={this.setRef}
            type="checkbox"
            checked={checked && "checked"}
            onClick={this.handleClick}
          />
          {children}
        </div>
        {errorMsg && (
          <div>
            <span {...css(styles.errorText)}>{errorMsg}</span>
          </div>
        )}
      </label>
    );
  }
}

CheckBox.propTypes = {
  name: PropTypes.string.isRequired,
  autoFocus: PropTypes.bool,
  checked: PropTypes.bool,
  onChange: PropTypes.func,
};

CheckBox.defaultProps = {
  autoFocus: false,
  checked: false,
  onChange: () => {},
};

export default withStyles(({ color, size }) => ({
  errorText: {
    fontSize: size.sm,
    color: color.error,
  },
}))(CheckBox);
- 단축평가 (&&)로 if문을 대체함. (삼항연산자는 if-else 대체시 사용)
- 콜백함수 안에 this 변수를 참조하므로 bind()하여 this가 CheckBox 컴포넌트의 인스턴스를 가리키도록 함.
- onChange() 호출시, 첫번째는 name 프로퍼티를 , 두번째로는 e.target.checked를 전달함.
withstyles.js 분석
- react-with-style 의 css함수, withStyles함수 임포트함
- Theme.js 임포트함 (xl,lg,md,sm,xs 등 있는 것)
- registerTheme 함수로 테마파일 등록함
- css, withStyles (외 4) 함수 export함.
import ThemedStyleSheet from 'react-with-styles/lib/ThemedStyleSheet';
import aphroditeInterface from 'react-with-styles-interface-aphrodite';
import { css, withStyles, withStylesPropTypes } from 'react-with-styles';
import Theme from './Theme';

ThemedStyleSheet.registerTheme(Theme);
ThemedStyleSheet.registerInterface(aphroditeInterface);

export { css, withStyles, withStylesPropTypes, ThemedStyleSheet };
export default withStyles;
참고 -
export와export default
named export default export export class User {...} export default class User {...} import {User} from ... import User from ...