암기화면 만들기
만든 부분 - 2022 / 09 / 13
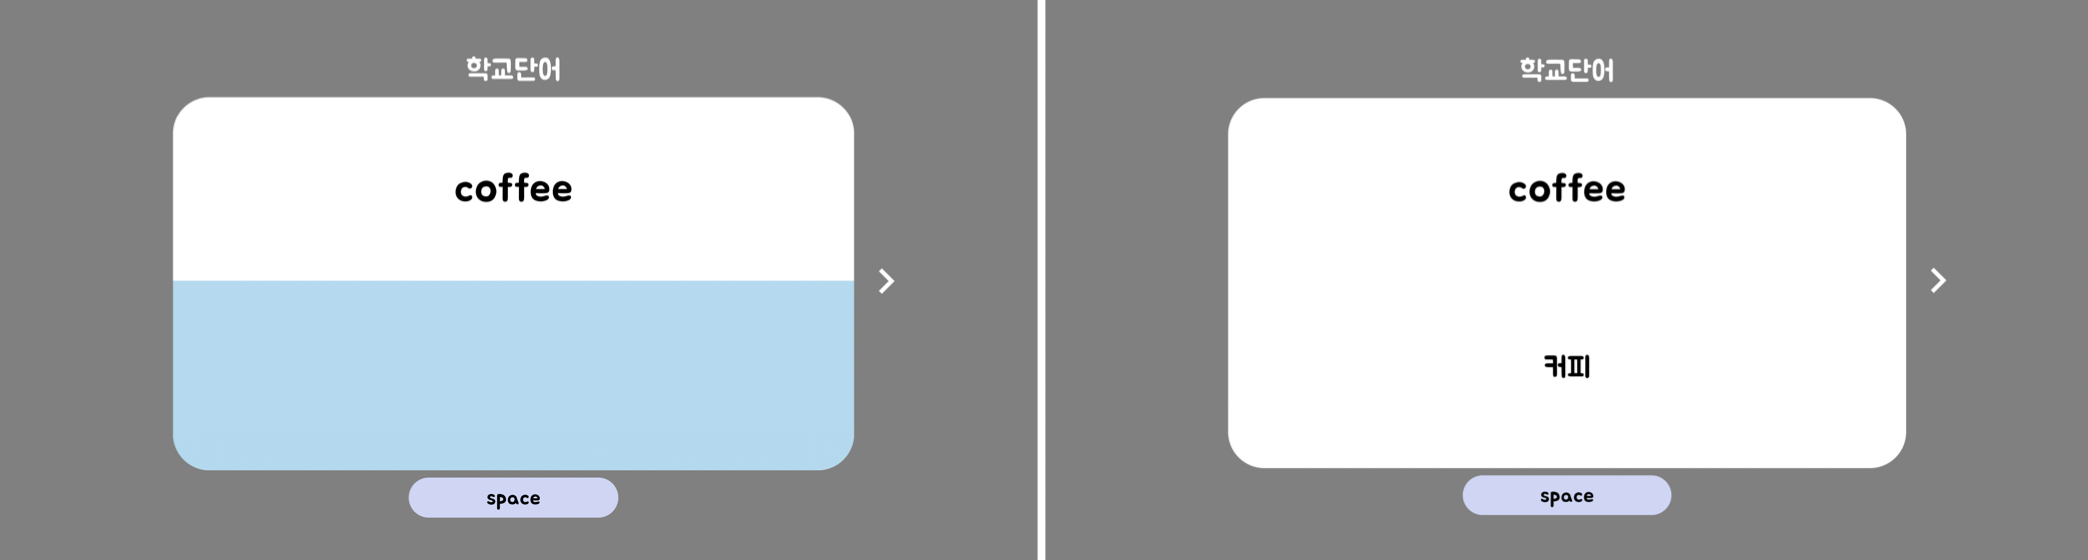
사진을 보면 미리 피그마로 디자인 해놓은 화면과 거의 비슷하게 만들었다. 현재는 space 버튼을 클릭하는 것과 넘어가는 아이콘을 클릭하는 기능을 구현했고 하늘색 박스가 아래로 내려가도록 애니메이션도 만들어 주었다.
화면 애니메이션
이제 space 버튼을 클릭하는 것뿐만아니라 키보드의 space bar를 누르는 것도 만들어야한다. 그리고 서버에서 단어 리스트를 받아왔을 때 다음 버튼을 누르면 단어가 달라지게 하는 것도 만들어야한다.
React 코드 (Memorize.js)
import React, { useState } from 'react'
import "../styles/Memorize.css"
import { MdOutlineNavigateNext } from "react-icons/md"

const Memorize = () => {
    const [isClick, setIsClick] = useState(false);
  return (
    <div className='memorize_container'>
        <span>학교단어</span>
        <div className='content_box'>
            <p>coffee</p>
            <div
                className={
                    isClick ? "content_box_onClick" : "nonClick"
                }
            ></div>
            <span>커피</span>
        </div>
        <div onClick={()=> {
            setIsClick(true)
        }} className='space_button'>space</div>
        <MdOutlineNavigateNext onClick={() => {setIsClick(false)}} className='next_word_button' color='white' size='70' />
    </div>
  )
}

export default Memorize
CSS 코드 (Memorize.css)
* {
    margin: 0;
    padding: 0;
}
.memorize_container {
    width: 100%;
    height: 100vh;
    display: flex;
    flex-direction: column;
    align-items: center;
    justify-content: center;
    background-color: grey;
}
.memorize_container span {
    height: 10%;
    /* background-color: bisque; */
    line-height: 200%;
    font-size: 40px;
    color: white;
}
.content_box {
    width: 65%;
    height: 65%;
    background-color: white;
    border-radius: 50px;
    margin-bottom: 10px;
    display: flex;
    flex-direction: column;
    justify-content: space-around;
    align-items: center;
}
.content_box p {
    font-size: 60px;
}
.content_box span {
    font-size: 40px;
    color: black;
    margin-bottom: 40px;
}
.nonClick {
    position: fixed;
    background-color: #9EDDF4;
    width: 65%;
    height: 33%;
    top: 50.4%;
    border-bottom-left-radius: 50px;
    border-bottom-right-radius: 50px;
}
.content_box_onClick {
    position: fixed;
    background-color: #9EDDF4;
    width: 65%;
    height: 33%;
    top: 50.4%;
    border-bottom-left-radius: 50px;
    border-bottom-right-radius: 50px;
    animation-duration: 1s;
    animation-name: slidein;
    animation-fill-mode: forwards;
}
@keyframes slidein {
    from {
        position: fixed;
        top: 50.4%;
        height: 33%;
    }
    50% {
        width: 65%;
    }
    to {
        position: fixed;
        top: 83.4%;
        width: 56%;
        height: 0;
    }
}
.space_button {
    width: 20%;
    height: 7%;
    background-color: #CCD6F9;
    border-radius: 100000px;
    text-align: center;
    line-height: 170%;
    font-size: 30px;
    /* margin-top: 100px; */
}
.next_word_button {
    position: fixed;
    right: 12%;
    top: 46%;
}
만든 부분 - 2022 / 09 / 14
바뀐 부분이 좀 많이 있다. 일단 전체적인 디자인을 팀원이 예쁘게 바꿨다. 그리고 난 암기 부분에서 스펠링으로 학습을 하는 기능을 추가하였다. 맞추면 잠깐 커지는 애니메이션, 틀리면 흔들리는 애니메이션으로 맞춤과 틀림을 나타냈다.
NextJS 코드 (Spelling.js의 한 부분)
<div className='content_box'>
      {
          way === 'meaning' ? !isClick ?
          <button className='voicebtn'><GiSpeaker color='grey' size="30" /></button>
          : <button className='voicebtn' onClick={() => (speech(data.word))}>{playing? <CgPlayPause size="30" /> : <GiSpeaker size="30" />}</button>
          :<button className='voicebtn' onClick={() => (speech(data.word))}>{playing? <CgPlayPause size="30" /> : <GiSpeaker size="30" />}</button>
      }
      <div className="inner_box">
        <p>{way === 'word' ? data.word : data.meaning}</p>
        <hr style={{width:"100%", height:"1px", backgroundColor: "grey"}}></hr>
        <input
          onChange={(e) => {
            setAnswer(e.target.value)
          }}
          className={first ? "Spelling_input" : isClick ? "Spelling_right" : "Spelling_wrong"}
          type='text'
          value={answer}
        />

        {/* {isClick ? <span className='inner_span'>정답입니다!</span> : <span className='inner_span' style={{color:"red"}}>틀렸습니다!</span>} */}
        {!first && (isClick ? <span className='inner_span'>정답입니다!</span> : <span className='inner_span' style={{color:"red"}}>틀렸습니다!</span>)}
      </div>
  </div>
내가 단어를 적으면 그 단어가 세트에 있는 단어와 같은지 확인하고 맞냐 틀리냐에 따라서 조건부렌더링을 사용했다.
CSS 코드 (Spelling.css)
.Spelling_input {
    width: 70%;
    height: 15%;
    border: 1px solid grey;
    border-radius: 10px;
    font-size: 20px;
    padding-left: 10px;
    margin-bottom: 10%;
}
.Spelling_right {
    width: 70%;
    height: 15%;
    border: 1px solid #1f8bf7;
    color: #1f8bf7;
    border-radius: 10px;
    font-size: 20px;
    padding-left: 10px;
    animation: right 0.8s;
    margin-bottom: 10%;
}
.Spelling_wrong {
    width: 70%;
    height: 15%;
    border: 1px solid red;
    color: red;
    border-radius: 10px;
    font-size: 20px;
    padding-left: 10px;
    animation: wrong 0.3s;
    margin-bottom: 10%;
}
@keyframes wrong {
    from {
        transform: translateX(-10px);
    }
    20% {
        transform: translateX(20px);
    }
    40% {
        transform: translateX(-20px);
    }
    60% {
        transform: translateX(20px);
    }
    80% {
        transform: translateX(-20px);
    }
    to {
        transform: translateX(10px);
    }
}
@keyframes right {
    from {
        transform: scale(1)
    }
    25% {
        transform: scale(1.2, 1.45);
    }
    38% {
        transform: scale(1.2, 1.45);
    }
    to {
        transform: scale(1);
    }
}
.inner_span {
    position: absolute;
    top: 73%;
    font-size: 30px !important;
    color: #1f8bf7;
}
암기화면 완성
암기화면 완성했음~ 잘 만들어진 것같아서 좋다!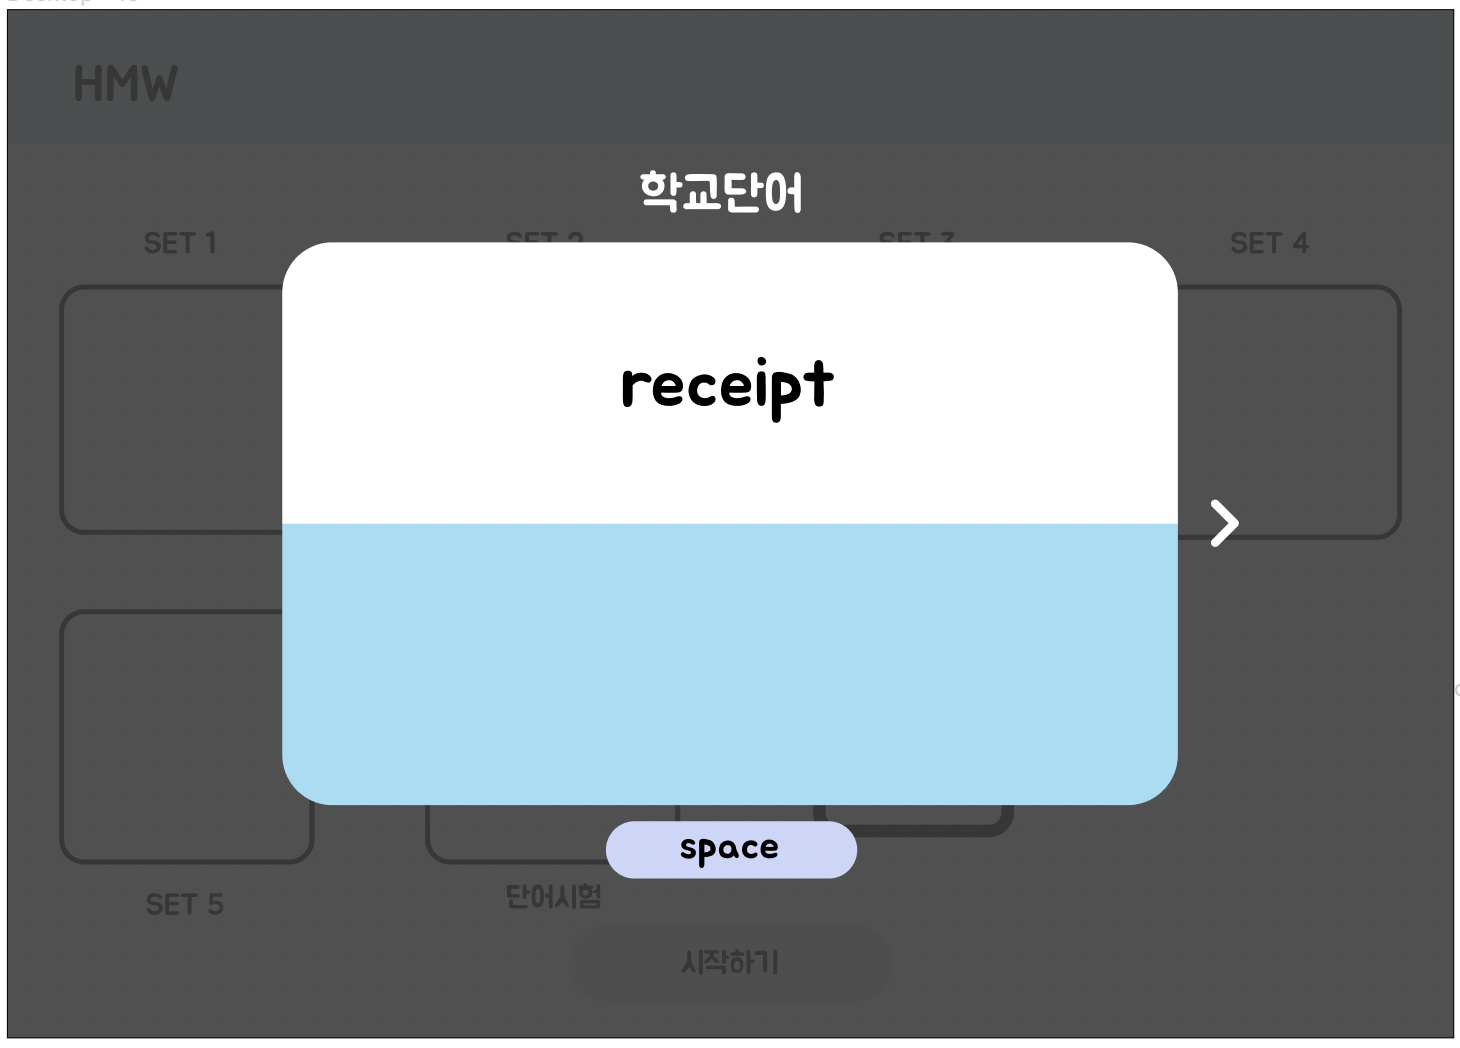
서커스형 개발자