LAMP
리눅스를 활용하는 분야 중 하나는 웹 서버 운영이다. APM에 대해 먼저 알아보았다.
- LAMP
리눅스(Linux) 환경에서 웹 서버를 운영하기 위해 안정적이고 유명한 아파치(Apache) 웹 서버와 프로그래밍 언어인 PHP, 데이터베이스를 담당하는 MariaDB를 뜻하며 각 앞글자를 조합하여 LAMP 혹은 LAPM라고 부른다.
물론 지금 트렌드보단 확실히 구식인 것 같다는 생각이다.
웹 서버 설치 및 설정
- 설치 및 상시작동 설정
[root@localhost ~]# dnf -y install httpd php php-mysqlnd mariadb-server
[root@localhost ~]# systemctl status httpd
● httpd.service - The Apache HTTP Server
   Loaded: loaded (/usr/lib/systemd/system/httpd.service; disabled; vendor pres>
  Drop-In: /usr/lib/systemd/system/httpd.service.d
           └─php-fpm.conf
   Active: inactive (dead)
     Docs: man:httpd.service(8)
[root@localhost ~]# systemctl start httpd
[root@localhost ~]# systemctl status httpd
● httpd.service - The Apache HTTP Server
   Loaded: loaded (/usr/lib/systemd/system/httpd.service; disabled; vendor pres>
  Drop-In: /usr/lib/systemd/system/httpd.service.d
           └─php-fpm.conf
   Active: active (running) since Wed 2022-08-10 17:05:58 KST; 6s ago
[root@localhost ~]# systemctl enable httpd
Created symlink /etc/systemd/system/multi-user.target.wants/httpd.service → /usr/lib/systemd/system/httpd.service.
[root@localhost ~]# systemctl restart mariadb
[root@localhost ~]# systemctl enable mariadb
Created symlink /etc/systemd/system/mysql.service → /usr/lib/systemd/system/mariadb.service.
Created symlink /etc/systemd/system/mysqld.service → /usr/lib/systemd/system/mariadb.service.
Created symlink /etc/systemd/system/multi-user.target.wants/mariadb.service → /usr/lib/systemd/system/mariadb.service.
- httpd, php, mariadb를 설치한다.
- httpd의 작동 상태 확인 후 실행중이지 않다면, start 옵션으로 실행시큰 후 enable 옵션으로 상시 작동할 수 있도록 한다.
- mariadb를 재시작 후 enable 옵션으로 상시 작동할 수 있도록 설정한다.
- httpd 작동 확인
[root@localhost ~]# vi /var/www/html/index.html<h1>this is first web site with LAMP stack<h1>
- vi 또는 gedit을 통해 index.html 파일을 간단하게 작성해본다.
- centos 내의 기본 브라우저인 firefox에서 127.0.0.1을 주소창에 입력 후 httpd가 정상작동 하는지 확인할 수 있다.
- php 확인
<?php phpinfo(); ?>
- /var/www/html/ 경로에서 phpinfo.php 파일을 생성하여 편집한다.
- php 모듈이 정상작동 하는 것을 확인할 수 있다.
- 방화벽 설정
[root@localhost ~]# firewall-cmd --permanent --add-service=http
success
[root@localhost ~]# firewall-cmd --permanent --add-service=https
success
[root@localhost ~]# firewall-cmd --reload
success
- http, https 서비스를 방화벽을 영구적으로 열어준다.
- WinClient에서 접속 여부를 확인하려고 했으나, 그냥 지금 글을 쓰고 있는 호스트 컴퓨터에서 연결을 확인하고 사진을 첨부했다.
- 외부에서 Server로 접속이 되는 것을 확인할 수 있으며, Server의 /var/www/html/ 디렉토리에 php 또는 html 소스를 위치시키면 웹 사이트를 운영할 수 있다고 볼 수 있다.
Wordpress 활용
웹사이트를 구축하기 위한 프로그래밍 실력이 부족할 뿐 아니라 아예 모른다고 봐도 무방하기 때문에, 오픈소스인 워드프레스로 구축해보았다.
- 워드프레스 사용자 데이터 베이스 생성
MariaDB [(none)]> create database wpDB;
MariaDB [(none)]> grant all privileges on wpDB.* to wpUser@localhost identified by '1234';
MariaDB [(none)]> exit- 워드프레스 설치
[root@localhost ~]# wget https://ko.wordpress.org/wordpress-4.9.6-ko_KR.tar.gz
[root@localhost ~]# ls -l word*
-rw-r--r-- 1 root root 9255606  6월 10  2018 wordpress-4.9.6-ko_KR.tar.gz
[root@localhost ~]# tar xfz wordpress-4.9.6-ko_KR.tar.gz
[root@localhost ~]# mv wordpress /var/www/html/
[root@localhost ~]# cd /var/www/html/
[root@localhost html]# ls -l
(중략)
drwxr-xr-x 5 1006 1006 4096  6월 10  2018 wordpress
[root@localhost html]# chmod 707 wordpress/
[root@localhost html]# chown -R apache.apache wordpress
[root@localhost html]# ls -l
(중략)
drwx---rwx 5 apache apache 4096  6월 10  2018 wordpress
- 워드프레스를 설치 후 압축 해제한다.
- 압축 해제된 워드프레스를 /var/www/html/ 디렉토리로 이동시킨 후 퍼미션을 707로 변경한다.
- 파일 소유저를 root에서 apache로 변경한다.
- 워드프레스 설정 파일 편집
[root@localhost html]# cd wordpress/
[root@localhost wordpress]# cp wp-config-sample.php  wp-config.php
[root@localhost wordpress]# vi wp-config.php
// ** MySQL settings - You can get this info from your web host ** //
/** The name of the database for WordPress */
define('DB_NAME', 'wpDB');
/** MySQL database username */
define('DB_USER', 'wpUser');
/** MySQL database password */
define('DB_PASSWORD', '1234');
- 디렉토리 이동 후 wp-config-sample.php 파일을 wp-config.php 파일로 복사한다.
- 복사한 wp-config.php 파일을 수정한다.
2-1. 수정한 내용은 데이터베이스에 추가한 내용을 수정한다.
- 웹 서버 설정 파일 편집
122 DocumentRoot "/var/www/html/wordpress"
134 <Directory "/var/www/wordpress">
154     AllowOverride All
vi 또는 gedit 을 활용해 /etc/httpd/conf/ 디렉토리에 위치한 웹 서버 설정 파일인 httpd.conf 파일을 수정한다. 앞의 숫자는 행 번호이다.
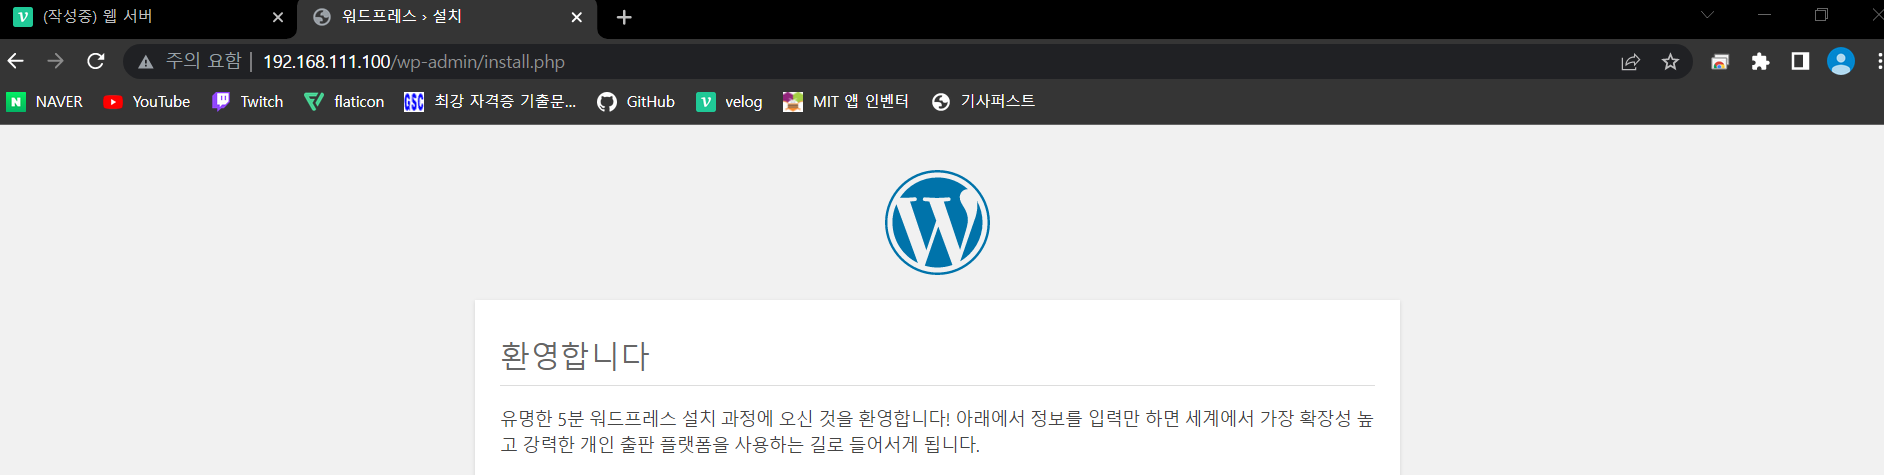
- 접속 확인
WinClient 또는 호스트 컴퓨터에서 접속해보면 아래 화면처럼 워드프레스 화면이 나타난다.
물론 접속하기 전에 httpd를 재시작 후 Server에 접속해야 한다.

아침엔 운동하고 밤엔 잠을 잔다.