1) 오픈소스에 대한 소개
오늘날 AR과 VR은 우리와 밀접한 관계를 갖고 있다.
그래서 "model-viewer"라는 web component를 사용해서 web상에 3D model을 띄우는 프로젝트를 할 것이다.
아래는 프로젝트를 하기위해 준비되어야 하는 것들이다.
1) 웹 브라우저 ( ex. chrome,firefox,safari 등.. )
2) Node.js, text editor, glitch
3) HTML,CSS,JavaScript에 대한 기본적인 지식
위의 3가지가 준비되었다면 시작해보자!
2) 오픈소스 설치
1. glitch에 접근하기
다음의 링크를 누르면 glitch에 접속할 수 있다.

glitch에서 프로젝트를 호스트하고 코드변화를 확인 할 수 있다.
2. 서버연결&코드다운하기
우리는 local web page에 접근하기 위해서 Node.js를 설치해야한다.
아래의 링크를 눌러 설치한다.
Node.js 설치 후, command창에 다음의 명령문을 실행한다.
npm install -g serve코드를 다운로드한다.
git clone https://github.com/googlecodelabs/model-viewer-codelab.git다운로드 한 경로에서 서버를 실행시킨다
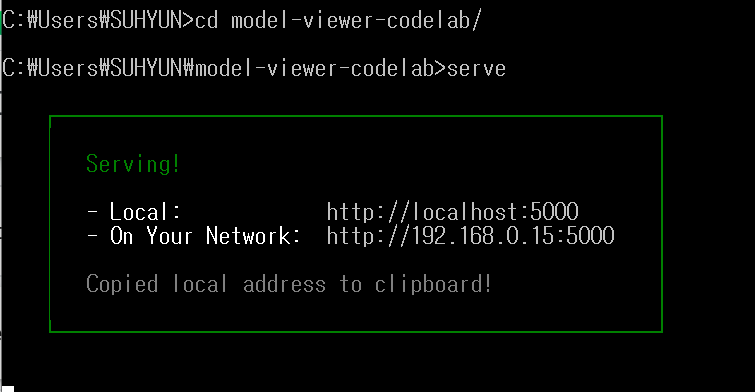
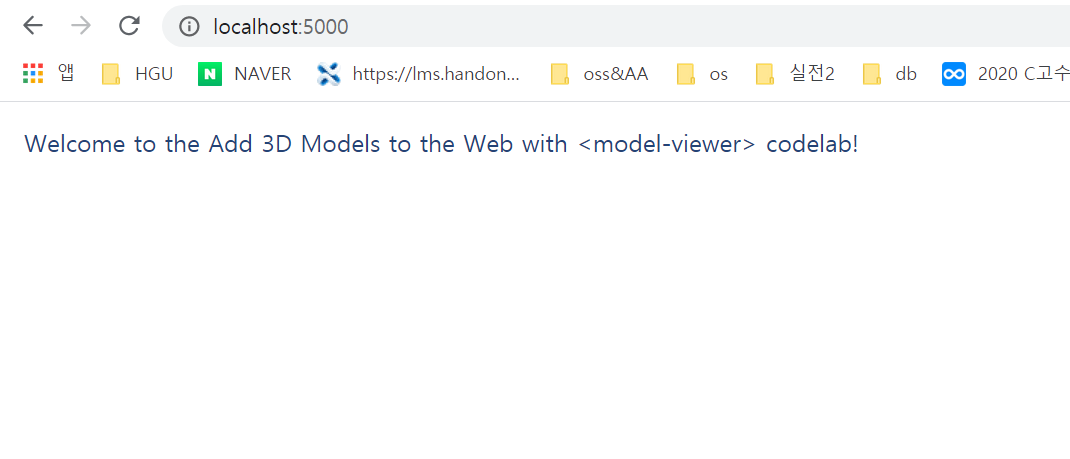
http://localhost:5000 에 접속하면 서버에 연결된 것을 확인 할 수 있다.
3. index.html 수정하기
glitch에 들어가면, 빨간 박스에 보여지는 것과 같이, git으로 clone한 것들이 연동되어 있는 것을 볼 수 있다.
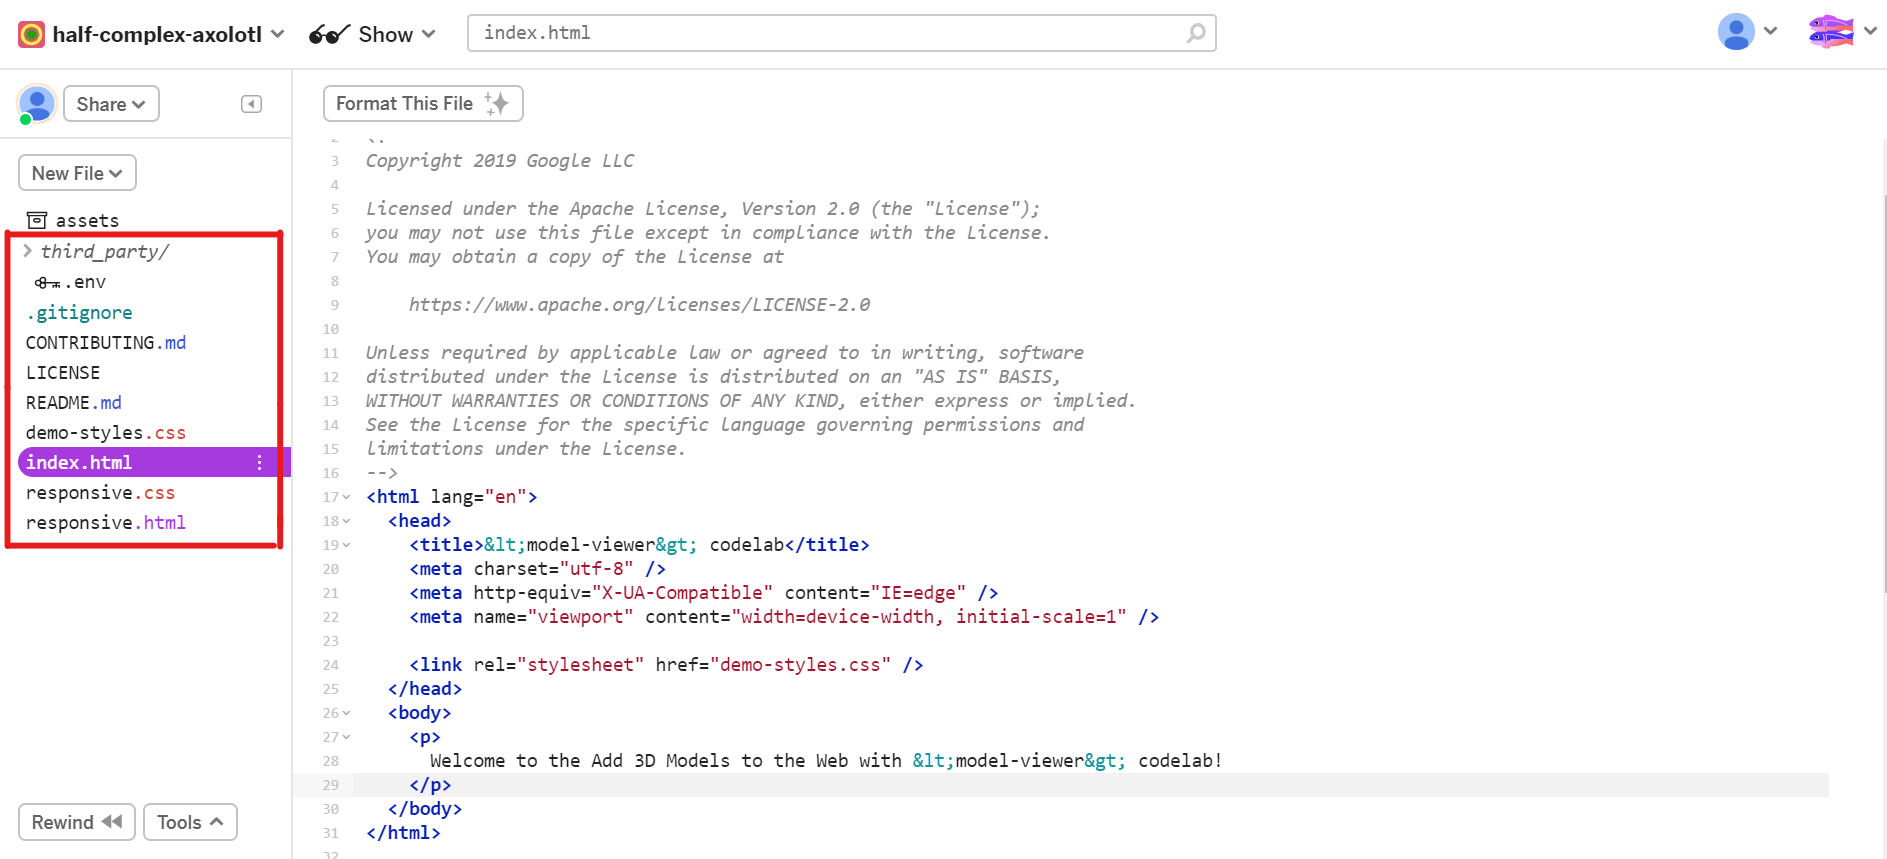
index.html에서,
3-1. model-viewer library를 추가하기
body 끝에 다음의 코드를 삽입한다.
webXR API가 없기 때문에 아직은 웹상에 아무런 변화가 없고 debtools의 consol창에 가보면 에러가 나는 것을 확인할 수 있다.
<!-- 💁 Include both scripts below to support all browsers! -->

<!-- Loads <model-viewer> for modern browsers: -->
<script type="module"
    src="https://unpkg.com/@google/model-viewer/dist/model-viewer.js">
</script>

<!-- Loads <model-viewer> for old browsers like IE11: -->
<script nomodule
    src="https://unpkg.com/@google/model-viewer/dist/model-viewer-legacy.js">
</script>
3-2. polyfills 추가하기
( *polyfills: 해당 환경의 수단 만 사용하여 이전 환경에 새로운 API를 제공 하는 라이브러리 )
head 부분에 다음의 코드를 삽입한다.
<!-- The following libraries and polyfills are recommended to maximize browser support -->
<!-- NOTE: you must adjust the paths as appropriate for your project -->

<!-- 🚨 REQUIRED: Web Components polyfill to support Edge and Firefox < 63 -->
<script src="https://unpkg.com/@webcomponents/webcomponentsjs@2.1.3/webcomponents-loader.js"></script>

<!-- 💁 OPTIONAL: Intersection Observer polyfill for better performance in Safari and IE11 -->
<script src="https://unpkg.com/intersection-observer@0.5.1/intersection-observer.js"></script>

<!-- 💁 OPTIONAL: Resize Observer polyfill improves resize behavior in non-Chrome browsers -->
<script src="https://unpkg.com/resize-observer-polyfill@1.5.1/dist/ResizeObserver.js"></script>

<!-- 💁 OPTIONAL: Fullscreen polyfill is required for experimental AR features in Canary -->
<!--<script src="https://unpkg.com/fullscreen-polyfill@1.0.2/dist/fullscreen.polyfill.js"></script>-->

<!-- 💁 OPTIONAL: Include prismatic.js for Magic Leap support -->
<!--<script src="https://unpkg.com/@magicleap/prismatic@0.18.2/prismatic.min.js"></script>-->
3-3. model-viewer 태그 추가하기
기존 p태그를 지우고 model-viewer 태그를 삽입한다.
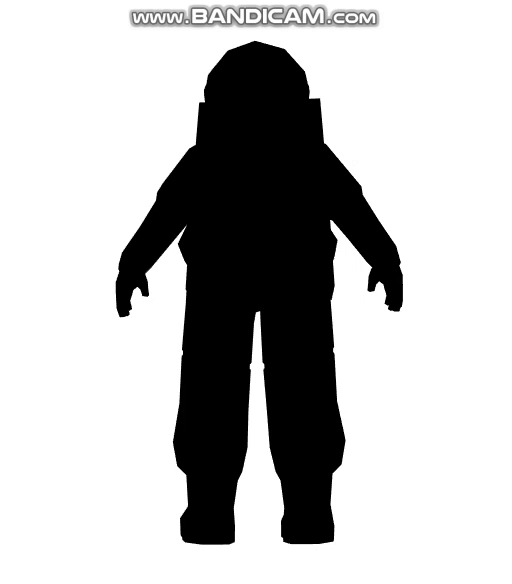
<model-viewer src="third_party/Astronaut/Astronaut.glb"
              alt="A 3D model of an astronaut">
</model-viewer>
다음의 단계를 잘 따라왔으면,
web page에 3D model이 생성된 것을 볼 수 있다 !!!
3) 오픈소스 활용 및 후기
오픈 소스를 활용하기 위해서 추가적인 기능을 넣기로 했다.
1) 회전하는 기능
<model-viewer src="third_party/Astronaut/Astronaut.glb"
              auto-rotate camera-controls
              alt="A 3D model of an astronaut">
</model-viewer>
2) ar기능
ARCore's Scene Viewer장치로 직접 눈으로 3d모델을 보기 가능
<model-viewer src="third_party/Astronaut/Astronaut.glb"
              ar
              auto-rotate camera-controls
              alt="A 3D model of an astronaut">
</model-viewer>
3) 카메라 각도 조절기능
<model-viewer src="third_party/Astronaut/Astronaut.glb"
              ar
              auto-rotate camera-controls
              camera-orbit="-20deg 75deg 2m"
              alt="A 3D model of an astronaut">
</model-viewer>
다음과 같이 여러 기능들을 추가해서 다양하고 재밌게 표현해 볼 수 있다.
오픈소스를 사용해보면서,
1) 이전에 알지 못했던 새로운 기능을 알아가는 것이 재미있다.
2) 각 오픈소스에 맞는 환경을 만들어 주기위해서 스스로 알아가야 하는 부분들이 있다.
3) 오픈소스들을 서로 공유하면서 발전도 많이 될 것 같다.
기회가 된다면 다음에도 오픈소스를 활용하여 여러 재미있는 프로젝트를 도전해보고 싶다!