
개발을 하다보면 form을 쓸 일이 많다. 글발행에서부터 댓글까지 submit 해야 할 일이 많은데 처음엔 어렵게 느껴지던 antd가 굉장히 유용하게 쓰여서 공유하고자 5주차 메인 주제로 삼았다.
리액트 Form 사용기🎨
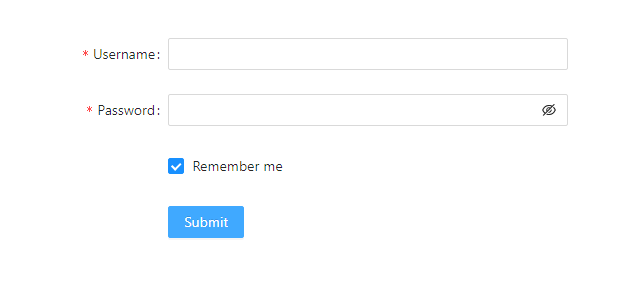
antd 공식문서 발췌 : antd form
- point 공식문서를 열심히 읽자.. 그 속에 답이 있다...
import { Form, Input, Button, Checkbox } from 'antd';

const Demo = () => {
  const onFinish = (values) => {
    console.log('Success:', values);
  };


  return (
    <Form
      name="basic"
      labelCol={{
        span: 8,
      }}
      wrapperCol={{
        span: 16,
      }}
      initialValues={{
        remember: true,
      }}
      onFinish={onFinish}
      autoComplete="off"
    >
      <Form.Item
        label="Username"
        name="username"
        rules={[
          {
            required: true,
            message: 'Please input your username!',
          },
        ]}
      >
        <Input />
      </Form.Item>

      <Form.Item
        label="Password"
        name="password"
        rules={[
          {
            required: true,
            message: 'Please input your password!',
          },
        ]}
      >
        <Input.Password />
      </Form.Item>

      <Form.Item
        name="remember"
        valuePropName="checked"
        wrapperCol={{
          offset: 8,
          span: 16,
        }}
      >
        <Checkbox>Remember me</Checkbox>
      </Form.Item>

      <Form.Item
        wrapperCol={{
          offset: 8,
          span: 16,
        }}
      >
        <Button type="primary" htmlType="submit">
          Submit
        </Button>
      </Form.Item>
    </Form>
  );
};
Form 발행시 가장 중요한 건 각각의 아이템들을 Form.Item으로 감싸주어야 한다는 점이다. 그러면 Form.Item 안에 있는 name이 value값을 가져오는 key가 된다. antd의 input은 따로 children 값을 가질 수 없기 때문에 추후 글 발생시 특정 텍스트를 가져와서 input에 넣어주는 과정이 필요하다면 name="" 이 굉장히 중요하다. 그리고 텍스트 변경은 form.setFieldsValue()를 이용하면 된다.
                 <Form.Item
                    name="title"
                    rules={[
                      {
                        required: true,
                        message: '제목을 입력하세요',
                      },
                    ]}
                  >
                    <Input
                      bordered={false}
                      placeholder="제목을 입력하세요"
                      className="title"
                    ></Input>
                  </Form.Item>
글 수정 페이지 작업
수정페이지 작업은 글쓰기 페이지와 완전 동일하되, 기존의 데이터를 받아오는 과정이 필요했다. 이때 form.setFieldsValue()를 매우 유용하게 사용했다.
const [form] = Form.useForm()

//해당글 가져오기
  useEffect(() => {
    axios(`/games/${gameNo}`) //
      .then((response) => {
        console.log('해당글 가져옴?', response)
        const prevData = response.data

        //name="title"의 value 값을 가지고 왔다
        form.setFieldsValue({
          title: prevData.title,

        })
      })
  }, [])

  return (
    <div>
        <Write>
            <Form form={form} onFinish={onFinish} courtInfo={courtInfo}>
                    <Form.Item
                      name="title"
                      rules={[
                        {
                          required: true,
                          message: '제목을 입력하세요',
                        },
                      ]}
                    >
                      <Input
                        bordered={false}
                        placeholder="제목을 입력하세요"
                        className="title"
                      ></Input>
                    </Form.Item>
                  <Button fs={'16px'} type="submit">
                    발행하기
                  </Button>
                </Flexbox>
            </Form>
          </Write>
    </div>
  )
}
먼저 const [form] = Form.useForm() 를 선언해주고 Form 안에 form={form}을 넣어준다. 이 두가지 과정이 선행되지 않으면 form.setFieldsValue()가 실행되지 않는다.. 이 다음에 댓글창 작업할 때 댓글 발행 후 input창을 비우고 싶은데 form.resetFields()를 여기저기 넣어도 안되는 게 아닌가. 알고보니
<Form form={form}>이렇게 Form 안에 form={form}을 넣지 않아서였음..
처음에 공식문서에서 무슨 말을 하는건지도 모르겠고 어려워서 그냥 쌩으로 만들고 싶었는데 기간이 정해져있는 프로젝트에서는 아주 유용하게 쓸 수 있는 라이브러리같다. 역시 아는것이 힘이여.
