일단 기존 프로젝트를 좀 삭제하고 셋팅하겠다.
IntelliJ에서 프로젝트를 삭제하기 위해 다음과 같이 한다.
File -> Close Project -> 디렉토리에서 직접 삭제
다시 intellij를 열 때, Recent Projects에서 삭제할 프로젝트를 선택하고 delete 키를 누른다.
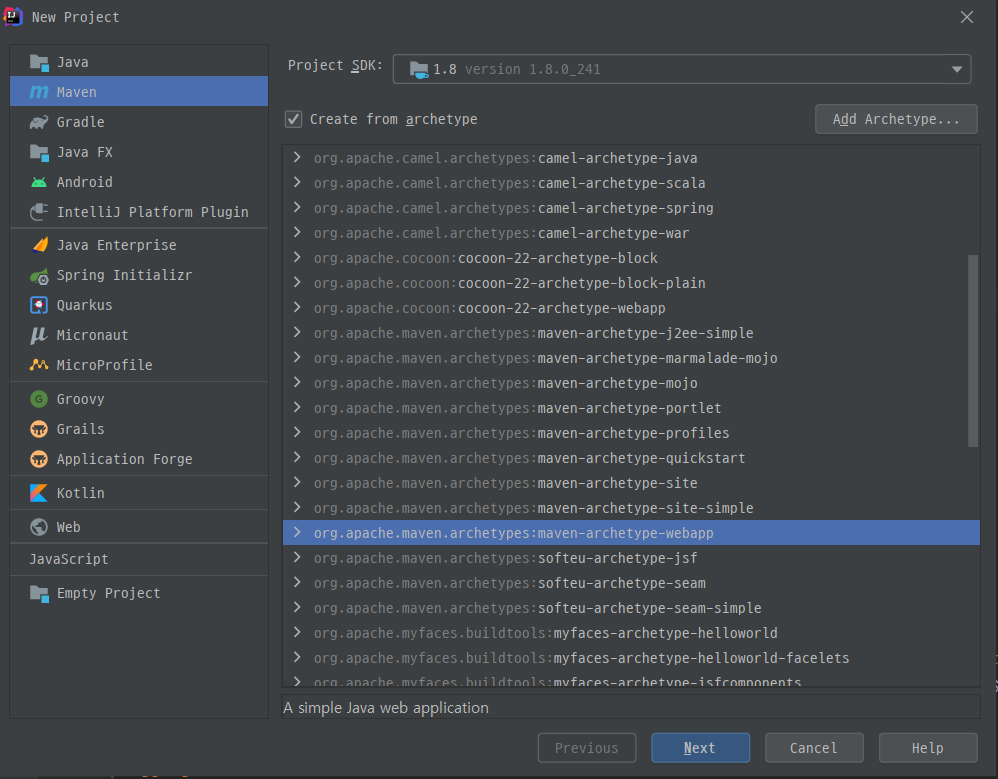
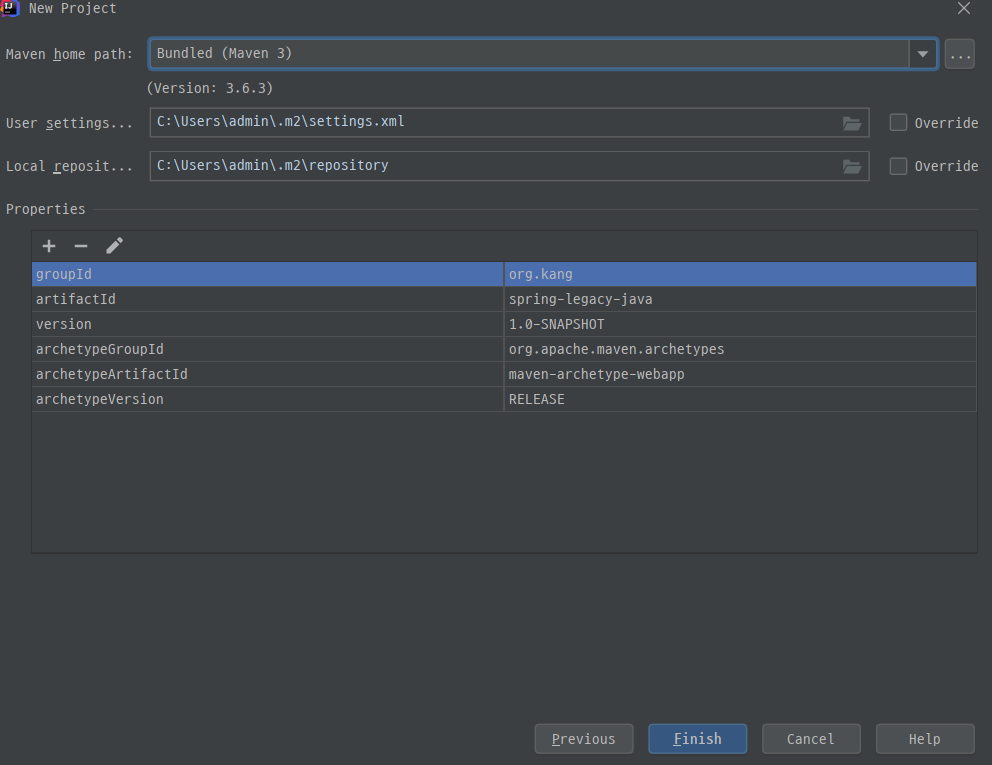
1. 프로젝트 생성
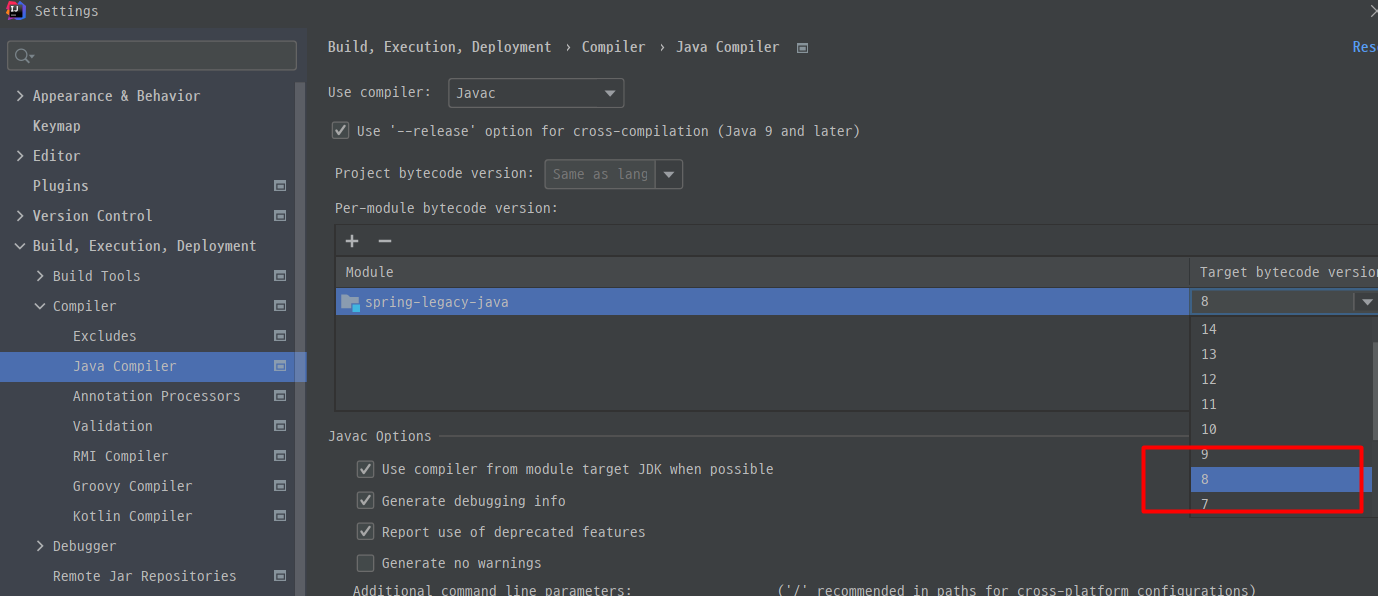
2. 자바 버전 수정

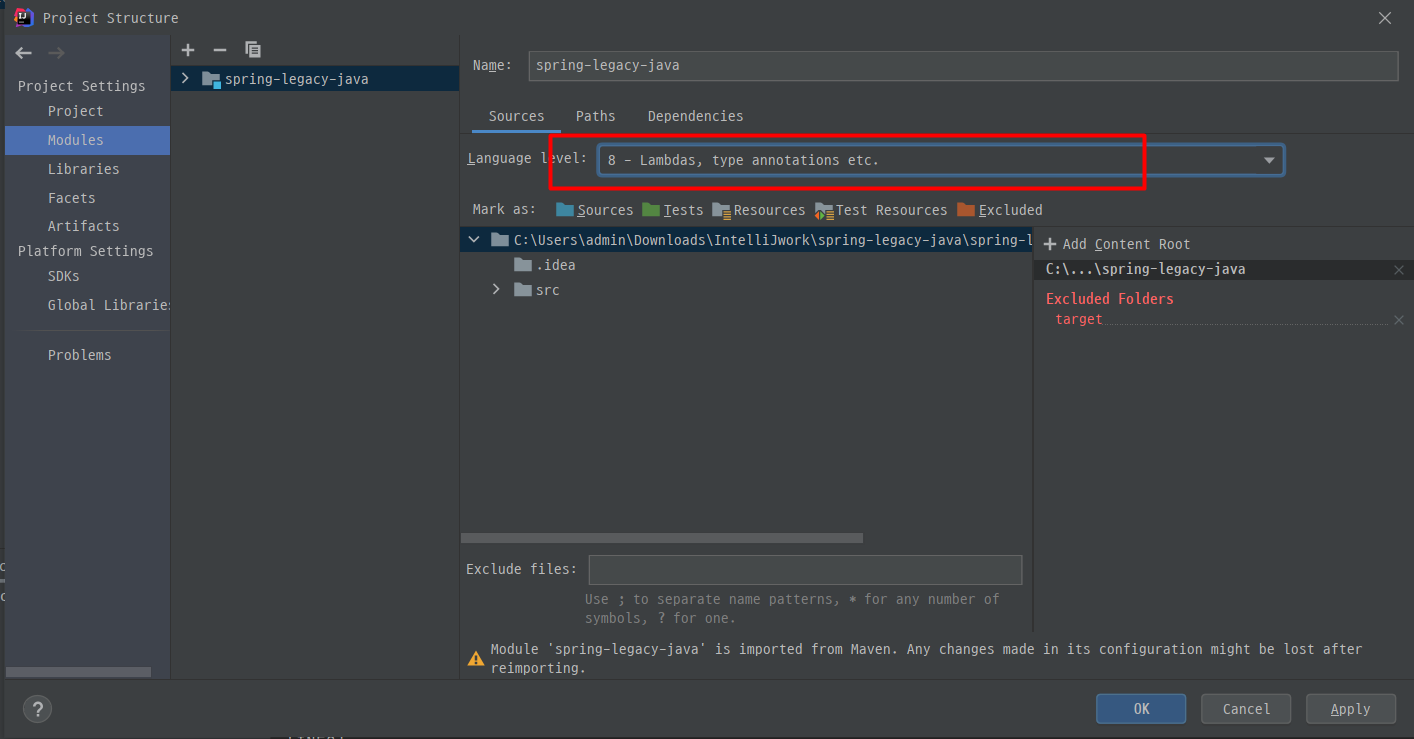
난 따로 모듈을 안 만들고, 프로젝트 통째로 시작했으니, 모듈 선택할 필요없슴
3. 의존성 설정
<properties>와 <dependencies> 수정
https://4urdev.tistory.com/62 마크다운 특수문자 표현법(How to use symbolic character in markdown)
<properties>
    <project.build.sourceEncoding>UTF-8</project.build.sourceEncoding>
    <maven.compiler.source>8</maven.compiler.source>
    <maven.compiler.target>8</maven.compiler.target>
    <spring-webmvc-version>5.2.6.RELEASE</spring-webmvc-version>
    <javax.servlet-api-version>4.0.1</javax.servlet-api-version>
    <javax.servlet.jsp-api-version>2.3.3</javax.servlet.jsp-api-version>
    <javax.servlet.jsp.jstl-api-version>1.2.2</javax.servlet.jsp.jstl-api-version>
    <taglibs-standard-impl-version>1.2.5</taglibs-standard-impl-version>
    <junit-version>4.11</junit-version>
  </properties>

  <dependencies>
    <!-- https://mvnrepository.com/artifact/org.springframework/spring-webmvc -->
    <dependency>
      <groupId>org.springframework</groupId>
      <artifactId>spring-webmvc</artifactId>
      <version>${spring-webmvc-version}</version>
    </dependency>

    <!-- https://mvnrepository.com/artifact/javax.servlet/javax.servlet-api -->
    <dependency>
      <groupId>javax.servlet</groupId>
      <artifactId>javax.servlet-api</artifactId>
      <version>${javax.servlet-api-version}</version>
      <scope>provided</scope>
    </dependency>

    <!-- https://mvnrepository.com/artifact/javax.servlet.jsp/javax.servlet.jsp-api -->
    <dependency>
      <groupId>javax.servlet.jsp</groupId>
      <artifactId>javax.servlet.jsp-api</artifactId>
      <version>${javax.servlet.jsp-api-version}</version>
      <scope>provided</scope>
    </dependency>

    <!-- https://mvnrepository.com/artifact/javax.servlet.jsp.jstl/javax.servlet.jsp.jstl-api -->
    <dependency>
      <groupId>javax.servlet.jsp.jstl</groupId>
      <artifactId>javax.servlet.jsp.jstl-api</artifactId>
      <version>${javax.servlet.jsp.jstl-api-version}</version>
    </dependency>

    <!-- https://mvnrepository.com/artifact/org.apache.taglibs/taglibs-standard-impl -->
    <dependency>
      <groupId>org.apache.taglibs</groupId>
      <artifactId>taglibs-standard-impl</artifactId>
      <version>${taglibs-standard-impl-version}</version>
    </dependency>

    <dependency>
      <groupId>junit</groupId>
      <artifactId>junit</artifactId>
      <version>${junit-version}</version>
      <scope>test</scope>
    </dependency>
  </dependencies>
4. XML 설정파일 자바로 대체
XML로 스프링 MVC 설정을 할 때 web.xml에 한 설정들은 자바로 설정할 때는 AbstractAnnotationConfigDispatcherServletInitializer를 상속하던지 WebApplicationInitializer 인터페이스를 구현하는 방법으로 설정할 수 있다.
AbstractAnnotationConfigDispatcherServletInitializer를 상속하는 방법이 더 쉽고 간단하지만 설정의 자유도가 떨어지는 특징이 있다.
나는 WebApplicationInitializer 사용
Web.xml => WebConfig
public class WebConfig implements WebApplicationInitializer {
    @Override
    public void onStartup(ServletContext servletContext) throws ServletException {

        // DispatcherServlet 설정 -s
        // 1. DispatcherServlet WebApplicationContext 객체 생성
        AnnotationConfigWebApplicationContext webContext = new AnnotationConfigWebApplicationContext();
        webContext.register(ServletConfig.class);

        // 2. DispatcherServlet 객체 생성 및 추가
        DispatcherServlet dispatcherServlet = new DispatcherServlet(webContext);
        ServletRegistration.Dynamic servlet = servletContext.addServlet("dispatcher", dispatcherServlet);

        // 3. 서블릿 매핑 및 부가 설정
        servlet.addMapping("/");
        servlet.setLoadOnStartup(1);
        // DispatcherServlet 설정 -e

        // Root Config 설정 -s
        AnnotationConfigWebApplicationContext rootContext = new AnnotationConfigWebApplicationContext();
        rootContext.register(RootConfig.class); //등록

        ContextLoaderListener listener = new ContextLoaderListener(rootContext);
        servletContext.addListener(listener);
        // Root Context Config 설정 -e

        // Filter 설정 -s
        FilterRegistration.Dynamic filter = servletContext.addFilter("encodingFilter", CharacterEncodingFilter.class);
        filter.setInitParameter("encoding", "UTF-8");
        filter.addMappingForServletNames(null, false, "dispatcher");
        // Filter 설정 -e
    }
}
servlet-context.xml => ServletConfig
@Configuration
@EnableWebMvc
@ComponentScan("com.kang.springLegacyJava.controller") //controller에 특정어노테이션이 등록된 애들을 자동으로 bean으로 등록
public class ServletConfig implements WebMvcConfigurer {

    @Override
    public void configureViewResolvers(ViewResolverRegistry registry) {
        WebMvcConfigurer.super.configureViewResolvers(registry);
        // ViewResolver 설정
        registry.jsp("/WEB-INF/views/", ".jsp");
    }

    @Override
    public void addResourceHandlers(ResourceHandlerRegistry registry) {
        WebMvcConfigurer.super.addResourceHandlers(registry);
        // Static Resources 설정
        registry.addResourceHandler("/**").addResourceLocations("/resources/");
    }
}
@Componentscan 어노테이션은 @Component어노테이션 및 streotype(@Service, @Repository, @Controller.)어노테이션이 부여된 Class들을 자동으로 Scan하여 Bean으로 등록해주는 역할을 하는 어노테이션입니다.
@ComponentScan(basePackages = { "org.zerock.controller" }) //요렇게 하면 여러개 등록할 수 있겠지?
root-context.xml => RootConfig
@Configuration  //초기에는 셋팅할 게 없다.
public class RootConfig {


}
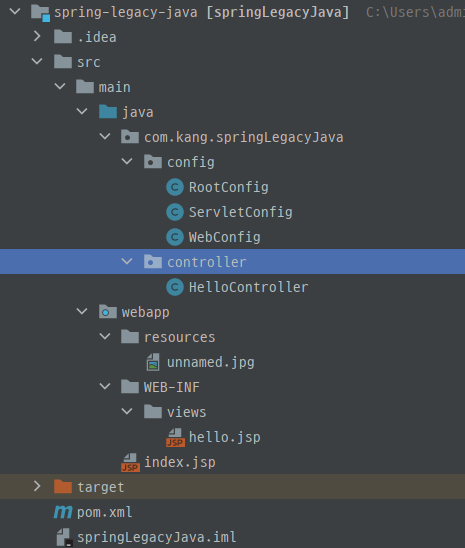
5. 프로젝트 구조 잡기
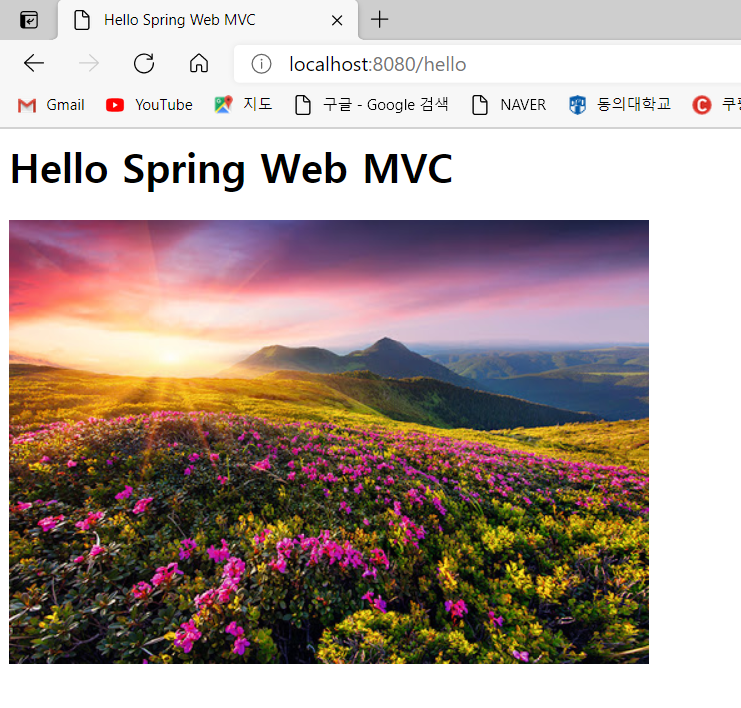
6. 테스트할 컨트롤러, jsp 작성
@Controller
public class HelloController {

    @GetMapping("/hello")
    public String hello(){
        return "hello";
    }
}
<%@ page contentType="text/html;charset=UTF-8" language="java" %>
<html>
<head>
    <title>Hello Spring Web MVC</title>
</head>
<body>
<h1>Hello Spring Web MVC</h1>
<img src="unnamed.jpg"/>
</body>
</html>
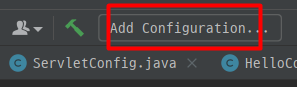
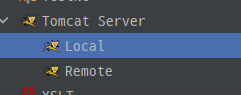
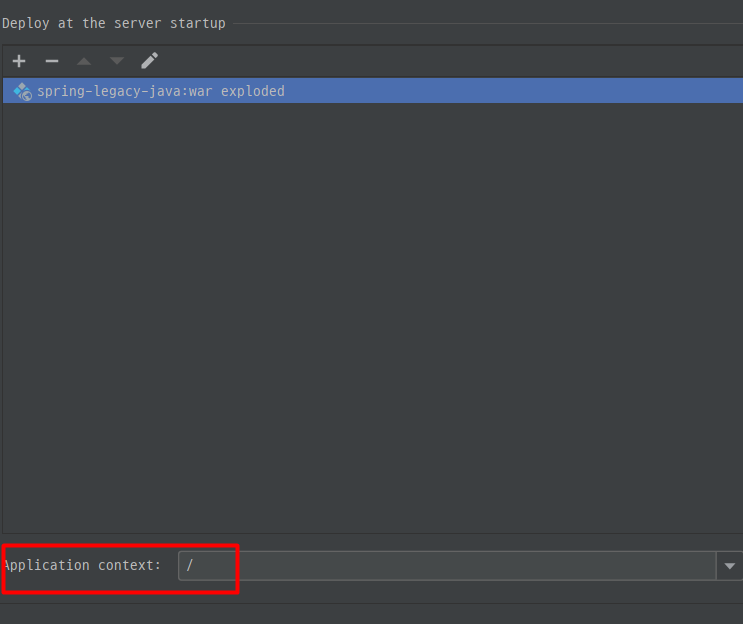
7. 톰캣 설정
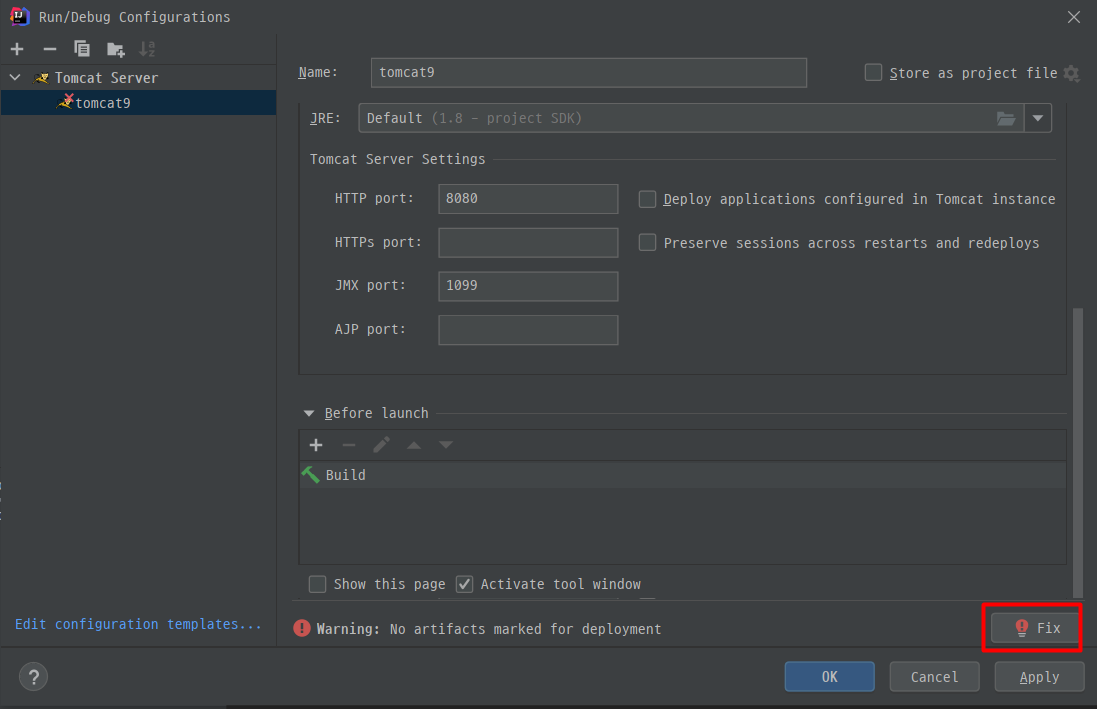
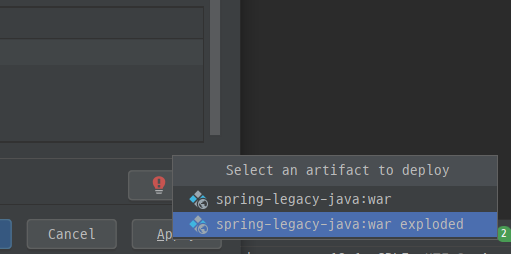
1) 아카이브(.war, .ear 등) 파일로 배포 한다.
- 아카이브는 WAS(Tomcat 등)에 의해 자동으로 압축이 해제된다.
- 파일이 많은 경우 압축을 푸는 시간이 오래 걸릴 수 있다.
- 원격 서버에 배포시 한 개의 파일만 전송하면 된다.
2) exploded(expanded)
-
아카이브를 압축 해제하여 디렉토리 형태로 배포 한다.
-
원본 소스를 건드리지 않고 그대로 배포하는 경우에 적합하다.
-
별도 디렉토리에 원본 소스를 복사하여 만들기 때문에 파일이 많은 경우 복사하는 시간이 오래 걸릴 수 있다.
출처: https://goddaehee.tistory.com/247 [갓대희의 작은공간]
8. 테스트
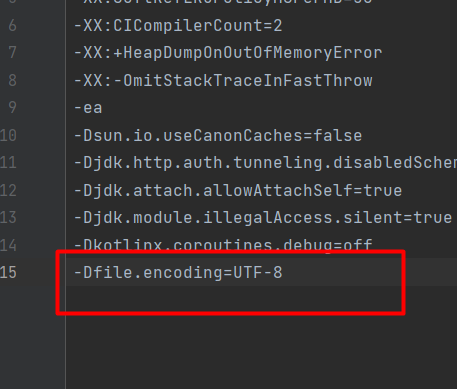
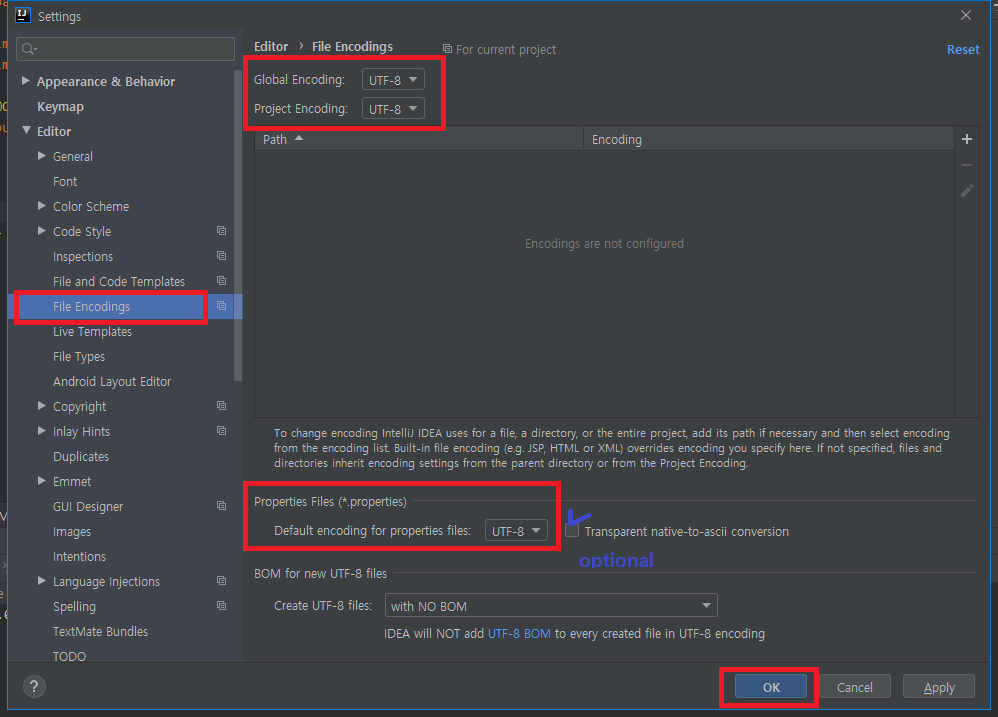
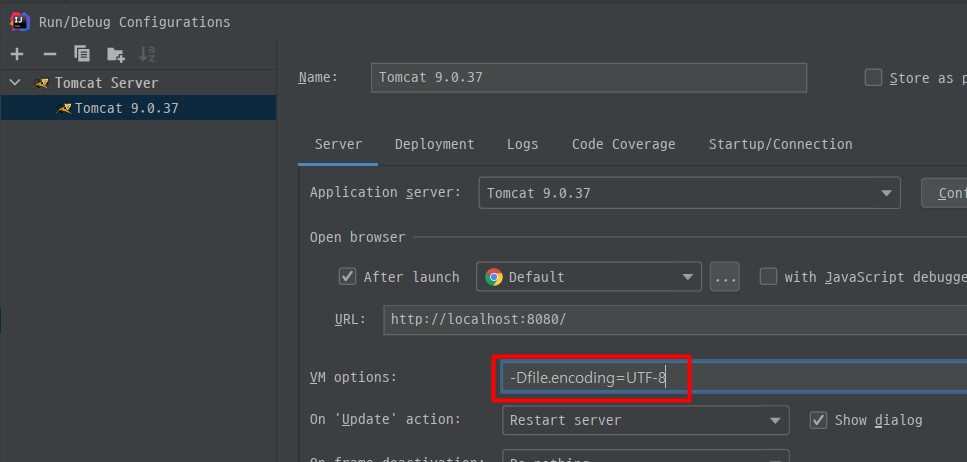
인코딩 설정
-Dfile.encoding=UTF-8- Help >> Edit Custom VM Options... 클릭
출처: https://goddaehee.tistory.com/248?category=395441 [갓대희의 작은공간]