Debian Package를 이용한 ROS2 Installation
Locale 설정
$ sudo apt update && sudo apt install locales
$ sudo locale-gen en_US en_US.UTF-8
$ sudo update-locale LC_ALL=en_US.UTF-8 LANG=en_US.UTF-8
$ export LANG=en_US.UTF-8
Sources 설정
$ sudo apt update && sudo apt install curl gnupg2 lsb-release
$ sudo curl -sSL https://raw.githubusercontent.com/ros/rosdistro/master/ros.key -o /usr/share/keyrings/ros-archive-keyring.gpg
$ echo "deb [arch=$(dpkg --print-architecture) signed-by=/usr/share/keyrings/ros-archive-keyring.gpg] http://packages.ros.org/ros2/ubuntu focal main" | sudo tee /etc/apt/sources.list.d/ros2.list > /dev/null
ROS2 Package 설치
$ sudo apt update
$ sudo apt upgrade
$ sudo apt install ros-foxy-desktop ros-foxy-rmw-fastrtps* ros-foxy-rmw-cyclonedds*
$ sudo apt install python3-argcomplete
# Development tools: Compilers and other tools to build ROS packages
$ sudo apt install ros-dev-tools(선택) ~/.bashrc에 등록하여 새로운 terminal을 열 때 자동으로 ROS2 경로 지정
$ echo "source /opt/ros/foxy/setup.bash" >> ~/.bashrcROS2 Package 설치 확인
Terminal 2개에서 각각 아래 명령어 실행
$ source /opt/ros/foxy/setup.bash
# ROS_DISTRO was set to 'noetic' before. Please make sure that the environment does not mix paths from different distributions.
# 위와 같은 error가 발생해도 ROS1에서 ROS2로 환경 변경하는 과정의 warning message이므로 무시하고 설치 진행
$ ros2 run demo_nodes_cpp talker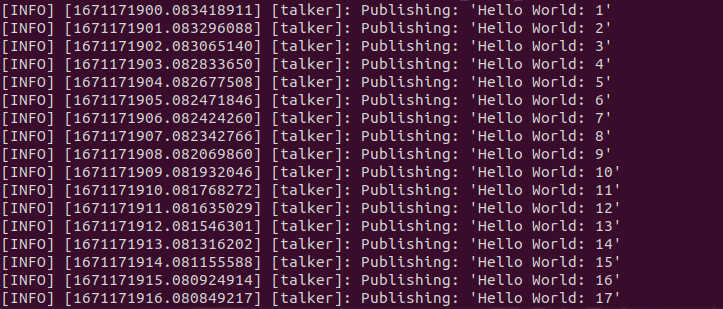
$ source /opt/ros/foxy/setup.bash
$ ros2 run demo_nodes_py listener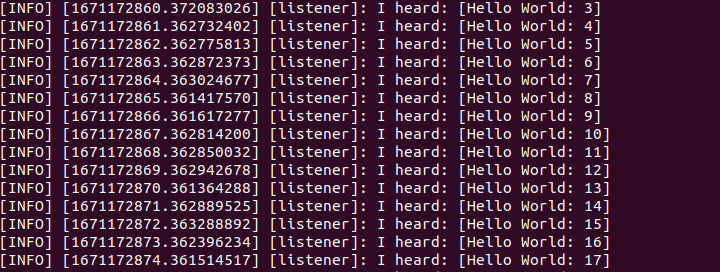
위의 두 캡쳐본을 보면 정상적으로 메세지가 송/수신 되는 것이 확인되면 잘 설치된 것이다.
ROS2 개발 툴 설치
$ sudo apt-get install ntpdate
$ python3 -m pip install colcon-common-extensions
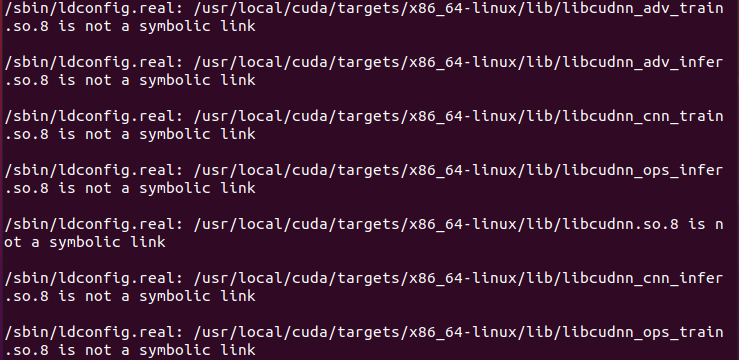
$ python3 -m pytest --version$ sudo apt update && sudo apt install -y build-essential cmake git libbullet-dev python3-colcon-common-extensions python3-flake8 python3-pip python3-pytest-cov python3-rosdep python3-setuptools python3-vcstool wgetpython3 -m pip install -U argcomplete flake8-blind-except flake8-builtins flake8-builtins flake8-class-newline flake8-comprehensions flake8-deprecated flake8-docstrings flake8-import-order flake8-quotes pytest-repeat pytest-rerunfailures pytest$ sudo apt install --no-install-recommends -y libasio-dev libtinyxml2-dev libcunit1-dev개발 툴 설치 과정에서 아래 사진과 같은 error가 발생할 때
$ cd /usr/local/cuda-11.7/lib64
# 검색
$ ls -lha libcudnn*
아래와 같이 -> 와 같은 symbolic link가 없는 것을 확인할 수 있음
-rwxr-xr-x 1 root root 109M 12월  2 17:38 libcudnn_adv_infer.so
-rwxr-xr-x 1 root root 109M 12월  2 17:38 libcudnn_adv_infer.so.8
-rwxr-xr-x 1 root root 109M 12월  2 17:38 libcudnn_adv_infer.so.8.5.0
-rw-r--r-- 1 root root 112M 12월  2 17:38 libcudnn_adv_infer_static.a
-rw-r--r-- 1 root root 112M 12월  2 17:38 libcudnn_adv_infer_static_v8.a
-rwxr-xr-x 1 root root  92M 12월  2 17:38 libcudnn_adv_train.so
-rwxr-xr-x 1 root root  92M 12월  2 17:38 libcudnn_adv_train.so.8
-rwxr-xr-x 1 root root  92M 12월  2 17:38 libcudnn_adv_train.so.8.5.0
-rw-r--r-- 1 root root  94M 12월  2 17:38 libcudnn_adv_train_static.a
-rw-r--r-- 1 root root  94M 12월  2 17:38 libcudnn_adv_train_static_v8.a
-rwxr-xr-x 1 root root 429M 12월  2 17:38 libcudnn_cnn_infer.so
-rwxr-xr-x 1 root root 429M 12월  2 17:38 libcudnn_cnn_infer.so.8
-rwxr-xr-x 1 root root 429M 12월  2 17:38 libcudnn_cnn_infer.so.8.5.0
-rw-r--r-- 1 root root 539M 12월  2 17:38 libcudnn_cnn_infer_static.a
-rw-r--r-- 1 root root 539M 12월  2 17:38 libcudnn_cnn_infer_static_v8.a
-rwxr-xr-x 1 root root  71M 12월  2 17:38 libcudnn_cnn_train.so
-rwxr-xr-x 1 root root  71M 12월  2 17:38 libcudnn_cnn_train.so.8
-rwxr-xr-x 1 root root  71M 12월  2 17:38 libcudnn_cnn_train.so.8.5.0
-rw-r--r-- 1 root root 104M 12월  2 17:38 libcudnn_cnn_train_static.a
-rw-r--r-- 1 root root 104M 12월  2 17:38 libcudnn_cnn_train_static_v8.a
-rwxr-xr-x 1 root root  88M 12월  2 17:38 libcudnn_ops_infer.so
-rwxr-xr-x 1 root root  88M 12월  2 17:38 libcudnn_ops_infer.so.8
-rwxr-xr-x 1 root root  88M 12월  2 17:38 libcudnn_ops_infer.so.8.5.0
-rw-r--r-- 1 root root  91M 12월  2 17:38 libcudnn_ops_infer_static.a
-rw-r--r-- 1 root root  91M 12월  2 17:38 libcudnn_ops_infer_static_v8.a
-rwxr-xr-x 1 root root  65M 12월  2 17:38 libcudnn_ops_train.so
-rwxr-xr-x 1 root root  65M 12월  2 17:38 libcudnn_ops_train.so.8
-rwxr-xr-x 1 root root  65M 12월  2 17:38 libcudnn_ops_train.so.8.5.0
-rw-r--r-- 1 root root  65M 12월  2 17:38 libcudnn_ops_train_static.a
-rw-r--r-- 1 root root  65M 12월  2 17:38 libcudnn_ops_train_static_v8.a
-rwxr-xr-x 1 root root 147K 12월  2 17:38 libcudnn.so
-rwxr-xr-x 1 root root 147K 12월  2 17:38 libcudnn.so.8
-rwxr-xr-x 1 root root 147K 12월  2 17:38 libcudnn.so.8.5.0
$ sudo ln -sf libcudnn.so.8.5.0 libcudnn.so.8
$ sudo ln -sf libcudnn.so.8 libcudnn.so아래와 같이 symbolic link가 생성되는 확인할 수 있음
-rwxr-xr-x 1 root root 109M 12월  2 17:38 libcudnn_adv_infer.so
-rwxr-xr-x 1 root root 109M 12월  2 17:38 libcudnn_adv_infer.so.8
-rwxr-xr-x 1 root root 109M 12월  2 17:38 libcudnn_adv_infer.so.8.5.0
-rw-r--r-- 1 root root 112M 12월  2 17:38 libcudnn_adv_infer_static.a
-rw-r--r-- 1 root root 112M 12월  2 17:38 libcudnn_adv_infer_static_v8.a
-rwxr-xr-x 1 root root  92M 12월  2 17:38 libcudnn_adv_train.so
-rwxr-xr-x 1 root root  92M 12월  2 17:38 libcudnn_adv_train.so.8
-rwxr-xr-x 1 root root  92M 12월  2 17:38 libcudnn_adv_train.so.8.5.0
-rw-r--r-- 1 root root  94M 12월  2 17:38 libcudnn_adv_train_static.a
-rw-r--r-- 1 root root  94M 12월  2 17:38 libcudnn_adv_train_static_v8.a
-rwxr-xr-x 1 root root 429M 12월  2 17:38 libcudnn_cnn_infer.so
-rwxr-xr-x 1 root root 429M 12월  2 17:38 libcudnn_cnn_infer.so.8
-rwxr-xr-x 1 root root 429M 12월  2 17:38 libcudnn_cnn_infer.so.8.5.0
-rw-r--r-- 1 root root 539M 12월  2 17:38 libcudnn_cnn_infer_static.a
-rw-r--r-- 1 root root 539M 12월  2 17:38 libcudnn_cnn_infer_static_v8.a
-rwxr-xr-x 1 root root  71M 12월  2 17:38 libcudnn_cnn_train.so
-rwxr-xr-x 1 root root  71M 12월  2 17:38 libcudnn_cnn_train.so.8
-rwxr-xr-x 1 root root  71M 12월  2 17:38 libcudnn_cnn_train.so.8.5.0
-rw-r--r-- 1 root root 104M 12월  2 17:38 libcudnn_cnn_train_static.a
-rw-r--r-- 1 root root 104M 12월  2 17:38 libcudnn_cnn_train_static_v8.a
-rwxr-xr-x 1 root root  88M 12월  2 17:38 libcudnn_ops_infer.so
-rwxr-xr-x 1 root root  88M 12월  2 17:38 libcudnn_ops_infer.so.8
-rwxr-xr-x 1 root root  88M 12월  2 17:38 libcudnn_ops_infer.so.8.5.0
-rw-r--r-- 1 root root  91M 12월  2 17:38 libcudnn_ops_infer_static.a
-rw-r--r-- 1 root root  91M 12월  2 17:38 libcudnn_ops_infer_static_v8.a
-rwxr-xr-x 1 root root  65M 12월  2 17:38 libcudnn_ops_train.so
-rwxr-xr-x 1 root root  65M 12월  2 17:38 libcudnn_ops_train.so.8
-rwxr-xr-x 1 root root  65M 12월  2 17:38 libcudnn_ops_train.so.8.5.0
-rw-r--r-- 1 root root  65M 12월  2 17:38 libcudnn_ops_train_static.a
-rw-r--r-- 1 root root  65M 12월  2 17:38 libcudnn_ops_train_static_v8.a
lrwxrwxrwx 1 root root   13 12월 16 16:20 libcudnn.so -> libcudnn.so.8
lrwxrwxrwx 1 root root   17 12월 16 16:20 libcudnn.so.8 -> libcudnn.so.8.5.0
-rwxr-xr-x 1 root root 147K 12월  2 17:38 libcudnn.so.8.5.0
$ ldconfig -N -v $(sed 's/:/ /' <<< $LD_LIBRARY_PATH) 2>/dev/null | grep libcudnn
위와 같이 나오면 성공
다시 아래의 명령어를 실행하면
$ sudo apt install --no-install-recommends -y libasio-dev libtinyxml2-dev libcunit1-dev
위의 사진과 같이 symbolic link가 없다는 error가 해결된 것을 확인할 수 있음
RQt 설치 및 실행
일반적인 설치로 ROS2를 설치했다면 RQt는 설치되었지만 추가적인 설치가 필요할 떄는 아래의 명령어로 설치하면 설치가 안된 package도 설치를 해준다.
$ sudo apt install ros-foxy-rqt*아래와 같은 package가 설치된다.
ros-foxy-rqt
ros-foxy-rqt-action
ros-foxy-rqt-common-plugins
ros-foxy-rqt-console
ros-foxy-rqt-graph
ros-foxy-rqt-gui
ros-foxy-rqt-gui-cpp
ros-foxy-rqt-gui-cpp-dbgsym
ros-foxy-rqt-gui-py
ros-foxy-rqt-image-view
ros-foxy-rqt-image-view-dbgsym
ros-foxy-rqt-msg
ros-foxy-rqt-plot
ros-foxy-rqt-publisher
ros-foxy-rqt-py-common
ros-foxy-rqt-py-common-dbgsym
ros-foxy-rqt-py-console
ros-foxy-rqt-reconfigure
ros-foxy-rqt-robot-monitor
ros-foxy-rqt-robot-steering
ros-foxy-rqt-service-caller
ros-foxy-rqt-shell
ros-foxy-rqt-srv
ros-foxy-rqt-top
ros-foxy-rqt-topic
RQt 실행하는 방법(3가지)
$ rqtmenu의 Plugins에서 원하는 plugin을 선택하여 실행하면 된다.
- 각 rqt 관련 package들의 node들을 하나씩 실행시킨다.
$ ros2 run rqt_msg rqt_msg- 단축 명령어 사용
2번 실행 방법을 alias 단축해서 만들어둔다면 동일하게 사용할 수 있다.
$ rqt_graph
$ rqt_topic
ROS2 Build Test
$ source /opt/ros/foxy/setup.bash
$ mkdir -p ~/robot_ws/src
$ cd robot_ws/
$ colcon build --symlink-install
$ ls
위의 사진과 같이 환경설정 및 빌드에 문제가 없었다면 robot_ws 폴더의 하위 폴더에 src에 추가적으로 build, install, log 폴더가 생성된다.
Run Commands 설정
Run Commands를 모아두는 bashrc 파일에 alias, source, export를 설정
$ vim ~/.bashrc
# vim 대신 gedit 사용 가능
source /opt/ros/foxy/setup.bash
source ~/robot_ws/install/local_setup.bash
source /usr/share/colcon_argcomplete/hook/colcon-argcomplete.bash
source /usr/share/vcstool-completion/vcs.bash
source /usr/share/colcon_cd/function/colcon_cd.sh
export _colcon_cd_root=~/robot_ws
export ROS_DOMAIN_ID=7
export ROS_NAMESPACE=robot1
export RMW_IMPLEMENTATION=rmw_fastrtps_cpp
# export RMW_IMPLEMENTATION=rmw_connext_cpp
# export RMW_IMPLEMENTATION=rmw_cyclonedds_cpp
# export RMW_IMPLEMENTATION=rmw_gurumdds_cpp
# export RCUTILS_CONSOLE_OUTPUT_FORMAT='[{severity} {time}] [{name}]: {message} ({function_name}() at {file_name}:{line_number})'
export RCTILS_CONSOLE_OUTPUT_FORMAT='[{severity}]: {message}'
export RCUTILS_COLORIZED_OUTPUT=1
export RCUTILS_LOGGING_USE_STDOUT=0
export RCUTILS_LOGGING_BUFFERED_STREAM=0
alias cw='cd ~/robot_ws'
alias cs='cd ~/robot_ws/src'
alias ccd='colcon_cd'
alias cb='cd ~/robot_ws && colon build --symlink-install'
alias cbs='colcon build --symlink-install'
alias cbp='colcon build --symlink-install --packages-select'
alias cbu='colcon build --symlink-install --packages-up-to'
alias ct='colcon test'
alias ctp='colcon test --packages-select'
alias ctr='colcon test-result'
alias rt='ros2 topic list'
alias re='ros2 topic echo'
alias rn='ros2 node list'
alias killgazebo='killall -9 gazebo & killall -9 gzserver & killall -9 gzclient'
alias af='ament_flake8'
alias ac='ament_cpplint'
alias testpub='ros2 run demo_nodes_cpp talker'
alias testsub='ros2 run_demo_nodes_cpp listener'
alias testpubing='ros2 run image_tools cam2image'
alias testsubimg='ros2 run image_tools showimage'실행
Source Code 설치 및 Build
$ cd ~/robot_ws/src
$ git clone https://github.com/robotpilot/ros2-seminar-examples.git
$ cd ~/robot_ws && colcon build --symlink-install
$ echo 'source ~/robot_ws/install/local_setup.bash' >> ~/.bashrc
$ source ~/.bashrc
또는 지정한 alias를 사용
# cd ~/robot_ws
$ cw
# colcon build --symlink-install --packages-select
$ cbp topic_service_action_rclcpp_example
build가 잘 된다면 아래와 같이 '~/robot_ws/install/topic_service_action_rclcpp_example/lib/topic_service_action_rclcpp_example' 경로에 argument, operator, calculator, checker와 같은 실행 스크립트가 생성됨

또한 '~/robot_ws/install/topic_service_action_rclcpp_example/share/topic_service_action_rclcpp_example' 경로에 아래와 같이 launch와 param 폴더가 생성되고, launch 폴더 내에 arithmetic.launch.py, param 폴더 내에 arithmetic_config.yaml이 생긴다.


Topic Subscriber, Service server, Action server 실행
calculator node 실행
$ cd ~/robot_ws/install/topic_service_action_rclcpp_example/lib/topic_service_action_rclcpp_example
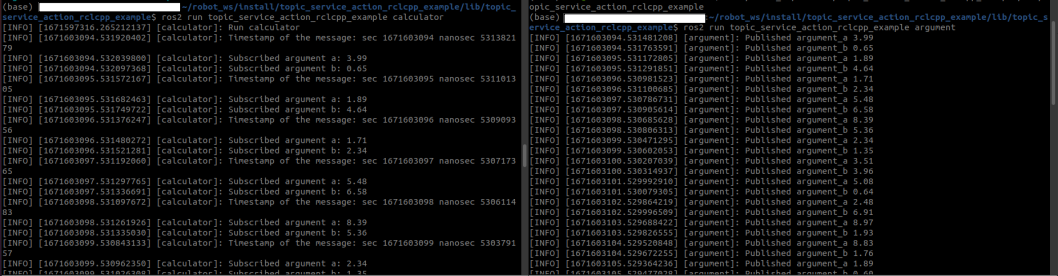
$ ros2 run topic_service_action_rclcpp_example calculator
Topic Publisher 실행
argument node 실행
$ cd ~/robot_ws/install/topic_service_action_rclcpp_example/lib/topic_service_action_rclcpp_example
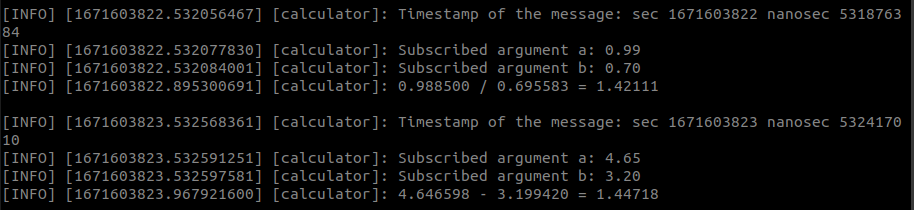
$ ros2 run topic_service_action_rclcpp_example argumentcalculator을 실행한 terminal에는 수신 받은 시간 정보, argument a, argument b가 출력되고, argument를 실행한 terminal에는 argument a, argument b가 출력된다.
Service Client 실행
operator node 실행
$ cd ~/robot_ws/install/topic_service_action_rclcpp_example/lib/topic_service_action_rclcpp_example
$ ros2 run topic_service_action_rclcpp_example operator
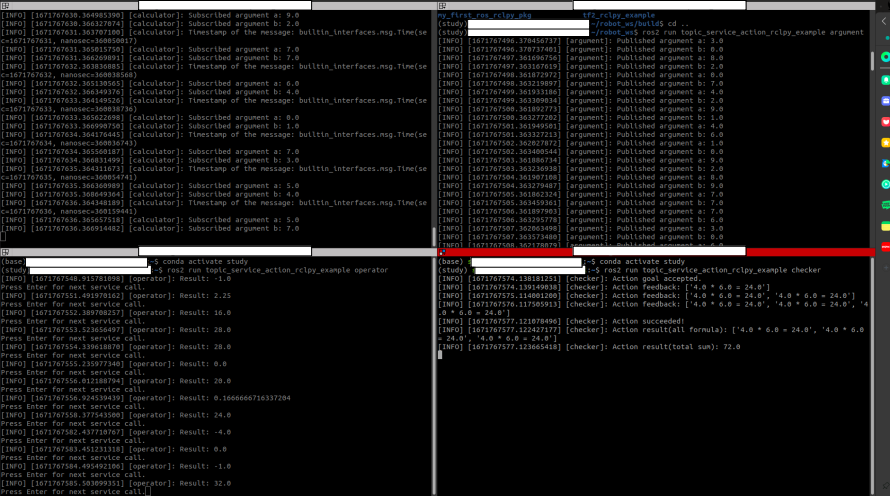
Enter를 눌러 service를 보내면 아래와 같이 연산자(+,-,*,/) 중 하나를 random하게 service 요청값으로 보내 계산한 후 calculator node를 실행한 terminal에 출력된다.
Action Client 실행
checker node 실행
$ cd ~/robot_ws/install/topic_service_action_rclcpp_example/lib/topic_service_action_rclcpp_example
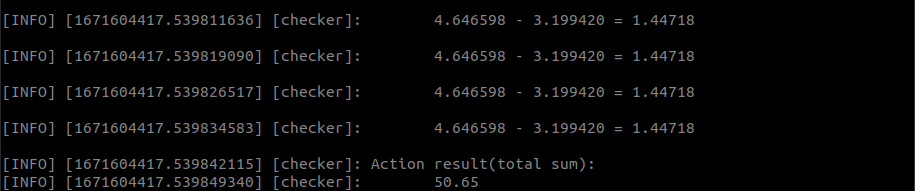
$ ros2 run topic_service_action_rclcpp_example checker연산값의 합계 한계치를 목표값으로 calculator node에 전달하고, calculator node로부터 action feedback을 받는다. 연산값의 합이 목표값이 넘으면 calculator node로부터 checker node는 최종적인 연산 합을 받는다.
GOAL_TOTAL_SUM 이라는 인자를 75로 할당 가능
$ ros2 run topic_service_action_rclcpp_example checker -g 75
argument 노드와 calculator 노드를 동시에 실행하는 법
$ cd ~/robot_ws/install/topic_service_action_rclcpp_example/share/topic_service_action_rclcpp_example/launch
$ ros2 launch topic_service_action_rclcpp_example arithmetic.launch.py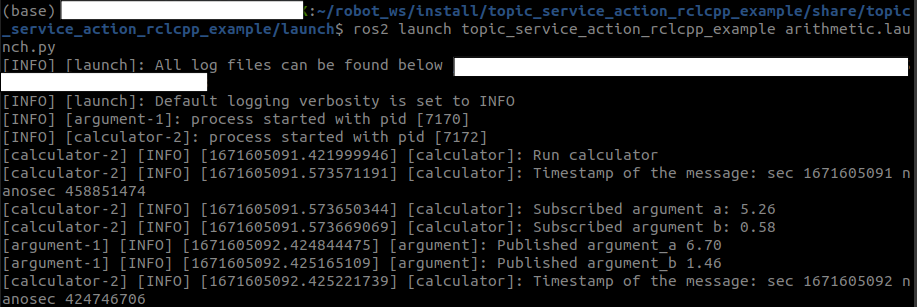
Python 실행도 cpp과 동일
ROS2 제거
$ sudo apt remove ~nros-foxy-* && sudo apt autoremoverepository 제거
$ sudo rm /etc/apt/sources.list.d/ros2.list
$ sudo apt update
$ sudo apt autoremove
# Consider upgrading for packages previously shadowed.
$ sudo apt upgrade