[text-to-illustration] Fine-tuning Stable Diffusion using Textual Inversion
안녕하세요. 기획 중인 웹서비스는 ‘Be My Story’로, ChatGPT를 이용한 아동용 일기기반 동화 생성 및 공유 플랫폼입니다. 제가 맡은 AI 부분은 세 단계로 이루어져 있습니다.
- 아동이 쓴 일기를 동화로 변환
- 각 동화의 문단마다 일러스트 생성 모델에 넣을 prompt로 변환
- 일러스트 생성 모델로, 각 동화의 문단별 내용을 잘 나타낸 일러스트 생성
첫 번째와 두 번째 단계들은 ChatGPT 사이트에서 여러번 데모를 돌려본 결과, ChatGPT API를 연결하여 비교적 손쉽게 구현될 것으로 보입니다. 반면, 세 번째 단계 구현은 기술적으로 가장 어려울 것으로 예상됩니다. 매도 먼저 맞는 게 낫다고 했던가요... 그래서 저는 이번 스타트 학기에 세 번째 단계를 가장 먼저 구현하려 노력하였습니다.
세 번째 단계에서 기존의 text-to-image 모델과 다른 기술적 차별점은 다음 두 가지 입니다.
- 통일된 화풍의 여러 이미지를 생성하는 것
- 일관된 등장인물이 등장하는 여러 이미지를 생성되는 것
1. 통일된 화풍
우선, 생성형 AI 구현에서 주되게 구현할 부분는 한 동화 속에서 같은 화풍의 그림체 생성하는 것입니다.
1-1. 데이터 크롤링
데이터 선정
지브리에서 공개한 400개의 이미지를 사용하기로 하였습니다.
크롤링할 페이지 접속
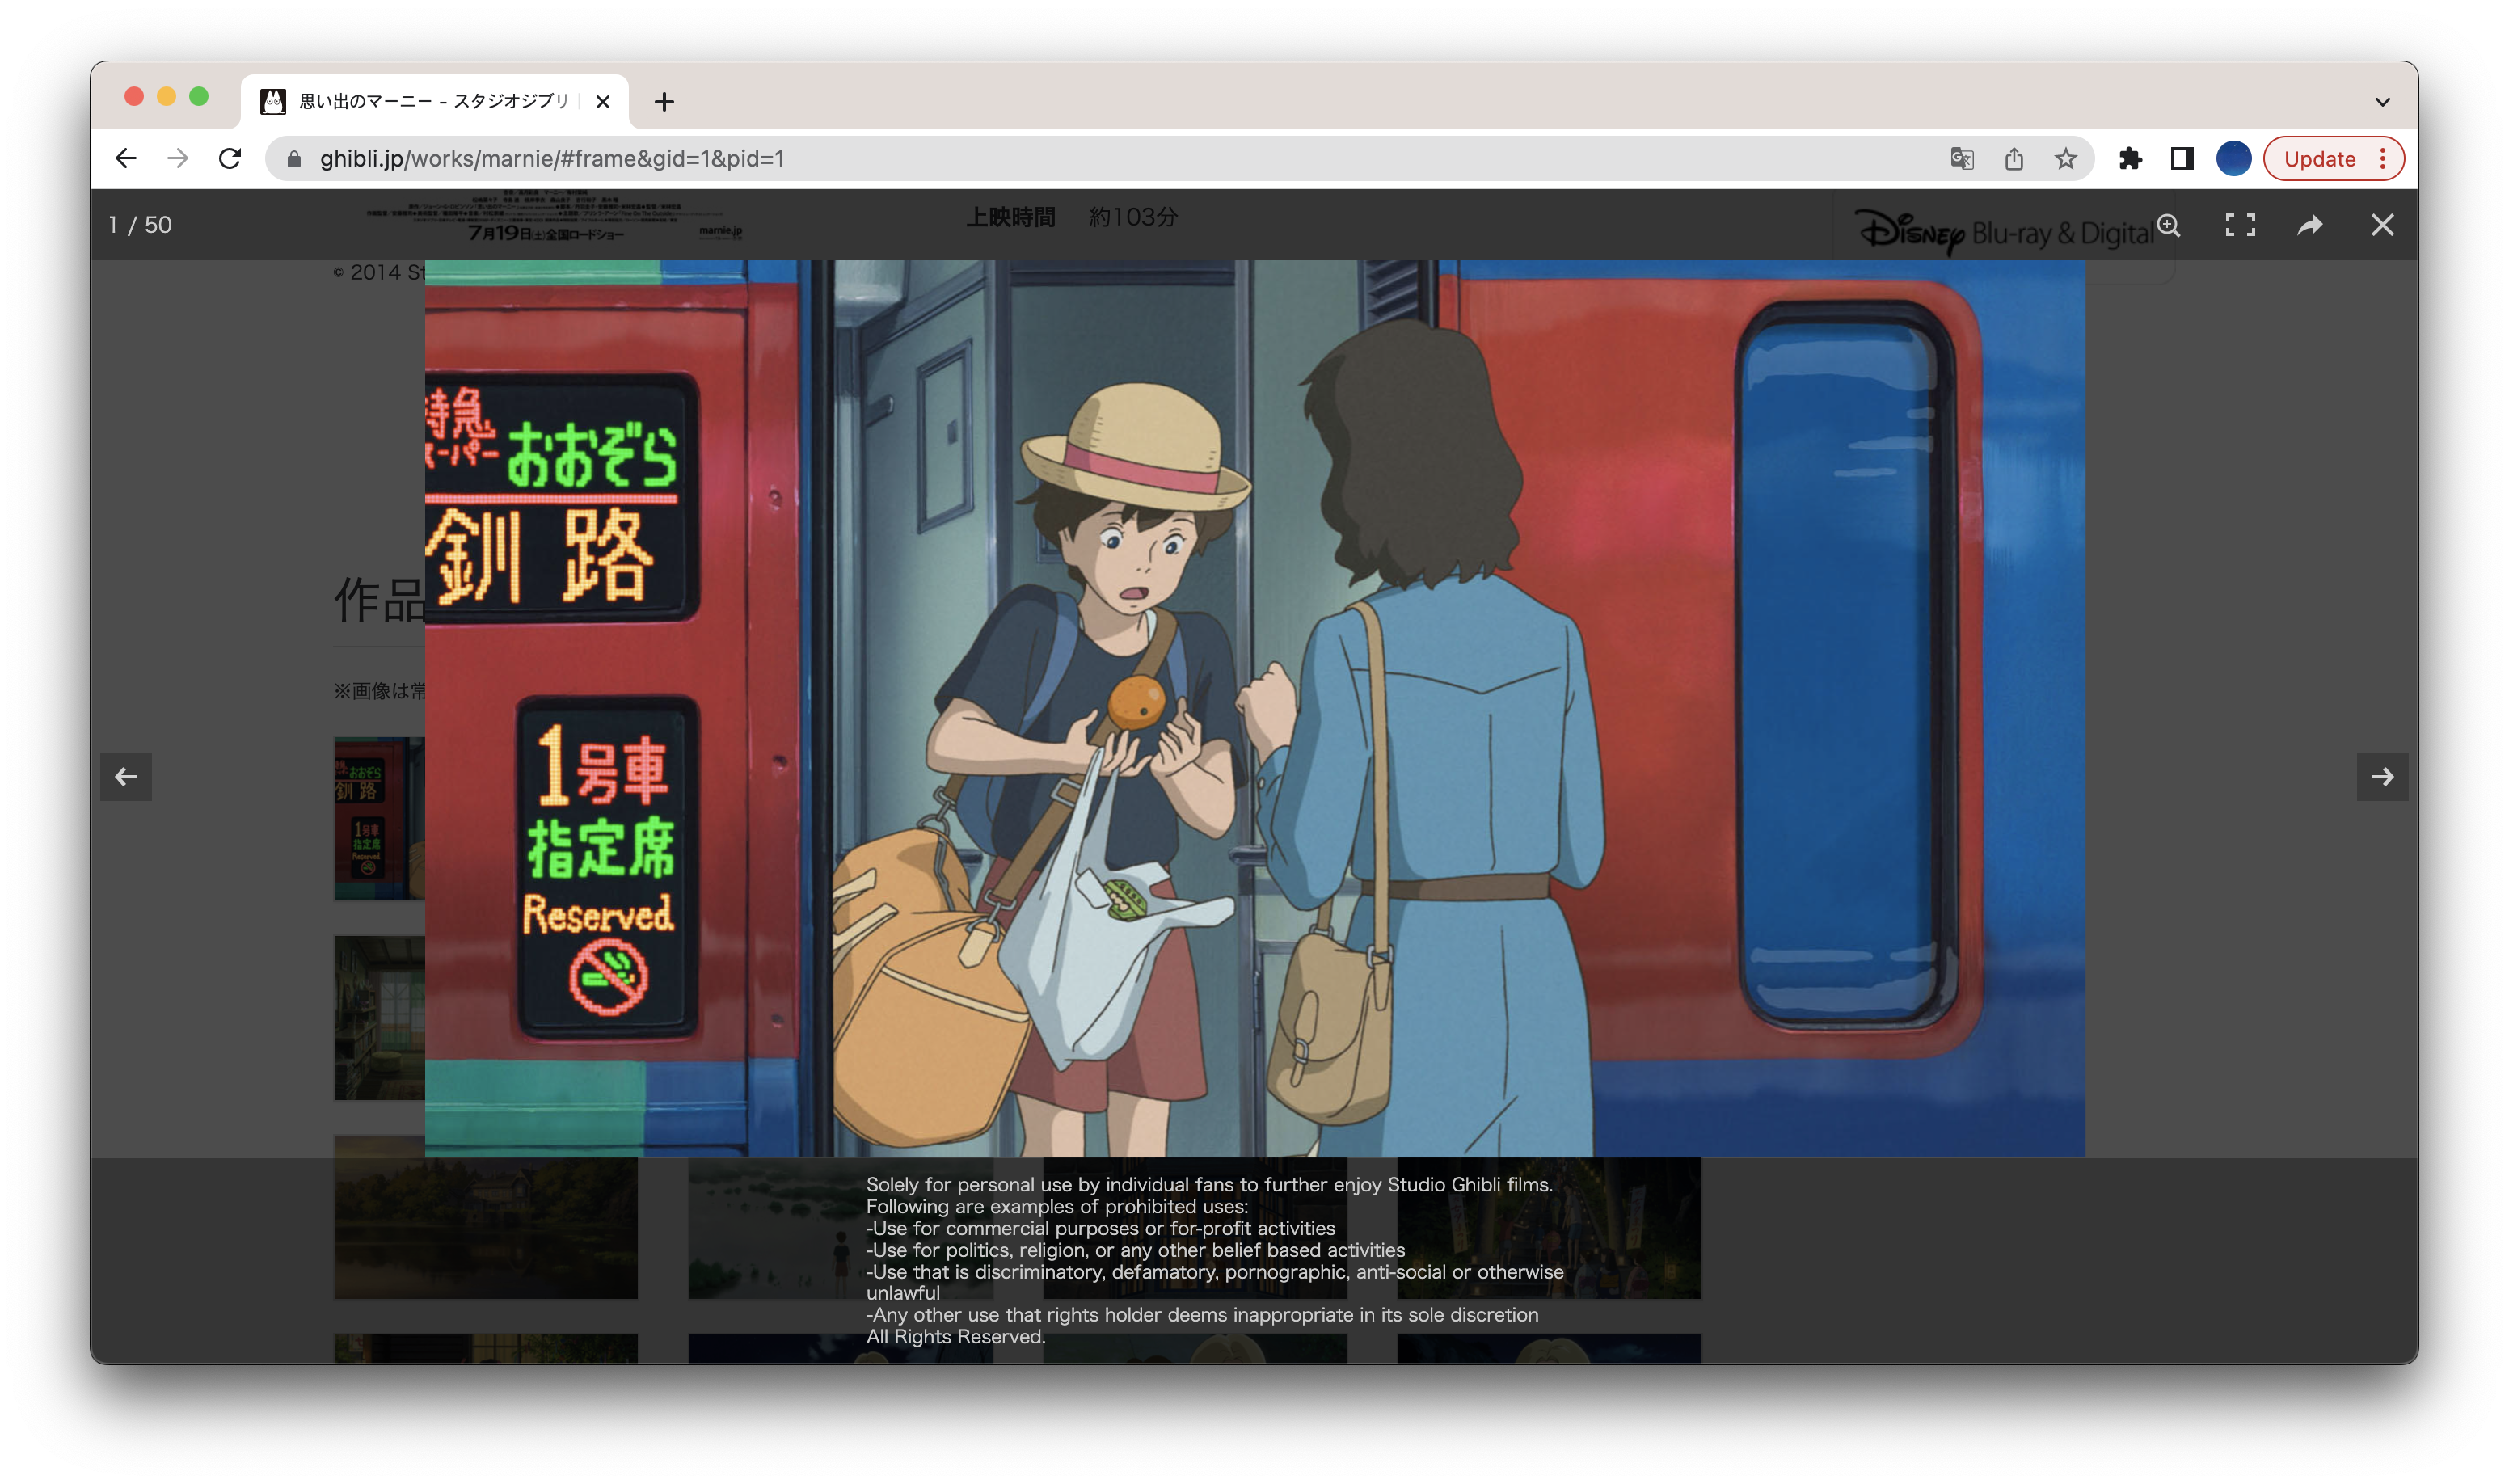
웹페이지 주소 규칙: https://www.ghibli.jp/works/{작품영문명}/#frame&gid=1&pid={이미지번호}
driver.get('https://www.ghibli.jp/works/'+keyword+'/#frame&gid=1&pid='+str(i)) # 웹페이지 접근크롤링 가능 여부 확인
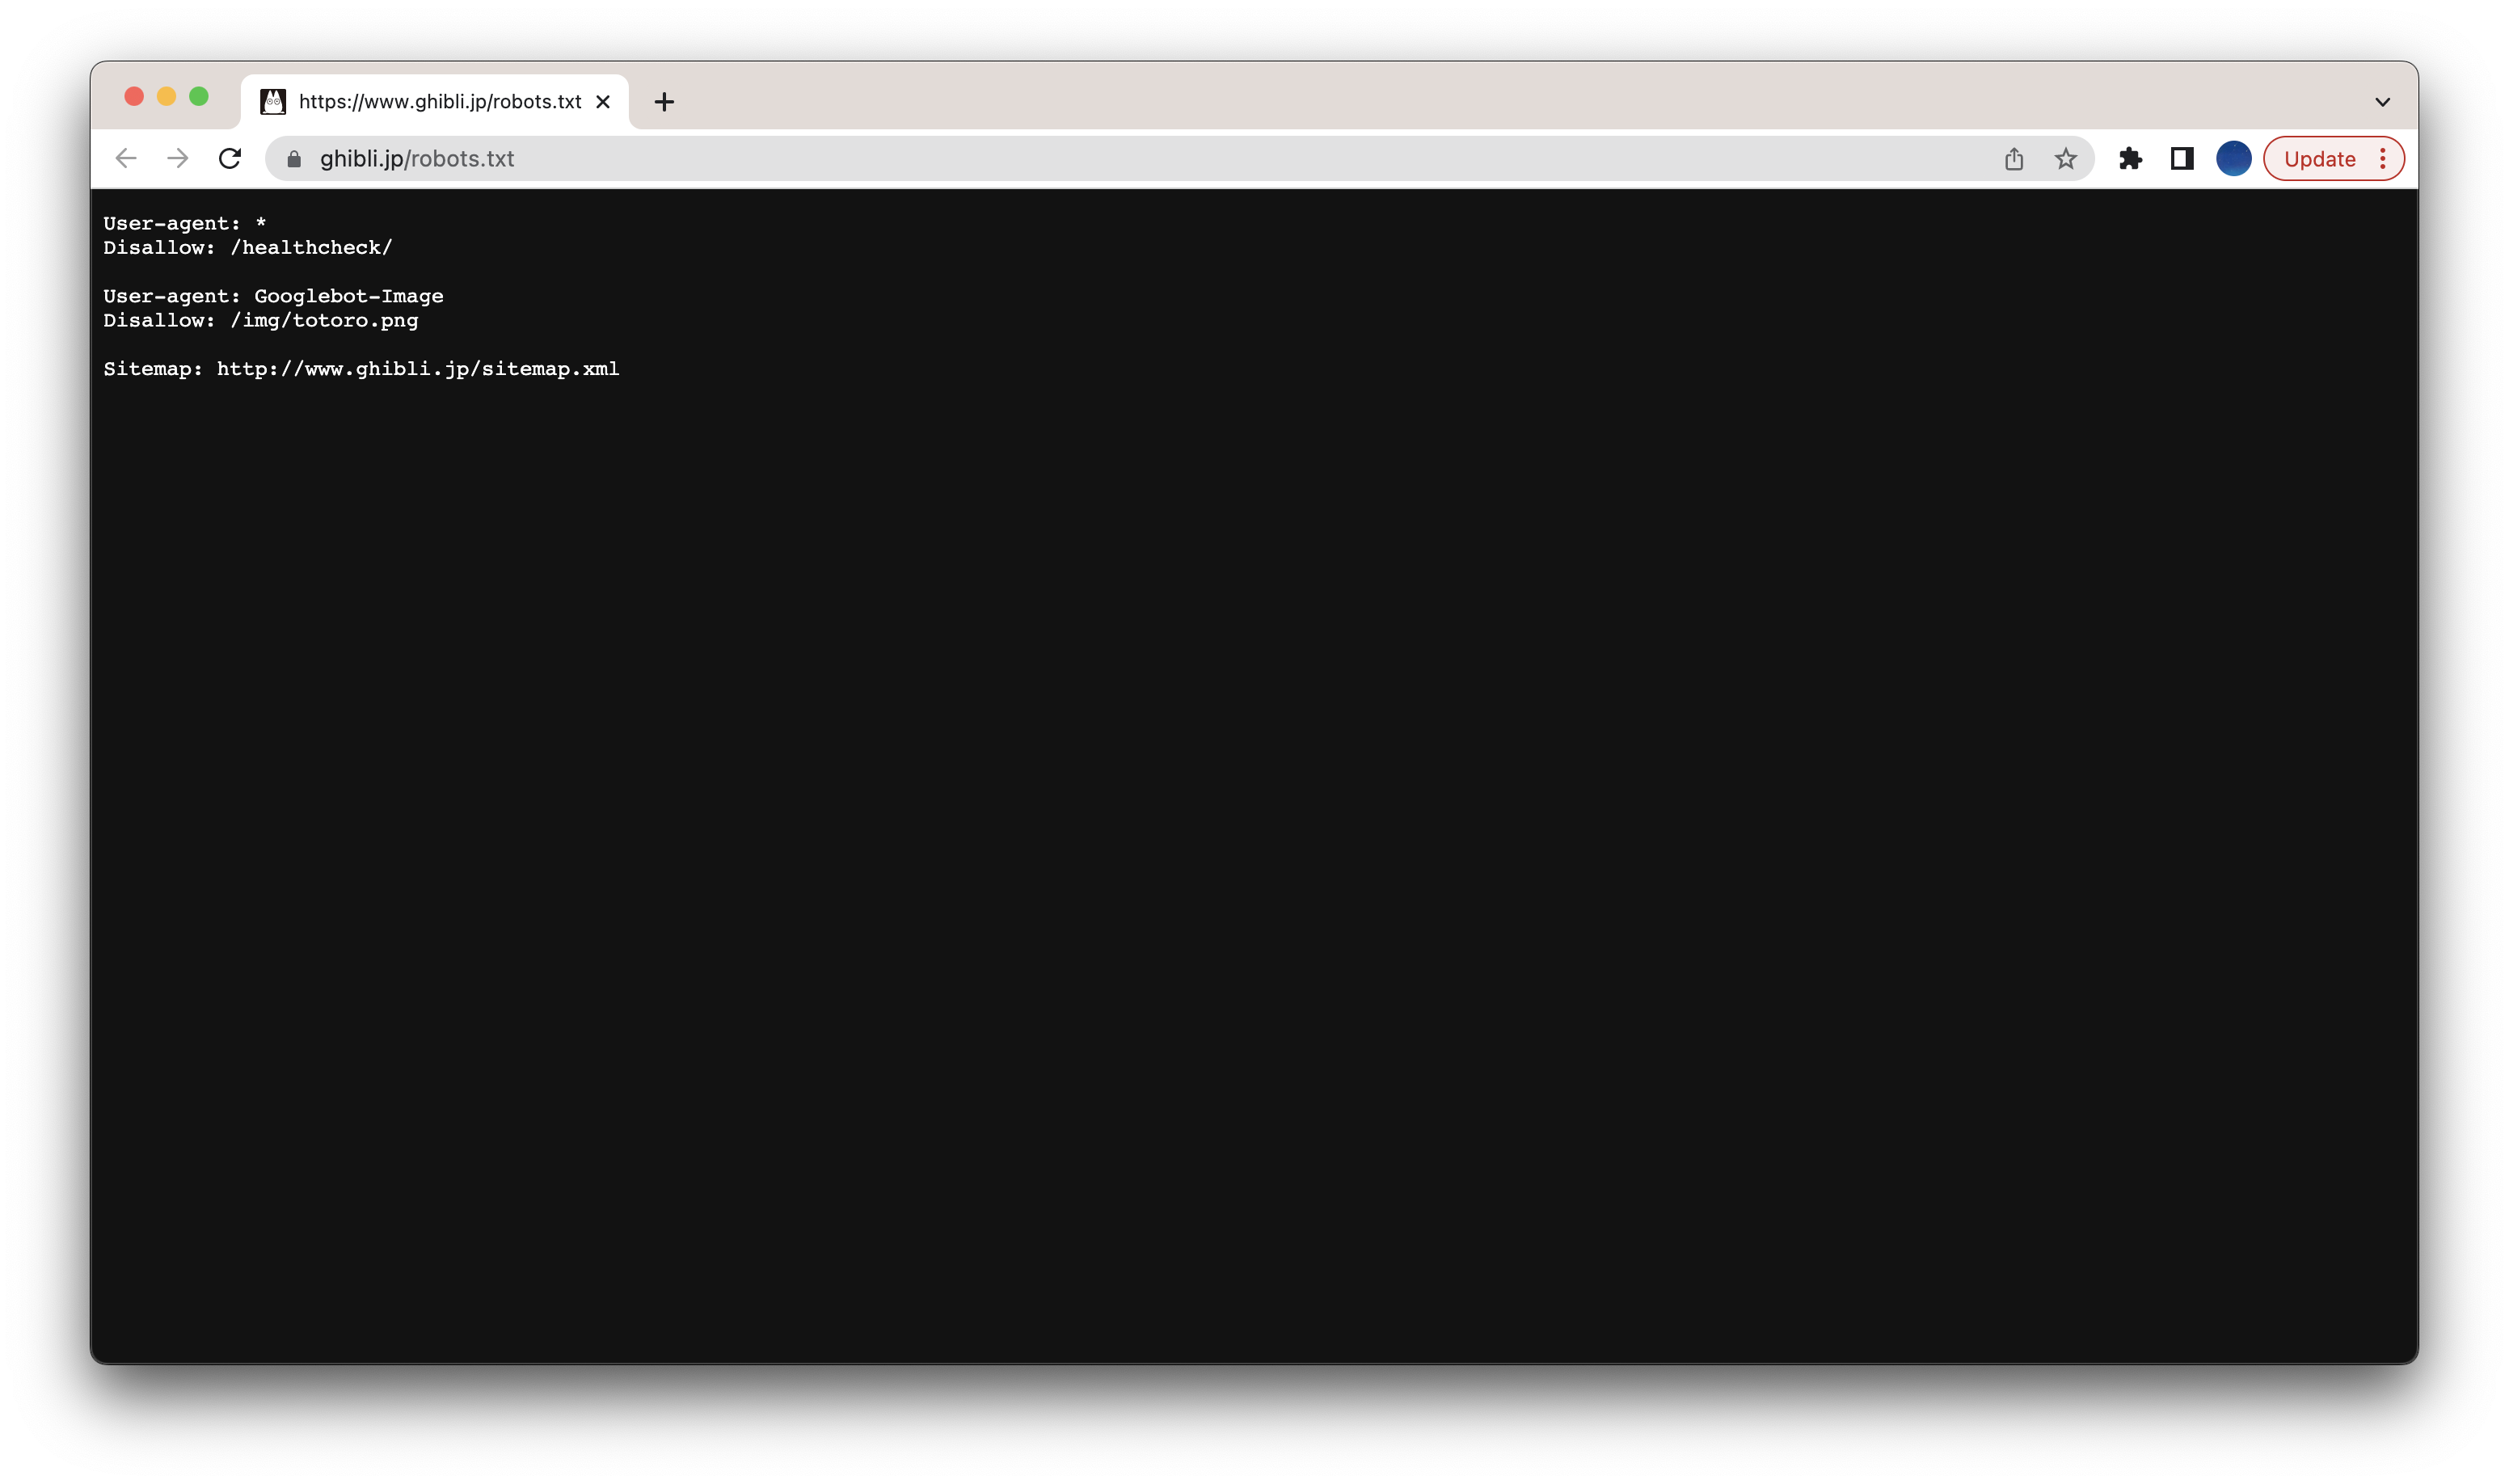
크롤링할 페이지에서는 크롤링 가능하군요.
크롤링 데이터 태그 파악
'웹페이지 우클릭 > Inspect > 검사 아이콘(사각형에 커서가 있는 아이콘) > 크롤링 데이터' 순 클릭하면, 해당 데이터의 태그를 파악할 수 있습니다.
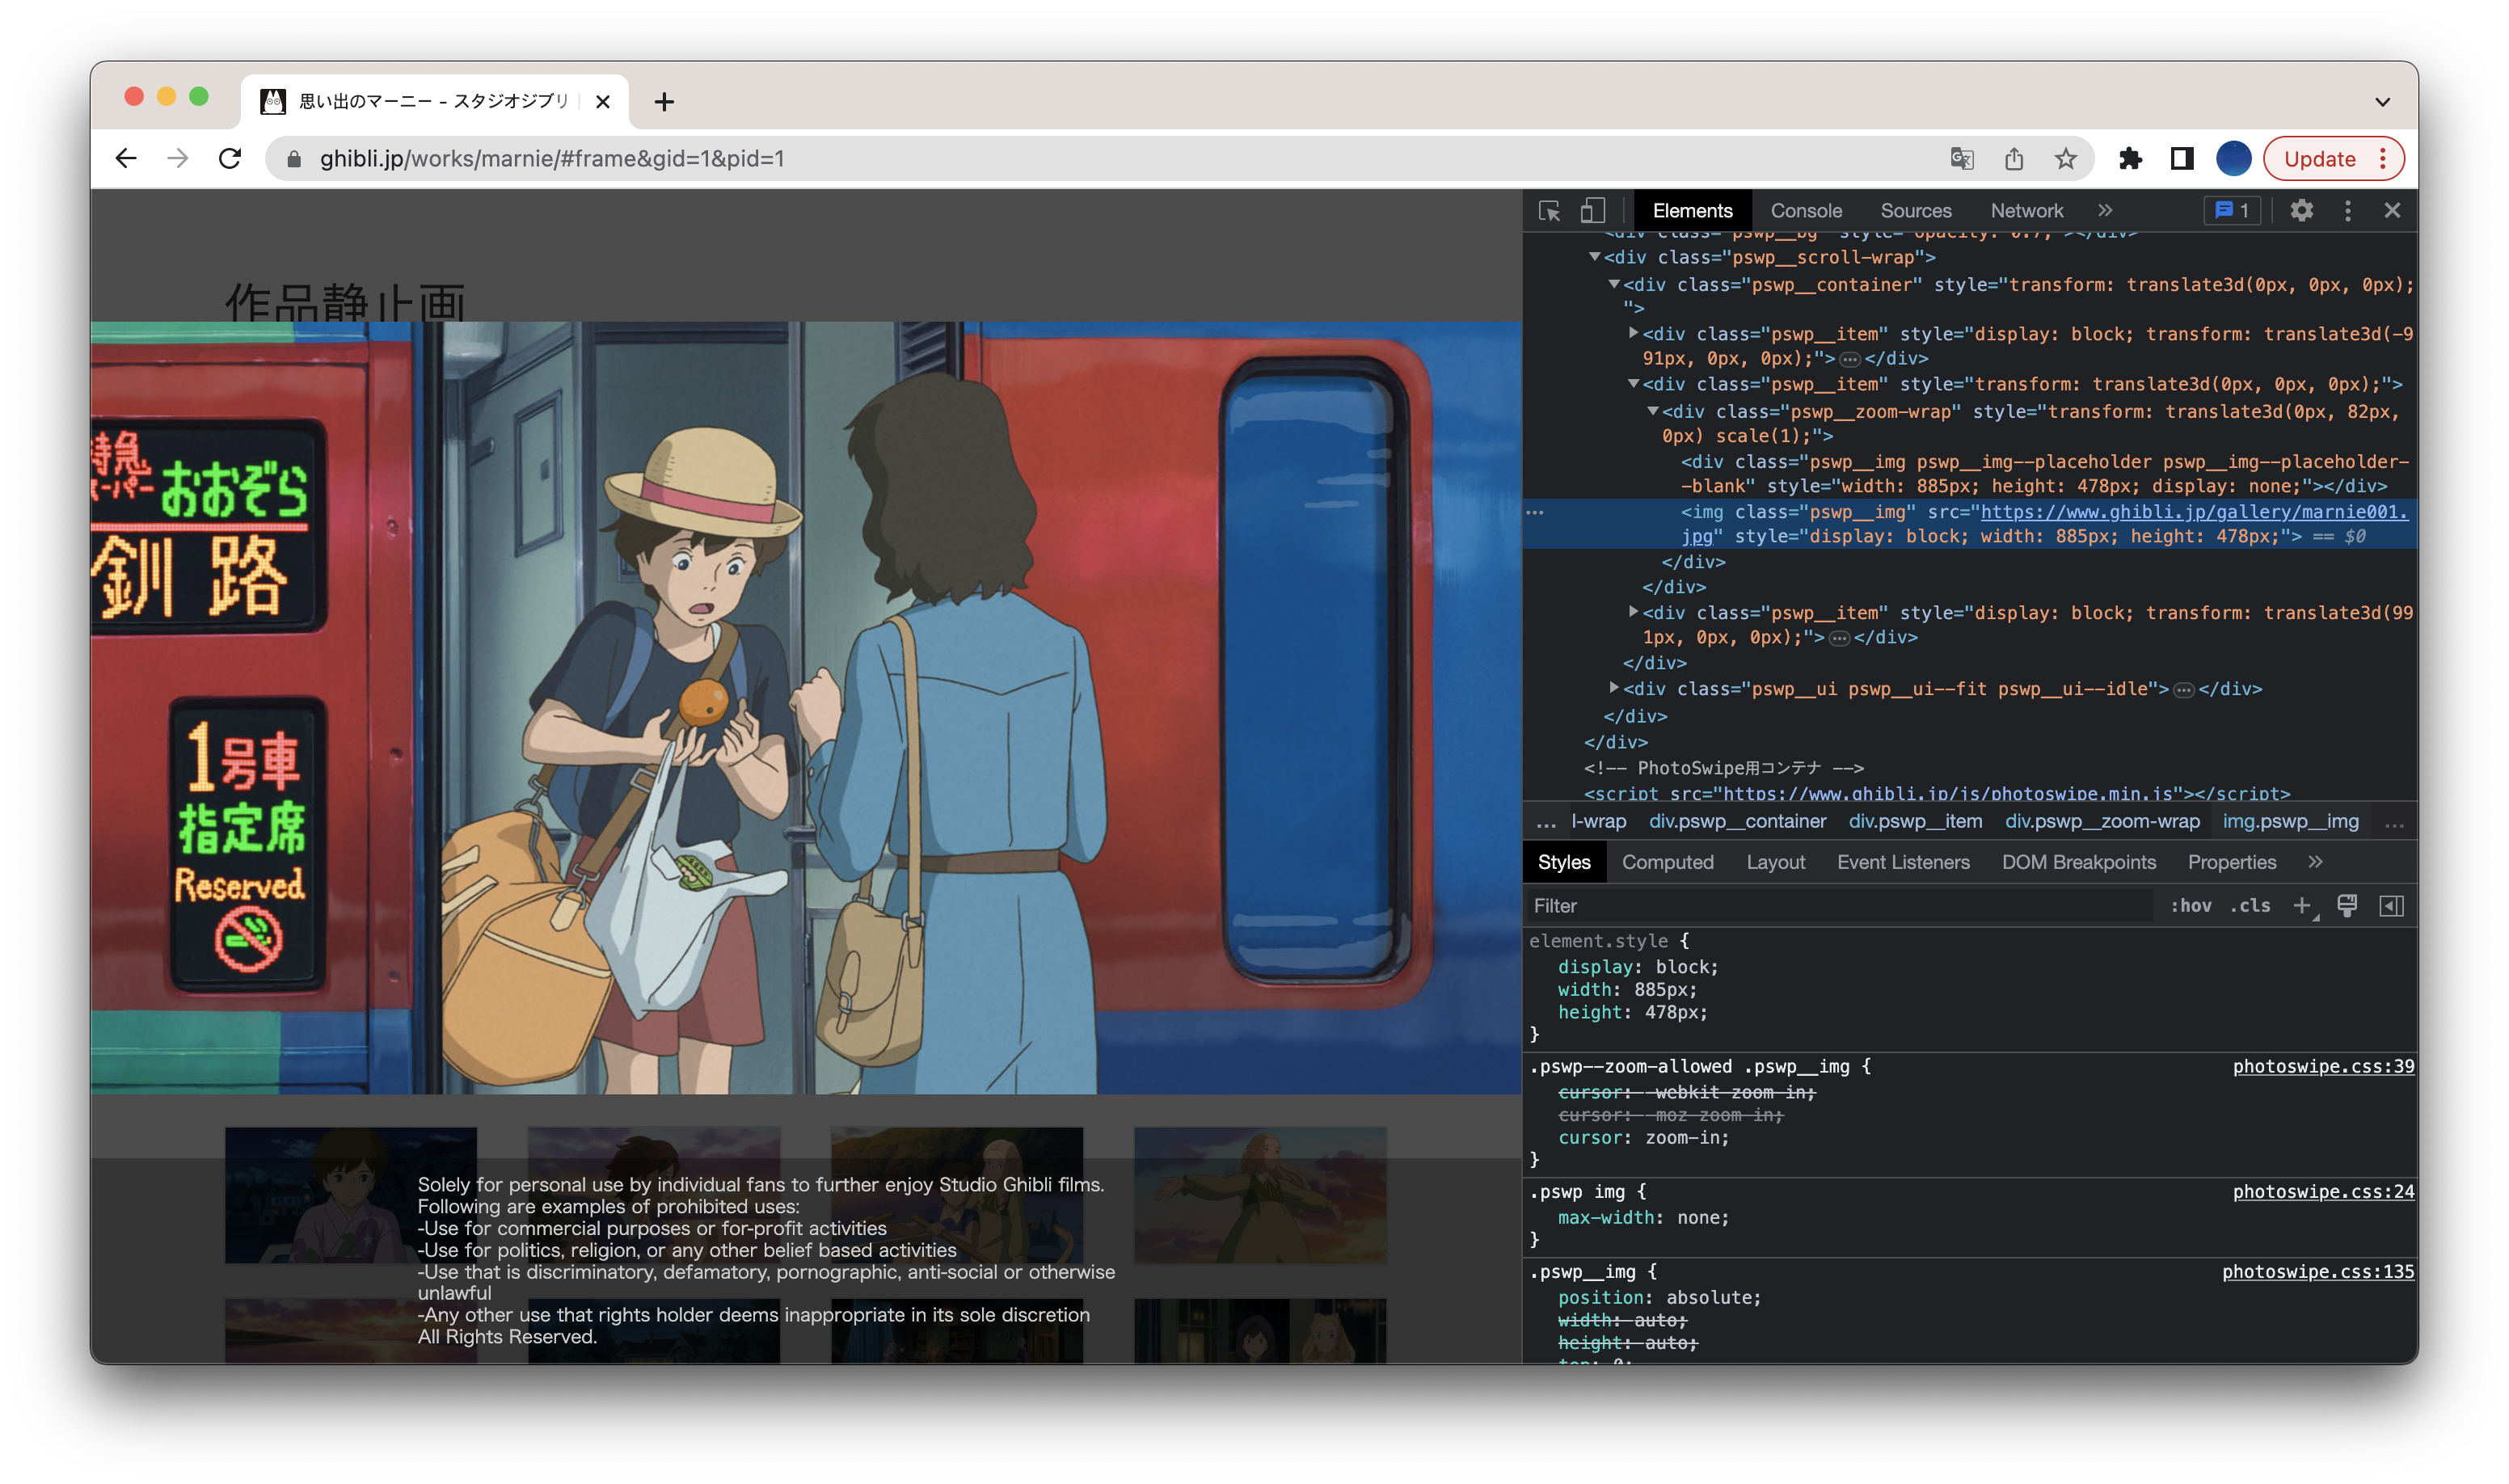
여기서 제가 사용할 태그는 img.pswp__img 입니다.
soup.select('img.pswp__img') # 요소 선택크롤링 가상환경 설정
conda create -n crawling python=3.8
conda activate crawling
pip install requests
pip install beautifulsoup4
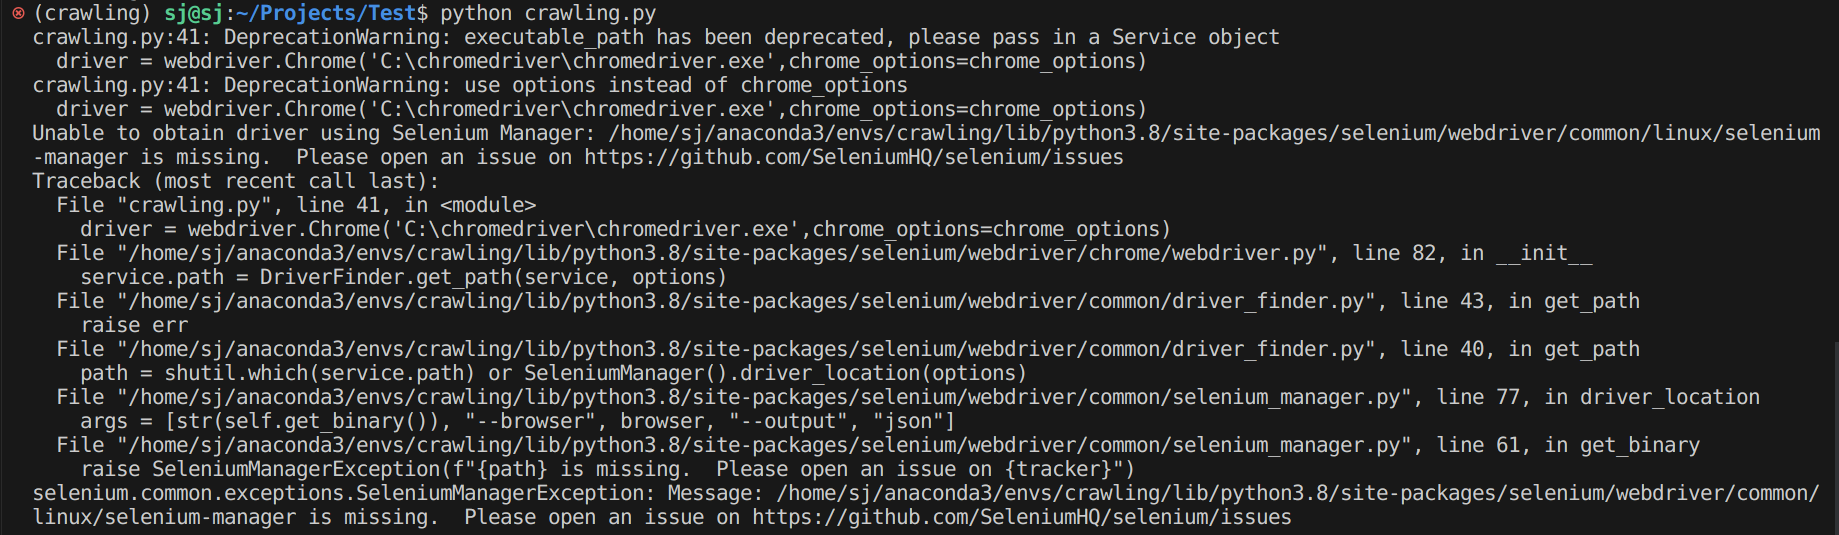
conda install -c conda-forge seleniumUnable to obtain driver using Selenium Manager 오류
Ubuntu 서버에 Selenium 설치하고 사용하기 사이트를 참고하여,
설치된 Chrome 버전에 맞는 112.0.5615.49 버전 Chrome Driver를 설치하였다.wget -N https://chromedriver.storage.googleapis.com/112.0.5615.49/chromedriver_linux64.zip unzip chromedriver_linux64.zip
최종 소스 코드
import os
import sys
import urllib.request
from selenium import webdriver
from selenium.webdriver.chrome.service import Service
from webdriver_manager.chrome import ChromeDriverManager
from time import sleep
from bs4 import BeautifulSoup

# 크롬 드라이버 설정
def set_chrome_driver():
    chrome_options = webdriver.ChromeOptions()
    driver = webdriver.Chrome(service=Service(ChromeDriverManager().install()), options=chrome_options)
    return driver

keyword = input('작품 : ')
max_images = 50

# 프로젝트에 미리 생성해놓은 crawled_img폴더 안에 하위 폴더 생성
path = 'crawled_img/'+keyword
try:
    if not os.path.exists(path):
        os.makedirs(path)
    else:
        print('이전에 같은 작품으로 다운로드한 폴더가 존재합니다.')
except OSError:
    print ('os error')
    sys.exit(0)

image_count = 0 # 추출 시도 이미지 수
driver = set_chrome_driver()

for i in range(1, max_images+1):
    # 웹 페이지 접근 후 1초 동안 로드를 기다림
    driver.get('https://www.ghibli.jp/works/'+keyword+'/#frame&gid=1&pid='+str(i))
    sleep(1)

    # 크롤링이 가능하도록 html코드 가공
    html = driver.page_source
    soup = BeautifulSoup(html,'html.parser')

    images = soup.select('img.pswp__img') # 요소 선택

    for img in images:
        src = img.get('src')

        filename = src.split('/')[-1] # 이미지 경로에서 날짜 부분뒤의 순 파일명만 추출
        save_url = path+'/'+filename # 저장 경로 결정

        if os.path.exists(save_url): continue # 이미 저장된 이미지인 경우 패스
        image_count+=1
        print(image_count)
        print("가져오는 경로:", src)
        print("이미지 파일명:", filename)
        print("저장되는 경로:", save_url)

        # 파일 저장
        # user-agent 헤더를 가지고 있어야 접근 허용하는 사이트도 있을 수 있음
        req = urllib.request.Request(src, headers={'User-Agent': 'Mozilla/5.0'})
        try:
            img_url = urllib.request.urlopen(req).read() #웹 페이지 상의 이미지를 불러옴
            with open(save_url,"wb") as f: # 디렉토리 오픈
                f.write(img_url) # 파일 저장
        except urllib.error.HTTPError:
            print('에러')
            sys.exit(0)

if image_count == max_images:
    print('성공')
else:
    print(f'실패: {max_images-image_count}')
1-2. Textual Inversion
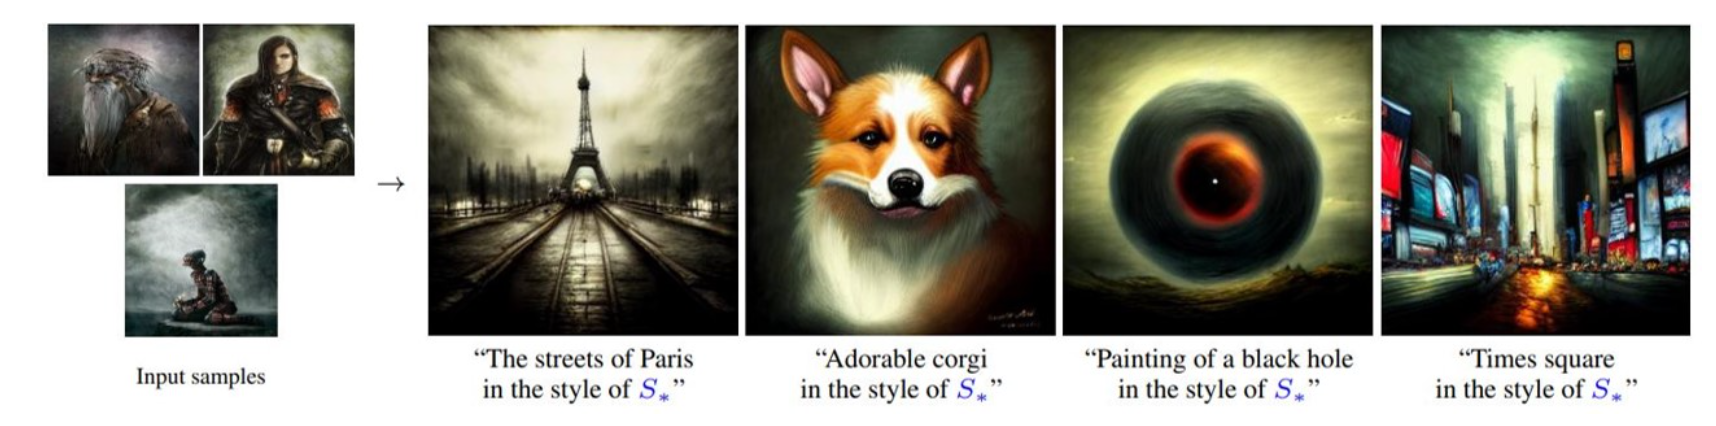
크롤링한 이미지 데이터에서 중 비슷한 느낌의 이미지 5개를 선택하고, How to Fine-tune Stable Diffusion using Textual Inversion 사이트를 참고하여 Textual Inversion을 이용한 Stable Diffusion Fine-tuning을 시도하였습니다.
다음 그림과 같이, S 스타일 화풍의 이미지로 textual inverison을 한 뒤,
prompt에 "{생성하고자하는 이미지에 대한 설명} in the style of S" 을 입력하면,
S* 스타일 화풍이 생성될 것이라고 가정하였습니다.
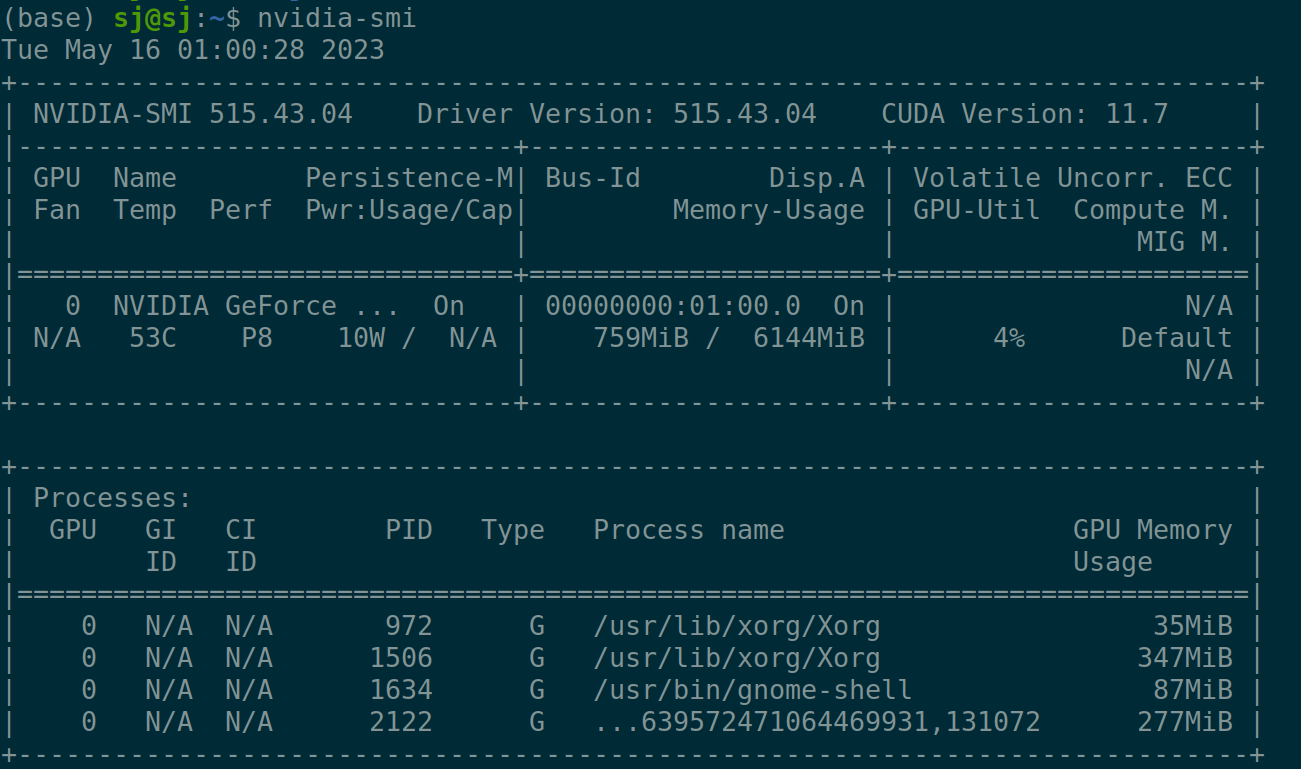
💻 개발 환경
CPU i7-770HQ, RAM 16GB
GeForce GTX 1060 Mobile, VRAM 6GB
Ubuntu 20.04
Nvidia Driver 515.43.04
CUDA 11.7
Cudnn 8.6.0
첫번째 접근 방법: Installing Manually using conda
-
git clone https://github.com/rinongal/textual_inversion.git cd textual_inversion -
아나콘다 가상환경 설치
conda env create -f environment.yaml conda activate ldm -
모델 다운
처음에는 latent diffusion 모델 다운 받고자 했으나 에러가 났습니다.mkdir -p models/ldm/text2img-large/ wget -O models/ldm/text2img-large/model.ckpt https://ommer-lab.com/files/latent-diffusion/nitro/txt2img-f8-large/model.ckpt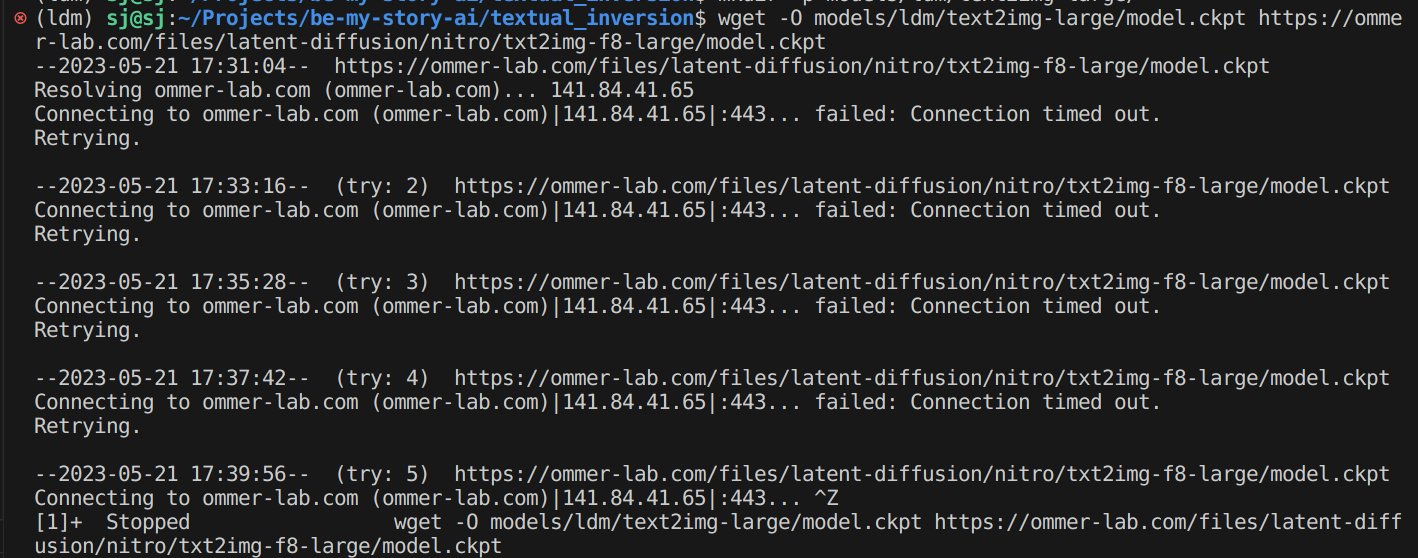
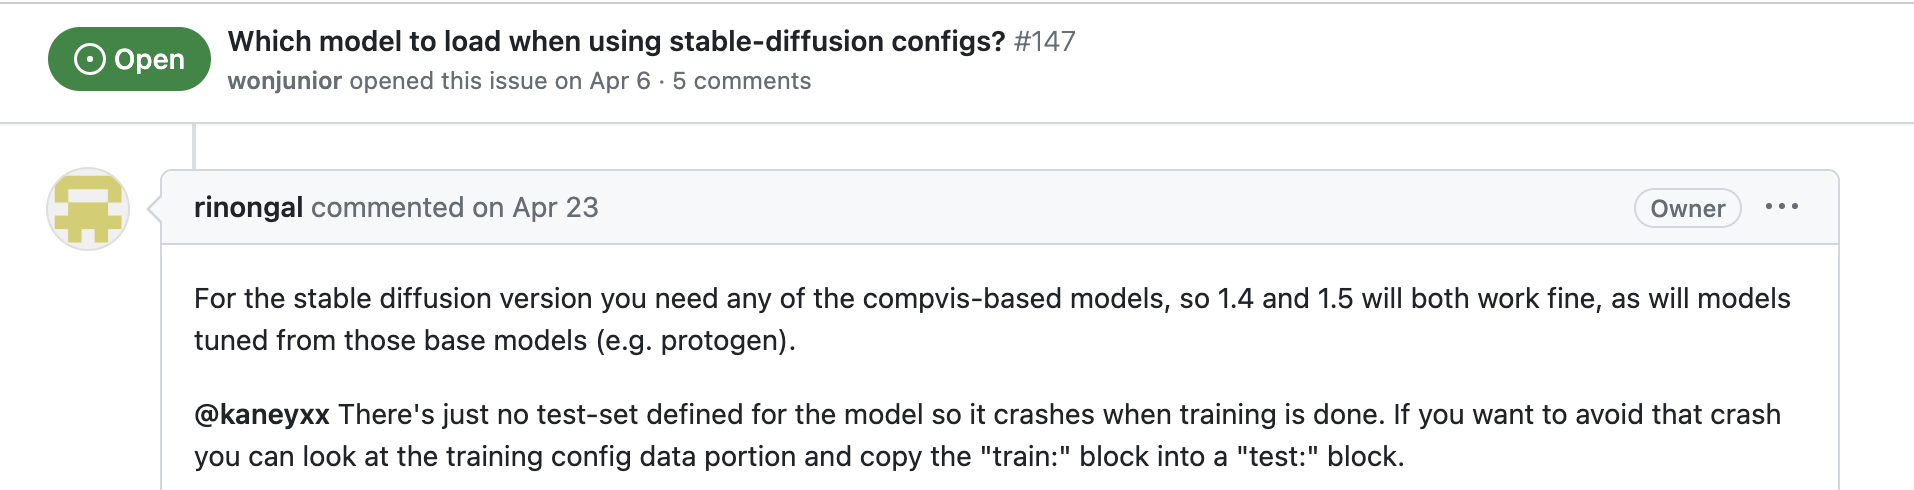
대신 Stable diffusion 모델을 사용한 경우를 이슈에서 발견했습니다.
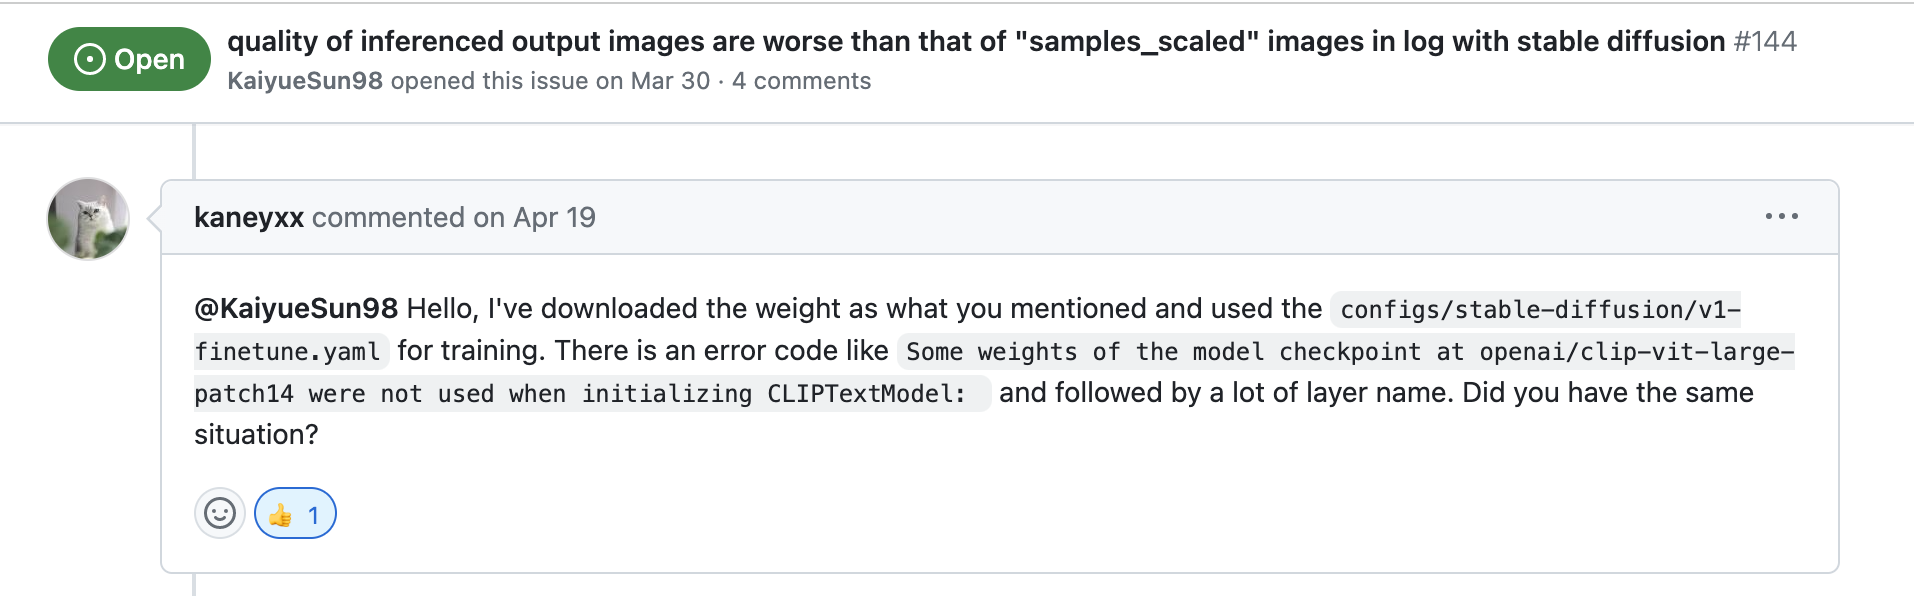
Which model to load when using stable-diffusion configs? #147
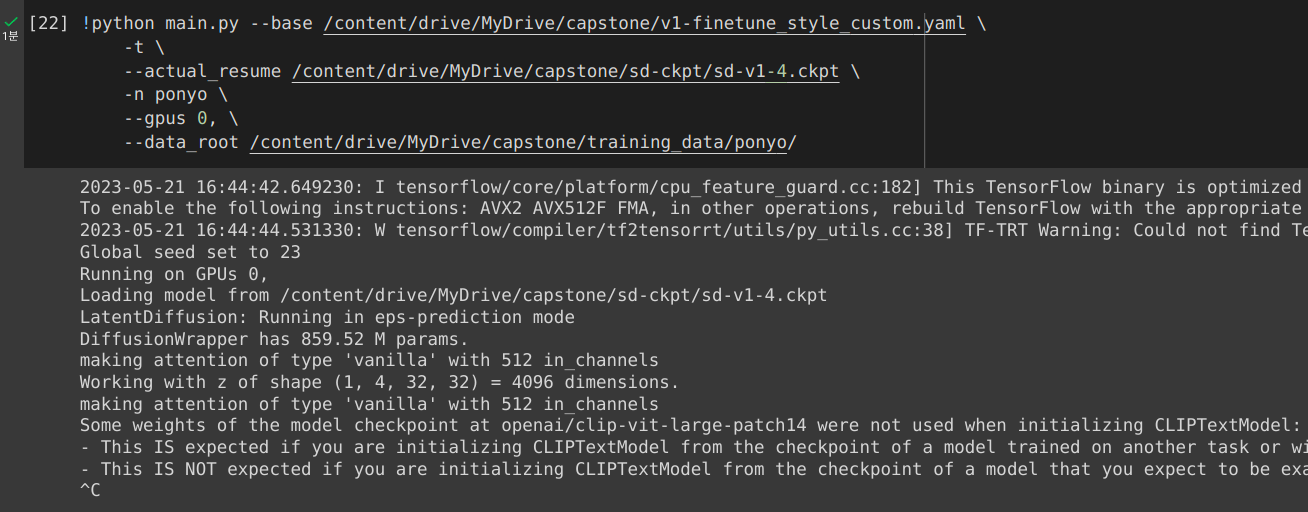
하지만 아래와 같은 에러가 났고, 이 방법이 아직 해결되지 않은 상태인 것을 알게 되었습니다.python main.py --base configs/latent-diffusion/txt2img-1p4B-finetune.yaml -t --actual_resume models/ldm/text2img-large/model.ckpt -n <run_name> --gpus 0, --data_root /path/to/directory/with/images --init_word <initialization_word>
두 번째 접근 방법: InvokeAI 소스코드 빌드
-
레파지토리 클론 및 가상환경 설치
git clone --quiet https://github.com/invoke-ai/InvokeAI.git
cd InvokeAI
git checkout --quiet tags/v2.0.0

conda env create -f emvironment.yml
conda activate ldm
-
모델 다운로드
python scripts/preload_models.py
mkdir ./models/ldm/stable-diffusion-v1
HuggingFace > CompVis/stable-diffusion-v-1-4-original에서
sd-v1-4.ckpt를 다운 받아 파일 이름을 model.ckpt로 변경하여 저장합니다. -
Inference을 합니다.
python scripts/invoke.py
invoke> Astronaut floating in a distant galaxy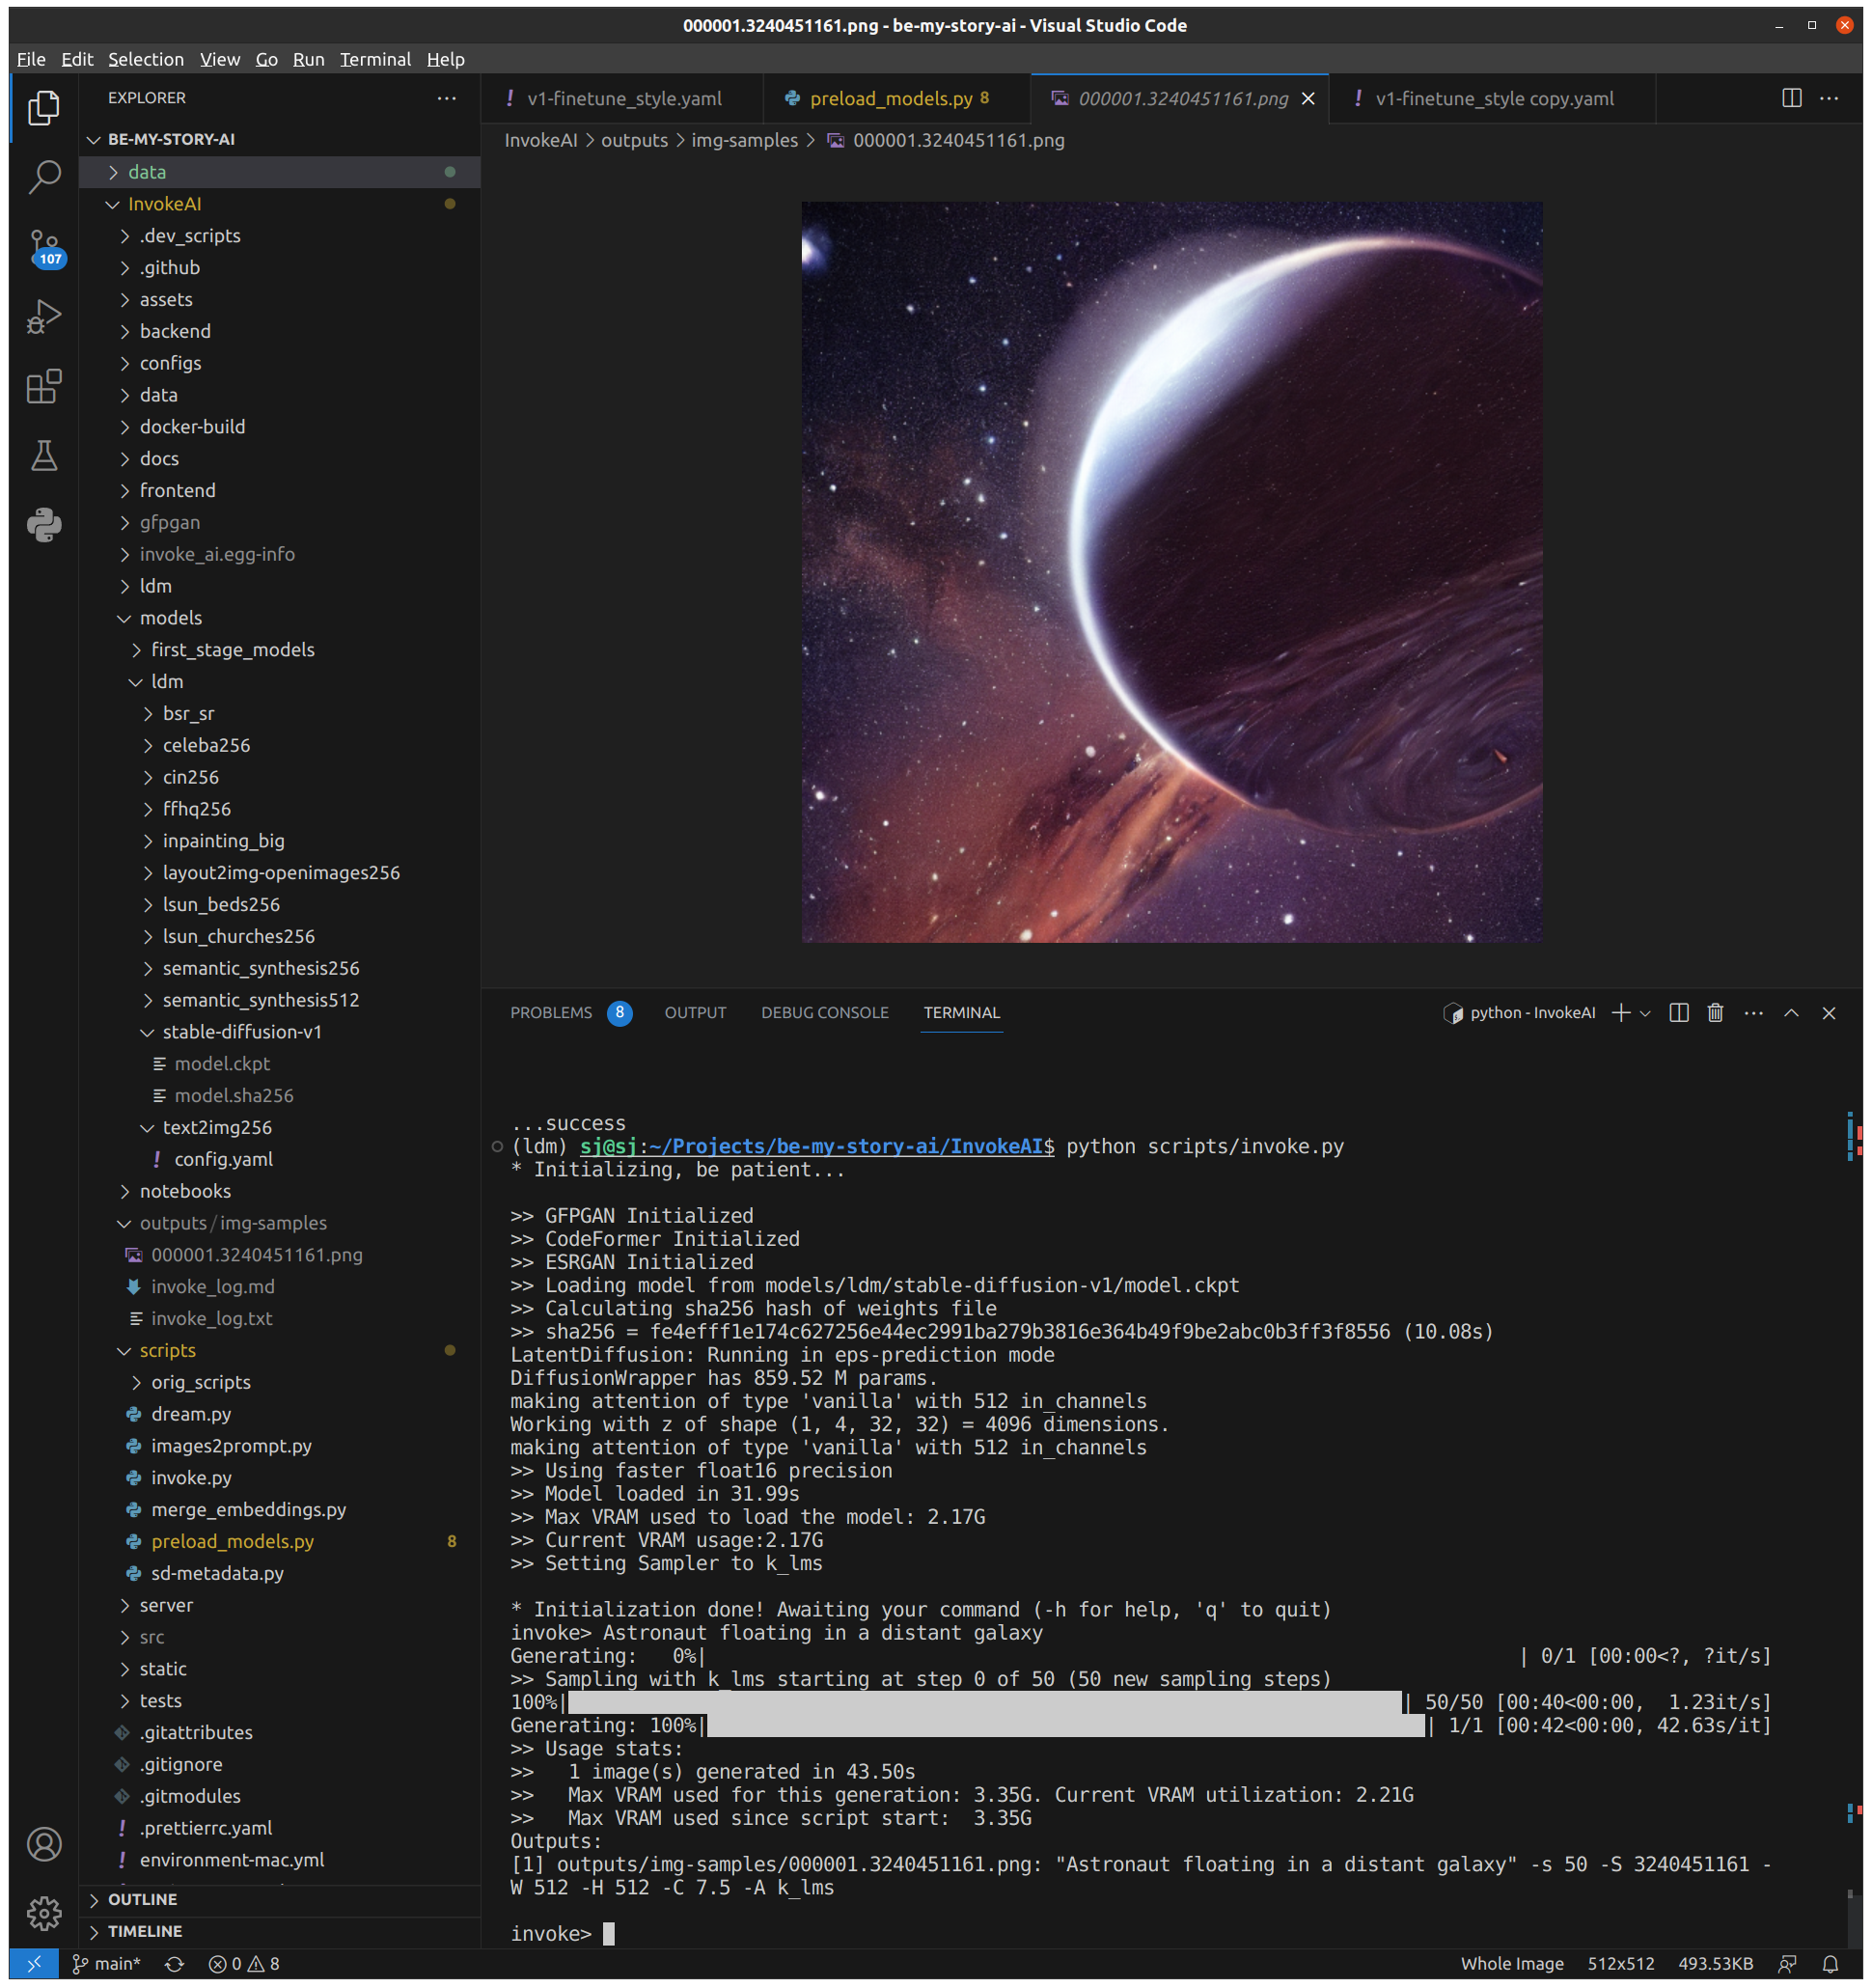
-
Training을 합니다.
python main.py --base ./configs/stable-diffusion/v1-finetune_style.yaml \
              -t \
              --actual_resume ./models/ldm/stable-diffusion-v1/model.ckpt \
              -n ponyo \
              --gpus 0, \
              --data_root ../data/training_data/ponyo/
❗️ CUDA out of memory 에러가 발생하였습니다.

알고보니, 공식 문서에 따르면, 12GB이상의 VRAM을 가진 GPU를 사용해야 합니다.

세 번째 접근 방법: 코랩
더 큰 용량의 VRAM을 가진 GPU 서버를 대여해주는 코랩을 사용해봅시다.
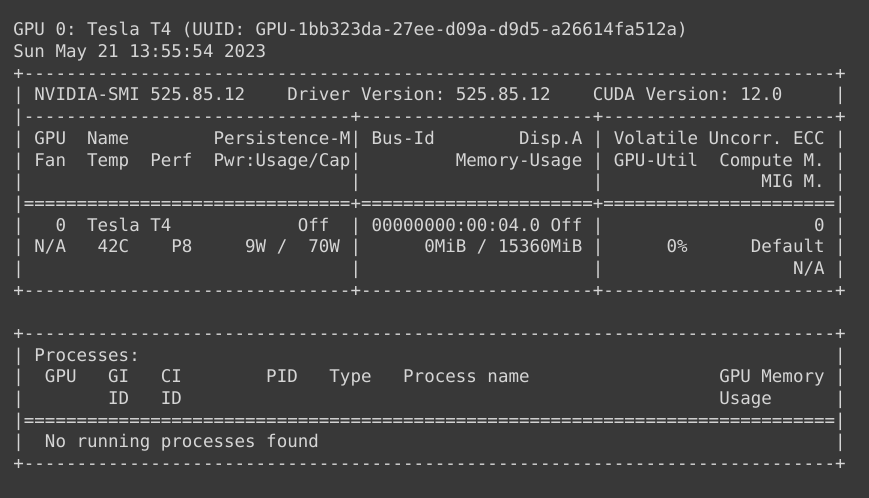
VRAM이 16GB로 충분합니다.
https://colab.research.google.com/github/lstein/stable-diffusion/blob/main/notebooks/Stable_Diffusion_AI_Notebook.ipynb
를 참고하여 Training을 시도하였습니다.
그러나, 구글드라이브의 오류로 런타임이 강제종료되는 상황이 반복되었습니다.
막막해질 찰나... 공식문서를 잘 읽어보면서, 부족한 용량의 VRAM을 가진 GPU에서도 가능한 방법이 있다는 것을 알게 되었습니다.
네 번째 접근 방법: InvokeAI + xFormers
이 방법은 InvokeAI에 xFormers를 설치하여 GPU 메모리 소비를 눈에 띄게 줄이고 속도도 빨라지게 하는 방법입니다.
두 번째 접근 방법이 실패했던 이유는, 개발하고 있는 랩탑의 VRAM이 학습에 필요한 VRAM이 12GB이상보다 작은 6GB으로, Out of Memory Issue 때문이었습니다.
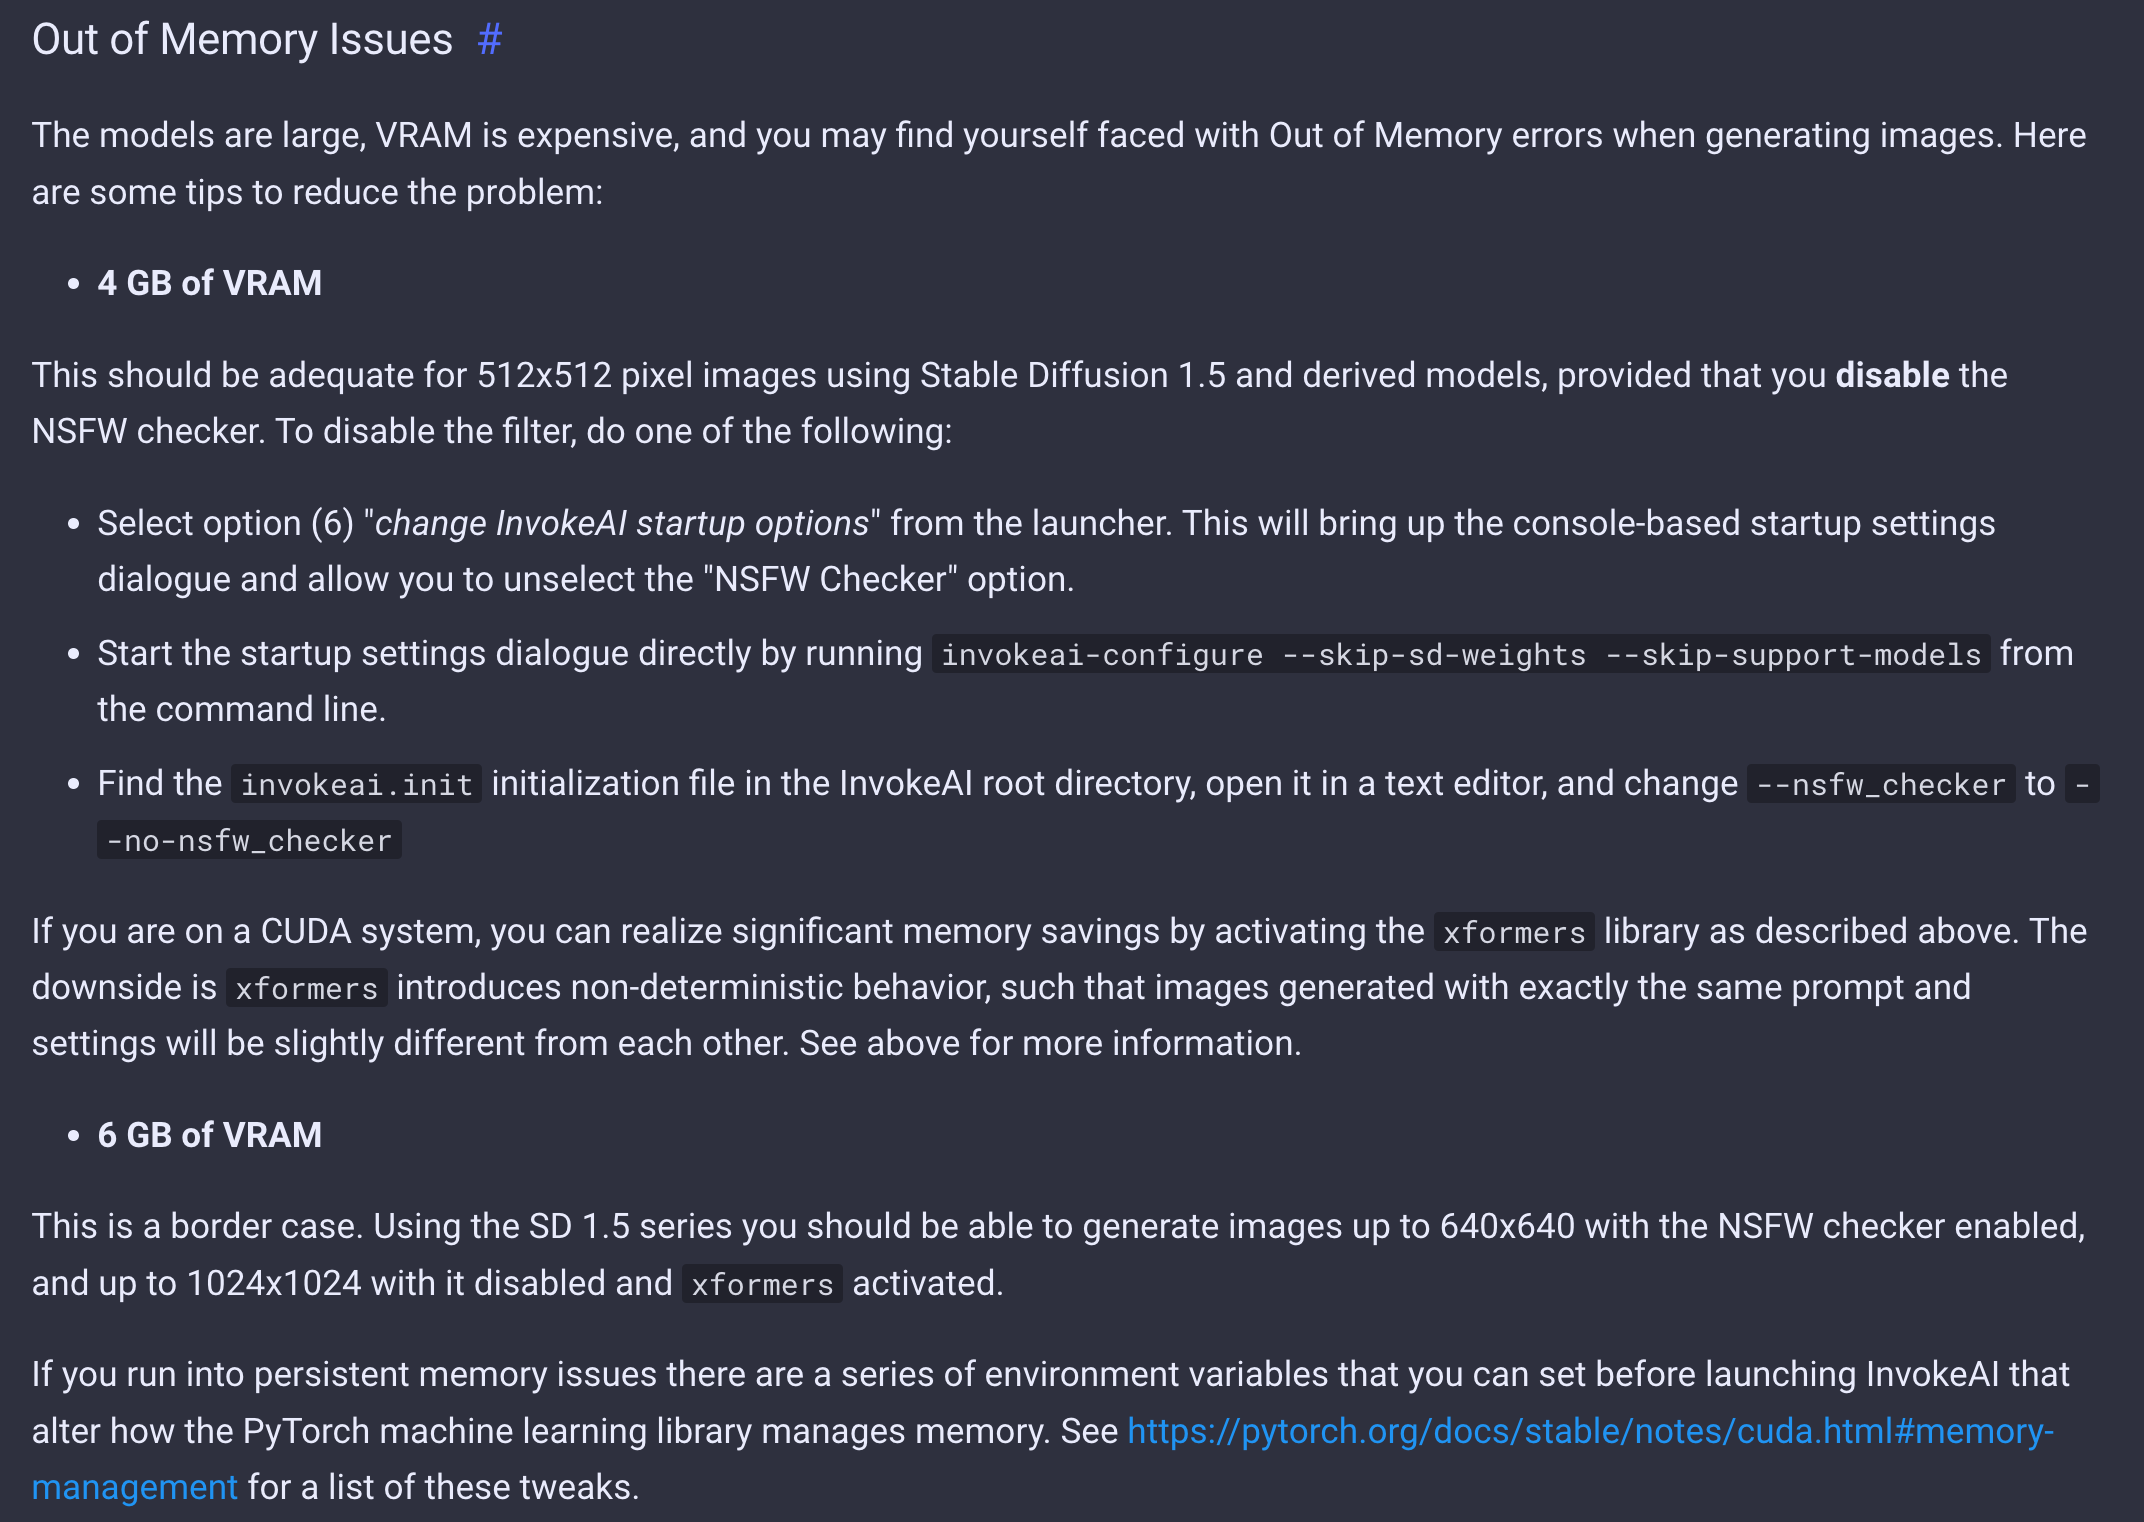
하지만, InvokeAI Stable Diffusion Toolkit Docs > Installing with the Automated Installer > Out of Memory Issues의 설명에 따르면, VRAM이 6GB 환경에서도 xformer가 활성화된 경우 최대 1024x1024의 이미지를 생성할 수 있다고 합니다.
Installing xformers의 설명에 따르면, xFormers는 pyTorch 및 CUDA 라이브러리와 통합되어 변압기 머신 러닝 아키텍처를 사용하는 애플리케이션에 가속화된 성능과 메모리 소비 감소를 제공하는 도구 상자입니다.
InvokeAI Stable Diffusion Toolkit Docs > InvokeAI Automated Installation를 참고하여 설치를 진행하였습니다.
-
python과 추가 라이브러리 설치합니다.
sudo apt update
sudo apt install -y software-properties-common
sudo add-apt-repository -y ppa:deadsnakes/ppa
sudo apt install -y python3.10 python3-pip python3.10-venv
sudo update-alternatives --install /usr/local/bin/python python /usr/bin/python3.10 3
sudo apt update && sudo apt install -y libglib2.0-0 libgl1-mesa-glx -
Invoke-ai releases v2.3.5에서 InvokeAI-installer-v2.3.5.zip 다운 후 압축해제합니다. (설치 당시 가장 최신 버전)
-
install.sh 실행 후, GUI로 Configuration 설정하고, Model을 다운합니다.
bash install.sh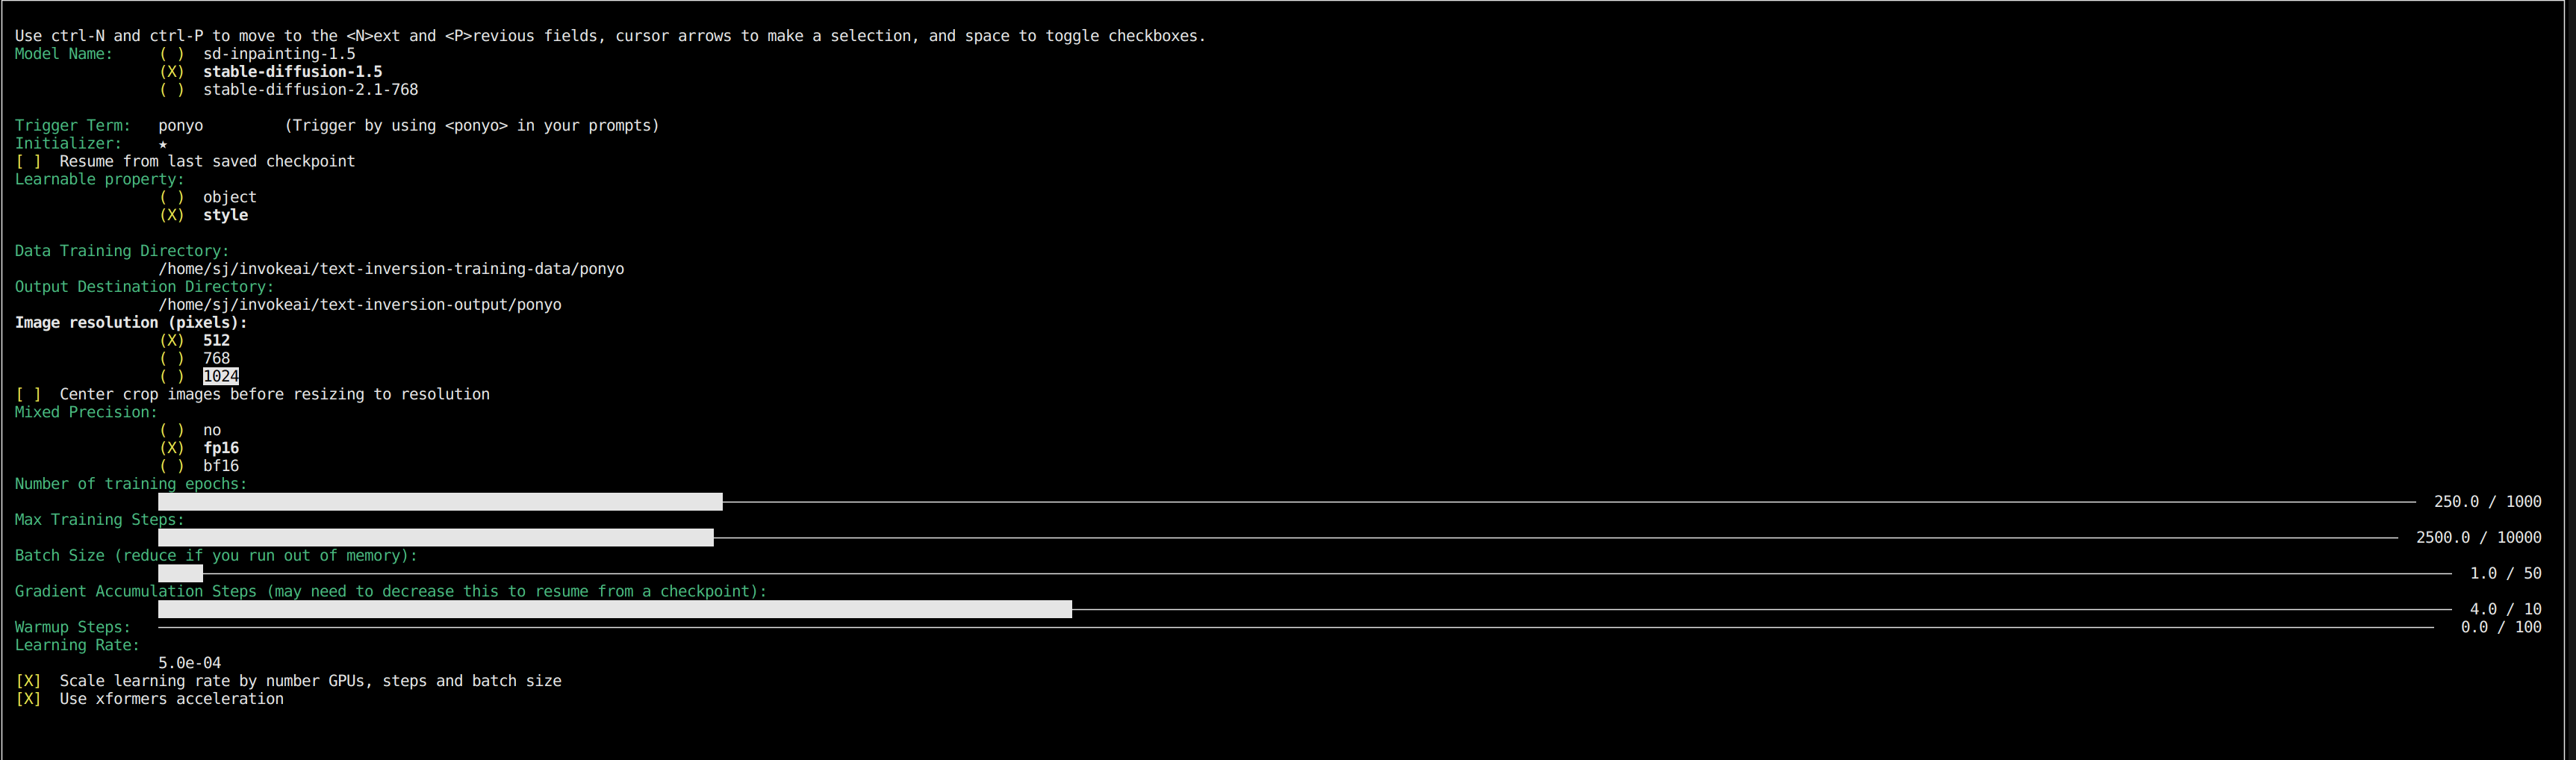
-
invoke ai을 실행하기 위해, invoke.sh 실행합니다.
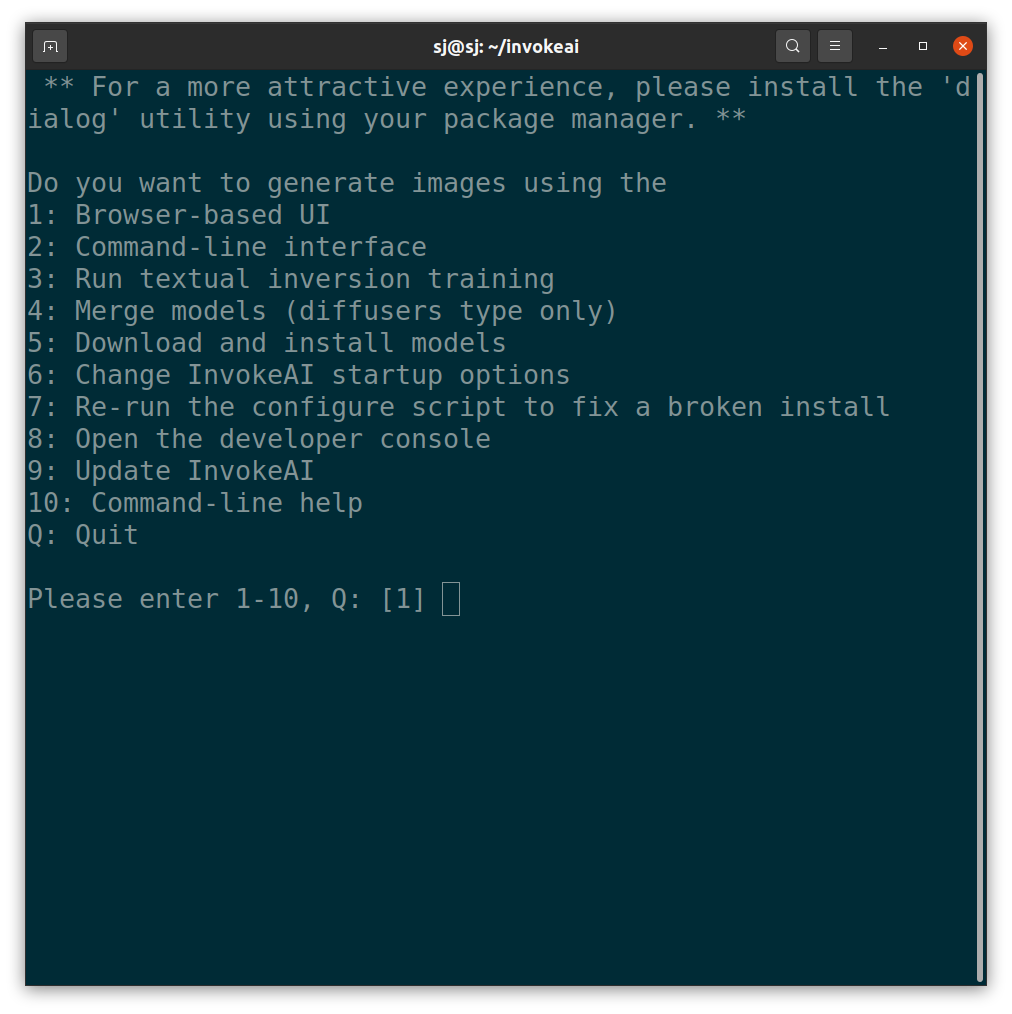
bash install.sh그러면 아래와 같이 어떤 기능을 사용할지 선택할 수 있는 메뉴가 나타납니다.
-
textual-inversion-training-data폴더 아래에 학습시킬 개념인 'marnie'을 폴더명으로 하는 폴더를 생성하고 그 폴더 아래에 학습할 이미지들을 넣습니다.
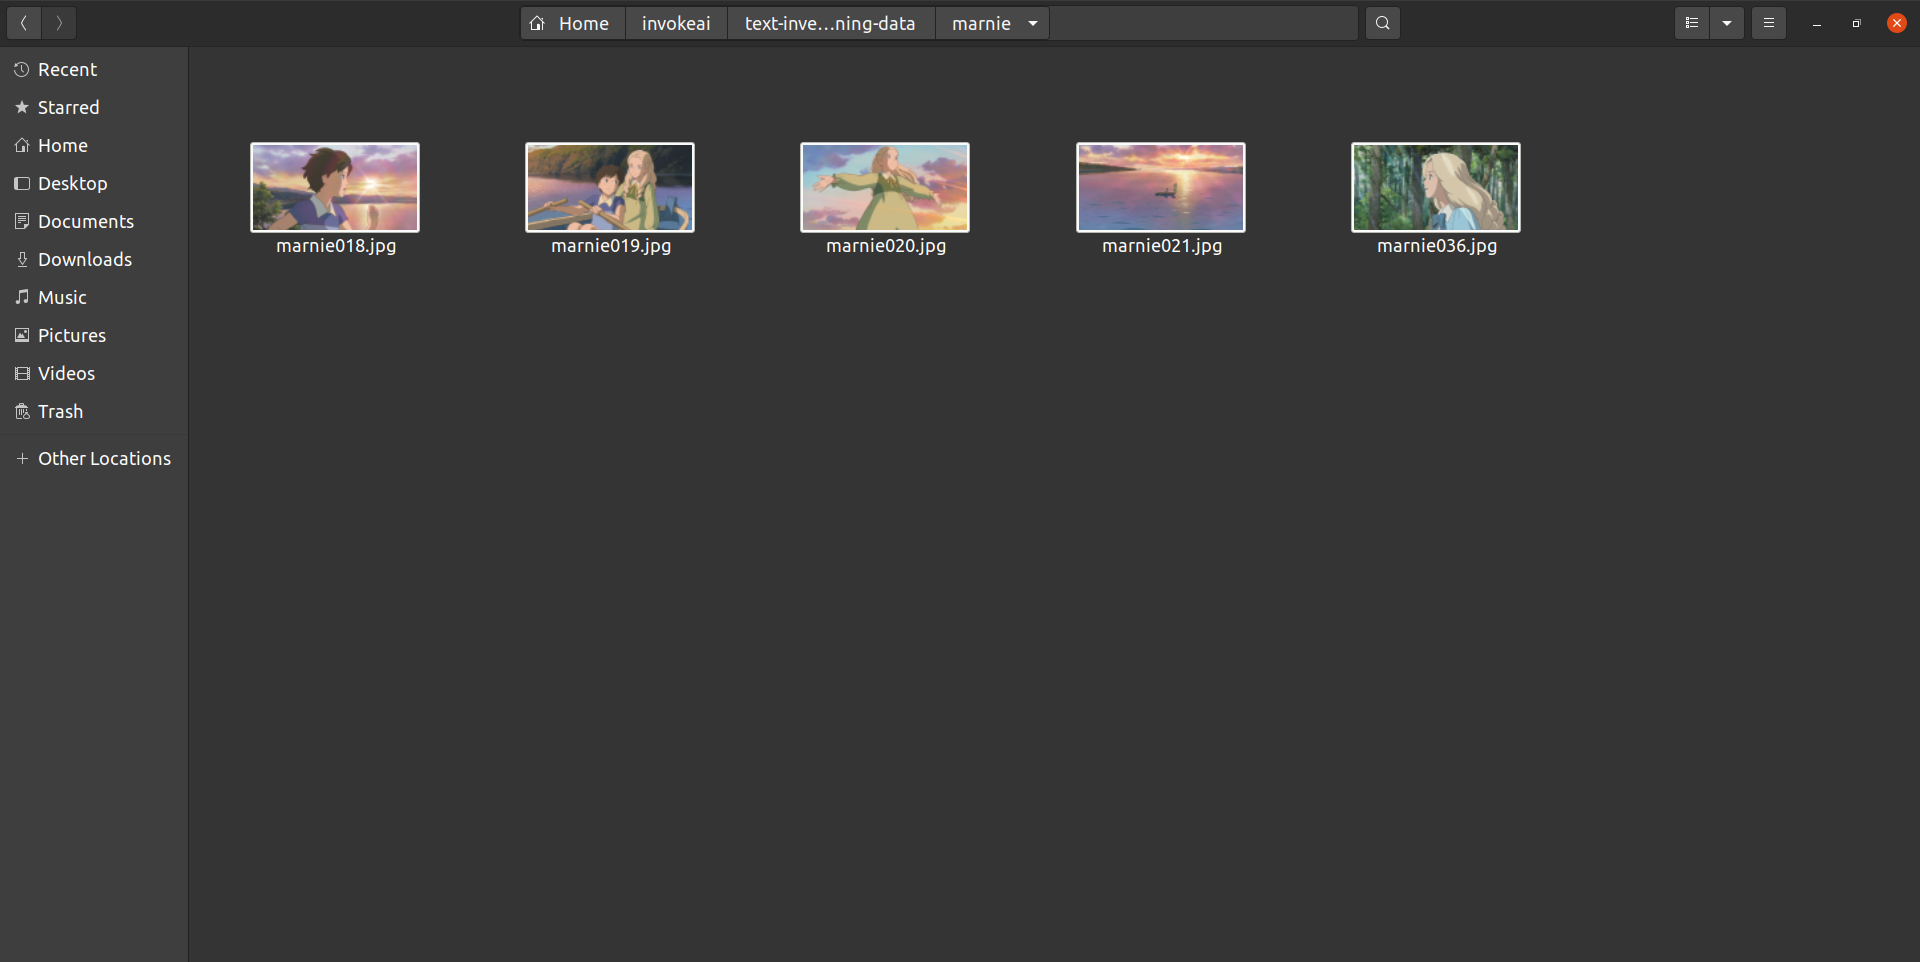
결과 이미지가 동화 일러스트 느낌이 나야하므로, 학습할 이미지는 일상적이면서도, 얼굴 이목구비가 뚜렷한 인물이 있고 색감이 비슷한 그림체의 이미지를 선택하였습니다.
-
3번을 선택합니다.

-
다음과 같은 화면이 나옵니다. 학습 에포크 수, 배치 사이즈 등 학습을 위한 설정을 합니다.
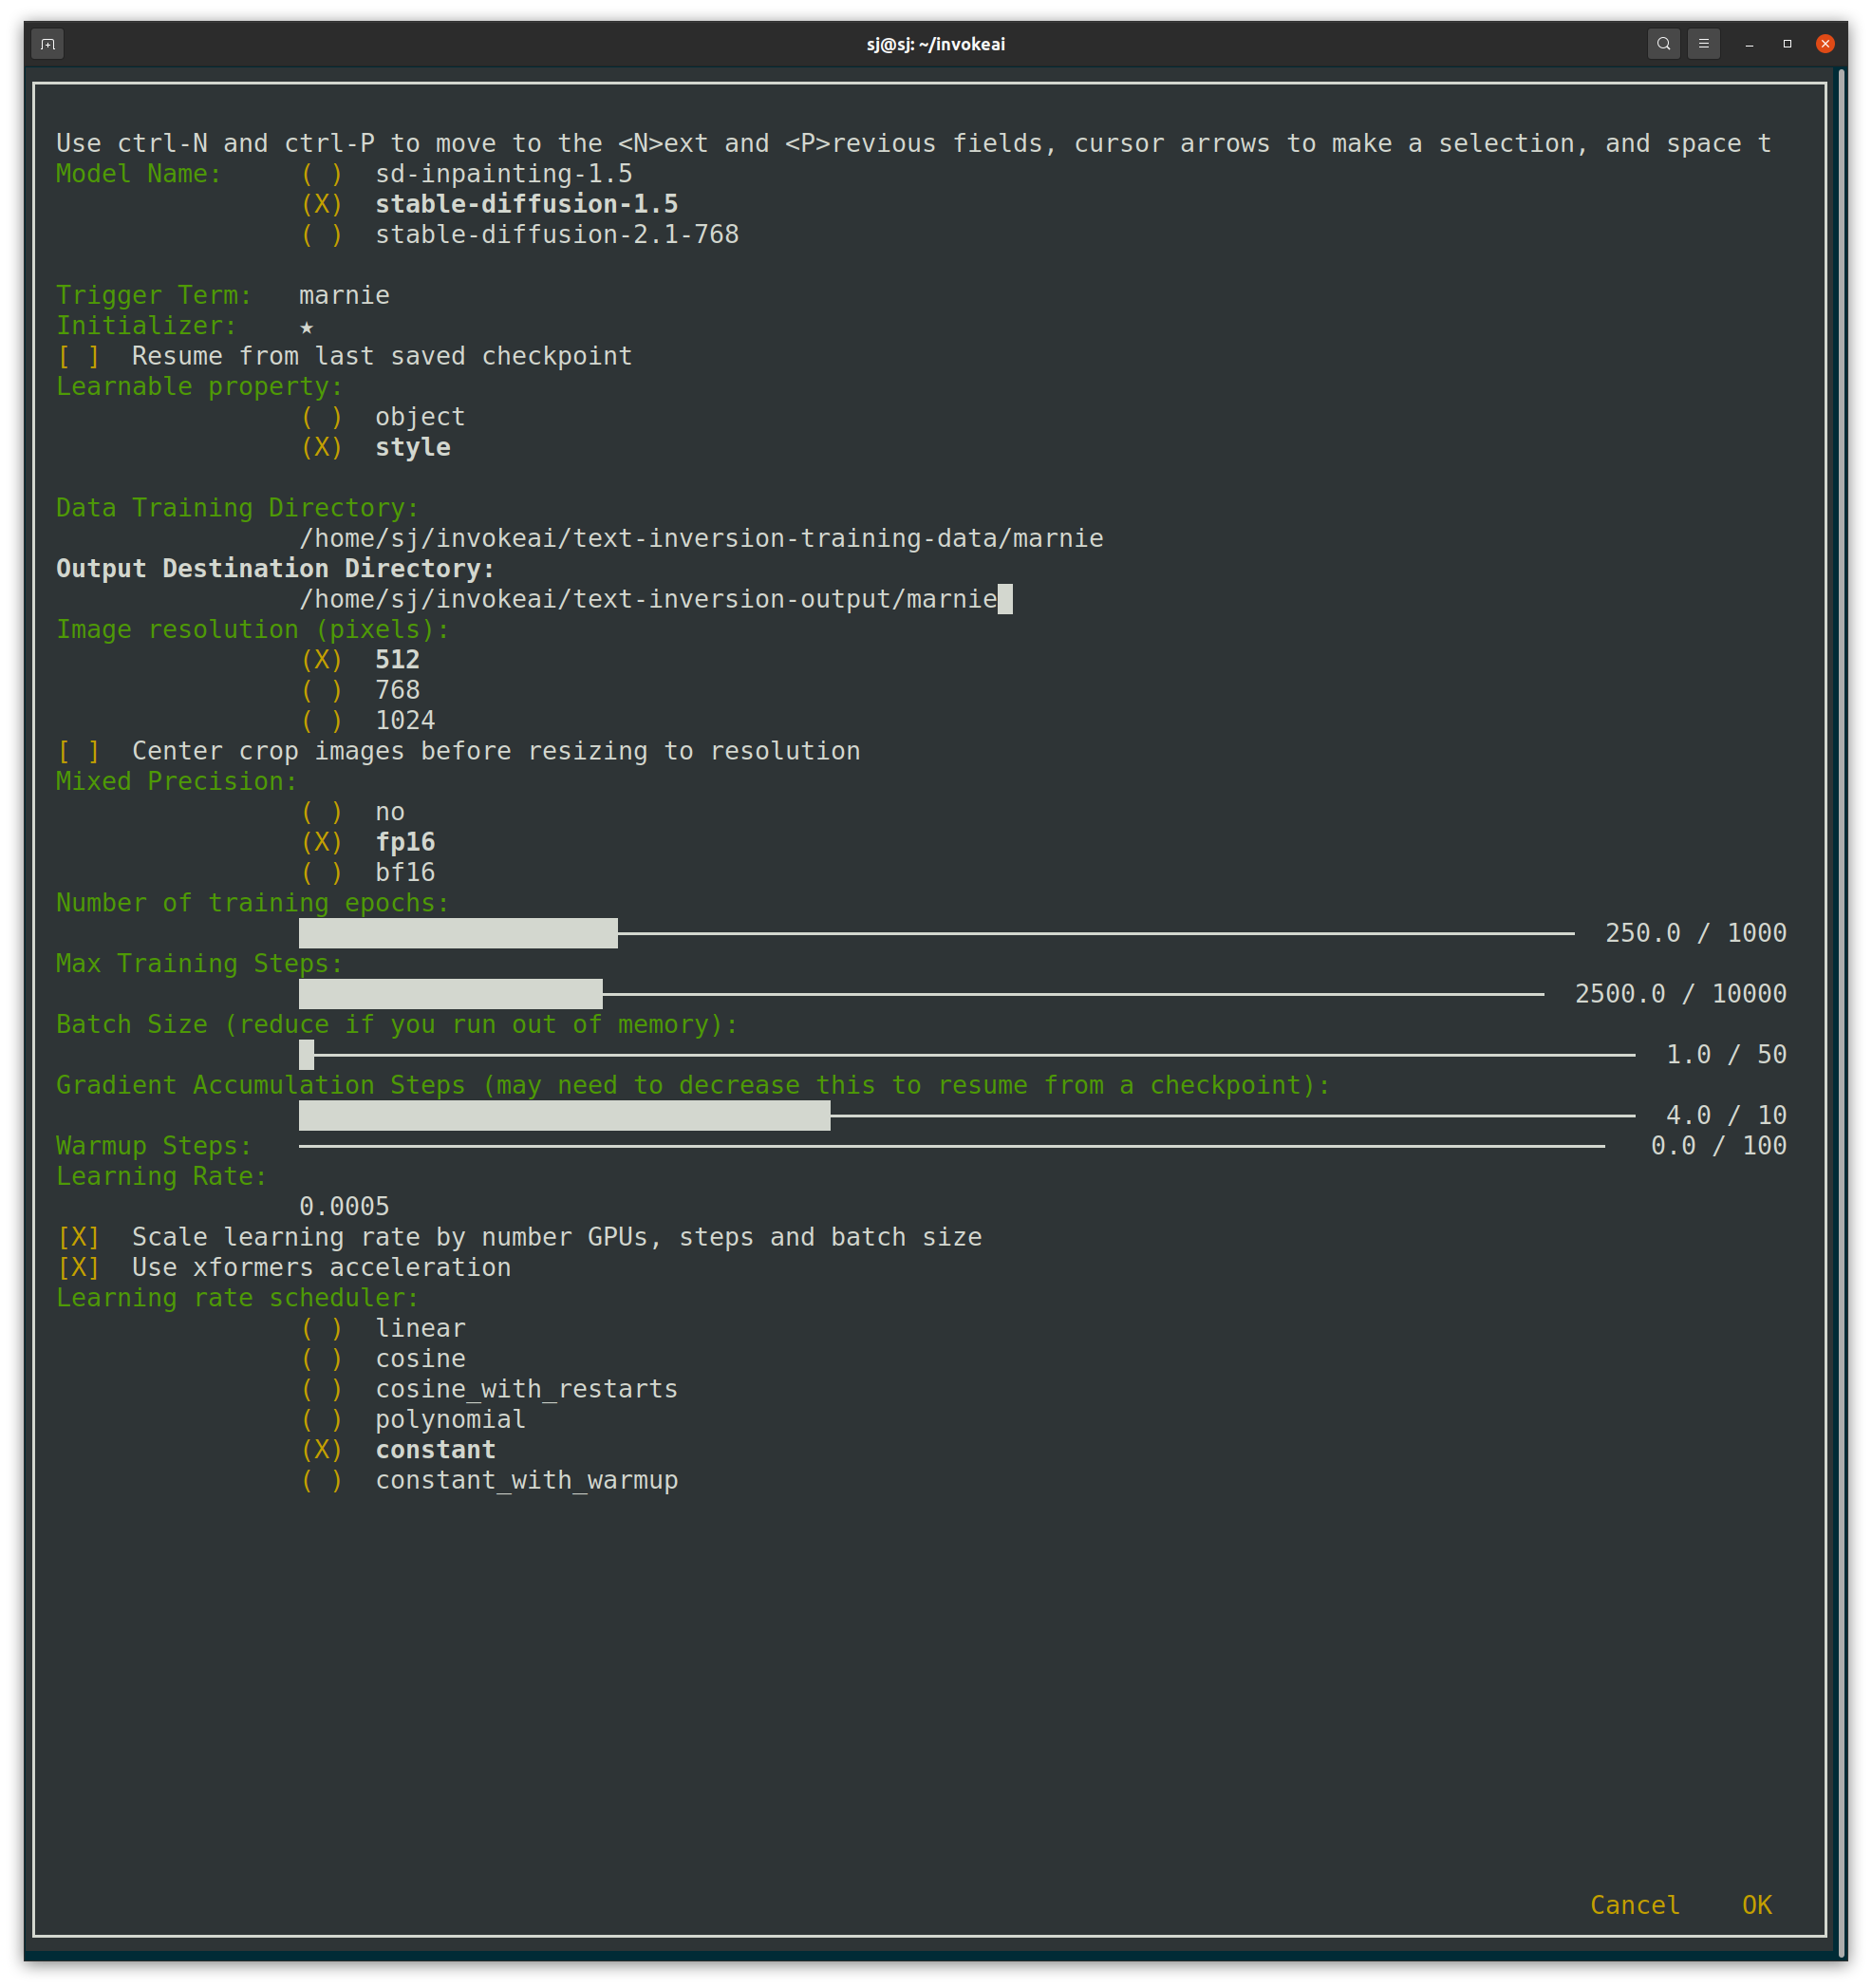
이때, Triger Term을 학습시킬 개념인 'marnie'로 설정해주고, Learnable property를 'style'로 선택합니다. -
'OK'를 누르면, Training을 시작합니다.
-
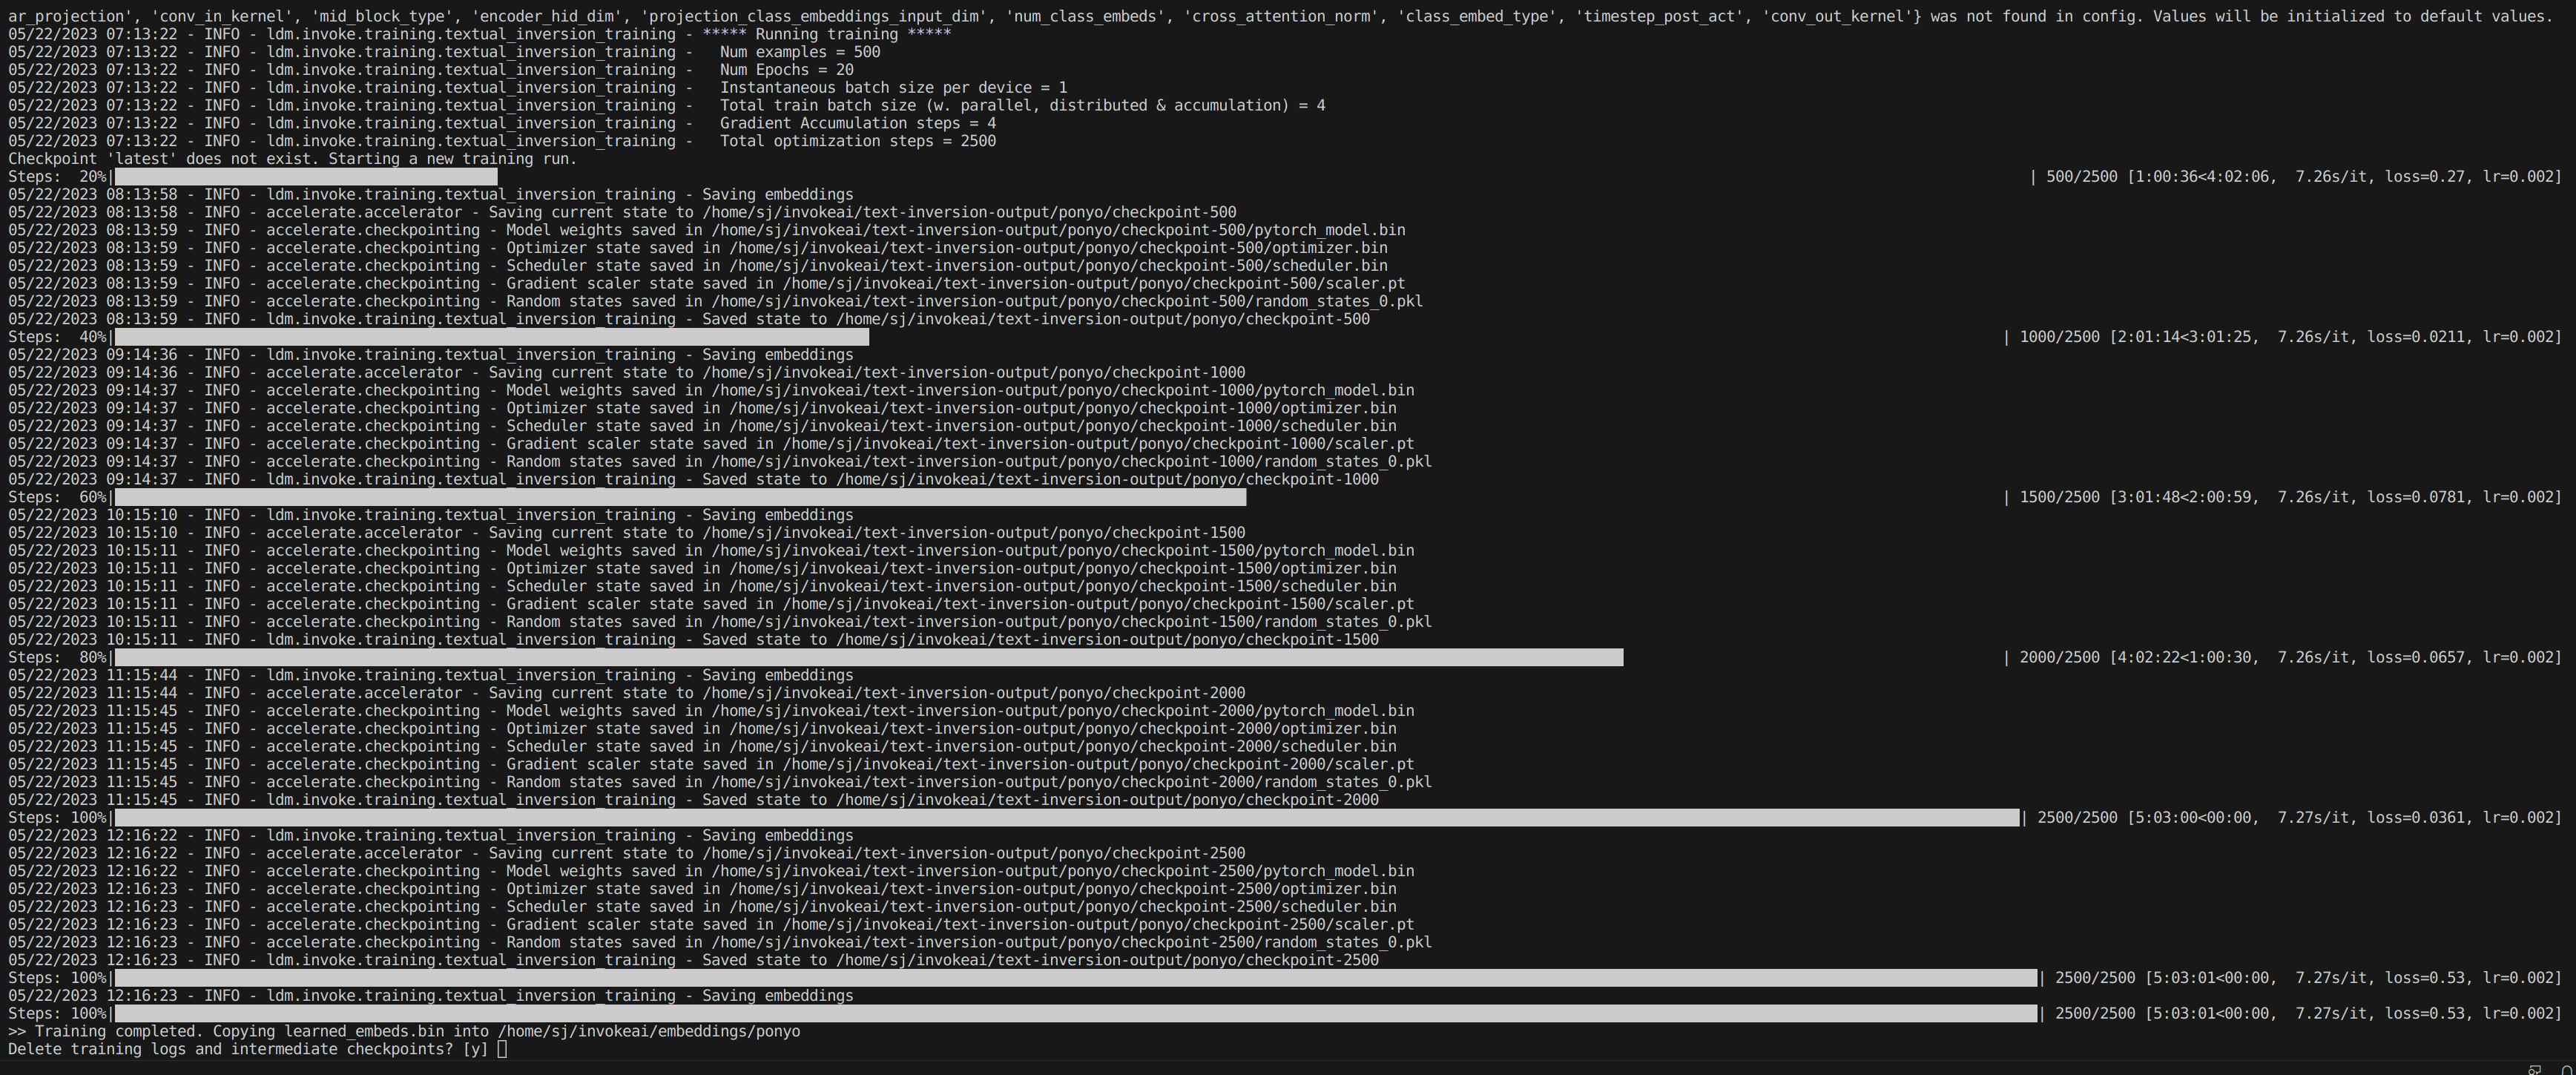
Training이 끝나면,
text-inversion-output폴더 아래 학습한 개념이 폴더명인 폴더를 보면, 학습 결과들이 있습니다.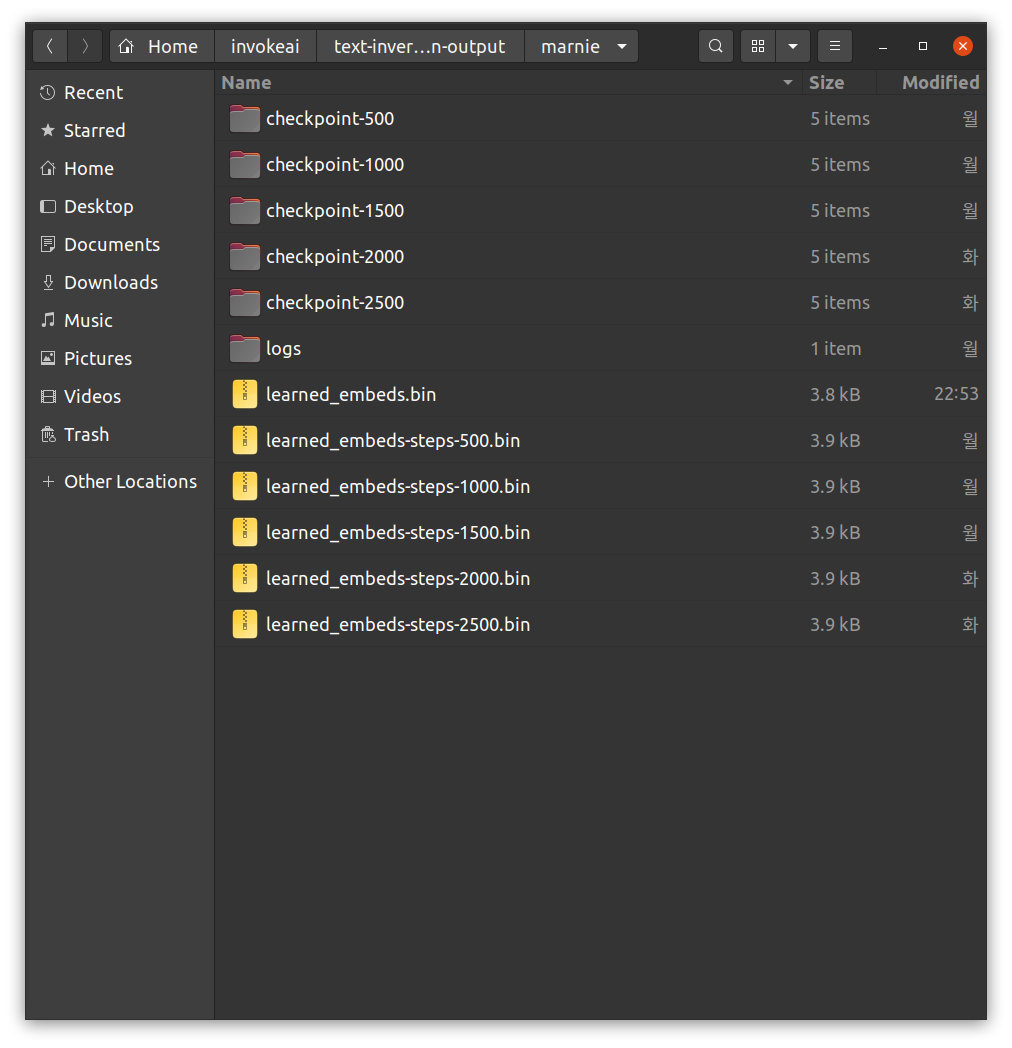
-
Inference를 해봅시다.

메뉴 화면에서 2번을 선택하여, Command-line interface를 엽니다.
다음과 같이 프롬프트를 입력하여 이미지를 생성하였습다.
우선, 생성하고자 하는 상황은 '~'로 비워두고, 오직 화풍에 대한 것만 언급한 프롬프트입니다.
"describe the situation that ~ , to use as an illustration for fairy tales, in the style of marnie"

이제 상황을 "Jane arrived in Hawaii, filled with excitement and curiosity."으로 설정해봅시다.
"describe the situation that ane arrived in Hawaii, filled with excitement and curiosity., to use as an illustration for fairy tales, in the style of marnie"

화풍을 좀 더 구체적으로 지정해보았습니다.
"describe the situation that Jane arrived in Hawaii, filled with excitement and curiosity., to use as an illustration for fairy tales, in more friendly style of marnie."

"describe the situation that Jane arrived in Hawaii, filled with excitement and curiosity., to use as an illustration for fairy tales, in more hand-painted style of marnie"
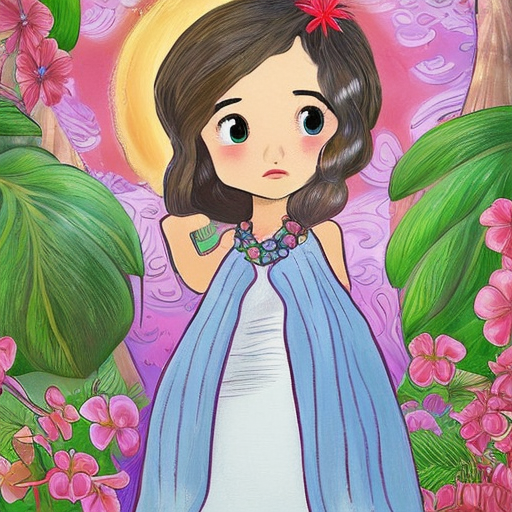
"describe the situation that Jane arrived in Hawaii, filled with excitement and curiosity., to use as an illustration for fairy tales, in more oil painting style of marnie"

생성되는 이미지에서 인물의 얼굴이 일그러지거나 몸의 형체가 비틀려있는 문제를 해결하기 위해, Negative Prompt를 추가하였습니다.
"describe the situation that Jane arrived in Hawaii, filled with excitement and curiosity., front view person, to use as an illustration for fairy tales,in more oil painting style of marnie [bad-anatomy text cross-eye deformed extra-limbs blurry-face fairy]"
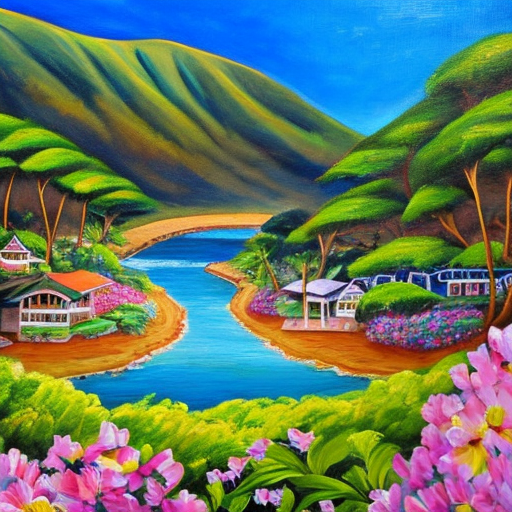
프롬프트를 정교화했더니 점점 어느정도 이상하지 않게 잘 나왔습니다.
하지만 학습한 이미지들의 화풍이 반영되지 않은 것으로 보입니다.
결과 및 분석
"in the style of *S"와 같은 프롬프트를 입력한 결과, 그림체가 통일된다기보다는, 학습한 이미지와 색감과 형태 부분에서 유사하지만 기존의 Stable Diffusion과 결과 이미지가 거의 동일하게 만들어집니다.
Stable Diffusion의 Textual Inversion을 이용한 Fine-tuning의 작동 방식은 다음과 같습니다.
생성하려는 새로운 개념의 이미지(예: 얼굴, 사물, 스타일 등)을 입력하면 Stable Diffusion서 새로운 개념을 표현하는 데 사용할 수 있는 기존의 유사한 개념을 찾아서 가르칩니다.
그런 다음 Stable Diffusion에서 특정 방식으로 결합하여 입력한 이미지에 표현된 개념과 유사한 것을 얻을 수 있는 기존의 개념 집합을 제시합니다.
Textual Inversion이란 Stable Diffusion 모델이 변하지 않고 프롬프트에 새로운 개념을 학습하는 것입니다.
그래서 기존에 Stable Diffusion에 학습된 이미지와 생성하려는 새로운 이미지가 유사한 개념이 많지 않다면, 기대했던 만큼 새로운 스타일의 이미지를 만들어내지 못할 수 있겠다는 것을 깨달았습니다.
해결방안 제안
그래서 새로운 접근 방법으로, DALLE API로 실사이미지를 만들고, StyleGAN에 FreezeD를 사용하여 툰필터와 같이 image-to-image translation을 하고자 합니다.
이 방법에서 걱정되는 부분은 얼굴뿐만 아니라 사물과 배경도 변환될 정도로 잘 구현할 수 있을지의 여부입니다.
만약 이 방법이 안된다면, DALLE API를 사용하고 되도록 통일된 화풍이 나오도록 프롬프트를 잘 설정할 예정입니다.
2. 일관된 등장인물
통일된 화풍 이외에, 부가적으로 해결하고자 하는 것은 한 동화 속에서 주인공이 동일하게 생성되도록 하는 것입니다.
캐릭터 하나를 정하고, DreamBooth를 이용하여 Stable Diffusion Fine-tuning을 하는 방법을 고려했지만, 보다 짧은 시간에 더 낮은 사양의 PC에서도 학습이 되는 LoRA(Low-Rank Adaptation)를 적용하는 방법으로 변경하게 되었습니다.
그럼, 다음 포스트에서 만나요! :)
참고 사이트


잘 읽었어요~