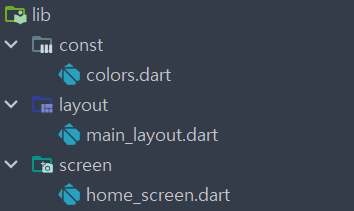
- const, layout 파일에 colors, main_layout 파일을 구성하였다.
- colors에는 색상을 구성했다.
import 'package:flutter/material.dart';

const rainbowColors = [
  Colors.red,
  Colors.orange,
  Colors.yellow,
  Colors.green,
  Colors.blue,
  Colors.indigo,
  Colors.purple,
];
- main_layout에는
import 'package:flutter/material.dart';
class MainLayout extends StatelessWidget {
final String title;
final Widget body;
const MainLayout({
required this.title,
required this.body,
Key? key,
}) : super(key: key);
Widget build(BuildContext context) {
return Scaffold(
appBar: AppBar(
title: Text(title),
),
body: body,
);
}
}
SingleChildScrollView
- 가장 기본적으로 스크롤이 가능한 위젯이다.
- 대부분 child에 Column을 넣어 여러 위젯들을 렌더링 한다.
SingleChildScrollView(
      child: Column(
        children: rainbowColors
            .map(
              (e) => renderContainer(color: e),
            )
            .toList(),
      ),
    );
- 기본적으로 페이지가 화면을 넘어가지 않으면 스크롤이 되지않는다.
- physics 파라미터를 사용하면 가능하다.
SingleChildScrollView(
        physics: AlwaysScrollableScrollPhysics(),
        child: Column(
          children: [
            renderContainer(color: Colors.black),
          ],
        ),
)- 위젯이 잘리지 않게 하기 하려면 Clip를 사용하면 된다.
SingleChildScrollView(
      clipBehavior: Clip.none,
      physics: BouncingScrollPhysics(),
      child: Column(
        children: [
          renderContainer(color: Colors.black),
        ],
      ),
)- 안드로이드, ios 스타일로 physics 값을 줄 수 있다.
SingleChildScrollView(
      physics: BouncingScrollPhysics(),
      // ClampingScrollPhySics() - 안드로이드 스타일
      child: Column(
        children: rainbowColors
            .map(
              (e) => renderContainer(color: e),
            )
            .toList(),
      ),
    )
특징
- SingleChildScrollView는 모든 위젯을 한번에 반환한다.
- 100개의 위젯이 있으면 100개 모두 한번에 리턴한다. 그렇기 때문에 리소스적으로 부담이 되고, 이것이 중첩되면 앱이 느려질 수 있다.
class SingleChildScrollViewScreen extends StatelessWidget {
final List<int> numbers = List.generate(100, (index) => index);
SingleChildScrollViewScreen({Key? key}) : super(key: key);
Widget build(BuildContext context) {
return MainLayout(
title: 'SingleChildScrollView',
body: SingleChildScrollView(
child: Column(
children: numbers
.map(
(e) => renderContainer(
color: rainbowColors[e % rainbowColors.length],
index: e,
),
)
.toList(),
),
),
);
}- 100개의 리스트를 만들어 인덱스를 붙이고 출력해보았다.

- 99번 인덱스까지 모두 출력된 것을 알 수 있다.
ListView
SingleChildScrollViewd에서는child: Column(children:[])을 사용해야 했지만ListView에서는children에 바로 값을 넣을 수 있다.
ListView(
      children: numbers
          .map(
            (e) => renderContainer(
              color: rainbowColors[e % rainbowColors.length],
              index: e,
            ),
          )
          .toList(),
    );
ListView.builder
- 위에서 살펴보았던 위젯들은 모든 값들이 한번에 반환된다. 하지만
ListView.builder의 경우 화면에 출력된 위젯들만 반환된다.
ListView.builder(
      itemBuilder: (context, index) {
        return renderContainer(
          color: rainbowColors[index % rainbowColors.length],
          index: index,
        );
      },
      itemCount: 100,
    );
- 보고있는 것만 화면에 출력되기 때문에 퍼포먼스 적으로 효율이 좋다.
ListView.separated
- 위젯 중간중간에 item을 넣을 수 있다.
- builder와 마찬가지로 보이는 것만 출력이 된다.
- 베너를 넣을 때 유용하게 사용할 수 있다.
ListView.separated(
        itemBuilder: (context, index) {
          return renderContainer(
            color: rainbowColors[index % rainbowColors.length],
            index: index,
          );
        },
        separatorBuilder: (context, index) {
          return renderContainer(
              color: Colors.black, index: index, height: 100);
        },
        itemCount: 100,
      )
GridView
GridView.count
- 위젯들이 좌우로 배치가 된다
- 한번 실행이 되면 모든 위젯들이 반환된다.
crossAxisCount의 숫자에 따라 좌우에 배치되는 수가 달라진다.
GridView.count(
        crossAxisCount: 3,
        children: numbers
            .map(
              (e) => renderContainer(
                color: rainbowColors[e % rainbowColors.length],
                index: e,
              ),
            )
            .toList(),
      )
crossAxisSpacing,mainAxisSpacing을 사용해서 위젯들 간의 간격을 줄 수 있다.
GridView.builder
- ListView.builder와 같은 기능이다.
- 보이는 위젯만 출력하게 된다.
GridView.builder(
      gridDelegate: SliverGridDelegateWithFixedCrossAxisCount(
        crossAxisCount: 2,
        crossAxisSpacing: 12.0,
        mainAxisSpacing: 12.0,
      ),
      itemBuilder: (context, index) {
        return renderContainer(
          color: rainbowColors[index % rainbowColors.length],
          index: index,
        );
      },
    )
ReorderableListView
-
위젯을 옮길 수 있는
ListView이다. -
ListView에onReorder값이 추가 됬는데,onReorder에는oldIndex와newIndex를 파라미터를 받는 함수를 사용한다. -
이
ListView는 위젯을 옮겨야 하기 때문에 위젯의 자리가 바뀌면서 기존에 있던index가 새로운index로 바뀐다. -
index산정 방식에 대해 알아보자. 이 때 조건이 있는데 인덱스를 번호를 정할 때는 인덱스를 옮기기 전에 산정을 해야한다.[a, b, c]에서a를c뒤로 옮긴다고 가정해보자
a는c다음인 인덱스 3번자리로 가게 된다.
이 과정에서oldIndex는0이 되고newIndex는3이 된다
산정 후 위치는[b, c, a]로 된다[a, b, c]에서c를a앞으로 옮긴다고 가정해보자
c는 0번 인덱스 자리로 가게 된다.
이 과정에서oldIndex는2이 되고newIndex는0이 된다
산정 후 위치는[c, a, b]가 된다.실제 위치를 구하게 되면
oldIndex<newIndex조건에서newIndex에서-1을 하면 실제로 위젯이 이동한 위치이다
oldIndex>newIndex조건에서는newIndex를 그대로 사용하면 된다.
ReorderableListView(
        children: numbers
            .map(
              (e) => renderContainer(
                  color: rainbowColors[e % rainbowColors.length], index: e),
            )
            .toList(),
        onReorder: (int oldIndex, int newIndex) {
          setState(() {
            if (oldIndex < newIndex) {
              newIndex -= 1;
            }
            final item = numbers.removeAt(oldIndex);
            numbers.insert(newIndex, item);
          });
        },
)ReorderableListView에는 꼭key를 넣어줘야 한다.- 위 코드를 보면 100개의 7가지 색상을 가진
Container를 사용하고 있다. 사람이 봤을 때는 색깔별로 다른Container인 것을 인지하지만 시스템적으로ReorderableListView인지하지 못한다. 그래서 이것을 구분해주기 위해key값을 넣어줘야 한다. 그리고key값은 절대로 겹치지 않는 값을 넣어줘야 하기 때문에index를 넣어준다.
Widget renderContainer({
    required Color color,
    required int index,
    double? height,
  }) {
    print(index);
    return Container(
      key: Key(index.toString()), // key
      height: height ?? 300,
      color: color,
      child: Center(
        child: Text(
          index.toString(),
          style: TextStyle(
            color: Colors.white,
            fontWeight: FontWeight.w700,
            fontSize: 30.0,
          ),
        ),
      ),
    );
  }
}- builder 생성자를 사용하지 않았기 때문에 모든 값들이 한번에 출력된다.
ReorderableListView.builder
- builder를 사용하면 보이는 것만 출력된다.
- index 값을 받고 있어서 순서를 아무리 바꿔도 숫자와 색상이 바뀌지 않늗다. index를 참조하고 있어 순서가 바뀌면 index도 바뀌게 되어 색깔도 바뀌게 된다. 해결방안은 index 값을 변경하면 숫자와 색상 모두 변경이 된다.
ReorderableListView.builder(
        itemBuilder: (context, index) {
          return renderContainer(
              color: rainbowColors[index % rainbowColors.length], index: index);
        },
        itemCount: 100,
        onReorder: (int oldIndex, int newIndex) {
          setState(() {
            if (oldIndex < newIndex) {
              newIndex -= 1;
            }
            final item = numbers.removeAt(oldIndex);
            numbers.insert(newIndex, item);
          });
        },
)- numbers 값을 참조해서 index 값을 변경하면 된다.
class _ReorderalbeListViewScreenState extends State<ReorderalbeListViewScreen> {
List<int> numbers = List.generate(100, (index) => index);
Widget build(BuildContext context) {
return MainLayout(
title: 'ReorderalbeListViewScreen',
body: ReorderableListView.builder(
itemBuilder: (context, index) {
return renderContainer(
color: rainbowColors[numbers[index] % rainbowColors.length],
index: numbers[index],
);
},
itemCount: numbers.length,
onReorder: (int oldIndex, int newIndex) {
setState(() {
if (oldIndex < newIndex) {
newIndex -= 1;
}
final item = numbers.removeAt(oldIndex);
numbers.insert(newIndex, item);
});
},
),
);
}
Widget renderContainer({
required Color color,
required int index,
double? height,
}) {
print(index);
return Container(
key: Key(index.toString()),
height: height ?? 300,
color: color,
child: Center(
child: Text(
index.toString(),
style: TextStyle(
color: Colors.white,
fontWeight: FontWeight.w700,
fontSize: 30.0,
),
),
),
);
}CustomScrollView
- slivers에는 리스트 형태의 위젯들을 모두 사용할 수 있다.
- slivers에 들어가는 모든 위젯들은 앞에 Sliver가 붙으니 참고하면 되겠다.
SliverAppbar
- SliverAppbar()를 사용하면 appbar를 만들 수 있다.
- ios 경우 위아래로 스크롤하면 바운스 효과를 볼 수 있다.
pinned
- 기본 Appbar처럼 상단에 Appbar가 고정되어 있다
SliverAppBar(
      pinned: true,
      title: const Text('CustomScrollViewScreen'),
    )
floating
- 스크롤 했을 때 appbar가 리스트 중간에 나타나게 할 수 있다.
SliverAppBar(
      floating: true,
      title: const Text('CustomScrollViewScreen'),
    )
snap
- 살짝만 스크롤해도 Appbar가 나타난다. (자석효과)
- 사용할 때
floating: true이여야 한다. - snap : false 이면 Appbar를 움직일 때 중간에 멈출 수 있다.
SliverAppBar(
      floating: true,
      snap: true,
      title: const Text('CustomScrollViewScreen'),
    )
stretch
- ios에서 리스트를 당기면 최상단 부분에 흰색 배경화면이 출력된다. 이 떄 stretch를 사용하면 흰부분은 나타나지 않고 appbar만 길게 늘어난다.
SliverAppBar(
      stretch: true,
      title: const Text('CustomScrollViewScreen'),
    )
expandedHeight
- appbar 사이즈를 조정할 수 있다.
SliverAppBar(
      expandedHeight: 200,
      floating: true,
      snap: true,
      title: const Text('CustomScrollViewScreen'),
    )
collapsedHeight
- appbar를 닫을 때 밀려들어가는 구간을 설정 할 수 있다
SliverAppBar(
      expandedHeight: 200,
      collapsedHeight: 200,
      floating: true,
      snap: true,
      title: const Text('CustomScrollViewScreen'),
    )
flexibleSpace
- appbar 하단에 위젯을 넣을 수도 있고 text를 넣을 수도 있다.
- title에 text를 넣고 확인해보면 appbar 하단에 text가 출력된 것을 볼 수 있다.
- 여기서 text가 차지하는 공간을 이미지로 확인해보면 appbar 전체를 사용하는 것을 볼 수 있다.
SliverAppBar(
      expandedHeight: 200,
      collapsedHeight: 150,
      floating: true,
      snap: true,
      flexibleSpace: FlexibleSpaceBar(
        background: Image.asset(
          'asset/img/image_1.jpeg',
          fit: BoxFit.cover,
        ),
        title: Text("Hello"),
      ),
      title: const Text('CustomScrollViewScreen'),
    )
SliverList
- 모든 위젯들을 한번에 보여주는 기본적인 위젯 형태를 사용할 때,
SliverChildListDelegate()를 사용한다. - 특징은 위젯을 스크롤하면 Appbar가 사라진다.
SliverList(
          delegate: SliverChildListDelegate(
            numbers
                .map((e) => renderContainer(
                    color: rainbowColors[e % rainbowColors.length], index: e))
                .toList(),
          ),
        )
- 보이는 것만 출력하려면
delegate에SliverChildBuilderDelegate()를 사용하면 된다.
SliverList(
          delegate: SliverChildBuilderDelegate(
            (context, index) => renderContainer(
                color: rainbowColors[index % rainbowColors.length],
                index: index),
          ),
        )
SliverGrid
- SliverGrid를 사용해서 GridView를 사용할 수 있다.
SliverGrid(
      delegate: SliverChildListDelegate(
        numbers
            .map((e) => renderContainer(
                color: rainbowColors[e % rainbowColors.length], index: e))
            .toList(),
      ),
      gridDelegate:
          SliverGridDelegateWithFixedCrossAxisCount(crossAxisCount: 2),
    )
- 마친가지로 Builder를 사용해서 보이는 것만 출력할 수도 있다.
SliverGrid(
          delegate: SliverChildBuilderDelegate(
            (context, index) => renderContainer(
                color: rainbowColors[index % rainbowColors.length],
                index: index),
            childCount: 100,
          ),
          gridDelegate:
              SliverGridDelegateWithMaxCrossAxisExtent(maxCrossAxisExtent: 150),
        )
RefreshIndicator
- 최상단에서 위젯을 내려 새로고침하는 기능을 사용할 때 사용한다.
- onRefresh 함수안에는 주로 서버에서 받아온 새로운 값을 넣어준다.
 RefreshIndicator(
        onRefresh: () async {
          await Future.delayed(
            Duration(seconds: 3),
          );
        },
        child: ListView(
          children: numbers
              .map(
                (e) => renderContainer(
                    color: rainbowColors[e % rainbowColors.length], index: e),
              )
              .toList(),
        ),
      )