내가 보려고 쓰는 Flutter 일기
출처1 : https://api.flutter.dev/flutter/widgets/CustomScrollView-class.html
출처2 : https://medium.com/flutter/slivers-demystified-6ff68ab0296f
CustomScrollView
오늘 배워볼 것은 CustomScrollView.
ScrollView 의 일종인데, 스크롤하는 영역, 즉 화면을 내 마음대로 꾸미기- 정도인 듯 하다. 코드 예시를 구경해보면 대부분 sliver라는 글자가 붙은 클래스와 같이 쓴다.
오늘은 원래 SliverAppBar를 공부하려고 했는데, sliver 를 쓰는 모든 코드에 CustomScrollView가 있었기 때문에... 이게 뭔지 궁금해서 먼저 일기로 써보기로 했다.
Sliver라는 말 자체가 생소했는데, 자주 가는 공식 페이지에는 없어서 이번엔 다른 페이지를 참고했다. 요기 (출처2)

sliver를 사전에 찾아보면, 조각이라는 뜻이다. (네이버 영어사전)
즉, 스크롤되는 영역을 이루는 조각모음인 것이다. 뇌피셜 아니구, 진짜 이렇게 적혀 있다.

여러 군데 코드를 헤집고 다니다 보면 SliverAppBar, SliverList, SliverGridView 와 같은 클래스와 자주 쓰는 걸 볼 수 있는데, ListView나 GridView 와 거의 비슷한 기능이다. 좀 더 예쁘게~ 할 수 있는 듯
SliverAppBar를 사용하면 스크롤 시 앱바의 크기가 줄어들거나 색이 변하는 등의 효과를 넣을 수 있다.
list와 grid를 같이 넣고 스크롤해야 할 때, SliverList 와 SliverGridView 를 함께 쓰면 된다.(ListView로 해도 되는데, 목록이 커지면 SliverList가 낫다.)
코드 예시로 알아보자
Sliver를 뜯어보는건 다음 시간에 하도록 하고, CustomScrollView를 보통 어떻게 쓰는지부터 한번 구경하기로 하자.
오늘도 공식 페이지(출처1)의 코드를 가져다가 돌려보았다.
import 'package:flutter/material.dart';
void main() => runApp(const MyApp());
/// This is the main application widget.
class MyApp extends StatelessWidget {
const MyApp({Key? key}) : super(key: key);
static const String _title = 'Flutter Code Sample';
Widget build(BuildContext context) {
return const MaterialApp(
title: _title,
home: MyStatefulWidget(),
);
}
}
class MyStatefulWidget extends StatefulWidget {
const MyStatefulWidget({Key? key}) : super(key: key);
State<MyStatefulWidget> createState() => _MyStatefulWidgetState();
}
/// This is the private State class that goes with MyStatefulWidget.
class _MyStatefulWidgetState extends State<MyStatefulWidget> {
Widget build(BuildContext context) {
return Scaffold(
appBar: AppBar(
title: const Text('Test CustomScrollView'),
),
//요기부터 시작
body: CustomScrollView(
slivers: <Widget>[
//Sliver 1
const SliverAppBar(
pinned: true,
expandedHeight: 250.0,
flexibleSpace: FlexibleSpaceBar(
title: Text('SliverAppBar'),
),
),
//Sliver 2
SliverGrid(
gridDelegate: const SliverGridDelegateWithMaxCrossAxisExtent(
maxCrossAxisExtent: 200.0,
mainAxisSpacing: 10.0,
crossAxisSpacing: 10.0,
childAspectRatio: 4.0,
),
delegate: SliverChildBuilderDelegate(
(BuildContext context, int index) {
return Container(
alignment: Alignment.center,
color: Colors.teal[100 * (index % 9)],
child: Text('Grid Item $index', style: TextStyle(fontSize: 20),),
);
},
childCount: 20,
),
),
//Sliver 3
SliverFixedExtentList(
itemExtent: 50.0,
delegate: SliverChildBuilderDelegate(
(BuildContext context, int index) {
return Container(
alignment: Alignment.center,
color: Colors.lightBlue[100 * (index % 9)],
child: Text('List Item $index',style: TextStyle(fontSize: 20),),
);
},
),
),
],
)
);
}
}
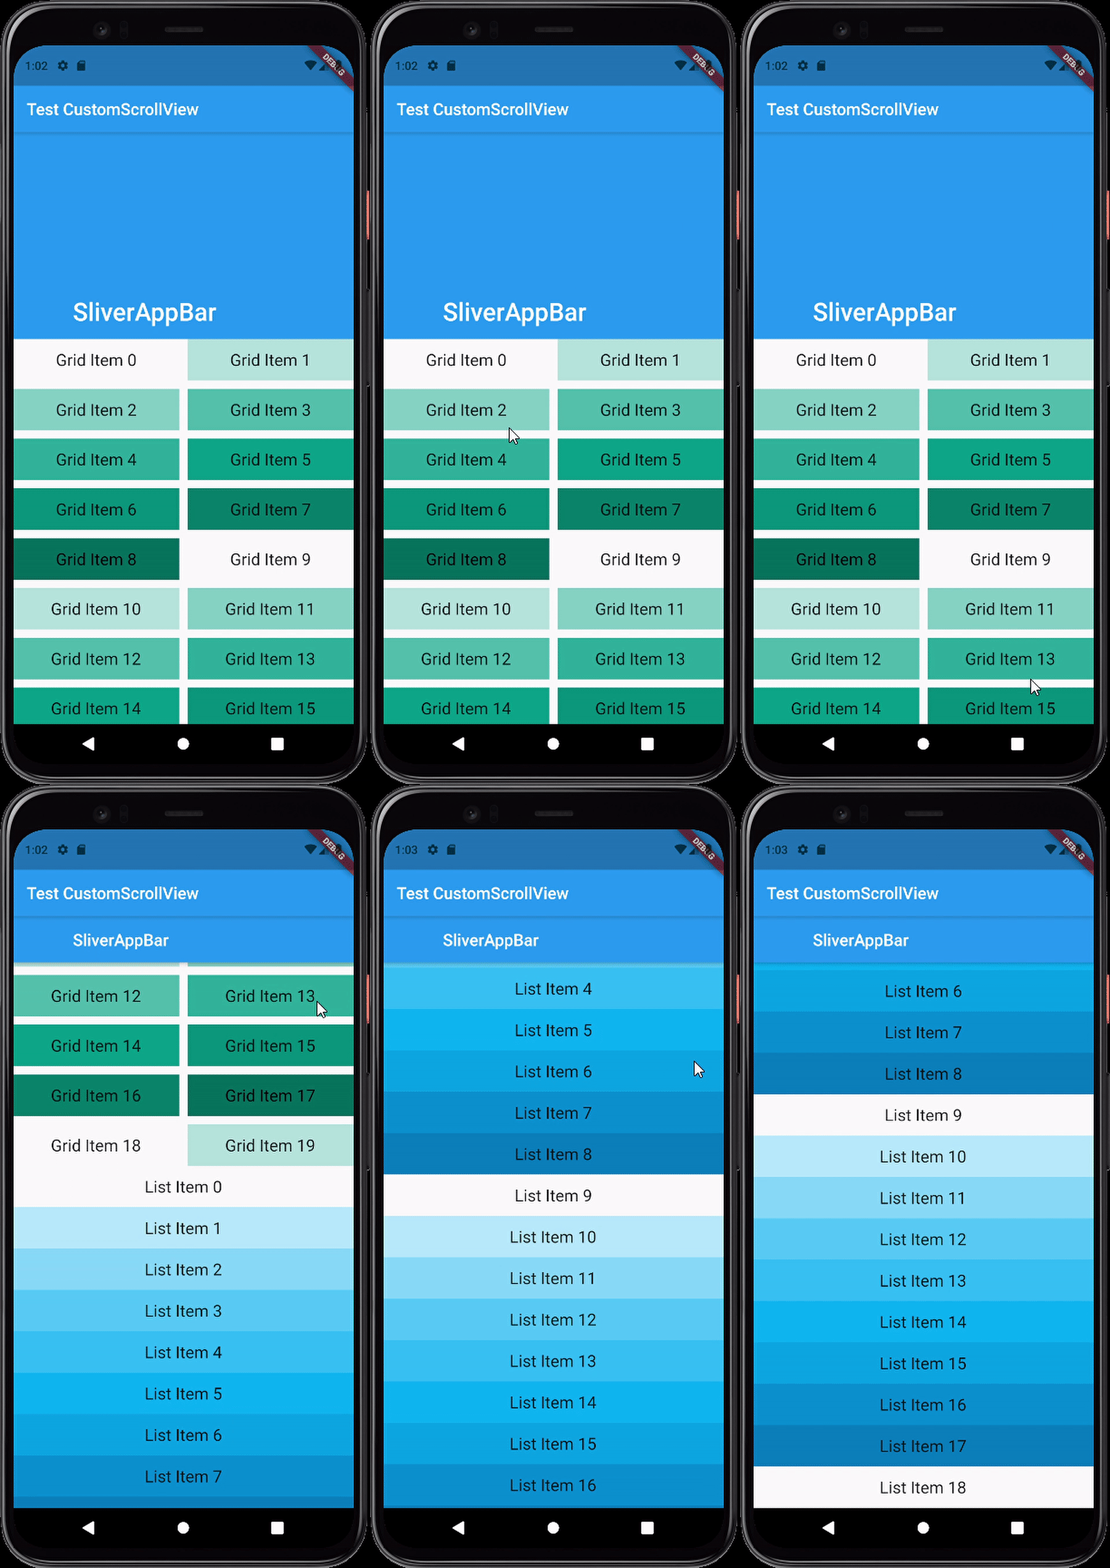
Scaffold 안의 body 는 CustomScrollView, slivers 속성에 SliverAppBar, SliverGrid, SliverFixedExtentList 까지 나열되어 있는 것을 볼 수 있다.
실행화면은 아래와 같다.

다음 일기부터 Sliver를 하나하나 파보기로 하고, 오늘의 일기는 여기까지!
