1. Homogeneous coordinates
기존에는 (x, y, z)만 다룸. 여기에 w를 추가하여 (x, y, z, w) 사용.
w == 1 → 벡터 (x, y, z, 1)은 공간에서의 위치
w == 0 → 벡터 (x, y, z, 0)은 방향
회전의 경우에는 이 둘의 차이가 없으나, 평행이동(translation) 하게 되면 차이가 있음.
2. Transformation matrices - An introduction to matrices
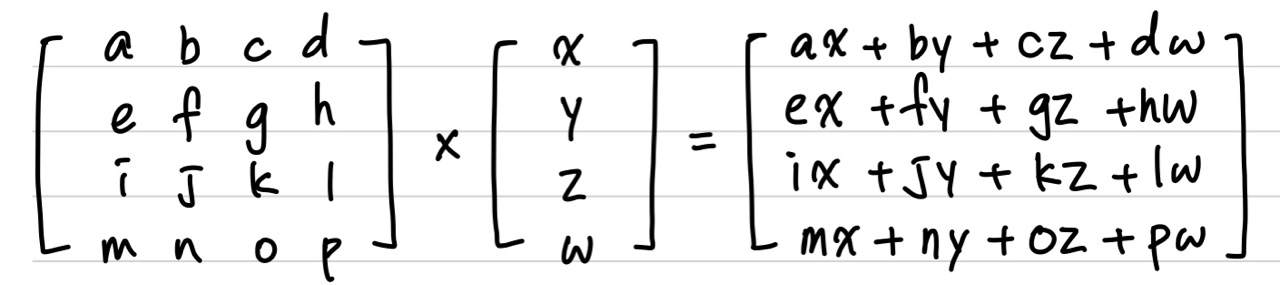
그래픽스에서는 주로 4x4 matrix를 사용.
glm::mat4 myMatrix;
glm::vec4 myVector;
glm::vec4 transformedVectory = myMatrix * myVector; // 곱하는 순서 중요!
3. Transformation matrices - Translation matrices (평행이동 행렬)
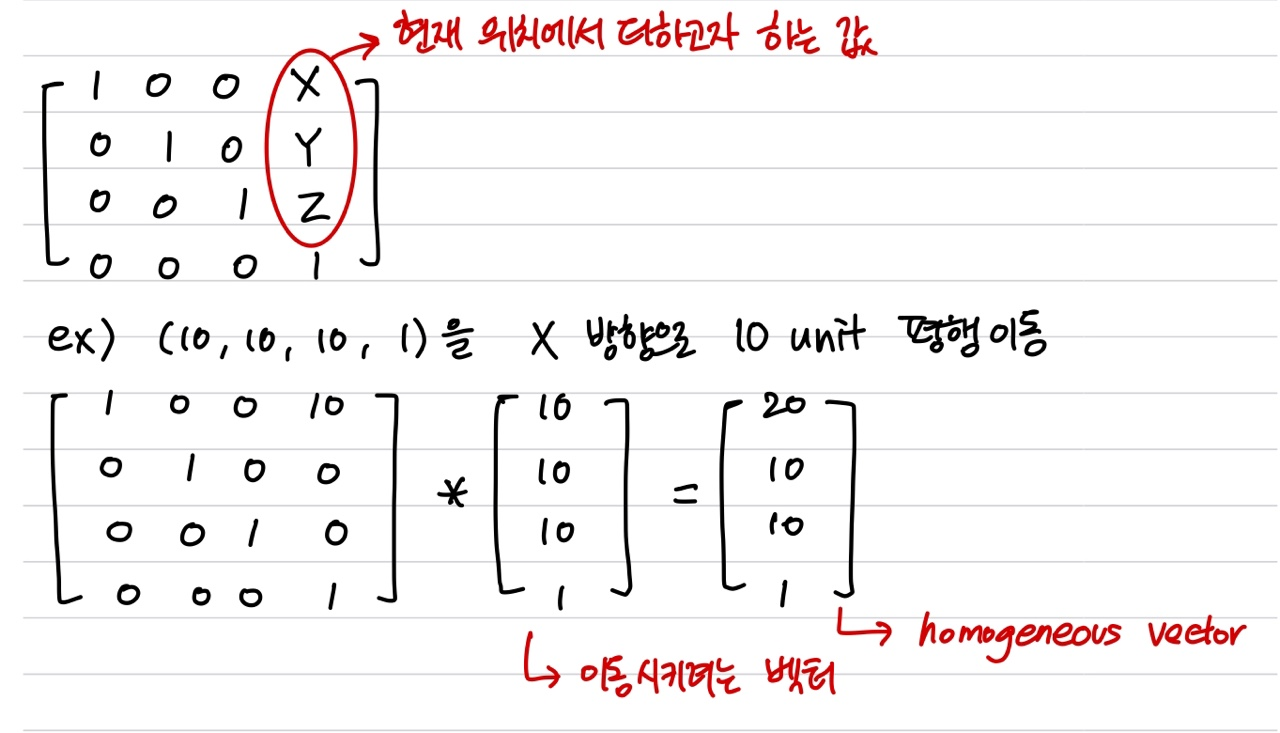
#include <glm/gtx/transform.hpp> // <glm/glm.hpp> 뒤에 넣기
glm::mat4 myMatrix = glm::translate(glm::mat4(), glm::vec3(10.0f, 0.0f, 0.0f));
glm::vec4 myVector(10.0f, 10.0f, 10.0f, 0.0f);
glm::vec4 transformedVector = myMatrix * myVector;
4. Transformation matrices - The Identity matrix (단위 행렬)
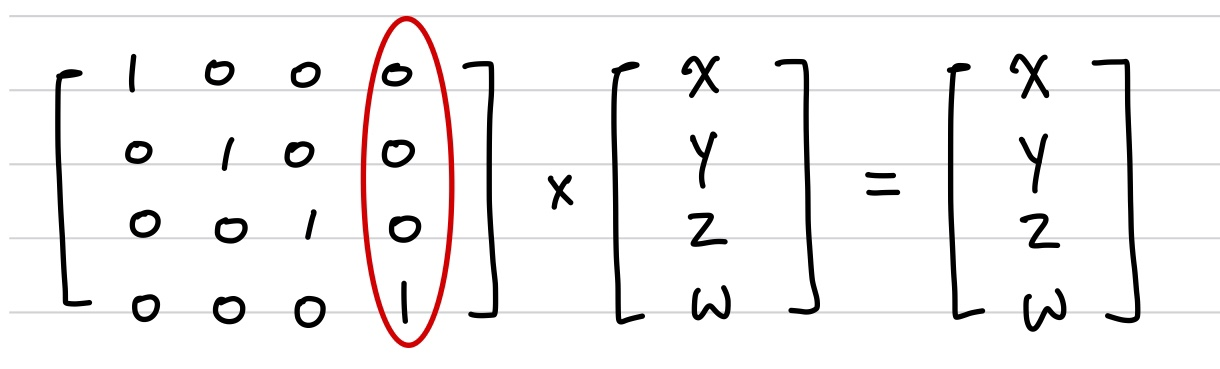
단위행렬은 벡터를 이동시키지 않음.
glm::mat4 myIdentityMatrix = glm::mat4(1.0f);5. Transformation matrices - Scaling matrices (스캐일링 행렬)

(X, Y, Z) = (1, 1, 1)이면 Identity matrix이자 Scaling matrix.
// #include <glm/gtc/matrix_transform.hpp> & #include <glm/gtx/transform.hpp> 사용
glm::mat4 myScalingMatrix = glm::scale(2.0f, 2.0f, 2.0f);
6. Transformation matrices - Rotation matrices (회전 행렬)
// #include <glm/gtc/matrix_transform.hpp> & #include <glm/gtx/transform.hpp> 사용
glm::vec3 myRotationAxis(??, ??, ??);
glm::rotate(angle_in_degrees, myRotationAxis);
7. Transformation matrices - Cumulating transformations (누적 변환)
벡터를 회전하고, 평행이동시키고, 스케일하는 것을 동시에 하는 것.
실제 수행 순서는 Scaling - Rotation - Translation임.
glm::mat4 myModelMatrix = myTranslationMatrix * myRotationMatrix * myScaleMatrix;
glm::vec4 myTransformedVector = myModelMatrix * myOriginalVector;
여기서부터 Blender의 3D model 중 하나인 the monkey Suzane 사용.
Model, View, Projection matrices는 사용하지 않아도 되지만, 사용하는 것이 편리함.
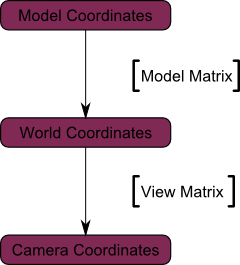
8. The Model, View and Projection matrices - The Model matrix
Vertex가 (0, 0, 0)에 있으면 오브젝트의 중심에 있는 것.
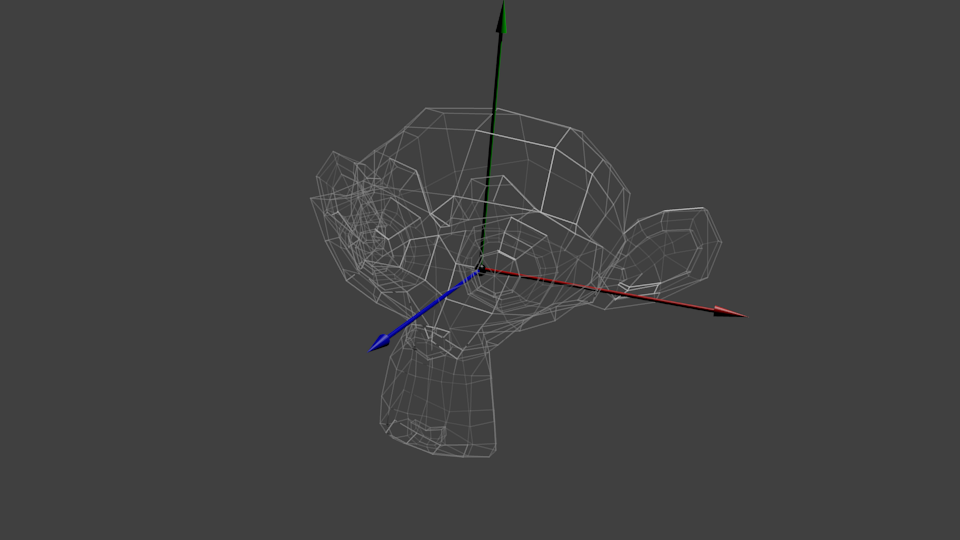
이 모델을 움직이고자 함. Translation matrices 사용하면 됨.
이 matrices를 매 프레임마다 모든 vertex에 적용해야 함.
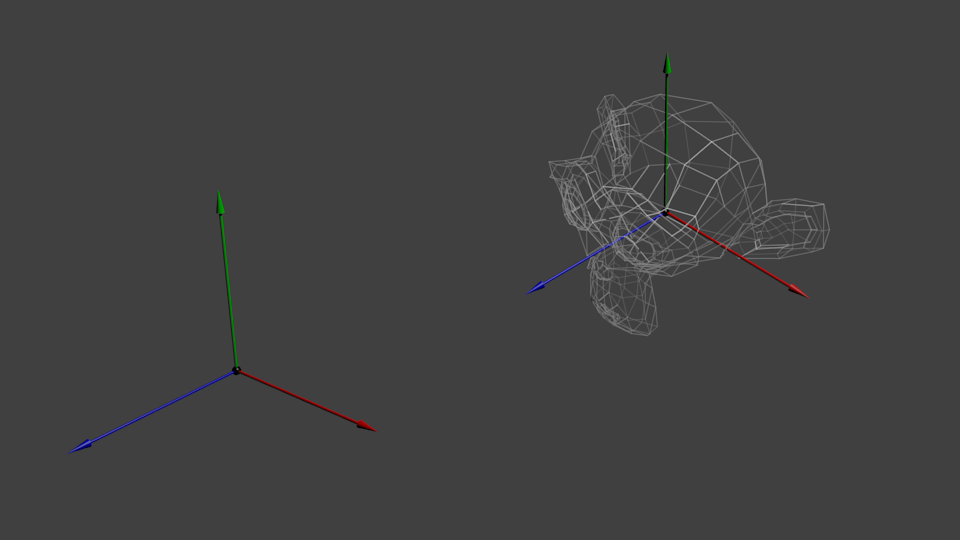
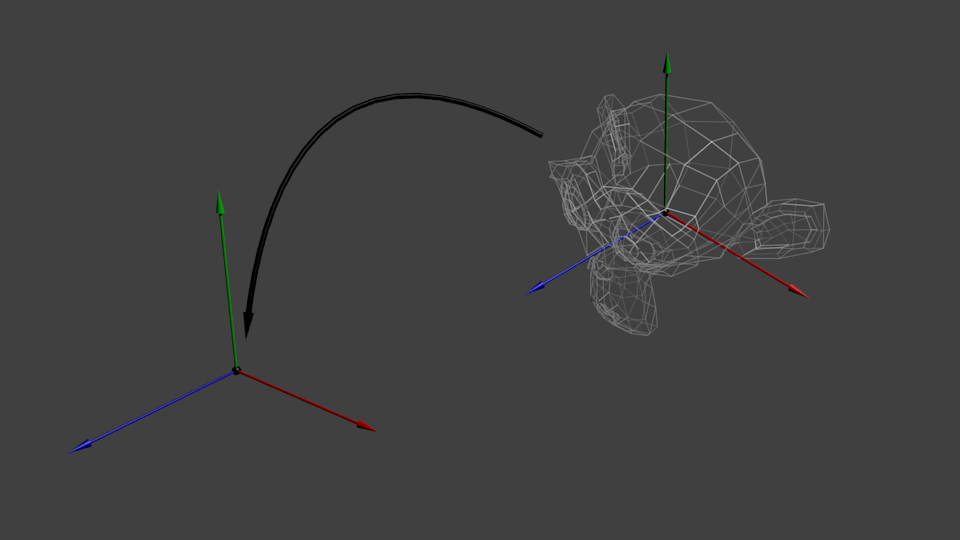
Vertex들이 World Space에 있음.
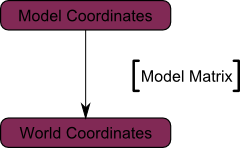
Model Space(모든 vertex가 모델을 중심으로 상대적으로 정의됨) → World Space(모든 vertex가 World Space을 중심으로 상대적으로 정의됨)
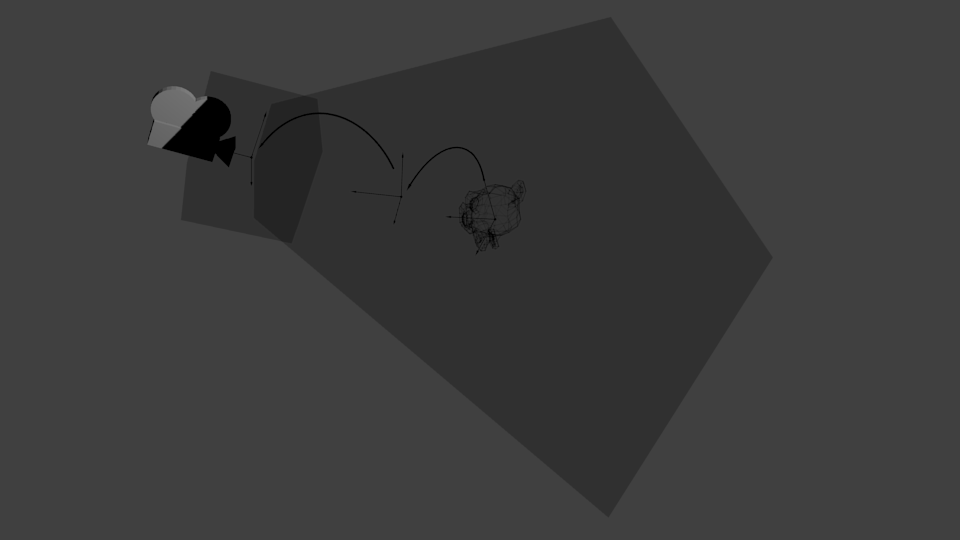
9. The Model, View and Projection matrices - The View matrix
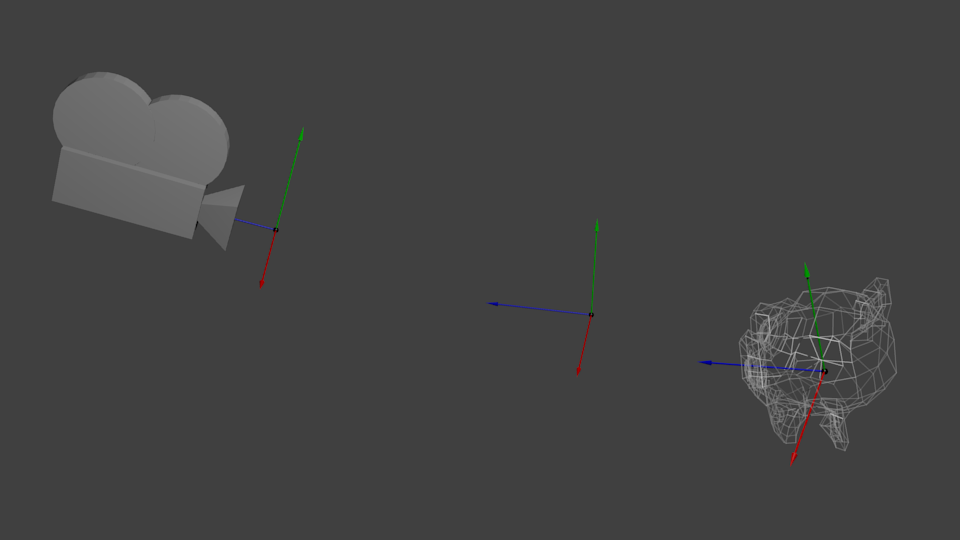
물체를 다른 각도에서 보고 싶다면, 카메라를 옮기거나 물체를 옮겨야 함.
초기에 카메라는 World Space의 원점에 있음.
카메라를 오른쪽(+X)으로 3 unit만큼 움직이면, 물체들을 왼쪽(-X)으로 3 unit만큼 움직이는 것과 같음.
// #include <glm/gtc/matrix_transform.hpp> & #include <glm/gtx/transform.hpp> 사용
glm::mat4 ViewMatrix = glm::translate(glm::mat4(), glm::vec3(-3.0f, 0.0f, 0.0f));
glm::mat4 CameraMatrix = glm::lookAt(
cameraPosition, // World Space에서 카메라의 좌표
cameraTarget, // World Space에서 카메라가 바라볼 곳
upVector // glm::vec(0, 1, 0)가 적절하나, (0, -1, 0)으로 화면 뒤집을 수 있음
);
World Space → Camera Space(모든 vertex가 카메라를 중심으로 상대적으로 정의됨)
10. The Model, View and Projection matrices - The Projection matrix
오브젝트를 스크린의 어느 부분에 띄울지 결정할 때 x, y, z(거리) 좌표 사용.
x, y 좌표가 동일한 두 vertex가 있다고 할 때, z 좌표 값이 더 큰 vertex는 화면의 중심에 더 가까움.
glm::mat4 projectionMatrix = glm::perspective(
    glm::radians(FoV),	// 수직방향 시야각
    4.0f / 3.0f,	// 화면 비율 (4:3 = 800:600 = 1280:960)
    0.1f,	// Near clipping plane(근거리 잘라내기 평면). 최대한 크게 할 것
    100.0f	// Far clipping plane(원거리 잘라내기 평면). 최대한 작게 할 것
);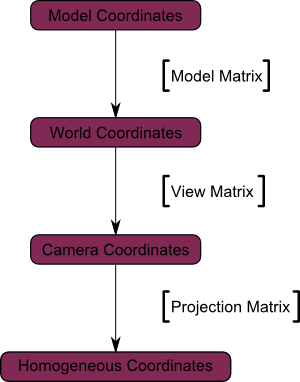
Camera Space → Homogeneous Space(모든 vertex가 작은 큐브 안에 정의되고, 큐브 안에 있는 모든 것은 화면에 나타남)
아래는 이해를 돕는 그림이다.

블루 오브젝트들이 Camera Space 안에 있다.
빨간색은 Camera의 frustum이다.
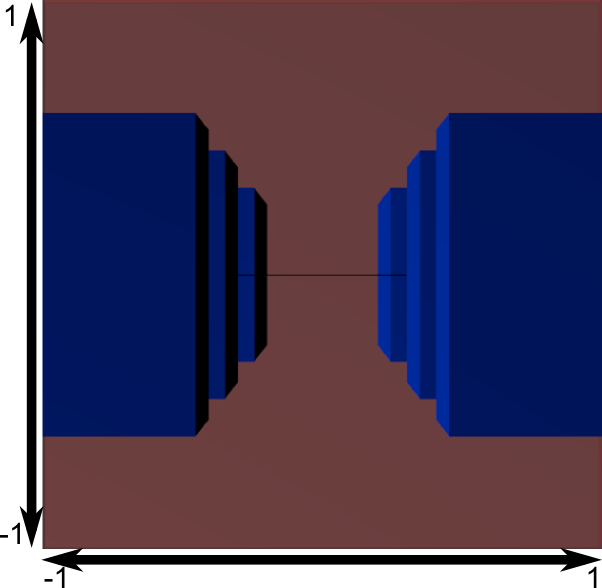
Projection Matrix를 곱하는 것은 아래와 같은 효과를 준다.

Frustum은 완벽한 큐브가 되었다. (모든 축으로 -1~1에만 존재)
그리고 모든 블루 오브젝트들도 동일한 방식으로 왜곡되었다.
따라서, 카메라와 가까운 오브젝트는 커지고, 먼 오브젝트는 작아진다. (실제 세상처럼)
Frustum 뒤에서는 다음과 같이 보인다.
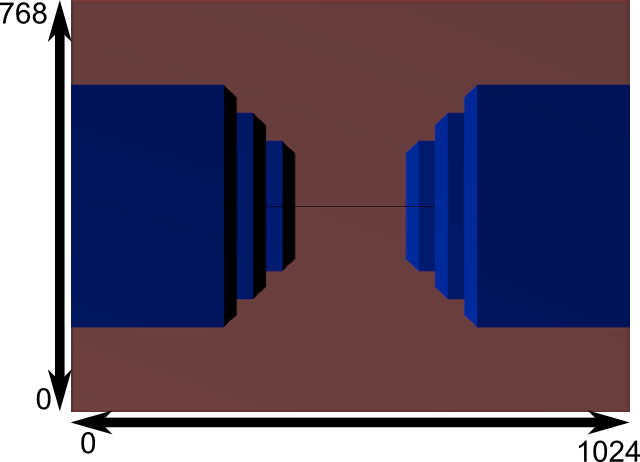
실제 윈도우 사이즈에 맞추어진 것은 다음과 같다.
11. The Model, View and Projection matrices - Cumulating transformations : the ModelViewProjection matrix
이전에 했던 일반적인 매트릭스 곱과 동일하다.
glm::mat4 MVPmatrix = projection * view * model; // 순서 중요!