Intro
- 이번주 내 이슈였던 MVVM을 조금은 정리하는 시간을 가졌다.
- MVVM 패턴으로 간단하게 Room을 실습할 수 있는 앱을 구성해보았다.
폴더구조
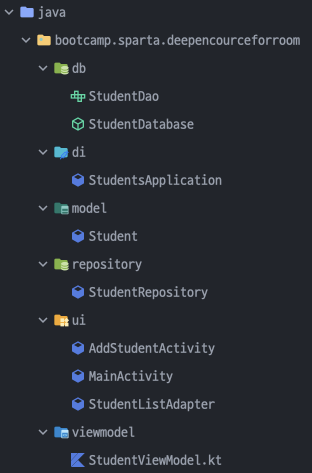
- 폴더구조는 보시다시피 구성했다. 원래는 db가 datasource 안에 local 폴더에 들어가야 맞지만 앱 기능상 통신이 없기에 편의상 이렇게 빼놓았다..!
- 이따 아래에서 보겠지만 앱 자체가 굉장히 간단한 기능임에도 파일이 무지하게 많이 필요하다.. 이 구조로는 빠르게 개발하긴 힘들거같긴한데 큰 구조면 왜 쓰는지 알것같은 느낌적인 느낌이다.
DB
- db는 크게 Entity, Dao, Database 이렇게 3가지가 필요하다.
- Entity는 table과 1:1대응이고, Dao는 쿼리를 처리할 수 있는 메서드를 제공한다. Database는 말 그대로 데이터베이스에 접근해 사용할 수 있도록 도와주는 친구다. 아래 코드를 살펴보자.
Entity
@Parcelize
@Entity(tableName = "student_table")
data class Student(
    @PrimaryKey(autoGenerate = true)
    @ColumnInfo(name = "student_id")
    val id: Int? = null,
    val name: String,
    val grade: String,
): Parcelable
Dao
@Dao
interface StudentDao {
    @Insert(onConflict = OnConflictStrategy.REPLACE)
    suspend fun insertStudent(student: Student)

    @Query("SELECT * FROM student_table")
    fun getAllStudents(): LiveData<List<Student>>

    @Delete
    suspend fun deleteStudent(student: Student)

    @Query("DELETE FROM student_table")
    suspend fun deleteAllStudent()
}
Database
@Database(entities = [Student::class], version = 1 )
abstract class StudentDatabase : RoomDatabase() {
    abstract fun getStudentDao() : StudentDao

    companion object {
        private var instance: StudentDatabase? = null

        fun getDatabase(context: Context): StudentDatabase {
            if(instance == null) {
                instance = Room.databaseBuilder(
                    context, StudentDatabase::class.java, "student_database"
                )
                    .build()
            }
            return instance as StudentDatabase
        }
    }
}
Repository
- db를 만들었으면 다음으로 db를 접근할 수 있는 중개자가 필요하다. 그게 바로 Repository의 역할이다. Repository는 Datasource와 ViewModel 사이를 연결해주는 중개인 역할을한다. 그래서 ViewModel은 Repository에 나와있는 것에만 접근하여 사용할 수 있다.
- Repository가 필요한 이유는 ViewModel과 Data사이의 통신규칙을 정해줄수있기 때문에 필요하다고 정리되었다. MVVM이 프레임워크가 아니니까(절대적인 규칙이 있는건 아니니까..!) 프로젝트 상황에 맞게 쓰면 되겠지만 배우는 입장에서는 일단 다 구현해보는게 맞다는 생각이들었다.
class StudentRepository(private val studentDao: StudentDao) {
    val getAllStudent: LiveData<List<Student>> = studentDao.getAllStudents()

    @WorkerThread
    suspend fun insert(student: Student) {
        studentDao.insertStudent(student)
    }

    @WorkerThread
    suspend fun delete(student: Student){
        studentDao.deleteStudent(student)
    }
}
ViewModel
- 다음은 View와 통신할 ViewModel을 만들어보자. ViewModel은 데이터의 변화를 감지하여 업데이트를 진행해주는일을 한다.
- ViewModel의 경우 기본적으로 파라미터가 없는 형태로 생성되지만, 만약 파라미터를 추가하고싶다면 별도로 ViewModelProvider.Factory를 상속받아서 직접 정의해주면 된다.
- 여기에서는 ViewModel에 repository를 넣어줘야하므로 Factory를 구현했다.
class StudentViewModel(private val repository: StudentRepository) : ViewModel() {
    val allStudents: LiveData<List<Student>> = repository.getAllStudent

    fun insert(student: Student) = viewModelScope.launch {
        repository.insert(student)
    }

    fun delete(student: Student) = viewModelScope.launch {
        repository.delete(student)
    }
}

class StudentViewModelFactory(private val repository: StudentRepository): ViewModelProvider.Factory {
    override fun <T : ViewModel> create(modelClass: Class<T>): T {
        if(modelClass.isAssignableFrom(StudentViewModel::class.java)) {
            @Suppress("UNCHECKED_CAST")
            return StudentViewModel(repository) as T
        }
        throw IllegalArgumentException("Unknown ViewModel class")
    }
}
DI(Dependancy Injection, 의존성 주입)
- 해당내용은 Android Developer 공식문서에 나온 설명을 보고 공부할겸 내 말로 정리를 시도했다. 더 자세하고 정확한 정보는 여기에 잘 정리되어있다.
개요
- 의존성주입은 프로그래밍에서 널리 사용되는 기법이라고 한다.
- 의존성이라는게 무슨말인고 하니 우리가 클래스를 사용하려면 다른 클래스를 참조하는것이 필요할때가 많다. 여기에서 말하는 필요한 클래스가 바로
종속항목이다. 그럼 왜 꼭 DI라는 개념을 만들어야 했을까? 그것을 알아보려면 먼저 클래스가종속항목을 어떻게 얻는지부터 알아보자.
클래스가 필요한 객체를 얻는방법
- 클래스 내부에서 instance를 생성하고 초기화한다.
class Car {
	private val engine = Engine()
	fun start() {
		engine.start()
	}
}

fun main(args: Array) {
	val car = Car()
	car.start()
}-
다른곳에서 객체를 가져온다.
Contextgetter 및getSystemService()등이 이런식으로 동작한다고 함. -
객체를 매개변수로 제공받음. 아마 3번의 방법을 가장 많이 사용하지않을까싶다. 내가 만들고자하는 클래스를 인스턴스화 할때 객체를 주입해서 사용하는것이다. 바로 아래왁같이 말이다.
- 생성자 삽입
class Car(private val engine: Engine) { fun start() { engine.start() } } fun main(args: Array) { val engine = Engine() val car = Car(engine) car.start() }- 필드 삽입(혹은 setter 삽입)
class Car() {
	lateinit var engine: Engine

	fun start() {
		engine.start()
	}
}

fun main(args: Array) {
	val car = Car(engine)
	car.engine = Engine()
	car.start()
}
위 방식의 문제점은 무엇일까?
- 앱이 커질수록 종속삽입이라는 일을 끊임없이 밥복해야할 것이다. 거기에 모든 종속항목을 올바르게 연결하려면 이것을 하기위한 보일러플레이트 코드가 늘어날 수 있다. 우리 생활에서 실제 자동차를 만든다고 생각해보면 하나의 자동차에 들어가는 부품이 어마어마한데 이 모든 부품이있어야 자동차가 정상동작하는것을 떠올리면 현 상황을 이해하기 쉬울것이다.
- 종속 항목을 전달하기 전에 구성할 수 없는 경우 개발자가 모든것을 대응해야한다. 즉, 종속항목의 lifecycle을 수동으로 관리해줘서 어떤 종속 항목이 언제 메모리에 올라갈지를 정해줘야한다.
이것을 자동화해주면 얼마나 좋을까?
- 여기서 등장하는게 바로 DI 라이브러리이다.
- 구글은 Dagger라는 DI 라이브러리를 만들었다. 이거 쓰면된다.
ServiceLocator라는 걸 사용하면 된다고 한다. 얘도 디자인패턴이라고하는데.. 그냥 인스턴스에 다 때려박고 필요할때 꺼내쓰는 냉장고 같은 느낌이랄까?
object ServiceLocator {
    fun getEngine(): Engine = Engine()
}

class Car {
    private val engine = ServiceLocator.getEngine()
    fun start() {
        engine.start()
    }
}

fun main(args: Array) {
    val car = Car()
    car.start()
}
결론
- Hilt 쓰면 된다. 라이프사이클에 맞게 알아서 종속 항목들을 관리해준다.
특징
- 의존성주입으로 아래와같은 이점을 누릴 수 있다.
- 코드 재사용 가능
- 리펙터링 편의성
- 테스트 편의성
DI 코드는 여기에!
- 코드가 꽤 간단하다. 왜냐하면 하는일이 클래스에 종속삽입할 클래스들을 모아놓은것인데 우리 앱이 워낙 단순하니 몇개 안되는 것이다 ㅎㅎ
class StudentsApplication: Application() {
    val database by lazy { StudentDatabase.getDatabase(this) }
    val repository by lazy { StudentRepository(database.getStudentDao()) }
}
UI
- 먼 길을 떠나 드디어 View에 도달했다..!(정확히는 UI컨트롤러라고 말해야겠지만..) 이제 위에서 구현해놓은것들을 적용할 시간이다.
- 여기서 UI는 Activity, Fragment를 말한다. 실제 사용자와 Interaction하는 곳이기도하고 사용자의 입력을 받고 화면에 반영해주는 곳이기 때문이다.
- MVVM 패턴이 원하는바는 결국 어느 한곳에 과중한 책임이 가지 않도록 하는것이다. 그걸위해 위에서 수많은 단계를 만들고 책임을 나눈것이다. 이렇게되어야 유지보수하기 쉬운 코드가 되는것이고, 유지보수가 쉽다는 말은 테스트가 용이한 코드라는 것이기도 하다.
- Activity(Fragment)에서는 사용자의 입력에의해 값이 변경될경우 ViewModel에게 알려만 준다. 그러면 ViewModel이 확인해서 알아서 처리해준다.
// MainActivity.kt

class MainActivity : AppCompatActivity() {
    companion object {
        fun newIntent(context: Context): Intent = Intent(context, MainActivity::class.java)
    }

    private val binding by lazy {
        MainActivityBinding.inflate(layoutInflater)
    }

    private val listAdapter by lazy {
        StudentListAdapter()
    }

    private val studentViewModel: StudentViewModel by viewModels {
        StudentViewModelFactory((application as StudentsApplication).repository)
    }

    private val addStudentLauncher =
        registerForActivityResult(ActivityResultContracts.StartActivityForResult()) { result ->
            if (result.resultCode == RESULT_OK) {
                val studentModel = if (Build.VERSION.SDK_INT >= Build.VERSION_CODES.TIRAMISU) {
                    result.data?.getParcelableExtra(
                        AddStudentActivity.EXTRA_STUDENT,
                        Student::class.java
                    )
                } else {
                    result.data?.getParcelableExtra(AddStudentActivity.EXTRA_STUDENT)
                }
                studentModel?.let {
                    studentViewModel.insert(it)
                }
            } else {
                Toast.makeText(
                    applicationContext,
                    R.string.empty_not_saved,
                    Toast.LENGTH_LONG
                ).show()
            }
        }

    override fun onCreate(savedInstanceState: Bundle?) {
        super.onCreate(savedInstanceState)
        setContentView(binding.root)

        initView()
    }

    private fun initView() = with(binding) {
        recyclerMain.adapter = listAdapter
        recyclerMain.layoutManager = LinearLayoutManager(this@MainActivity)
        studentViewModel.allStudents.observe(this@MainActivity) {students ->
            listAdapter.submitList(students)
        }

        fabMain.setOnClickListener {
            val intent = AddStudentActivity.newIntent(this@MainActivity)
            addStudentLauncher.launch(intent)
        }
    }
}
// RecyclerView ListAdapter
class StudentListAdapter: ListAdapter<Student, StudentListAdapter.StudentHolder>(
object: DiffUtil.ItemCallback<Student>() {
override fun areItemsTheSame(oldItem: Student, newItem: Student): Boolean {
return oldItem.id == newItem.id
}
override fun areContentsTheSame(oldItem: Student, newItem: Student): Boolean {
return oldItem == newItem
}
}
) {
class StudentHolder(private val binding: StudentItemBinding) : RecyclerView.ViewHolder(binding.root) {
fun bind(item: Student)=with(binding) {
itemId.text = item.id.toString()
itemName.text = item.name
itemGrade.text = item.grade
}
}
override fun onCreateViewHolder(parent: ViewGroup, viewType: Int): StudentHolder {
return StudentHolder(StudentItemBinding.inflate(LayoutInflater.from(parent.context)))
}
override fun onBindViewHolder(holder: StudentHolder, position: Int) {
holder.bind(getItem(position))
}
}// AddStudentActivity.kt
class AddStudentActivity : AppCompatActivity() {
companion object {
const val EXTRA_STUDENT = "extra_student"
fun newIntent(context: Context): Intent = Intent(context, AddStudentActivity::class.java)
}
private val binding by lazy {
AddStudentActivityBinding.inflate(layoutInflater)
}
override fun onCreate(savedInstanceState: Bundle?) {
super.onCreate(savedInstanceState)
setContentView(binding.root)
initView()
}
private fun initView()=with(binding) {
submitAddStudent.setOnClickListener {
val intent = Intent()
if(TextUtils.isEmpty(nameAddStudent.text) || TextUtils.isEmpty(gradeAddStudent.text)) {
setResult(RESULT_CANCELED, intent)
} else {
intent.apply {
putExtra(EXTRA_STUDENT, Student(
name = nameAddStudent.text.toString(),
grade = gradeAddStudent.text.toString()
))
}
setResult(RESULT_OK, intent)
}
finish()
}
}
}- 여기서부터는 xml
<!-- main_activity.xml -->
<?xml version="1.0" encoding="utf-8"?>
<androidx.constraintlayout.widget.ConstraintLayout xmlns:android="http://schemas.android.com/apk/res/android"
    xmlns:app="http://schemas.android.com/apk/res-auto"
    xmlns:tools="http://schemas.android.com/tools"
    android:layout_width="match_parent"
    android:layout_height="match_parent"
    tools:context=".ui.MainActivity">

    <androidx.appcompat.widget.Toolbar
        android:id="@+id/toolbar_main"
        android:layout_width="0dp"
        android:layout_height="wrap_content"
        app:title="@string/main_toolbar_title"
        app:titleTextColor="@color/white"
        android:background="@color/main_toolbar_bg"
        app:layout_constraintStart_toStartOf="parent"
        app:layout_constraintEnd_toEndOf="parent"
        app:layout_constraintTop_toTopOf="parent"
        app:layout_constraintBottom_toTopOf="@+id/recycler_main"/>

    <androidx.recyclerview.widget.RecyclerView
        android:id="@+id/recycler_main"
        android:layout_width="0dp"
        android:layout_height="0dp"
        android:padding="@dimen/recyclerview_padding"
        app:layout_constraintStart_toStartOf="parent"
        app:layout_constraintEnd_toEndOf="parent"
        app:layout_constraintTop_toBottomOf="@+id/toolbar_main"
        app:layout_constraintBottom_toBottomOf="parent" />

    <com.google.android.material.floatingactionbutton.FloatingActionButton
        android:id="@+id/fab_main"
        android:layout_width="wrap_content"
        android:layout_height="wrap_content"
        android:layout_margin="20dp"
        android:src="@drawable/baseline_add_24"
        app:layout_constraintEnd_toEndOf="parent"
        app:layout_constraintBottom_toBottomOf="parent" />

</androidx.constraintlayout.widget.ConstraintLayout>
<!-- student_item.xml -->
<?xml version="1.0" encoding="utf-8"?>
<androidx.constraintlayout.widget.ConstraintLayout xmlns:android="http://schemas.android.com/apk/res/android"
xmlns:app="http://schemas.android.com/apk/res-auto"
xmlns:tools="http://schemas.android.com/tools"
android:layout_width="match_parent"
android:layout_height="wrap_content"
android:background="@color/recyclerview_item_bg"
android:orientation="horizontal">
<TextView
android:id="@+id/item_id"
android:layout_width="wrap_content"
android:layout_height="wrap_content"
android:padding="@dimen/recyclerview_item_padding"
android:textSize="@dimen/recyclerview_item_text_size"
android:textStyle="bold"
app:layout_constraintStart_toStartOf="parent"
app:layout_constraintTop_toTopOf="parent"
tools:text="1" />
<TextView
android:id="@+id/item_hyphen"
android:layout_width="wrap_content"
android:layout_height="wrap_content"
android:padding="@dimen/recyclerview_item_padding"
android:text="@string/recyclerview_item_hyphen"
android:textSize="@dimen/recyclerview_item_text_size"
android:textStyle="bold"
app:layout_constraintBottom_toBottomOf="@+id/item_id"
app:layout_constraintEnd_toStartOf="@+id/item_name"
app:layout_constraintStart_toEndOf="@+id/item_id"
app:layout_constraintTop_toTopOf="@+id/item_id" />
<TextView
android:id="@+id/item_name"
android:layout_width="wrap_content"
android:layout_height="wrap_content"
android:padding="@dimen/recyclerview_item_padding"
android:textSize="@dimen/recyclerview_item_text_size"
android:textStyle="bold"
app:layout_constraintBottom_toBottomOf="@+id/item_id"
app:layout_constraintStart_toEndOf="@+id/item_hyphen"
app:layout_constraintTop_toTopOf="@+id/item_id"
tools:text="정나미" />
<TextView
android:id="@+id/item_grade"
android:layout_width="wrap_content"
android:layout_height="wrap_content"
android:padding="@dimen/recyclerview_item_padding"
android:textSize="@dimen/recyclerview_item_text_size"
android:textStyle="bold"
app:layout_constraintBottom_toBottomOf="@+id/item_id"
app:layout_constraintStart_toEndOf="@+id/item_name"
app:layout_constraintTop_toTopOf="@+id/item_id"
tools:text="3학년" />
</androidx.constraintlayout.widget.ConstraintLayout><!-- add_student_activity.xml -->
<?xml version="1.0" encoding="utf-8"?>
<androidx.constraintlayout.widget.ConstraintLayout xmlns:android="http://schemas.android.com/apk/res/android"
xmlns:app="http://schemas.android.com/apk/res-auto"
xmlns:tools="http://schemas.android.com/tools"
android:layout_width="match_parent"
android:layout_height="match_parent"
android:layout_margin="15dp"
tools:context=".ui.AddStudentActivity">
<androidx.appcompat.widget.Toolbar
android:id="@+id/toolbar_add_student"
android:layout_width="0dp"
android:layout_height="wrap_content"
android:background="@color/main_toolbar_bg"
app:layout_constraintBottom_toTopOf="@+id/name_add_student"
app:layout_constraintEnd_toEndOf="parent"
app:layout_constraintStart_toStartOf="parent"
app:layout_constraintTop_toTopOf="parent"
app:title="@string/main_toolbar_title"
app:titleTextColor="@color/white" />
<EditText
android:id="@+id/name_add_student"
android:layout_width="0dp"
android:layout_height="wrap_content"
android:layout_marginTop="5dp"
android:hint="@string/add_student_edittext_name_hint"
android:inputType="textPersonName"
app:layout_constraintEnd_toEndOf="parent"
app:layout_constraintStart_toStartOf="parent"
app:layout_constraintTop_toBottomOf="@+id/toolbar_add_student" />
<EditText
android:id="@+id/grade_add_student"
android:layout_width="0dp"
android:layout_height="wrap_content"
android:hint="@string/add_student_edittext_grade_hint"
android:inputType="text"
app:layout_constraintEnd_toEndOf="parent"
app:layout_constraintStart_toStartOf="parent"
app:layout_constraintTop_toBottomOf="@+id/name_add_student" />
<Button
android:id="@+id/submit_add_student"
android:layout_width="0dp"
android:layout_height="wrap_content"
android:text="@string/add_student_submit_button_text"
app:layout_constraintBottom_toBottomOf="parent"
app:layout_constraintEnd_toEndOf="parent"
app:layout_constraintStart_toStartOf="parent" />
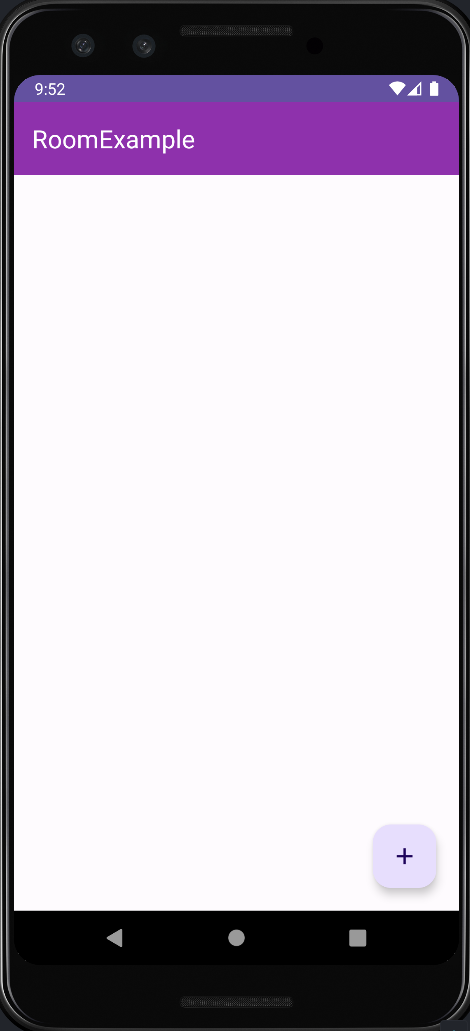
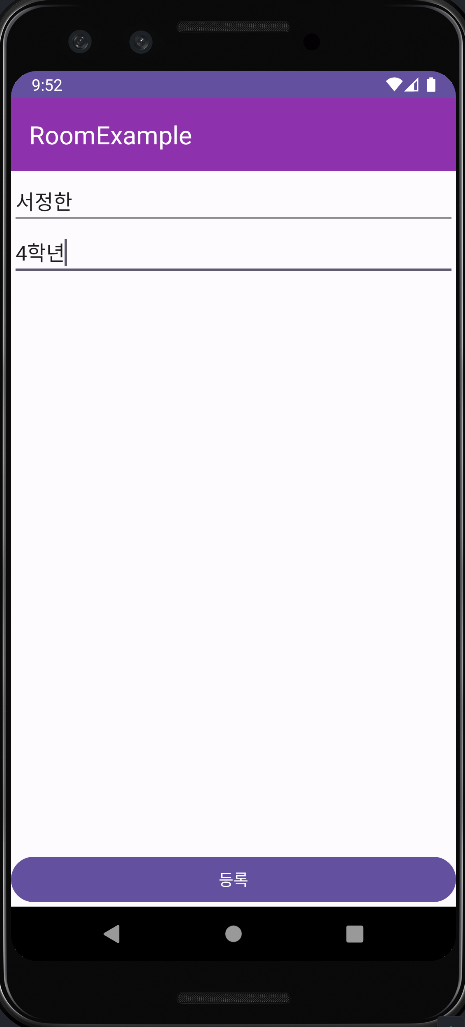
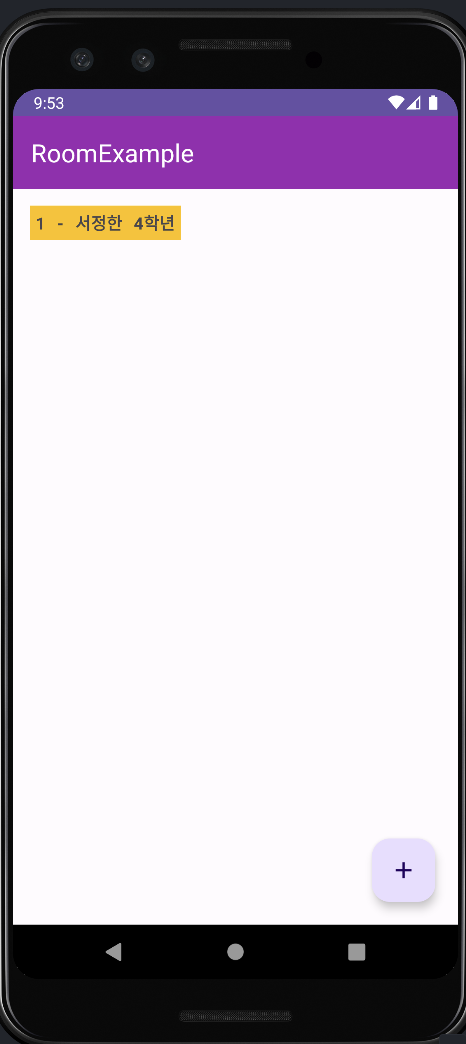
</androidx.constraintlayout.widget.ConstraintLayout>결과
Outro
- VMMV 구조를 만들면서 모르는 부분이 참 많음을 느꼈다.
- 안드로이드에서 제공하는 lifecycle 클래스는 어떻게 돌아갈까?- Hilt는 안에서 무슨 일을 하고있는거지? 그냥 클래스 하나 만들어서 종속항목을 때려박아놓는것이랑 무슨 차이가있지?(공식문서상으로 설명이 있긴한데 사실 내부적으로 어떻게 돌아가는지 모르니 설명을봐도 잘 이해가 안됐다..)
- LiveData와 Flow는 무슨 차이를 가지고있지?(안드로이드 Codelab에서 Room 실습했을때는 Flow를 asLiveData로 변경해서 사용했었다)
- 등...
- 요즘 점점 더 시간이 없다는 생각에 압박감으로 다가올때가있다. 새로운 개념을 머리속에 정착시키는것에는 당연히 시간이 들기 마련이지만 욕심이 욕심이.. 이럴때일수록 하나씩 하나씩 해결해가야겠다는 생각을 하며 마무리해본다.

잘부탁드립니다!