1. social-login
요즘은 대부분의 사이트가 회원가입한 아이디로만 로그인이 가능한 것이 아닌 구글, 카카오, 네이버 등 여러 사이트의 아이디로 로그인이 가능하게 제공한다.
이기능을 구현 하고자 한다.
2. google-login
처음으로는 가장 흔한 구글 로그인을 구현하고자 한다.
현재 로그인 로직은 passport를 활용하여 하고 있기 때문에 passport-google-oauth20을 활용하여 로직을 구현해 보겠다.
oauth20과 nestjs에서 사용을 위한 type버전도 설치를 한다.
$ npm install passport-google-oauth20
$ npm install @types/passport-google-oauth20
1. goole api 등록

공식 깃허브에 들어가 보니 구글 api를 등록을 해야 된다고 나와있다.
등록을 완료했다며 strategy부터 만들어 보자

깃허브 문서를 보니 clientID, clientSecret, callbackURL, scope, state인자를 필요로 한다
import { PassportStrategy } from "@nestjs/passport";
import { Strategy } from "passport-google-oauth20";
export class SocialGoogle extends PassportStrategy(Strategy, "social-google") {
constructor() {
super({
clientID: "",
clientSecret: "",
callbackURL: "http://localhost:3000",
scope: ["profile"],
})
}
async validate(profile) {
console.log(profile);
return profile;
}
}
@UseGuards(AuthGuard("social-google"))
@Get("google")
googleLogin(@Req() req) {
console.log(req.user);
}
테스트를 위해 html파일 하나를 생성해 주었다.
<!DOCTYPE html>
<html lang="en">
<head>
    <meta charset="UTF-8">
    <meta http-equiv="X-UA-Compatible" content="IE=edge">
    <meta name="viewport" content="width=device-width, initial-scale=1.0">
    <title>Document</title>
</head>
<body>
    <a href="http://localhost:3000/users/google">구글로그인</a>
</body>
</html>
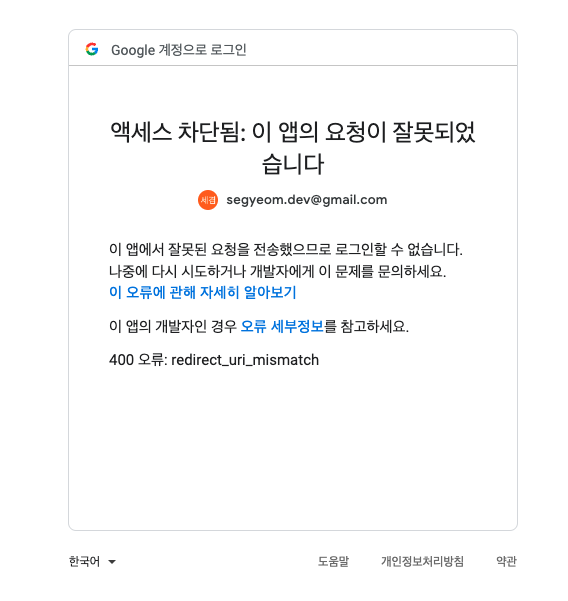
테스트 결과 문제가 생겼다. 이유를 찾아보자.
strategy에서 설정을 잘못해 주었다...
super({
clientID: "",
clientSecret: "",
callbackURL: "http://localhost:3000/users/google",
scope: ["profile"],
})
async socialCreate(email: string):Promise<User> {
const result = await this.userRepository.save({
email,
});
return result
}
async googleLogin(email: string, res: Response) {
let user = await this.userRepository.findOne({where: {email}});
if (!user) {
user = await this.socialCreate(email);
}
await this.setRefreshToken(user, res);
res.redirect('http://127.0.0.1:5500/fornt/index.html');
}
2. cookie문제 해결
1. cors
app.enableCors({
origin: true,
credentials: true,
});
2. 문제 발견

Hearders의 Set-Cookies 부분을 보면 쿠키가 들어가 있다.
이걸 해결해 보자
3. 문제해결
async googleLogin(email: string, res: Response) {
let user = await this.userRepository.findOne({where: {email}});
if (!user) {
user = await this.socialCreate(email);
}
await this.setRefreshToken(user, res);
res.redirect('http://localhost:5500/fornt/index.html');
}
3. naver-login
1. 결과값 보기
naver전용 passport를 설치하자.
$ npm i passport-naver
설치를 완료 했으면 strategy를 설정해 보자.
npm 사이트의 공식 문서를 보니 google와 비슷하게 사용하면 될꺼 같다. 일단 설정을 해주고 넘어오는 profile을 확인해 보자.
import { PassportStrategy } from "@nestjs/passport";
import { Strategy } from "passport-naver";
export class SocialNaver extends PassportStrategy(Strategy, "social-naver") {
constructor() {
super({
clientID: "",
clientSecret: "",
callbackURL: "http://localhost:3000/users/naver",
})
}
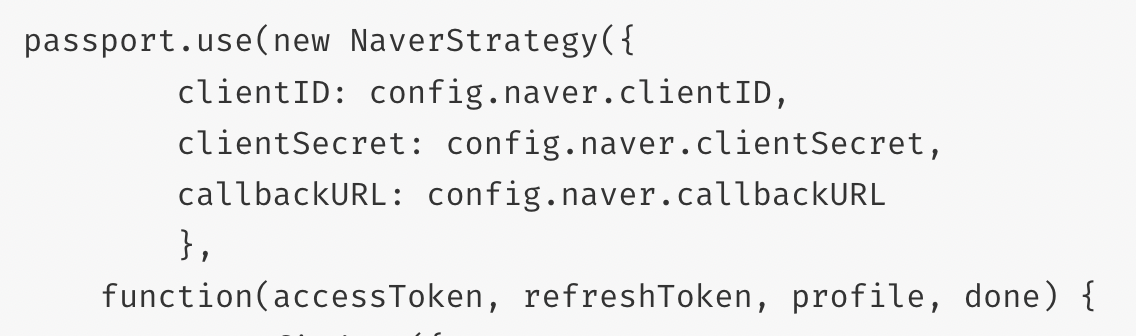
async validate(accessToken, refreshToken, profile,) {
console.log(profile);
}
}
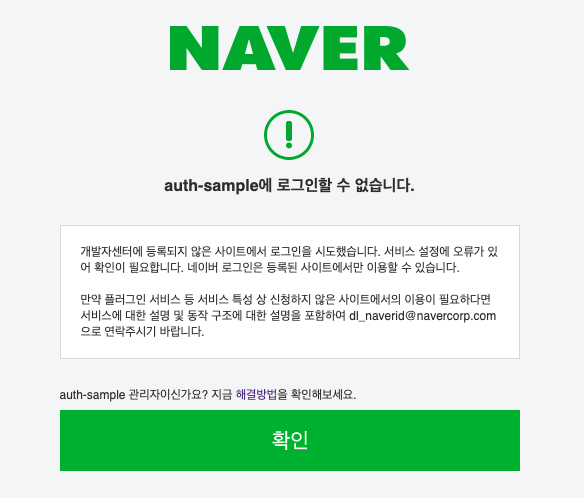
구글과 같이 에러가 뜬다... 아마 또 설정쪽 문제이지 안으까 싶다. 찾아보자
문제를 찾아보니 설정할 때 localhost가 아닌 127.0.0.1로 설정해야 한다.
설정을 바꾸어주니 결과값이 정상적으로 나온다.
{
  provider: 'naver',
  id: 'EPPSmIi_izo_xUMLCvXdq237u6E_PEvEkVow20Yomks',
  displayName: undefined,
  emails: [ { value: 'rlatprua4@naver.com' } ],
  _json: {
    email: 'rlatprua4@naver.com',
    nickname: undefined,
    profile_image: undefined,
    age: undefined,
    birthday: undefined,
    id: 'EPPSmIi_izo_xUMLCvXdq237u6E_PEvEkVow20Yomks'
  }
}
2. service 로직
이제 결과 값이 정상적으로 넘어 오는 것을 확인했다. service로직을 작성해 보자
@UseGuards(AuthGuard("social-naver"))
@Get("naver")
async naverLogin(@Req() req, @Res() res) {
const email = req.user.email;
await this.userService.naverLogin(email, res);
}
async naverLogin(email: string, res: Response) {
let user = await this.userRepository.findOne({where: {email}});
if (!user) {
user = await this.socialCreate(email);
}
await this.setRefreshToken(user, res);
res.redirect('http://localhost:5500/fornt/index.html');
}

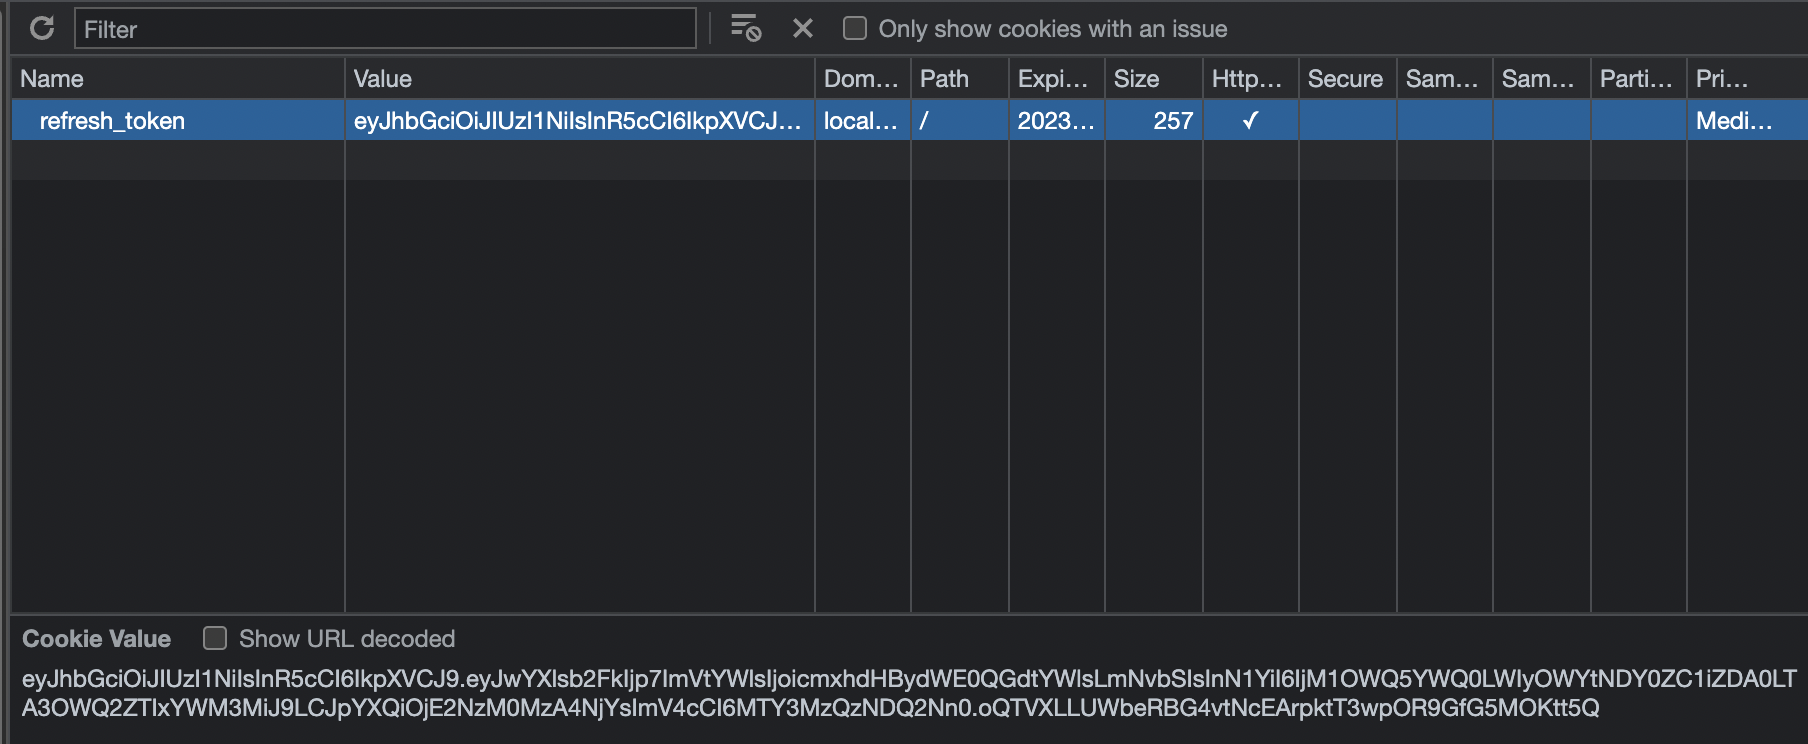
정상적으로 refresh_token이 쿠키 값으로 들어온다.
4. 리팩토링
1. 코드 중복 제거
코드 구조를 보니 google, naver 로그인에 구조가 똑같다. 중복 코드를 없애보자.
@UseGuards(AuthGuard("social-google"))
@Get("google")
async googleLogin(@Req() req, @Res() res) {
const email = req.user.email;
await this.userService.googleLogin(email, res);
}
@UseGuards(AuthGuard("social-naver"))
@Get("naver")
async naverLogin(@Req() req, @Res() res) {
const email = req.user.email;
await this.userService.naverLogin(email, res);
}
async googleLogin(email: string, res: Response) {
let user = await this.userRepository.findOne({where: {email}});
if (!user) {
user = await this.socialCreate(email);
}
await this.setRefreshToken(user, res);
res.redirect('http://localhost:5500/fornt/index.html');
}
async naverLogin(email: string, res: Response) {
let user = await this.userRepository.findOne({where: {email}});
if (!user) {
user = await this.socialCreate(email);
}
await this.setRefreshToken(user, res);
res.redirect('http://localhost:5500/fornt/index.html');
}
@UseGuards(AuthGuard("social-google"))
@Get("google")
async googleLogin(@Req() req, @Res() res) {
this.socialLogin(req, res);
}
@UseGuards(AuthGuard("social-naver"))
@Get("naver")
async naverLogin(@Req() req, @Res() res) {
this.socialLogin(req, res);
}
async socialLogin(req, res: Response) {
const email = req.user.email;
await this.userService.socialLogin(email, res);
}
async socialLogin(email: string, res: Response) {
let user = await this.userRepository.findOne({where: {email}});
if (!user) {
user = await this.socialCreate(email);
}
await this.setRefreshToken(user, res);
res.redirect('http://localhost:5500/fornt/index.html');
}
2. 민감한 정보 숨기기
현재 API 키값 또는 DB접속 정보 등이 전부 하드코딩 되어있다. 이것은 깃허브등 내 코드를 올릴때 보안에 매우 취약하다.
현재는 무료 API등을 사용하고 있지만 만약 AWS 접속 키등 유료 사용료가 발생하는 정보들이 이렇게 인터넷에 올라가게 되면,
요금 폭탄을 맞을 수도 있다. 그렇기 때문에 이러한 값들은 따로 관리를 할 수 있게 해보자
$ npm i --save @nestjs/config

공식문서를 보았을 때 이 configmodule이라는 것을 사용하고 gitignore에 등록하면 될꺼 같다.

.env 파일을 등록해 주었다. 이제 gitignore에 .env를 등록하고 github 에 올려 주면 된다.