🎁 Webpack 이란?
-
번들러의 한 종류다.
-
js, sass, png, jpg와 같은 파일들을 간략한 파일로 압축하고 번들링 시켜주는 도구
-
효율적이고 용량이 경량화되는 프로젝트가 되어야 하기 때문
🔨 Webpack 설치 방법
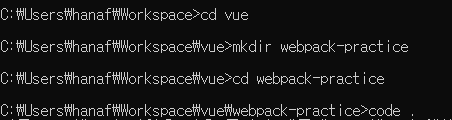
vue폴더 안에webpack-practice폴더를 새로 만들고 vscode 터미널을 열고 다음과 같은 명령어로 npm에서 webpack을 설치해준다.
-
npm init -y: npm 라이브러리를 관리할 수 있는package.json생성 -
npm install webpack webpack-cli --save-dev: webpack, webpack-cli 설치를 개발할 때만 필요한 라이브러리 버전으로 다운로드
src폴더를 만들고 내부에app.js파일을 만들어서 번들링에 사용할 함수components()를 생성해준다.
  const components = () => {
      const h1 = document.createElement("h1");
      h1.innerText = "Hello Webpack!"
      return h1;
  }

document.body.appendChild(components());-
프로젝트 기본 레벨에
webpack.config.js를 생성해서 webpack을 셋팅해준다.-
mode: production, development, none -
entry: 번들링할 파일의 대상 경로 알려줌 -
output: 번들링이 되어서 나오게 될 위치와 파일명을 지정
-
  const path = require("path");

  module.exports = {
      mode: "production",
      entry: "./src/app.js",
      output: {
          filename: 'bundle.js',
          path: path.resolve(__dirname, "dist")
      }
}-
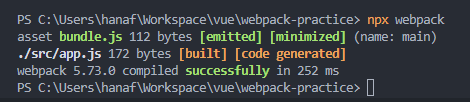
터미널에
npx webpack를 입력하고 실행시켜준다.- 다음과 같이 번들링이 성공적으로 빌드되었다는 메시지가 출력된다.
- 프로젝트 레벨에
dist가 형성이 되고 생성된bundle.js를 열어보면 코드가 압축되어서 변환이 된 것을 볼 수 있다.
document.body.appendChild((()=>{const e=document.createElement("h1");return e.innerText="Hello Webpack!",e})());-
npm install babel-loader @babel/core @babel/preset-env --save -dev명령어를 이용해서babel을 설치한다.-
설치를 완료하고
babel.config.js파일을 생성해준다. -
presets: babel이 구버전 코드로 변환을 할 때 어떤 셋팅값을 참고할 것인지 알려줌 -
babel.config.js내용
-
  module.exports = (api) => {
      api.cache(true);
      const presets = [
          ["@babel/preset-env"]
      ]
      return { presets };
}-
webpack.config.js파일에서 babel을 사용할 수 있도록 추가 수정해준다.- 수정 후에,
npx webpack명령어로 webpack을 한 번 더 실행시켜준다.
- 수정 후에,
  const path = require("path");

  module.exports = {
      mode: "production",
      entry: "./src/app.js",
      output: {
          filename: 'bundle.js',
          path: path.resolve(__dirname, "dist")
      },
      module: {
          rules: [
              {
                  test: /\.js$/,
                  use: ["babel-loader"],
                  exclude: /node_modules/
              }
          ]
      }
}bundle.js를 열면 변수형const가var로 변경된 것을 확인할 수 있다.
(()=>{var e;document.body.appendChild(((e=document.createElement("h1")).innerText="Hello Webpack!",e))})();- 테스트 용도로
monkey.js파일을 만들어주고module.exports를 통해서 다른 js 파일에서 해당 코드를 가져다 쓸 수 있도록 만들어준다.
monkey.js
  module.exports = {
      name: "monkey",
      food: ["banana", "apple"]
}app.js최상단에monkey.js를 require 시켜준다.
const monkey = require("./monkey.js");- 그 후, 다시
npx webpack으로 실행시켜주면 다음과 같이bundle.js가 변동되어 있을 것이다.
(()=>{var e,n={233:e=>{e.exports={name:"monkey",food:["banana","apple"]}}},o={};function r(e){var t=o[e];if(void 0!==t)return t.exports;var a=o[e]={exports:{}};return n[e](a,a.exports,r),a.exports}r(233),document.body.appendChild(((e=document.createElement("h1")).innerText="Hello Webpack!",e))})();bundle.js파일이 정상적으로 작동하는 지index.html에서 확인해본다.
  <!DOCTYPE html>
  <html lang="ko">
      <head>
          <meta charset="UTF-8">
          <meta http-equiv="X-UA-Compatible" content="IE=edge">
          <meta name="viewport" content="width=device-width, initial-scale=1.0">
          <title>Document</title>
      </head>
      <body>
          <script src="dist/bundle.js"></script>
      </body>
  </html>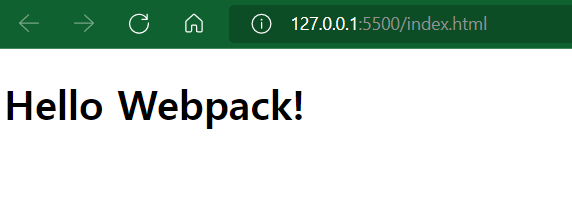
-
잘 실행되었다.
-
참고로 매번 업데이트 할 때마다 webpack 실행시키기 번거로우니
npx webpack --watch명령어를 사용하면 변화가 감지될 때마다 매번 화면을 새로 렌더링시켜줌! -
종료할 때는
ctrl+c로 기능을 멈춰줌
-
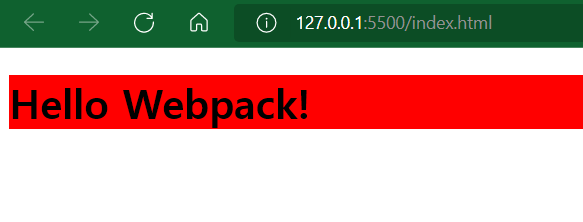
CSS를
webpack으로 번들링 시켜보기-
터미널에
npm install css-loader style-loader --save-dev명령어로 설치 -
src폴더 안에main.css파일 만들어주기
-
    h1 {
        color: fff;
        background: red;
}app.js최상단에 css파일을 require 시켜주기
require("./main.css");- 그리고
webpack.config.js에 rule을 하나 더 추가해 다음과 같이 추가해주기
  const path = require("path");

  module.exports = {
      mode: "production",
      entry: "./src/app.js",
      output: {
          filename: 'bundle.js',
          path: path.resolve(__dirname, "dist")
      },
      module: {
          rules: [
              {
                  test: /\.js$/,
                  use: ["babel-loader"],
                  exclude: /node_modules/
              },
              {
                  test: /\.css$/,
                  use: ["style-loader", "css-loader"],
              }
          ]
      }
}-
결과 화면
- 잘 변환되었다.