Text 위젯
- Text 위젯에는 클래스인 TextStyle을 이용해서 스타일을 바꿔줄 수 있습니다.
- TextStyle은 클래스이므로 생성자 위치에 값을 넣어주면 됩니다.
- 폰트 색상, 배경색상, 폰트 크기, 폰트 두께 등을 변경할 수 있습니다.
TextStyle - Text 스타일링
- style을 이용해서 TextStyle을 사용합니다.
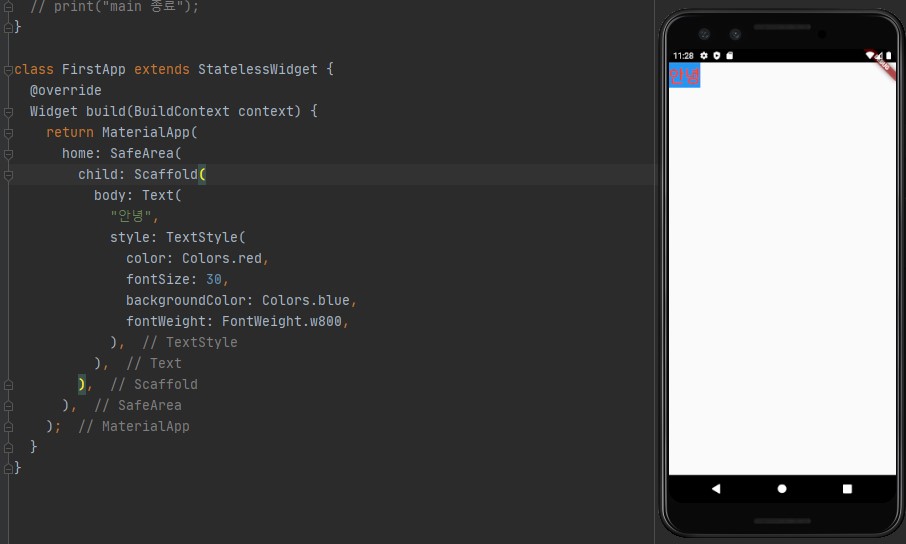
class FirstApp extends StatelessWidget {

  @override
  Widget build(BuildContext context) {
    return MaterialApp(
      home: SafeArea(
        child: Scaffold(
          body: Text(
            "안녕",
            style: TextStyle(
              color: Colors.red,
              fontSize: 30,
              backgroundColor: Colors.blue,
              fontWeight: FontWeight.w800,
            ),
          ),
        ),
      ),
    );
  }
}
TextAlign - Text 정렬
- Text는 범위가 배경범위 안에서 돌기 때문에 TextAlign을 이용해서 정렬을 할 수 없습니다.
- TextAlign을 사용하기 위해서는 Text를 Container로 감싸줍니다.
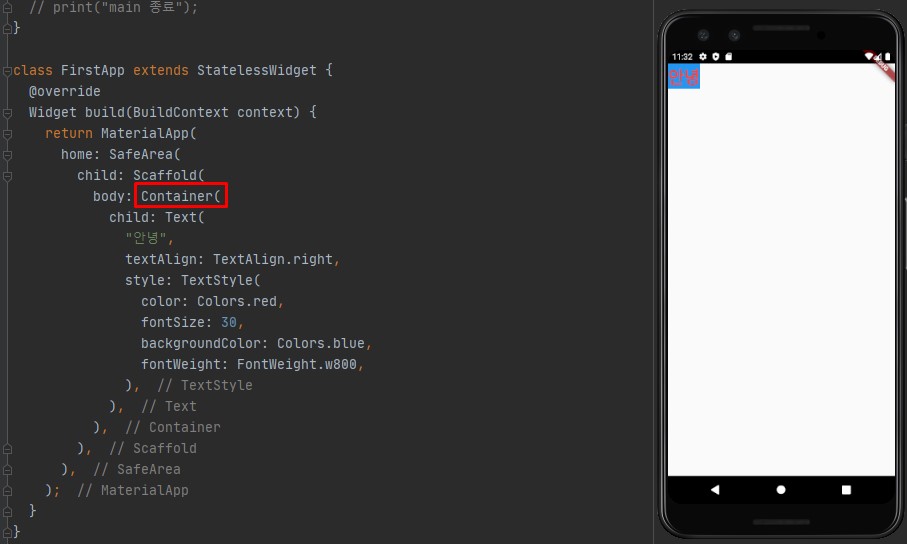
...
body: Container(
   child: Text(
     "안녕",
     textAlign: TextAlign.right,
     style: TextStyle(
       color: Colors.red,
       fontSize: 30,
       backgroundColor: Colors.blue,
       fontWeight: FontWeight.w800,
     ),
   ),
 ),
...- 감싸고 보면은 Container의 영역은 자식인 Text의 영역만큼만 차지합니다.
- Container는 항상 자식의 크기에 맞춰지며, 자식이 없으면 부모의 크기에 맞춰집니다.
- Container의 가로와 세로를 지정해주면 확장이 됩니다.
- double.infinity를 사용하면 끝까지 확장이 됩니다.
- 이제 alignment를 사용하면 텍스트의 위치를 바꿀 수 있습니다.
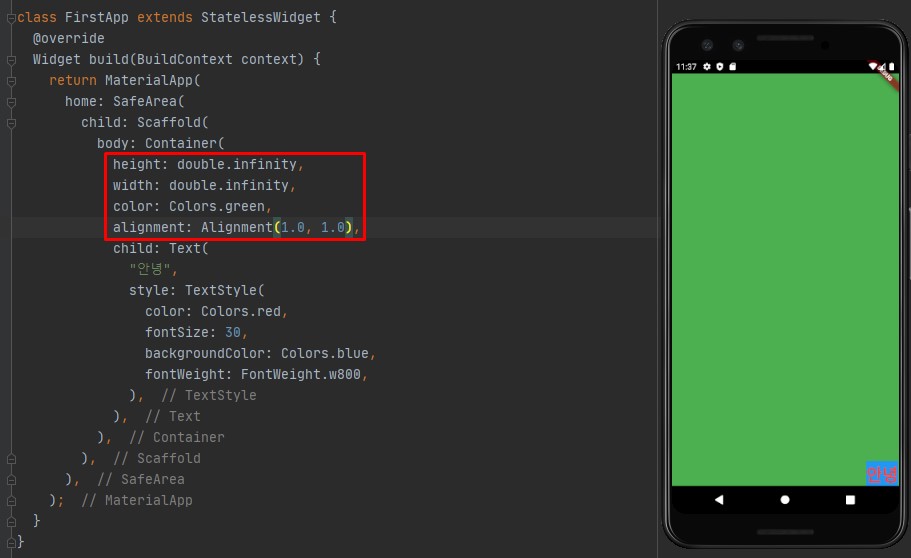
body: Container(
  height: double.infinity,
  width: double.infinity,
  color: Colors.green,
  alignment: Alignment(1.0, 1.0),
  child: Text(
    "안녕",
    style: TextStyle(
      color: Colors.red,
      fontSize: 30,
      backgroundColor: Colors.blue,
      fontWeight: FontWeight.w800,
    ),
  ),
),
Text.rich - 여러 개의 Text 넣기
- Text를 여러 개 넣고 싶다면 Text를 Row로 감싸줍니다.
- Row로 감싸면 Text가 왼쪽으로 정렬이됩니다.
- Row가 왼쪽 끝에서부터 오른쪽 끝까지 다 차지하고 있으므로 alignment가 적용이 안됩니다.
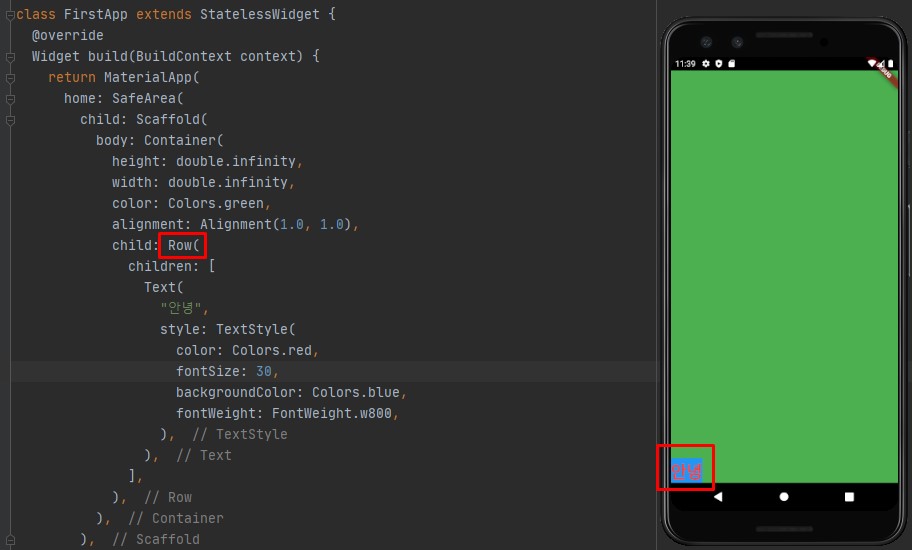
body: Container(
  height: double.infinity,
  width: double.infinity,
  color: Colors.green,
  alignment: Alignment(1.0, 1.0),
  child: Row(
    children: [
      Text(
        "안녕",
        style: TextStyle(
          color: Colors.red,
          fontSize: 30,
          backgroundColor: Colors.blue,
          fontWeight: FontWeight.w800,
        ),
      ),
    ],
  ),
),- Text를 하나 추가하고 길게 적으면 화면을 벗어나면서 깨지게됩니다.
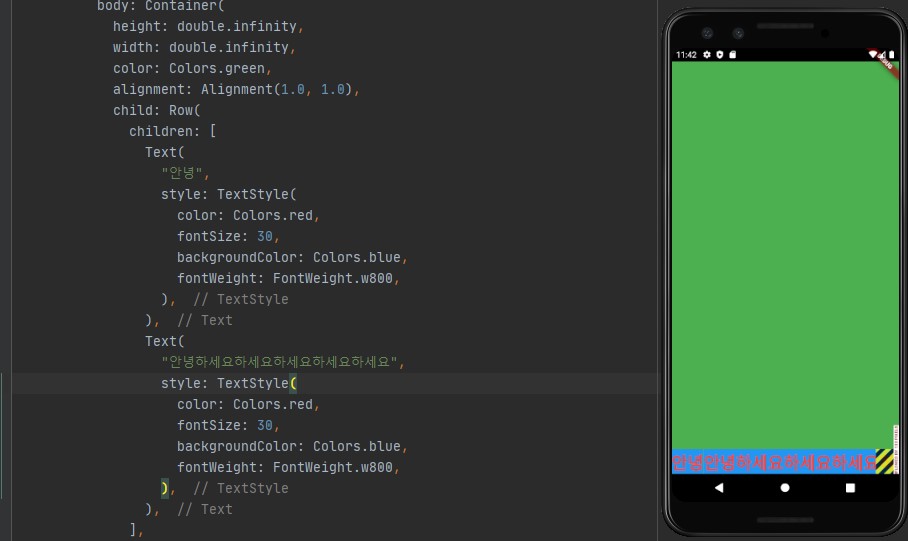
- 이와 같이 Row는 사용할 수 없으므로 Text.rich( )를 사용합니다.
- Text.rich 내부에 TextSpan을 사용하면 화면을 넘어가는 긴 문장이 오는 경우 다음 줄로 넘어갑니다.
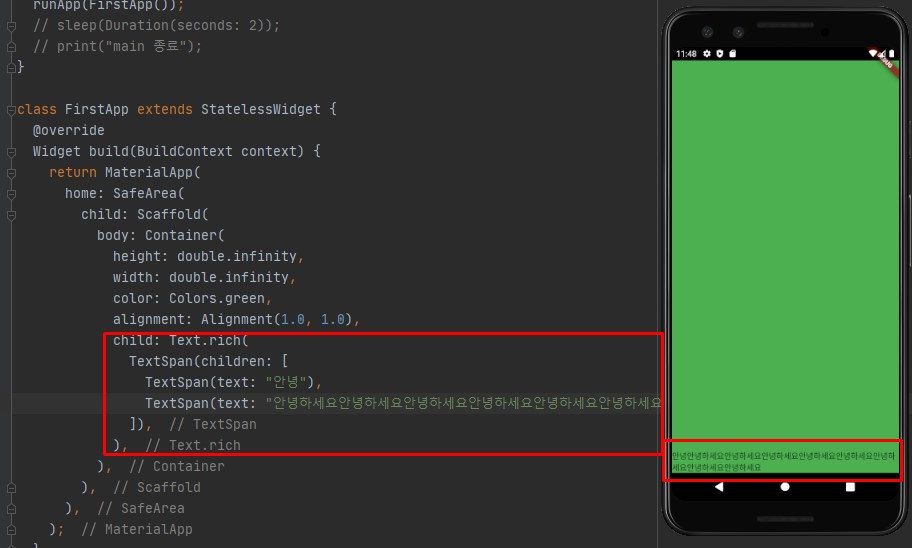
body: Container(
  height: double.infinity,
  width: double.infinity,
  color: Colors.green,
  alignment: Alignment(1.0, 1.0),
  child: Text.rich(
    TextSpan(children: [
      TextSpan(text: "안녕"),
      TextSpan(text: "안녕하세요안녕하세요안녕하세요안녕하세요안녕하세요안녕하세요안녕하세요"),
    ]),
  ),
),- Text.rich를 사용하면 내부의 텍스트를 구분해서 스타일링할 수 있습니다.
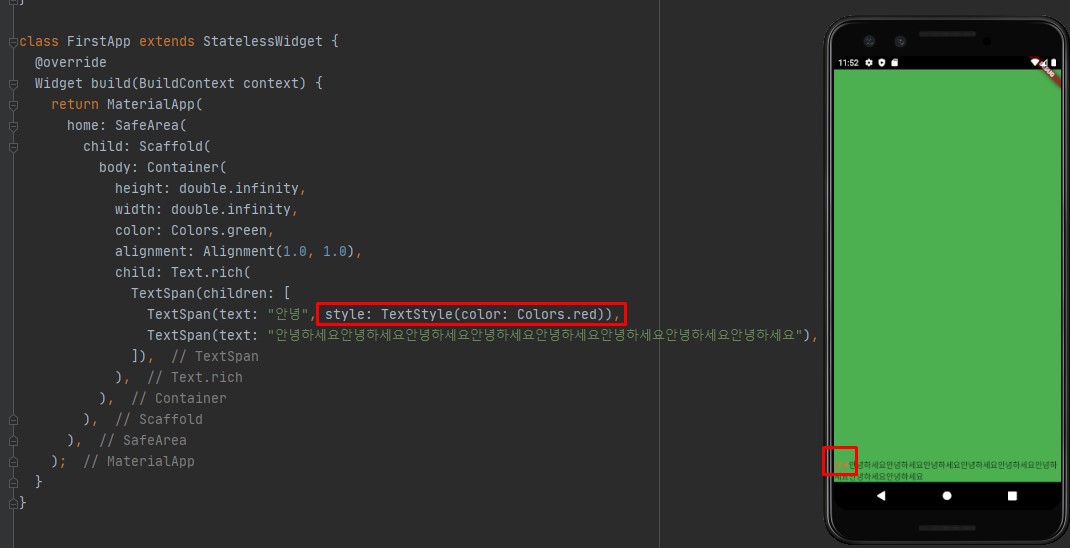
전체 코드
// ignore_for_file: prefer_const_literals_to_create_immutables, prefer_const_constructors
import 'package:flutter/material.dart';

// main 스레드는 runApp 을 실행시키고 종료됩니다.
void main() {
  // 비동기로 실행됨(이벤트 루프에 등록된다)
  runApp(FirstApp());
  // sleep(Duration(seconds: 2));
  // print("main 종료");
}

class FirstApp extends StatelessWidget {
  @override
  Widget build(BuildContext context) {
    return MaterialApp(
      home: SafeArea(
        child: Scaffold(
          body: Container(
            height: double.infinity,
            width: double.infinity,
            color: Colors.green,
            alignment: Alignment(1.0, 1.0),
            child: Text.rich(
              TextSpan(children: [
                TextSpan(text: "안녕", style: TextStyle(color: Colors.red)),
                TextSpan(text: "안녕하세요안녕하세요안녕하세요안녕하세요안녕하세요안녕하세요안녕하세요안녕하세요"),
              ]),
            ),
          ),
        ),
      ),
    );
  }
}

Nil Desperandum <절대 절망하지 마라>