지난 시간에 했던 toByteArray 메모리 에러 문제를 이어서 진행해보도록 하자.
Naver mybox 서비스 상 못해도 약 30GB의 데이터까지 한번에 다운받을 수 있도록 해야하기 때문에 2GB도 다운받지 못하는 기존의 다운로드 방식은 사용하기에 무리가 있다.
그래서 Byte[] 대신 TransferManager와 Resource를 이용한 다운로드 요청을 해보고자 한다.
TransferManager란?
AWS에서 지원하는 SDK로, S3파일의 다운로드/ 업로드/ 전송시간 실시간 모니터링 등을 지원한다.
⚙ Setting
NcpConfig.java
@Bean
public TransferManager transferManager() {
	TransferManager transferManager = TransferManagerBuilder
    									.standard()
                						.withS3Client(amazonS3())
                						.build();
	return transferManager;
}
NcpConfig에 해당 Bean을 새로 추가해준다.
FileUtil.java
@Slf4j
public class FileUtil {

    public static void remove(File file) throws IOException {
        if (file.isDirectory()) {
            removeDirectory(file);
        } else {
            removeFile(file);
        }
    }

    public static void removeDirectory(File directory) throws IOException {
        File[] files = directory.listFiles();
        for (File file : files) {
            remove(file);
        }
        removeFile(directory);
    }

    public static void removeFile(File file) throws IOException {
        if (file.delete()) {
            log.info("File [" + file.getName() + "] delete success");
            return;
        }
        throw new FileNotFoundException("File [" + file.getName() + "] delete fail");
    }
}
TransferManager를 사용할 경우 로컬서버에 파일이 저장되기 때문에 다운이 끝난 로컬파일을 다시 삭제시키기 위해 파일 삭제 API를 작성한다.
📄TEST Code
Controller.java
@GetMapping("/filedownload/{fileNo}")
public ResponseEntity<Resource> fileDownload2(@PathVariable("fileNo") Long fileNo) throws IOException, InterruptedException {
	return service.download2(fileNo);
}
Service.java
private final TransferManager transferManager;

...

public ResponseEntity<Resource> download2(Long fileNo) throws IOException, InterruptedException {
		// 1)
        Resource resource = null;
        HttpHeaders headers = null;
        UserFile userFile = fileRepository.findById(fileNo).orElseThrow();
        File file = new File(userFile.getFileOriginName());
        Path path = Paths.get(file.getPath());
        try {
        	// 2)
            Download download = transferManager.download(bucketName, userFile.getFileName(), file);

            // 3) 다운로드 상태 확인
            log.info("[" + userFile.getFileOriginName() + "] download progressing... start");
            DecimalFormat decimalFormat = new DecimalFormat("##0.00");
            while (!download.isDone()) {
                Thread.sleep(1000);
                TransferProgress progress = download.getProgress();
                double percentTransferred = progress.getPercentTransferred();
                log.info("[" + userFile.getFileOriginName() + "] " + decimalFormat.format(percentTransferred) + "% download progressing...");
            }
            log.info("[" + userFile.getFileOriginName() + "] download from S3 success!");

			// 4)
            resource = new InputStreamResource(Files.newInputStream(path));
            headers = new HttpHeaders();
            headers.setContentType(MediaType.APPLICATION_OCTET_STREAM);
            headers.setContentDisposition(ContentDisposition.builder("attachment")
                    .filename(URLEncoder.encode(userFile.getFileOriginName(),"UTF-8")).build());
        } finally {
        	// 5)
            FileUtil.remove(file);
        }

        return new ResponseEntity<Resource>(resource, headers, HttpStatus.OK);
}
흐름을 알아보자.
1. ResponseEntity를 위해 필요한 객체들을 호출하고 File명과 Object Storage 경로를 지정해준다.
2. TransferManager를 통해 파일 다운로드를 진행한다.
3. TransferManager는 멀티스레드를 이용한 멀티파트 전송 즉, 비동기 처리 방식이다. 때문에 파일 다운로드가 완료될 때까지 다음 코드가 실행되지 않도록 while (!download.isDone())로 동기 처리하고 그 사이 다운로드 진행상황을 로그로 보여준다.
4. 로컬 파일 다운로드 이후 resource와 headers를 통해 사용자 브라우저에 다운로드 요청을 보낸다.
5. 다운로드가 끝난 후 불필요한 로컬 파일을 삭제해준다.
💻TEST

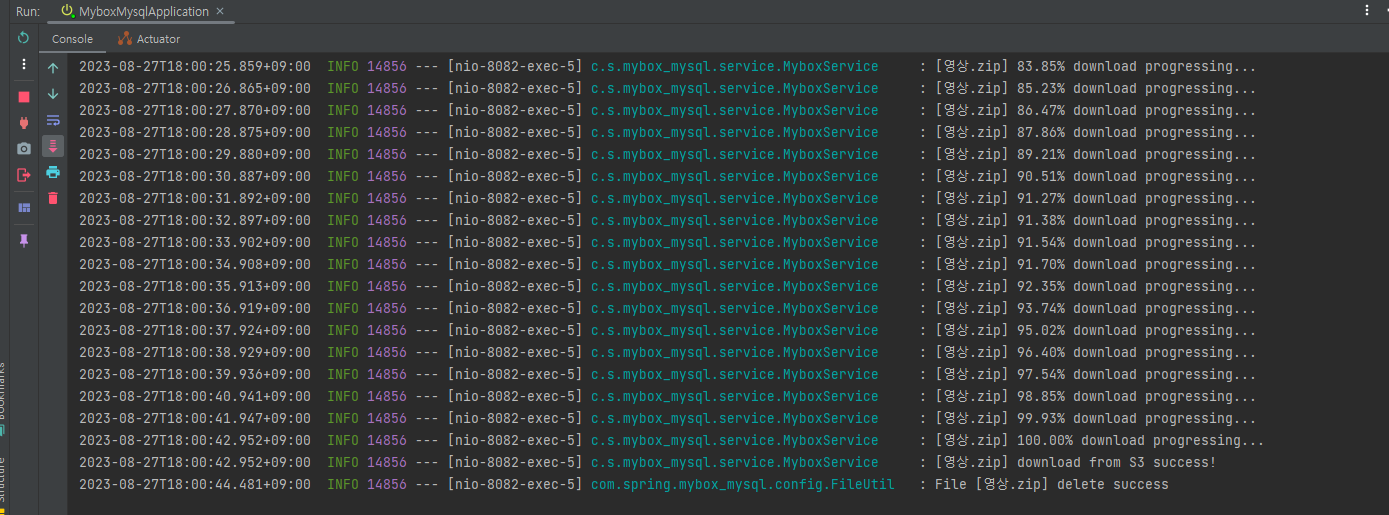
영상.zip (2GB) 다운 : 로컬 다운(약 1분) + 브라우저 다운(약 2분) = 총 3분
다운로드는 문제없이 동작하는 것을 볼 수 있었다.
좋은 점
- 다운로드 가능한 용량의 폭이 매우 늘어났다.
- TransferManager의 속도가 생각보다 빠르다.
- 파일의 재가공이 용이하다. (압축 등)
아쉬운 점
- 로컬 서버의 사용
- Object Storage - 로컬 - 사용자 순으로 다운이 되기에 효율적이라고 보긴 어렵다.
- 다운로드 가능한 사이즈는 로컬 용량에 비례한다. 이에 따라 다수의 사용자가 동시에 대용량파일을 다운할 경우, 로컬 용량 사이즈에 따라 에러가 날 수도 있다.
처음 마주한 memory error에 매우 당황했지만 구글링을 통해 더 많은 것을 알게해주는 발판이 되었다고 생각해 오히려 error가 떠줘서 감사하다고 생각하게 됐다.
참고