* 이미 언급한 내용은 초록색으로 작성했습니다.
* 새로 이해한 내용은 노란색으로 작성했습니다.
* 추가적인 속성 내용은 회색으로 작성했습니다.
* 새로 이해한 내용은 노란색으로 작성했습니다.
* 추가적인 속성 내용은 회색으로 작성했습니다.
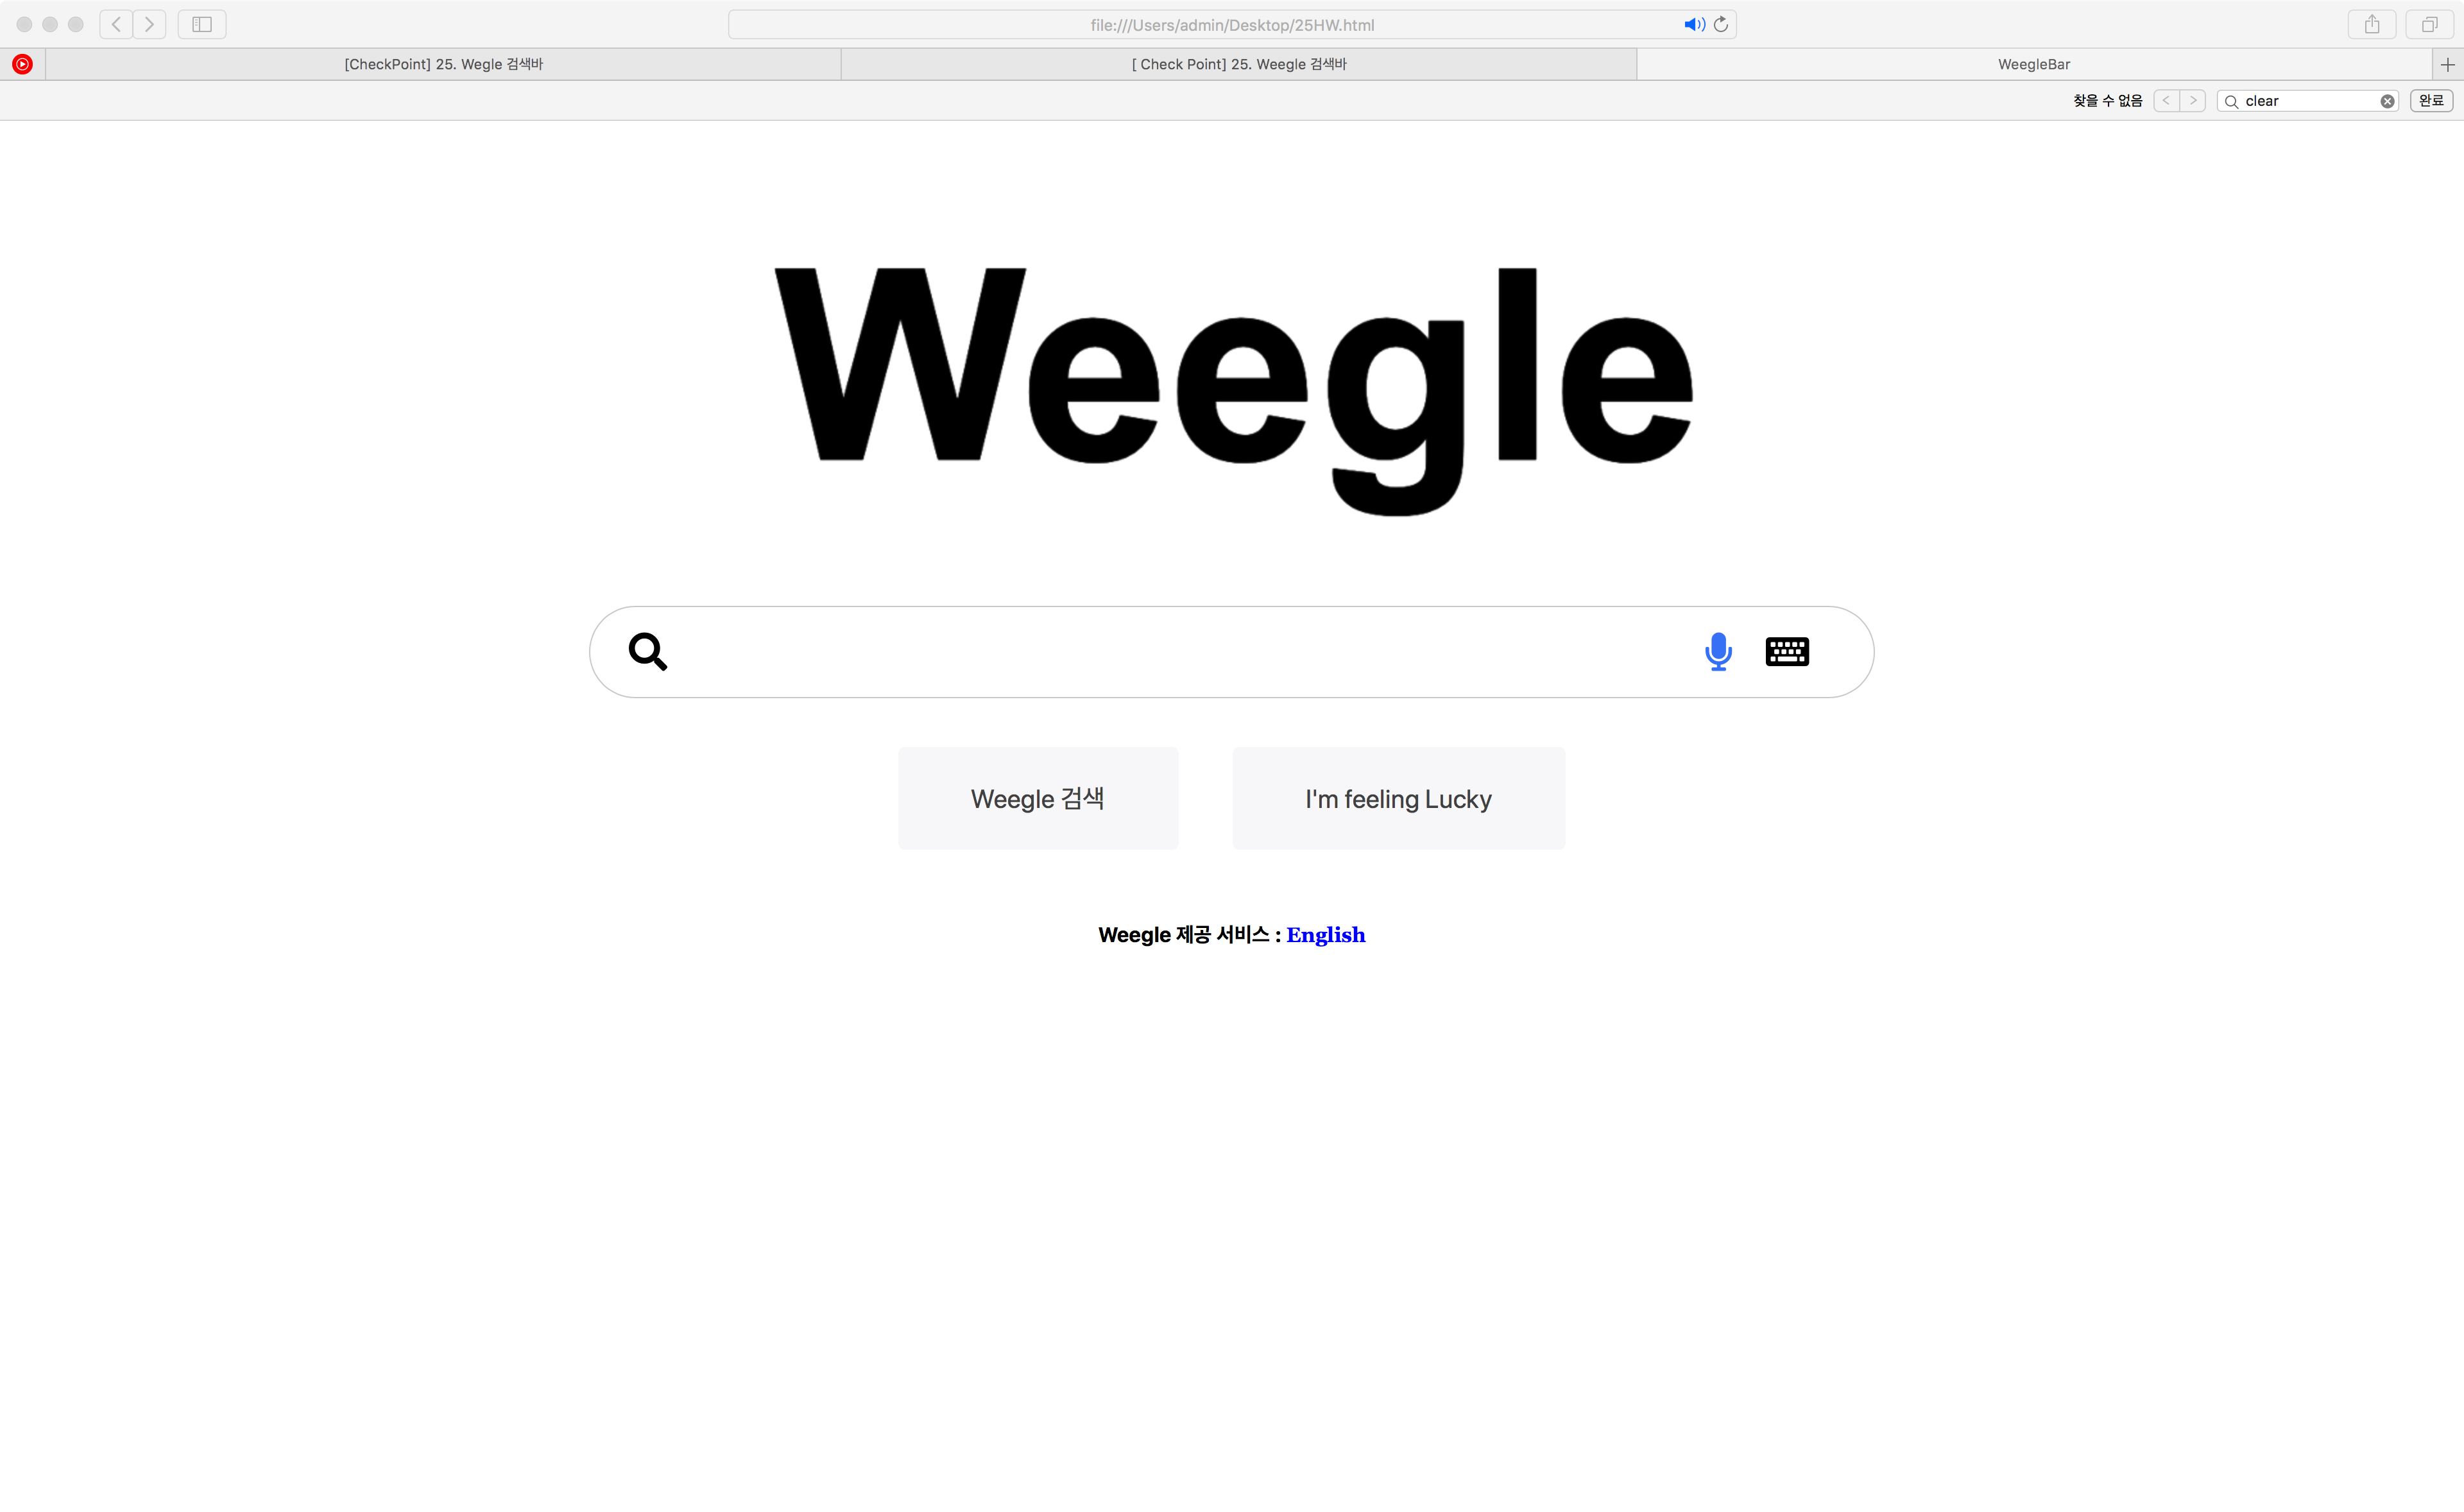
🤷🏻♂️ Weegle 만들어보기 과제
아래 이미지를 보고 클론하는 html, css 과제였다. 이 과제를 통해서 레이아웃에 대한 이해가 부족한 나를 볼 수 있었다.
1. html_code
과제를 만들 때 작성한 html code이다.
<body>
    <img src="https://user-images.githubusercontent.com/61774575/95163201-34411c00-075c-11eb-9987-d6301acb4dab.png" alt="">
    <div class="search-container">
        <i class="fas fa-search"></i>
        <input type="text" placeholder="">
        <i class="fas fa-keyboard"></i>
        <i class="fas fa-microphone"></i>
    </div>
    <div class="button-container">
        <button class="button">Weegle 검색</button>
        <button class="button">I'm feeling Lucky</button>
    </div>
    <p>Weegle 제공 서비스 : <a href="https://thumbs.gfycat.com/SleepyAnyDarwinsfox-size_restricted.gif" alt="">English</a></p>
</body>
layout
- 세로 4개의 공간(img, serach, button, footer)으로 나눔
- search는 div안에 i태그과 input 태그를 사용
i태그: font-awesome에서 활용
- button 태그에 동일한 class를 적용
2. css_code
html보다 css에서 느낀 점이 굉장히 많았다. 양이 기니까 반으로 나눠서 설명하겠다
* {
    font-family:-apple-system, BlinkMacSystemFont, 'Segoe UI', Roboto, Oxygen, Ubuntu, Cantarell, 'Open Sans', 'Helvetica Neue', sans-serif;
}
img {
    display: block;
    margin: 40px auto;
}
.search-container {
    position: relative;
    margin: 0 auto;
    border: 1px solid lightgrey;
    border-radius: 50px;
    width: 1000px;
    height: 70px;
}
input {
    font-size: 40px;
    margin: 11px 0px 10px 90px;
    padding-right: 250px;
    border: none;
}
.fas {
    font-size: 30px;
}
.fa-search {
    position: absolute;
    left: 30px;
    top: 20px;
}
.fa-microphone {
    position: absolute;
    color: #4285F4;
    top: 20px;
    right: 110px;
}
.fa-keyboard {
    position: absolute;
    right: 50px;
    top: 20px;
}
img
- display: block;
- 기본
Display : Inline이기에 다루기 쉽게 하기위해 block 설정 - 기본 크기 = 내장한 이미지의 크기
- 기본
.search-container
- position: relative;
- 자녀 요소로 포함될 이미지들에
position: absolute를 적용하기 위함
- 자녀 요소로 포함될 이미지들에
input
- font-size: 40px;
- input의 크기를 조정하기 위해서 사용함
- 박스 크기 = width / height
- text-align(텍스트 정렬), letter-spacing(자간 조절)
.fas(아이콘)
- position: absolute;
top,right,bottom,left로 절대적 위치 조절top: 10px: 위에서 아래로 10px 이동
.button-container {
    text-align: center;
}
.button {
    font-size: 20px;
    margin: 2% 1% 0 1%;
    padding: 1.5% 3%;
    background-color: #f9f9fa;
    color: #525252;
    border: 0;
    border-radius: 5px;
}
p {
    margin: 3% 0;
    text-align: center;
    font-weight: 700;
}
a {
    font-family: Georgia, 'Times New Roman', Times, serif;
    font: Georgia;
    color: blue;
    text-decoration: none;
}
.button-container
- text-align: center;
- button은 inline 요소이기 때문에 text-align 적용
a
- font-family ~ font: Georgia
- 여기서 적용하기 보다는
*{여기에서}에 적용하자
- 여기서 적용하기 보다는
- text-decoration: none
- 기본 옵션으로 적용되는 아래선을 제거할 수 있다
4. 결론🙆🏼♂️
html, css 레이아웃을 어떻게 제작해야 하는지 처음으로 감이 왔다.
느려서 바쁘다