
State
- 렌더링이나 데이터 흐름에 사용되는 값만 State에 포함시켜야한다.
- State가 변경될 경우 컴포넌트가 재랜더링 되기 떄문에 렌더링과 데이터흐름 관련 없는 값은 성능을 저하시킬 수 있음
- State는 JavaScript 객체이다.
- 직접 수정할 수 없다(Setter) 사용해야한다.
import React from "react";

class LikeButton extends React.Component {
  constructor(props) {
    super(props);
    this.state = {
      liked: false,
    };
  }
}

export default LikeButton;
-
리액트 컴포넌트를 나타낸 것이다.
-
생성자는 클래스가 생성될 떄 호출된다.
  this.state = {
      liked: false,
};-
현재 컴포넌트를 정의한다.
-
calss 컴포넌트의 경우 state를 생성자에서 정의한다.
-
함수 컴포넌트는 state를 useState라는 훅을 이용해서 정의한다.
-
state는 직접 수정할 수 없다.
-
State를 직접수정한다.(잘못된 사용법)
this.state = { name : 'Inje' } -
SetState 함수를 통한 수정(정상적인 사용법)
this.setState({
	name : 'Inje'
});
-
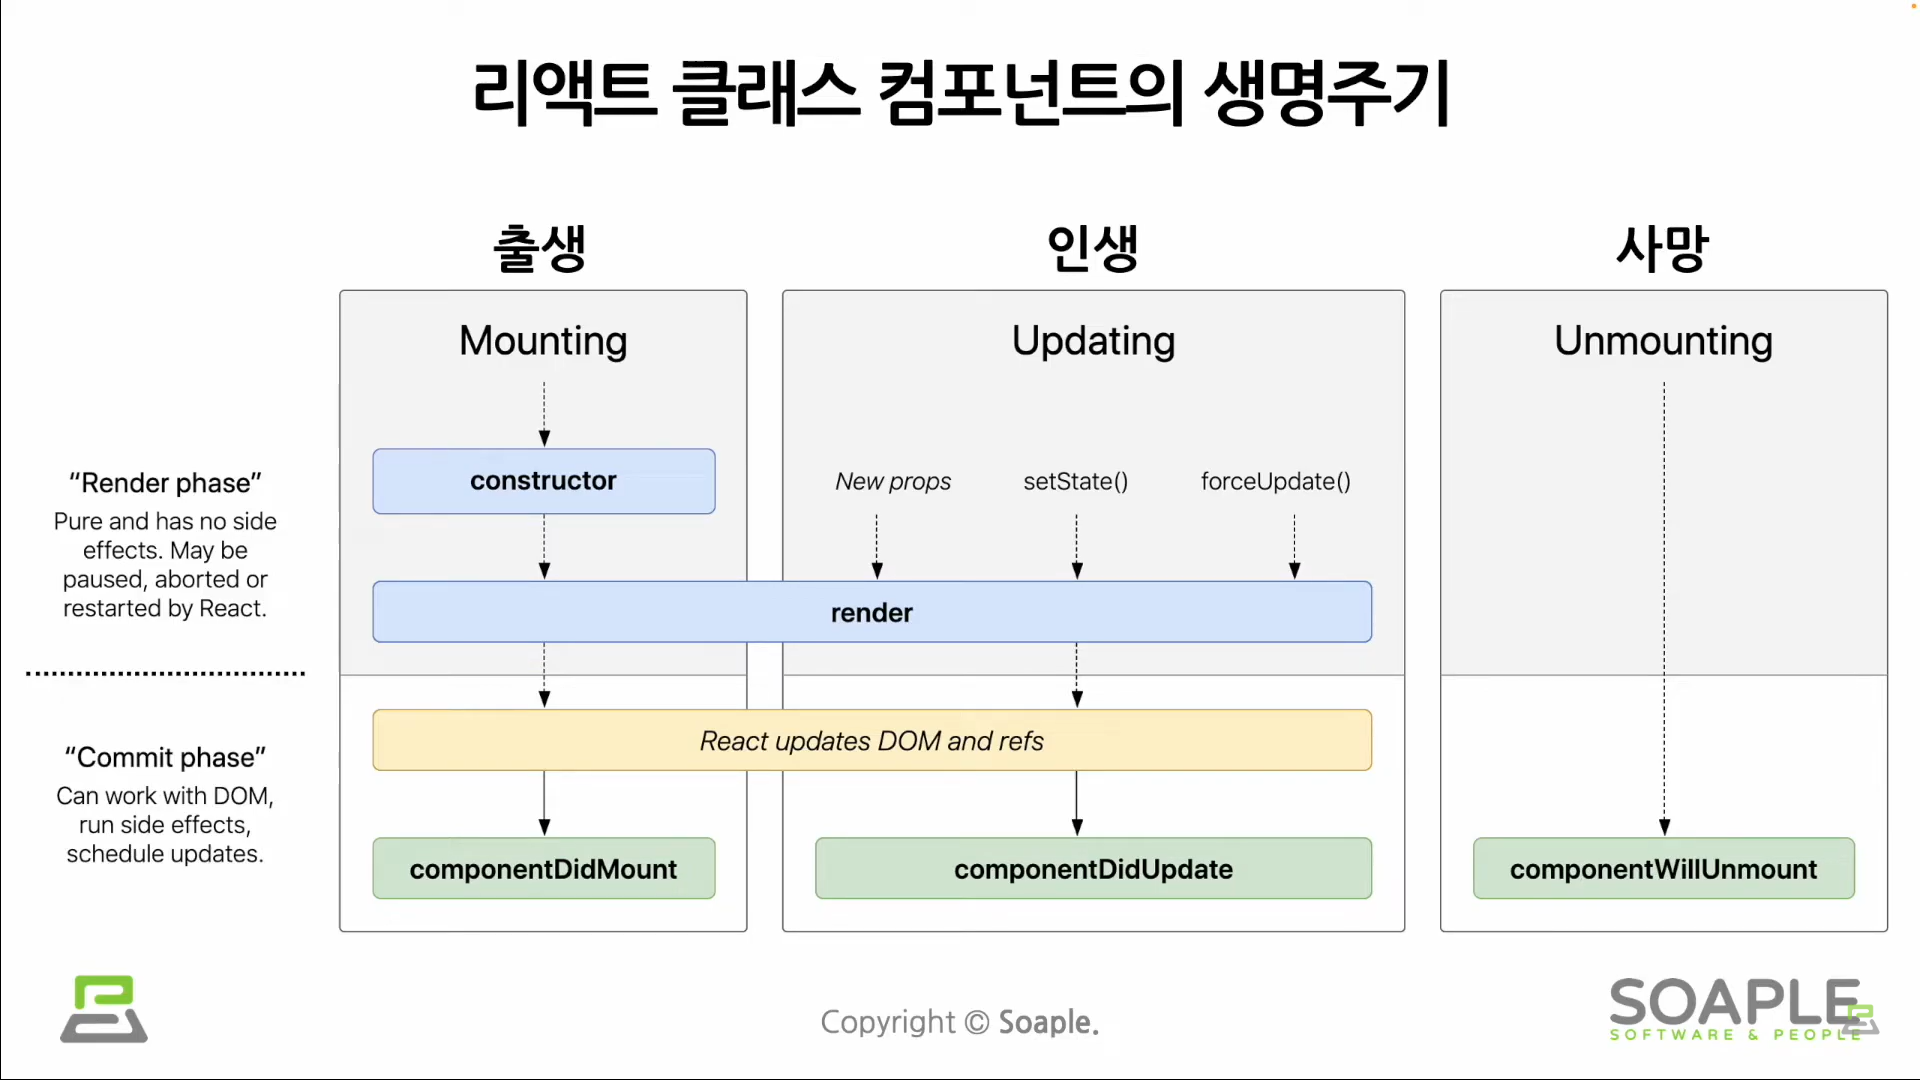
LifeCycle
-
LifeCycle : 리액트 클래스 Component 생명주기이다.
-
Constructor ---> render
-
mounting(출생) / updating(인생) / unmounting (사망)
- mounting(출생) : 생성자가 실행된다.
- updating(인생) : 프롭스가 변경되는 등...etc
-
컴포넌트는 시간의 흐름에 따라 생성되고 업데이트 되다가 사라진다.
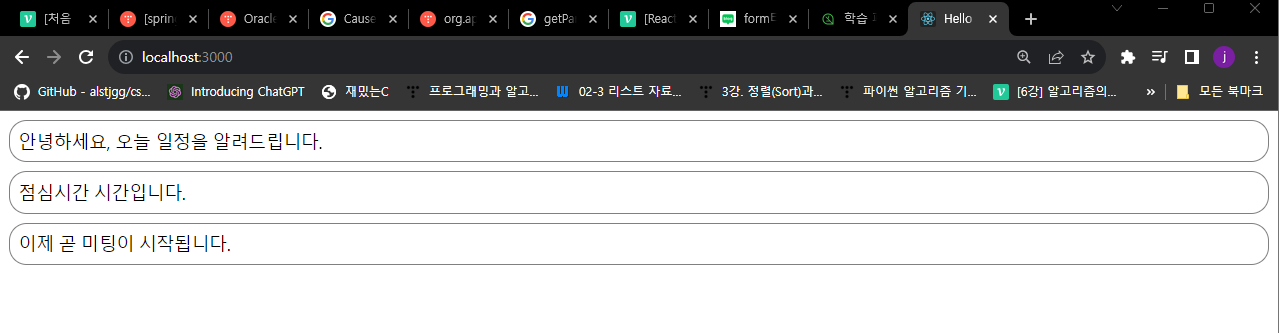
실습
NotificationList
import React from "react";
import Notification from "./Notification";

const reservedNotifications = [
  {
    message: "안녕하세요, 오늘 일정을 알려드립니다.",
  },
  {
    message: "점심시간 시간입니다.",
  },
  {
    message: "이제 곧 미팅이 시작됩니다.",
  },
];

let timer;

class NotificationList extends React.Component {
  constructor(props) {
    super(props);
    this.state = {
      notifications: [],
    }; // 생성자에서 앞으로 사용할 데이터를 state에 넣어서 초기화한다.
  }

  /* 클래스 컴포넌트 생명주기 함수 중 하나중 DidMount함수이다
  미리 만들어낸 reservedNotifications로 부터 알림 데이터를 하나씩 가져와서
  notifiactions 배열에 넣는다.

   주목할 점은 state를 업데이트하기 위해서 setState함수를 호출한다.

  */
  componentDidMount() {
    const { notifications } = this.state;
    timer = setInterval(() => {
      if (notifications.length < reservedNotifications.length) {
        const index = notifications.length;
        notifications.push(reservedNotifications[index]);
        this.setState({
          notifications: notifications,
          //주목할 점은 state를 업데이트하기 위해서 setState함수를 호출한다.
        });
      } else {
        clearInterval(timer);
      }
    }, 1000);
  }
  render() {
    return (
      <div>
        {this.state.notifications.map((notification) => {
          return <Notification message={notification.message} />;
        })}
      </div>
    );
  }
}

export default NotificationList;
Notification
import React from "react";

const styles = {
  wrapper: {
    margin: 8,
    padding: 8,
    display: "flex",
    flexDirection: "row",
    border: "1px solid grey",
    borderRadius: 16,
  },
  messageText: {
    color: "black",
    fontSize: 16,
  },
};
class Notification extends React.Component {
  constructor(props) {
    super(props);
    this.state = {};
  }


  render() {
    return (
      <div style={styles.wrapper}>
        <span style={styles.messageText}>{this.props.message}</span>
      </div>
    );
  }
}

export default Notification;
Notification 수정
  componentDidMount() {
    console.log("ComponentDidMount() called");
  }

  componentDidUpdate() {
    console.log("componentDidUpdate() called");
  }

  componentWillUnmount() {
    console.log("componentWillUnmount() called");
  }
추가했다.
import React from "react";

const styles = {
  wrapper: {
    margin: 8,
    padding: 8,
    display: "flex",
    flexDirection: "row",
    border: "1px solid grey",
    borderRadius: 16,
  },
  messageText: {
    color: "black",
    fontSize: 16,
  },
};
class Notification extends React.Component {
  constructor(props) {
    super(props);
    this.state = {};
  }

  componentDidMount() {
    console.log("ComponentDidMount() called");
  }

  componentDidUpdate() {
    console.log("componentDidUpdate() called");
  }

  componentWillUnmount() {
    console.log("componentWillUnmount() called");
  }


  render() {
    return (
      <div style={styles.wrapper}>
        <span style={styles.messageText}>{this.props.message}</span>
      </div>
    );
  }
}

export default Notification;
notificationList 수정
- id값 부여 및 render() Notification key, id 추가
import React from "react";
import Notification from "./Notification";

const reservedNotifications = [
  {
    id: 1,
    message: "안녕하세요, 오늘 일정을 알려드립니다.",
  },
  {
    id: 2,
    message: "점심시간 시간입니다.",
  },
  {
    id: 3,
    message: "이제 곧 미팅이 시작됩니다.",
  },
];

let timer;

class NotificationList extends React.Component {
  constructor(props) {
    super(props);
    this.state = {
      notifications: [],
    }; // 생성자에서 앞으로 사용할 데이터를 state에 넣어서 초기화한다.
  }

  /* 클래스 컴포넌트 생명주기 함수 중 하나중 DidMount함수이다
  미리 만들어낸 reservedNotifications로 부터 알림 데이터를 하나씩 가져와서
  notifiactions 배열에 넣는다.

   주목할 점은 state를 업데이트하기 위해서 setState함수를 호출한다.

  */
  componentDidMount() {
    const { notifications } = this.state;
    timer = setInterval(() => {
      if (notifications.length < reservedNotifications.length) {
        const index = notifications.length;
        notifications.push(reservedNotifications[index]);
        this.setState({
          notifications: notifications,
          //주목할 점은 state를 업데이트하기 위해서 setState함수를 호출한다.
        });
      } else {
        clearInterval(timer);
      }
    }, 1000);
  }
  render() {
    return (
      <div>
        {this.state.notifications.map((notification) => {
          return (
            <Notification
              key={notification.id}
              id={notification.id}
              message={notification.message}
            />
          );
        })}
      </div>
    );
  }
}

export default NotificationList;
역따옴표(`) 사용해서 Notification.jsx 묶기
  componentDidMount() {
    console.log(`${this.props.id}ComponentDidMount() called`);
  }

  componentDidUpdate() {
    console.log(`${this.props.id} componentDidUpdate() called`);
  }

  componentWillUnmount() {
    console.log(`${this.props.id}componentWillUnmount() called`);
  }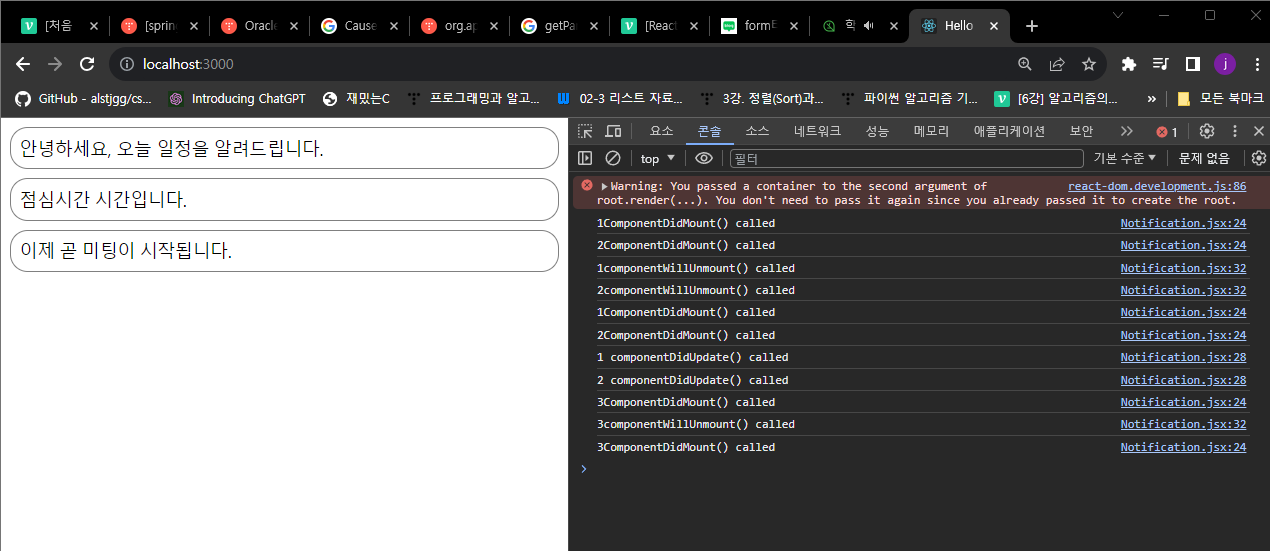
순서대로 형성된다.
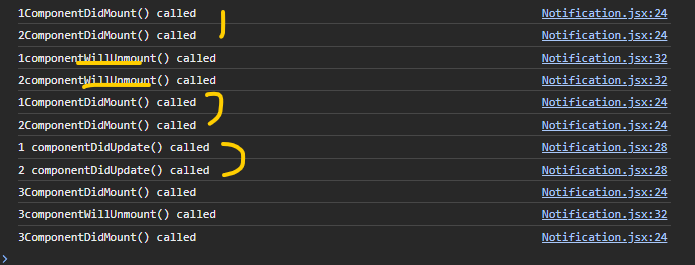

아는만큼보인다.