출처 | 인프런 : 처음만난리액트 강의를 정리한 글입니다.
Components와 Props의 정의
-
리액트는 컴포넌트 기반이다. 작은 컴포넌트들이 모여서 하나의 컴포넌트를 구성하고 또 이러한 컴포넌트들이 모여서 전체 페이지를 구성한다.
-
하나의 컴포넌트를 반복적으로 사용함으로써 전체 코드의 양을 줄일 수 있고, 유지보수비용도 줄일 수 있다.

"리액트 컴포넌트"는 개념적으로 "자바스크립트 함수"와 비슷하지만,
"리액트 컴포넌트의 입출력"은 자바스크립트 함수와
다르다.

-
입력은(Props:속성)이고, 출력은 React element이다.
-
리액트 컴포넌트의 역할 : 어떤 속성들을 입력으로 받아서 이에 해당하는 리액트 엘리먼트를 생성해서 리턴한다.
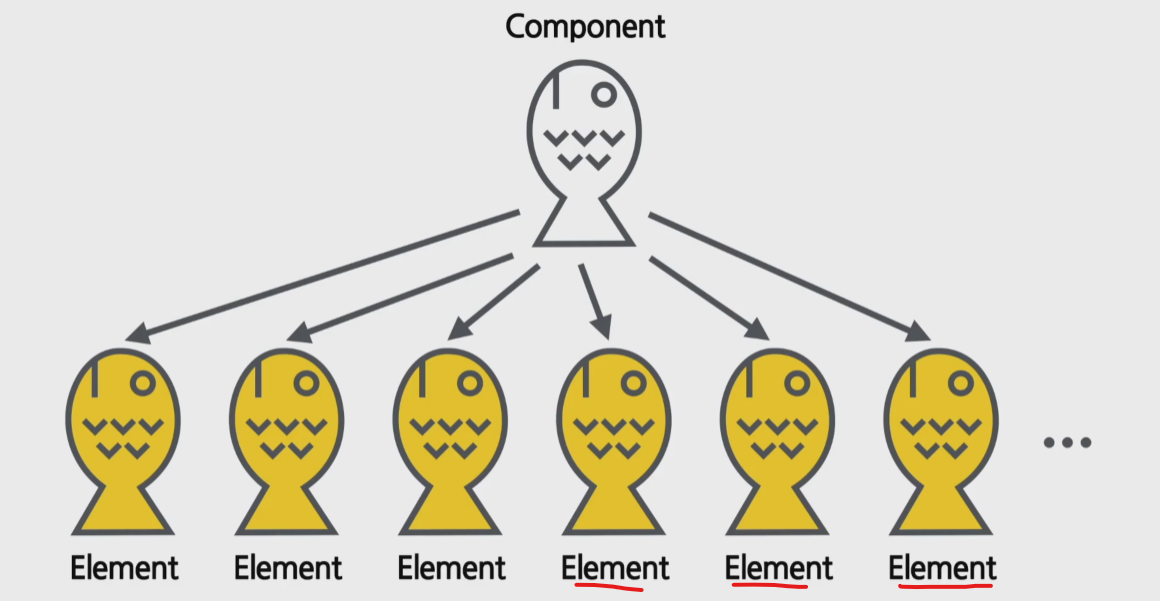
붕어빵을 예시로 들어보자.
- 붕어빵을 만드는 부분은 = 리액트 컴포넌트로부터 엘리먼트가 만들어지는 과정이다.
- 붕어빵 틀은 = 리액트 컴포넌트
- 각 붕어빵들은 = 리액트 앨리먼트이다.
- 정리하면, 붕어빵 틀만 있으면, 붕어빵은 언제든지 찍어낼 수 있다.
Props?
-
Prop(Property) + s = Prop이 여러개라는 의미다.
-
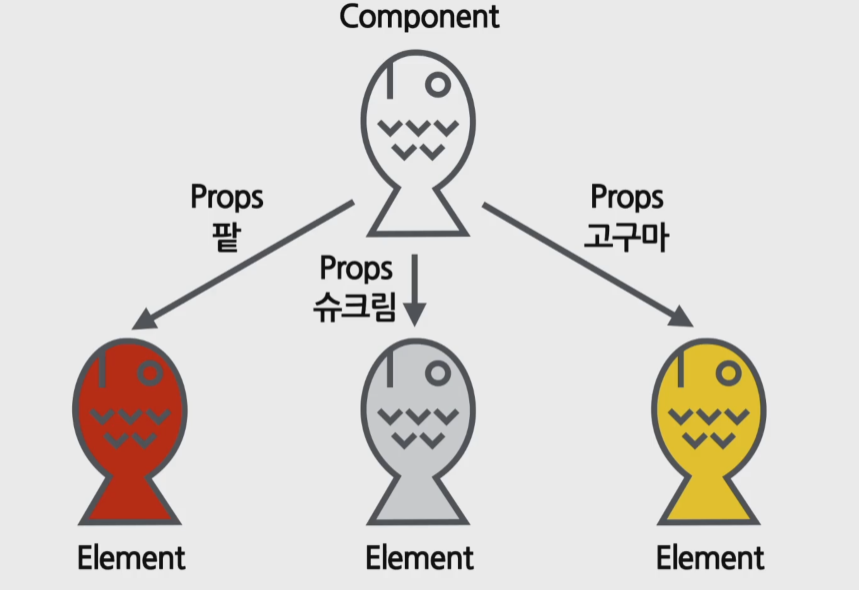
Props는 컴포넌트에 전달할 다양한 정보를 담고 있는 자바스크립트 객체이다.
-
컴포넌트의 모습과 속성을 결정하는 것이 Props이다.
-
컴포넌트의 속 재료라고 생각하면 편하다.
-
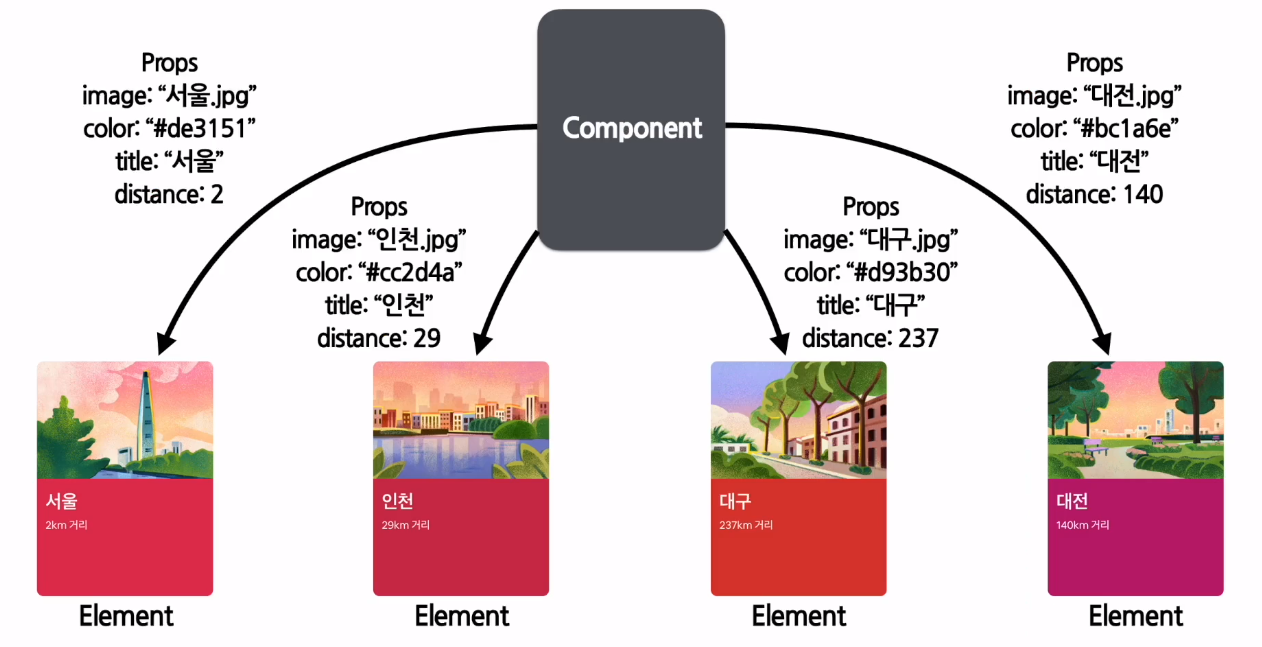
컴포넌트의 어떤 데이터를 전달하고 데이터에 따라 다른 모습의 엘리먼트를 화면에 렌더링 하고 싶을 때, 데이터를 Props에 넣어서 전달한다.
정리하면
"컴포넌트"에 전달할 다양한 정보를 담고 있는 "자바스크립트" 객체이다. ==> 누가?(Props)
Props의 특징 및 사용법
- Read-Only : 읽기전용이다. + 값을 변경할 수
없다.
(붕어빵을 다 굽고 나서 속 재료를 바꿀 수 없다)
다른 Props의 값으로 Element를 생성하려면 어떻게 해야될까?
-
새로운 값을 Component에 전달하여 새로 Element를 생성하면 된다.
-
모든 리액트 컴포넌트는 그들의 Props에 관해서는 퓨어함수 같은 역할을 해야한다.
- "모든 리액트 컴포넌트는 Props를 직접 바꿀 수 없고 같은 Props에 대해서는 항상 같은 결과를 보여줄 것"
- 퓨어함수란? 입력 값을 변경하지 않으며, 같은 입력값에 대해서는 항상 같은 출력값을 리턴한다.
한 줄로 요약하자면,
React 컴포넌트의 Props는 바꿀 수 없고, 같은 Props가 들어오면 항상 같은 엘리먼트를 리턴해야 한다
-
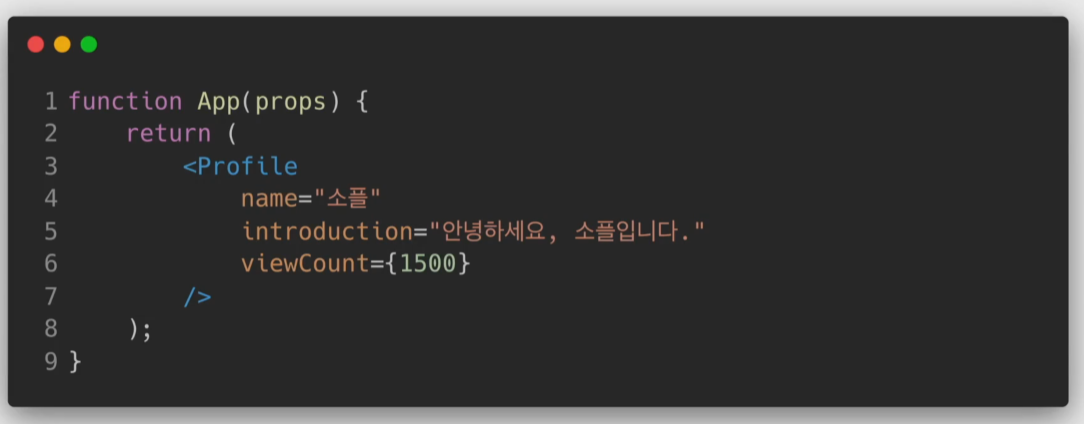
이 코드에는 "App 컴포넌트"가 나오고 "profile 컴포넌트"를 사용하고 있다.
-
profile 컴포넌트에 name/introduction/viewCount 3가지 속성을 넣었다.
-
이 부분에서 중요한데, 속성에 값을 넣을 때 "중괄호"를 사용하는 것과 사용하지 않은 것의 차이다.
-
name과 introduction에 들어간 문자열은
"중괄호를 사용하지 않았고 " -
viewCount는 중괄호를 사용했다. ({})가 들어가면 앞에서 자바스크립트 코드가 매핑된다고 배웠다. "Props" 도 마찬가지로 문자열, 변수, 컴포넌트가 들어갈 땐 "중괄호"로 사용해서 감싸야된다.
-
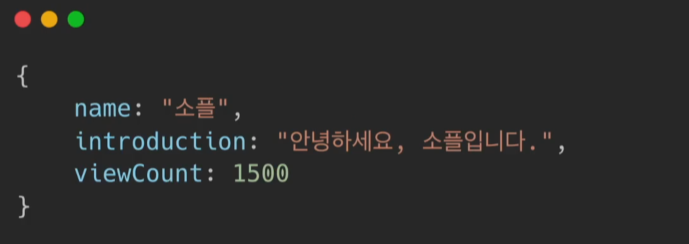
- 이렇게 하면 모든 속성의 값들이 프로필 컴포넌트 Props에 전달되며 Props는 이와 같은 형태의 자바스크립트 객체가 된다.
-
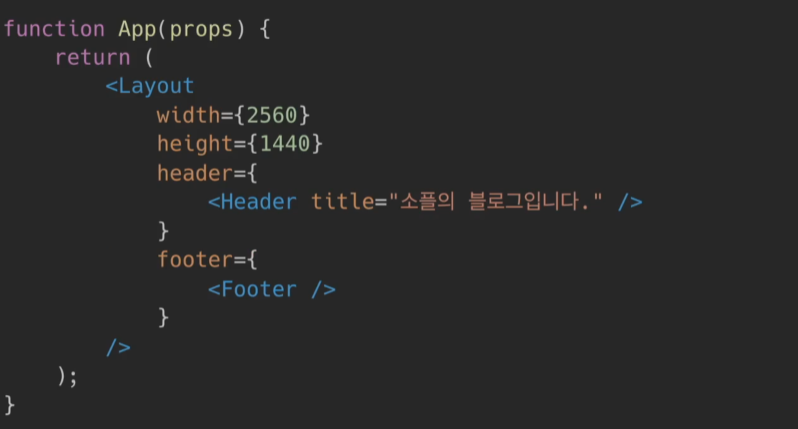
Props의 값으로 컴포넌트도 넣을 수 있다. 레이아웃 컴포넌트의 Props로는 정수 값을 가진 width , height과
-
엘리먼트로 header, footer가 들어오게 된다.
- (jsx)사용하는 경우 간단하게 Props를 넣을 수 있다.
만약에 jsx를 사용하지 않으면 어떻게 처리해야 될까?
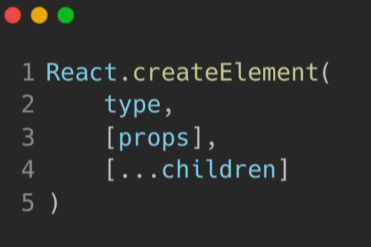
두번째 Props에 객체를 넣으면 컴포넌트의 Props가 된다.

리액트 컴포넌트 만들기
-
모든 React 컴포넌트는 pure 함수 같은 역할을 한다.
-
React의 컴포넌트를 일종의함수라고 생각하면 된다.
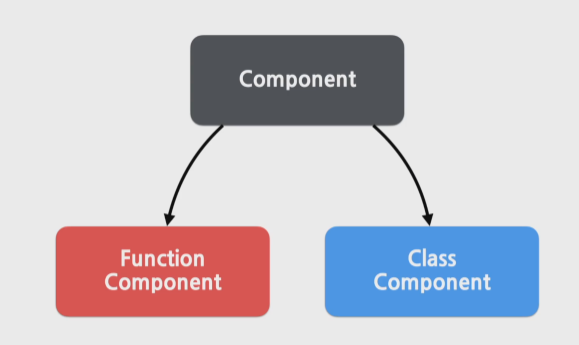
함수컴포넌트
장점 : 간단한 코드
function Welcome(props)
{
	return <h1> 안녕, {props.name} </h1>;
}- 하나의 Props 객체를 받아서 인삿말이 담긴 React 엘리먼트를 리턴하기 때문에 React 컴포넌트라고 할 수 있다.
클래스컴포넌트
- 함수 컴포넌트에 비해 추가적인 기능을 갖고 있다.
class Welcome extends React.Component{
	render() {

    	return <h1>안녕, {this.props.name} </h1>
    }
}- 위 함수컴포넌트 Welcome과 동일한 역할을 하는 컴포넌트를 클래스형태로 만들었다.
함수컴포넌트 vs 클래스컴포넌트 차이는?
- React의 모든 Class Component는 React.Component를 상속받아서 만든다
컴포넌트의 이름은 어떻게 지어야할까?
- 컴포넌트의 이름은 항상 대문자로 시작해야된다.
Foo,Welcome,Profile
const element = <Welcome name="인제" />;
//Welcome이라는 리액트 Component로 인식
//W아니고 w면, 컴포넌트가 아닌 DOM태그로 인식- 소문자로 시작하는거는 DOM태그로 인식함
div, span, h1....
const element = <div />;
//HTMl div태그로 인식
컴포넌트를 다 만든 이후에 실제로 렌더링 하려면 어떻게 해야 할까?
실제로 컴포넌트가 화면에 렌더링 되는 것이 아니다.
컴포넌트라는 붕어빵 틀을 통해 찍혀서 나온 "엘리먼트"라는 붕어빵이 실제로 화면에 보이게 되는 것이다.
엘리먼트라는 붕어빵이 실제로 화면에 보이는 것이다.
(렌더링을 위해서는 가장 먼저 컴포넌트로부터 "엘리먼트"를 만들어야한다)
function Welcome(props){
  return <h1>안녕, {props.name} </h1>;
} //컴포넌트

const element = <Welcome name="인제" />; //파라미터. 얘가 props
ReactDOM.render( // render 함수
  element,
  document.getElementById('root')
); //얘가 HTML에 띄움
Component 합성과 추출
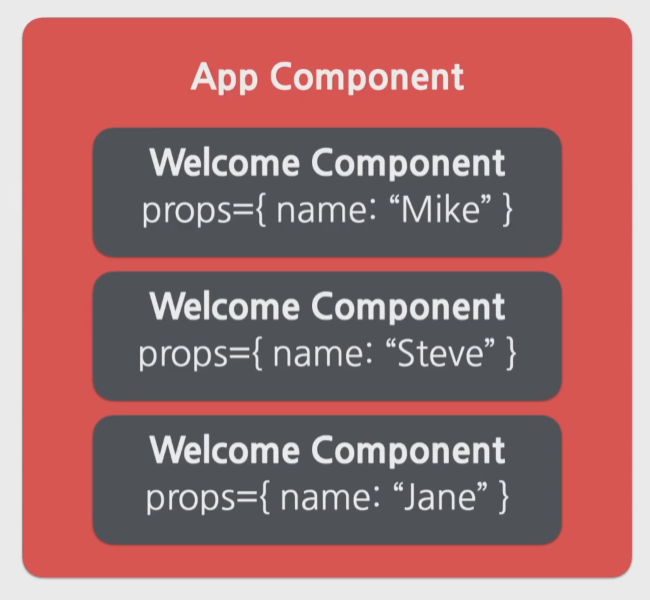
컴포넌트 합성 :
- 여러 개의 컴포넌트를 합쳐서 하나의 컴포넌트를 만들 수 있다.
function Welcome(props){
	return <h1>Hello, {props.name}</h1>;

}

function App(props)
{
	return (
    	<div>
      		<Welcome name = "Mike"/>
     		<Welcome name = "Steve"/>
      		<Welcome name = "Jane"/>
    	</div>

    );
}

ReactDom.render(
	<App/>,
  document.getElementById('root')
);
- App Component를 root로 해서 하위 컴포넌트들이 존재하는 형태가 리액트로만 구성된 앱의 기본적인 구조이다.
컴포넌트 추출
-
큰 컴포넌트에서 일부를 추출해서 새로운 컴포넌트를 만든다.
-
컴포넌트 합성과 반대로 복잡한 컴포넌트를 쪼개서 여러개의 컴포넌트로 나눌 수 있다. + 잘만 활용하면 컴포넌트의 재사용성이 올라간다.
import React from "react";

function Comment(props) {
  <div className="comment">
    <div className="user-info">
      <img
        className="avatar"
        src={props.author.avatarUrl}
        alt={props.author.name}
      />
      <div className = "user-info-name">
        {props.author.name}
      </div>
    </div>

    <div className = "comment-text">{props.text}</div>
    <div className = "commnet-date">{formatDate(props.date)}</div>


  </div>;
}

export default Test;
추출 시작
Avator 추출
function Avator(props){

	return(

    	<img className = "avatar"
      	src = {props.user.avatarUrl}
		alt = {props.user.name} />
    )

}
UserInfo 추출
function UserInfo(props)
{
	return (

    	<div className = "user-info">
      		<Avatar user = {props.user}/>
			<div className = "user-info-name">
              <props.user.name>
            </div>
		</div>
    )
}
Comment 추출
function Comment(props){
	return (
    	<div className ="comment">
      		<userInfo user = {props.author}/>

			<div className = "comment-text">
              {props.text}
            </div>

			<div className = "comment-date">
              {formatDate(props.date)}
            </div>

      	</div>

    )

}

실습
Comment
import React from "react";

const styles = {
  wrapper: {
    margin: 8,
    padding: 8,
    display: "flex",
    flexDirection: "row",
    border: "1px solid grey",
    borderRadius: 16,
  },
  imageContainer: {},
  image: {
    width: 50,
    height: 50,
    borderRadius: 25,
  },
  contentContainer: {
    marginLeft: 8,
    display: "flex",
    flexDirection: "column",
    justifyContent: "center",
  },
  nameText: {
    color: "black",
    fontSize: 16,
    fontWeight: "bold",
  },
  commentText: {
    color: "black",
    fontSize: 16,
  },
};
const Comment = (props) => {
  return (
    <div style={styles.wrapper}>
      <div style={styles.imageContainer}>
        <img
          src="https://w7.pngwing.com/pngs/785/675/png-transparent-potato-illustration-baked-potato-potato-wedges-salt-potatoes-baked-beans-potato-high-quality-computer-network-food-performance.png"
          style={styles.image}
        />
      </div>
      <div style={styles.contentContainer}>
        <span style={styles.nameText}>{props.name}</span>
        <span style={styles.commentText}>{props.comment}</span>
      </div>
    </div>
  );
};

export default Comment;
CommentList
import React from "react";
import Comment from "./Comment";

function CommentList(props) {
  return (
    <div>
      <Comment name={"오지환"} comment={"제가 만든 첫 컴포넌트임다."} />
    </div>
  );
}

export default CommentList;
index.js
import React, { Fragment } from "react";
import ReactDOM from "react-dom/client";
import "./index.css";
import CommentList from "./chapter_05/CommentList";

const root = ReactDOM.createRoot(document.getElementById("root"));
root.render(
  <React.StrictMode>
    <CommentList/>
  </React.StrictMode>,
  document.getElementById('root')
)
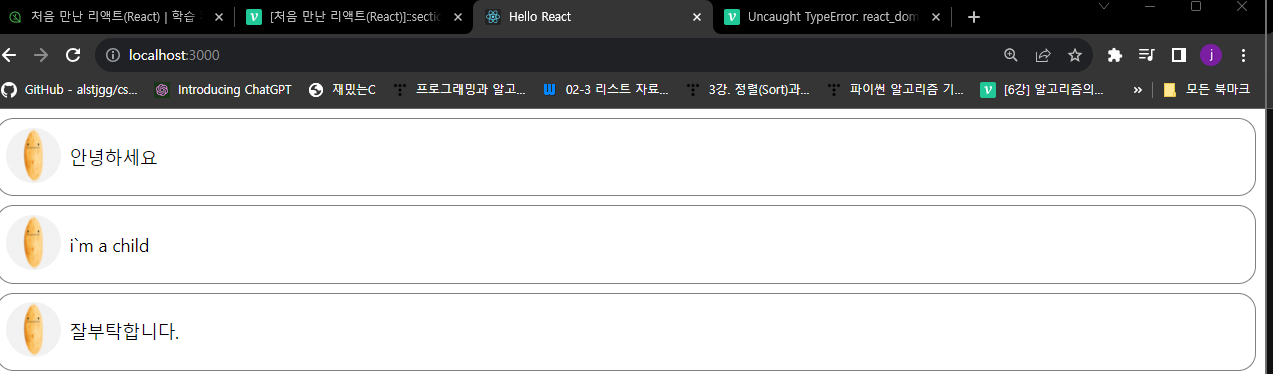
Comment 데이터를 별도의 객체로 분리하기
CommentList
import React from "react";
import Comment from "./Comment";

const comments = [
    {
        name : "오지환",
        comment : "안녕하세요",
    },
    {
        name : "이민형",
        comment : "i`m a child"
    },
    {
        name : "이장원",
        comment : "잘부탁합니다."
    }
]


function CommentList(props) {
  return (
    <div>
        {comments.map((comment)=>{
            return (
                <Comment name = {comments.name} comment = {comment.comment}/>
            );
        })}
    </div>
  );
}

export default CommentList;
나머지 동일
Comment
import React from "react";

const styles = {
	wrapper: {
		margin: 8,
		padding: 8,
		display: "flex",
		flexDirection: "row",
		border: "1px solid grey",
		borderRadius: 16,
	},
	imageContainer: {},
	image: {
		width: 50,
		height: 50,
		borderRadius: 25,
	},
	contentContainer: {
		marginLeft: 8,
		display: "flex",
		flexDirection: "column",
		justifyContent: "center",
	},
	nameText: {
		color: "black",
		fontSize: 16,
		fontWeight: "bold",
	},
	commentText: {
		color: "black",
		fontSize: 16,
	},
};

function Comment(props) {
	return (
		<div style={styles.wrapper}>
			<div style={styles.imageContainer}>
				<img
					src="https://w7.pngwing.com/pngs/785/675/png-transparent-potato-illustration-baked-potato-potato-wedges-salt-potatoes-baked-beans-potato-high-quality-computer-network-food-performance.png"
					style={styles.image}
				/>
			</div>
			<div style={styles.contentContainer}>
				<span style={styles.nameText}>{props.name}</span>
				<span style={styles.commentText}>{props.comment}</span>
			</div>
		</div>
	);
}

export default Comment;