1. 문서보기
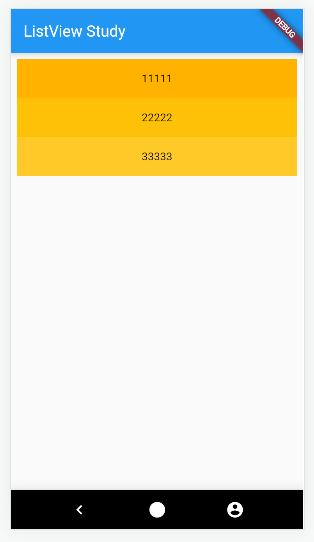
리스트로 그려줄 데이터가 다 정해져있고 몇개 안된다면 아래처럼 하면 된다.
<script>
import 'dart:html';

import 'package:flutter/cupertino.dart';
import 'package:flutter/material.dart';

void main() {
 runApp(const MyApp());
}
class MyApp extends StatelessWidget {
 const MyApp({Key? key}) : super(key: key);

 @override
 Widget build(BuildContext context) {

   return MaterialApp(
       home:Scaffold(
         appBar: AppBar(
             title:Text('ListView Study')
         ),
         body:ListView(
           padding:const EdgeInsets.all(8),
           children: [
             Container(
               height: 50,
               color: Colors.amber[600],
               child:const Center(
                 child:Text('11111')
               )
             ),
             Container(
                 height: 50,
                 color: Colors.amber[500],
                 child:const Center(
                     child:Text('22222')
                 )
             ),
             Container(
                 height: 50,
                 color: Colors.amber[400],
                 child:const Center(
                     child:Text('33333')
                 )
             )

           ],
         ),
         bottomNavigationBar: BottomAppBar(
           child:Container(
             height: 50,
             color:Colors.black,
             child: Row(
                 mainAxisAlignment:MainAxisAlignment.spaceEvenly,

               children: [
                 Icon(Icons.chevron_left,color:Colors.white),
                 Icon(Icons.circle_rounded,color:Colors.white),
                 Icon(Icons.account_circle,color:Colors.white),

               ],
             ),
           )
         ),
       )
   );
 }
}
</script>
결과
하지만 데이터가 많다면
ListView.builder를 사용해주면 된다
Dart List?
List는 데이터를 여러 개 담을 수 있는 자료구조이다. 데이터를 List에 담을 때 순서를 가지기 때문에 배열을 대체 할 수 있고 데이터에 순차적으로 접근하기 쉽다.
기본형태는 다음과 같다.
List<데이터 타입>변수명 = [데이터1,데이터2,데이터3,......];
또는
List<데이터 타입>변수명 = List();
변수명.add(데이터1);
변수명.add(데이터2);
변수명.add(데이터3);
리스트에 들어갈 데이터타입이 int,String,bul등 의 단일이 아니라 여러타입이라면 dynamic이나 var를 사용하면 된다.
List list1=[1,'무야호',true];
var list2=[2,'무야호오',false];
잊지말자 선언뒤에 세미콜론
리스트에서 사용되는 주요 메서드와 프로퍼티는 다음과 같다.
- indexOf(요소) :요소의 인덱스 값
- add(데이터) :데이터 추가
- addAll([데이터1,데이터2]) :여러 데이터 추가
- remove(요소) :요소 삭제
- removeAt(인덱스) :지정한 인덱스의 요소 삭제
- contains(요소) :요소가 포함되었으면 true, 아니면 false
- clear() :리스트 요소 전체 삭제
- sort() :리스트 요소 정렬
- first :리스트 첫 번째 요소
- last :리스트 마지막 요소
- reversed :리스트 요소 역순
- isNotEmpty :리스트가 비어있지 않으면 true, 아니면 false
- isEmpty :리스트가 비었으면 true, 아니면 false
- single :리스트에 단 1개의 요소만 있다면 해당 요소 리턴
Set?
List와 거의 유사한 형태이다. 주의할 점은 초기값을 넣을 때 List는 []를 사용했지만 Set은 {}을 사용한다.
또한 중복을 허용하지 않기 때문에 같은 값을 여러번 추가해도 단 하나만 존재한다.
순서를 가지지 않기때문에 각요소에 인덱스로는 접근하지 못하지만 for..in문을 통해서 접근가능하다.
Set의 매서드와 프로퍼티는 List와 겹치는 부분이 많지만 인덱스와 관련된 것은 사용하지 않는다.(indexOf(), removeAt(), sort(), reversed())
<script>
import 'dart:html';

import 'package:flutter/cupertino.dart';
import 'package:flutter/material.dart';

void main() {
  runApp(const MyApp());
}
class MyApp extends StatelessWidget {
  const MyApp({Key? key}) : super(key: key);

  @override
  Widget build(BuildContext context) {
    final List<String> entries = <String>['a','b','c','d'];
    final List<int> colorCodes = <int>[600,500,100,200];
    return MaterialApp(
        home:Scaffold(
          appBar: AppBar(
              title:Text('ListView Study')
          ),
          body:ListView.builder(
            padding:const EdgeInsets.all(8),
            itemCount:entries.length,
            itemBuilder: (BuildContext context, int index){
              return Container(
                height: 50,
                color: Colors.amber[colorCodes[index]],
                child:Center(
                  child:Text('순서대로 ${entries[index]}')
                )
              );
            }

          ),
          bottomNavigationBar: BottomAppBar(
            child:Container(
              height: 50,
              color:Colors.black,
              child: Row(
                  mainAxisAlignment:MainAxisAlignment.spaceEvenly,

                children: [
                  Icon(Icons.chevron_left,color:Colors.white),
                  Icon(Icons.circle_rounded,color:Colors.white),
                  Icon(Icons.account_circle,color:Colors.white),

                ],
              ),
            )
          ),
        )
    );
  }
}
</script>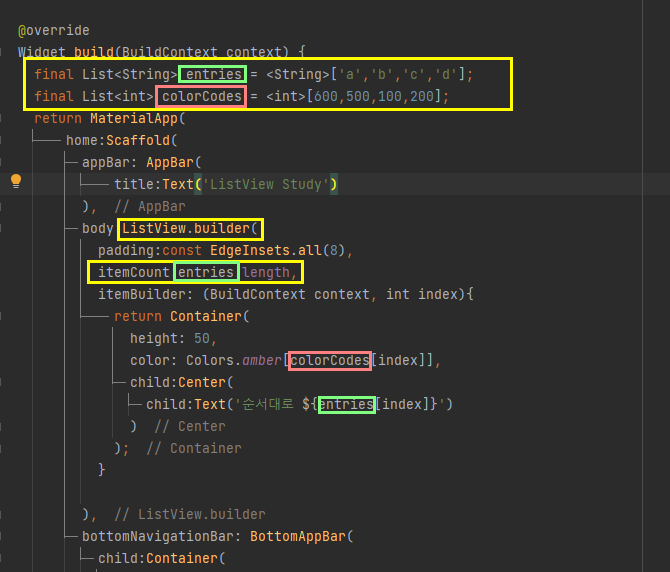
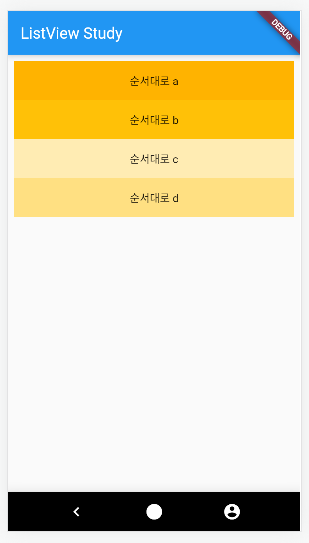
결과
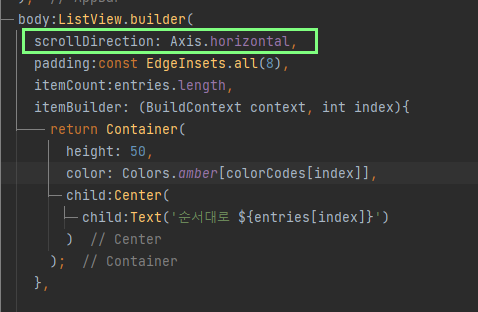
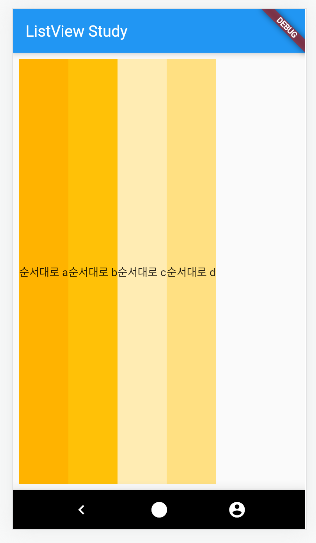
리스트를 가로(수평)로 나열 하고 싶으면
scrollDirection: Axis.horizontal를 사용해주면 된다
결과
상위요소의 높이값이 지정되어있지않아서 body의 높이값을 전부 사용한다. 높이값을 주고싶으면 Container로 묶고 height값을 주자
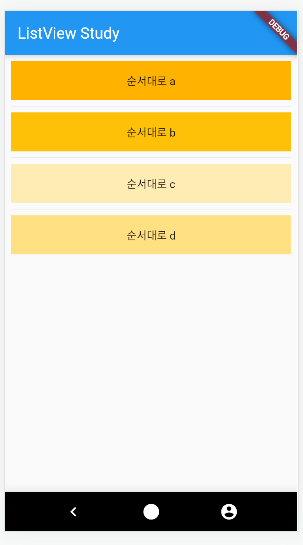
구분선을 주고 싶으면
ListView.builder말고 ListView.separated를 준다
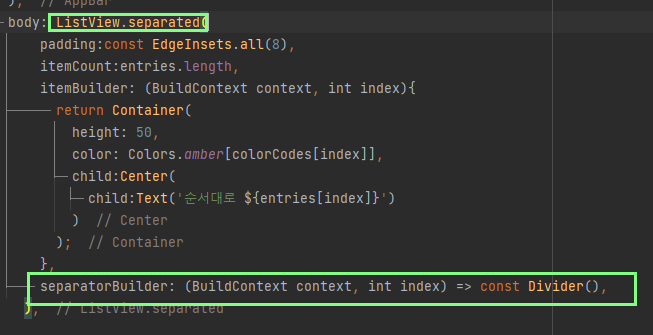
결과
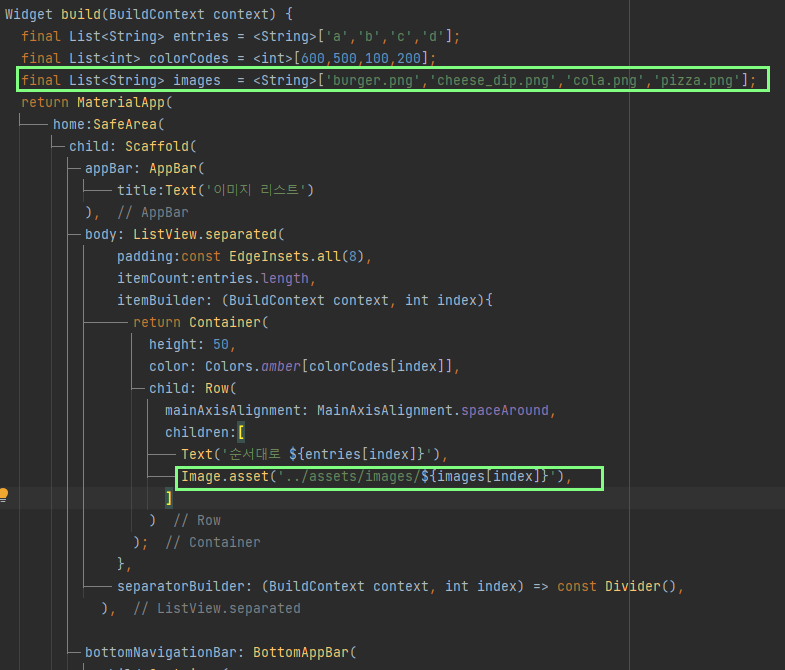
이미지도 넣어보자~
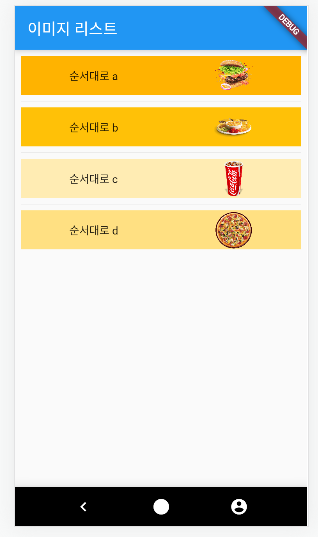
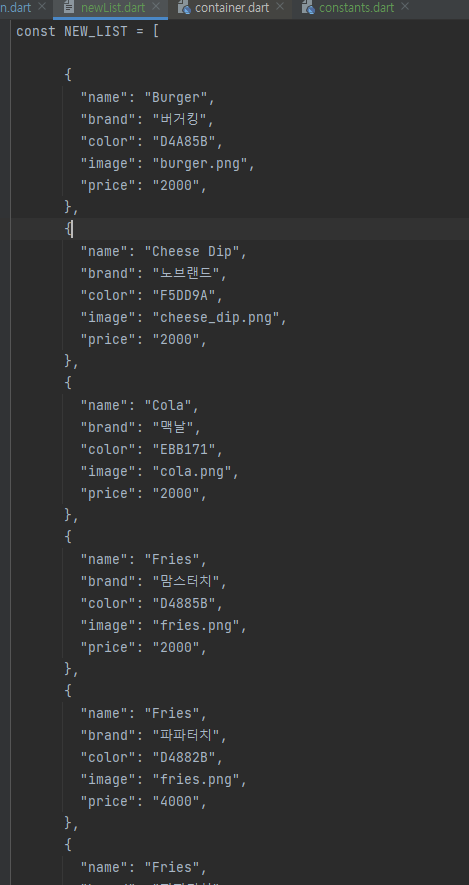
배열갯수가 많아지니 배열을 합치는게 관리가 편할것 같다 ..! 이럴땐..!
<script>
 const newList = [
      //map타입.key value pair방식(한쌍.짝)
      {
        "name": "Burger",
        "brand": "버거킹",
        "color": "D4A85B",
        "image": "burger.png",
        "price": "2000",
      },
      {
        "name": "Cheese Dip",
        "brand": "노브랜드",
        "color": "F5DD9A",
        "image": "cheese_dip.png",
        "price": "2000",
      },
      {
        "name": "Cola",
        "brand": "맥날",
        "color": "EBB171",
        "image": "cola.png",
        "price": "2000",
      },
      {
        "name": "Fries",
        "brand": "맘스터치",
        "color": "D4885B",
        "image": "fries.png",
        "price": "2000",
      },
      {
        "name": "Fries",
        "brand": "파파터치",
        "color": "D4882B",
        "image": "fries.png",
        "price": "4000",
      },
      {
        "name": "Fries",
        "brand": "파파터치",
        "color": "D4882B",
        "image": "fries.png",
        "price": "4000",
      }
    ];
</script> 
이런식으로 배열을 돌려서 만든다.
color적용하는 부분이 은근 까다로웠는데

일단 이런식으로 하니 되었다.
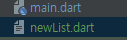
관리에 용이하도록 배열을 따로 뺐다.
newList.dart파일을 만들어서 그대로 복사해서 이름만 바꾸었다
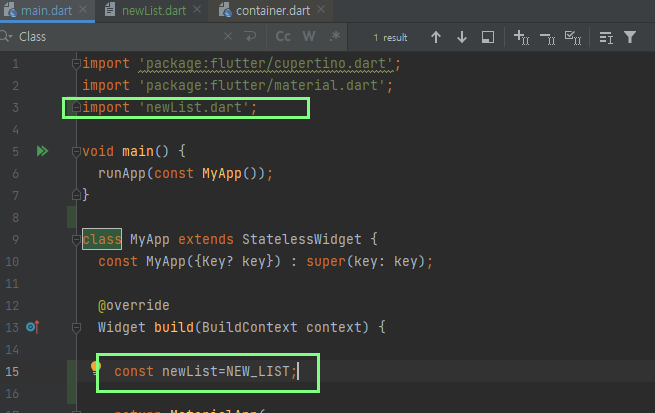
작업중이던 main.dart파일에 import한뒤 변수에 담아서 적용하니
그대로 화면이 나온다~성공 😆
자질구레하게 css속성을 건들여봤다. 익숙해지려면 꽤나 많이 연습해야 할것 같다. 마진패딩 -값,height:auto같이 그전에 편하게 마구 썼던것들이 여기선 안되서 전부 구글링을 해야한다 😭😭 아직은 구조 짜는거도 헷갈리고 css도 버벅이는데 이전에 vue에서 하던대로 편하게 만들수 있는 날이 오겠지..?
오늘 만들어낸 리스트..결과...
<script>
  import 'package:flutter/cupertino.dart';
import 'package:flutter/material.dart';
import 'newList.dart';

void main() {
runApp(const MyApp());
}

class MyApp extends StatelessWidget {
const MyApp({Key? key}) : super(key: key);

@override
Widget build(BuildContext context) {

  const newList=NEW_LIST;

  return MaterialApp(
      home: SafeArea(
        child: Scaffold(
          appBar: AppBar(
            backgroundColor: Colors.grey,
              title: Row(
                mainAxisAlignment: MainAxisAlignment.spaceBetween,
                children: [
                  Icon(Icons.menu),
                  SizedBox(
                    width: 80,
                    child: Row(
                      mainAxisAlignment: MainAxisAlignment.spaceBetween,
                      children:[
                        Icon(Icons.abc_sharp),
                        Icon(Icons.star)
                      ]

                    ),
                  )
                ],
              )
          ),
          body: Container(
            child: ListView.builder(
            padding: EdgeInsets.all(8),
            itemCount: newList.length,
            itemBuilder: (BuildContext context, int index) {

              return Container(
                height: 100,
                margin: EdgeInsets.only(left: 10, right: 10),
                padding: EdgeInsets.all(10),
                decoration: BoxDecoration(
                  boxShadow: [
                    BoxShadow(
                        color: Colors.white24,
                        blurRadius: 10.0,
                        spreadRadius: 1.0,
                        offset: Offset(-3, -3))
                  ],
                  color: Color(int.parse("0xff${newList[index]['color']}")),
                  borderRadius: BorderRadius.vertical(top: Radius.circular(10)),
                ),
                // color:Color(0xffF5DD9A),

                child: Row(
                    mainAxisAlignment: MainAxisAlignment.spaceBetween,
                    children: [
                      Column(
                        crossAxisAlignment: CrossAxisAlignment.start,
                        children: [
                          Text(
                              '${newList[index]['name']}',
                              style:TextStyle(fontWeight: FontWeight.bold,fontSize: 24)
                          ),
                          Text(
                              '${newList[index]['brand']}',
                              style: TextStyle(fontSize: 18,color: Colors.grey),
                          ),
                          Text('\$ ${newList[index]['price']}'),
                        ],
                      ),
                      Image.asset(
                          '../assets/images/${newList[index]['image']}'),
                    ]));
        },
      ),
          ),
         bottomNavigationBar: BottomAppBar(
          child: Container(
          height: 50,
          color: Colors.black,
          child: Row(
          mainAxisAlignment: MainAxisAlignment.spaceEvenly,
          children: [
            Icon(Icons.chevron_left, color: Colors.white),
            Icon(Icons.circle_rounded, color: Colors.white),
            Icon(Icons.account_circle, color: Colors.white),
          ],
        ),
      )),
    ),
  ));
}
}

</script>
할많하않..ㅎ...