
Api Management 설정
먼저, client에서 Application Gateway -> Api Mangement -> Luis 로 prediction 질의를 할 텐데, 해당 부분은 get로 아래와 같은 형식으로 질의 하면 된다.
get이나 post 둘다 사용 가능하다.
post로 진행하고 싶다면, 위 링크의 좌측 목록에서 post를 선택하여 적용하면 된다.
앞선 Application Gateway 단계에서, header의 host 값을 backend target으로 바꿔주었다.
Api Management에서는 해당 header 값으로, choose라는 if문 같은 아이를 사용하여, Application Gateway가 해주는 round robin을 활용한 부하분산이 목적이다.
Api Management가 트래픽을 받을 때, api.pwcqwer.com, api2.pwcqwer.com과 같은 도메인으로 받아야 하기에, Api Management에 custom domain을 우선 등록하여 준다.
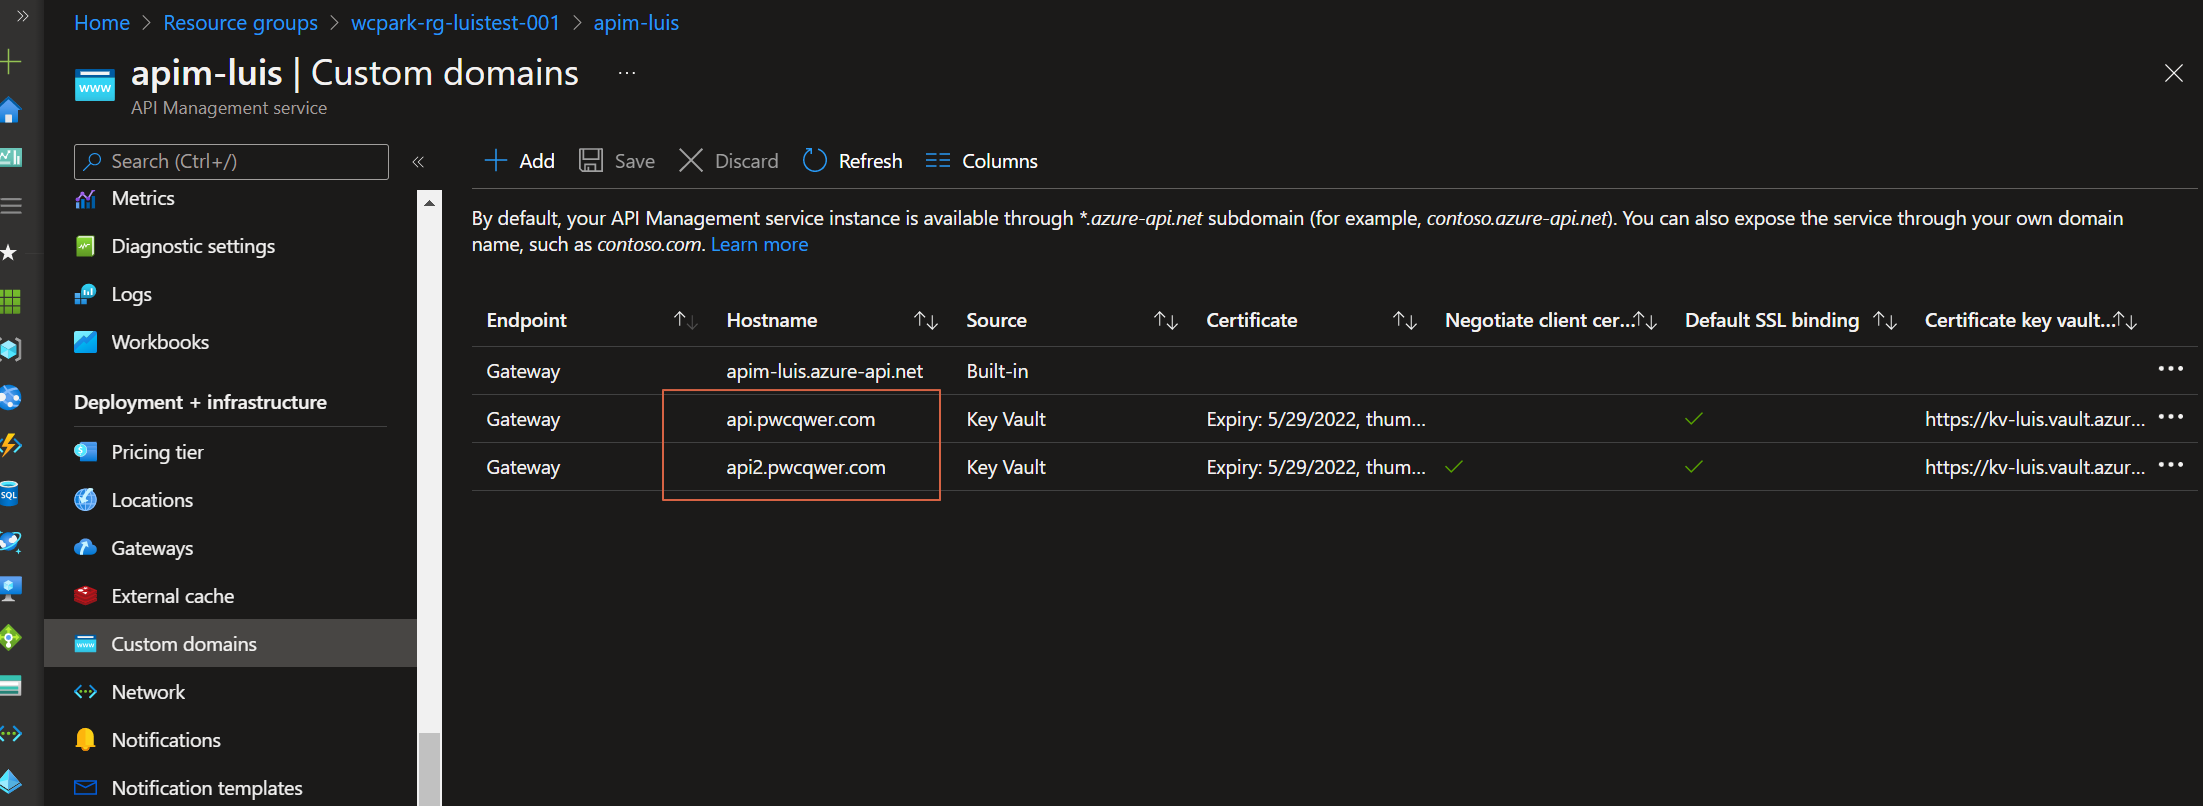
custom domain 등록할 때, 인증서나 도메인 소유권 확인 과정이 있으니 진행 해주자.
앞선 Application Gateway 설정하는 부분에서 a record를 수정해 주었기 때문에, 추가적인 설정없이, Application Gateway에서 Api Management로 넘길 수 있다.
위까지 진행하였으면, 트래픽은 이제 무사히 Api Management로 도달할 수 있다.
이제 남은 부분은 어떻게 backend api로 보낼 것인가? 인데, 키 포인트는 아래의 부분이다.
<policies>
<inbound>
<base />
<choose>
<when condition="@(context.Request.Headers.GetValueOrDefault("Host").Equals("api2.pwcqwer.com:443"))">
<set-header name="Ocp-Apim-Subscription-Key" exists-action="override">
<value>{sub_key2}</value>
</set-header>
<set-backend-service base-url="https://luis-prediction2-wcpark.cognitiveservices.azure.com" />
<rewrite-uri template="/luis/prediction/v3.0/apps/{app_id}/slots/staging/predict?verbose=true&show-all-intents=true&log=true&subscription-key={sub_key2}&query={user_query}" />
</when>
<otherwise>
<set-header name="Ocp-Apim-Subscription-Key" exists-action="override">
<value>{sub_key1}</value>
</set-header>
<set-backend-service base-url="https://luis-prediction-wcpark.cognitiveservices.azure.com" />
<rewrite-uri template="/luis/prediction/v3.0/apps/{app_id}/slots/production/predict?verbose=true&show-all-intents=true&log=true&subscription-key={sub_key1}&query={user_query}" />
</otherwise>
</choose>
</inbound>
<backend>
<base />
</backend>
<outbound>
<base />
</outbound>
<on-error>
<base />
</on-error>
</policies>choose 부분을 활용하여, Header 중,
Key: Host
Value: api.pwcqwer.com
이라면 prediction resource 1번을 사용
Key: Host
Value: api2.pwcqwer.com
이라면 prediction resource 2번을 사용
이런식으로 컨디션을 줘서 사용할 수 있다.
host의 value는 Application Gateway의 backend target 이름대로 host value과 같이 해당 이 override 되어서 들어오게 설정했기에, round robin으로 host value가 변경되어져서 들어오게 된다.
Application Gateway은 backend pool에 부하 분산시, round-robin 알고리즘을 사용한다.
즉,
#1
- luis.pwcqwer.com/query=쿼리쿼리
- Application Gateway (api.pwcqwer.com 으로 보내고, host header 또한 api.pwcqwer.com으로 override)
- Api Management (api.pwcqwer.com으로 받고, host header 확인해서 api.pwcqwer.com을 확인)
- prediction resource 1번으로 질의
#2
- luis.pwcqwer.com/query=쿼리쿼리
- Application Gateway (api2.pwcqwer.com 으로 보내고, host header 또한 api2.pwcqwer.com으로 override)
- Api Management (api2.pwcqwer.com으로 받고, host header 확인해서 api2.pwcqwer.com을 확인)
- prediction resource 2번으로 질의
이런식으로 번갈아 가면서 진행된다.
위에 코드를 보면, host value 뒤에 api.pwcqwer.com:443 나타나는 부분이 있는데, 이 부분 때문에 정말 많은 시간을 쏟았다.
override할 때, host name으로 한다고해서 choose에 api.pwcqwer.com만 쓰니 전부 otherwise로 빠져버렸다. 간단히 넘어가야 하는게 이상하게 동작하니 지옥같았다
다음 글에서는 어떻게 Api Management를 trouble shooting 하냐 라는 부분에 대해 간략하게 소개해 보겠다.
