Object(오브젝트)
쿠버네티스는 모든 기능을 오브젝트(객체)로 관리한다.
- Pod: 한 개 이상의 컨테이너. 주 컨테이너와 보조 컨테이너가 있다. 보조 컨테이너는 주 컨테이너의 log 관리와 모니터링을 수행하며 side-car 역할을 한다.
- namespace: 각 사용자별 작업 공간. persistent volume은 namespace를 공유한다.
- volume: pod에게 영구 데이터 보관을 위한 볼륨을 제공한다.
- service: 외부에서 클러스터 내의 pod로 접속할 수 있는 방법을 제공한다. clusterIP, NodePort, LoadBalancer가 있다.
- DaemonSet: 각 노드에 무조건 일괄적으로 하나씩 배포. 모니터링 등에 활용하면 유용하다.
- ConfigMap: 시스템 환경 변수, 일반적으로 파일 등을 제공하기 위한 방법. 보안성은 없다.
- Secret: ConfigMap과 거의 동일하지만 해당 데이터가 외부에 노출되지 않는다는 장점이 있어서, 주로 인증서, username/password, ssh 접속 등과 같은 보안성을 요구하는 곳에서 활용한다. 가령, 특정 사설 저장소로 접속하기 위한 username, password, address를 secret으로 작성하여 yaml 파일에 적용할 경우 특정 저장소에서 파일을 다운로드 할 떄 유용하다.
- Deployment: 일반적인 pod는 삭제가 자유로운 pod이며 이름의 경우도 임의의 hash 뒤에 붙이게 된다.
deployment: test-deploy
replicaset: test-deploy-12345 # 2개의 pod를 유지하겠다!
		    # 일반적인 pod 		 statefulset 적용된 pod
pod		  : test-deploy-qwerty # test-deploy-12345-1
		    test-deploy-asdfgh # test-deploy-12345-2
일반적인 pod는 이름 뒤에 랜덤한 문자가 붙는다. statefulset이 적용된 pod는 특정 이름이 지정된다.
Deployment 배포
- nginx Deployment yaml 파일 작성
dlrjsdn0414@cloudshell:~ (rapa-0901-lgw)$ mkdir 0902 ; cd 0902
dlrjsdn0414@cloudshell:~/0902 (rapa-0901-lgw)$ touch nginx1.yaml
dlrjsdn0414@cloudshell:~/0902 (rapa-0901-lgw)$ vi nginx1.yamlapiVersion: apps/v1
kind: Deployment
metadata:
name: test
spec:
replicas: 3
selector:
matchLabels:
color: blue
template:
metadata:
labels:
color: blue
spec:
containers:
- name: test
image: nginx
- 배포
dlrjsdn0414@cloudshell:~/0902 (rapa-0901-lgw)$ kubectl apply -f nginx1.yaml
deployment.apps/test created- 배포 확인
dlrjsdn0414@cloudshell:~/0902 (rapa-0901-lgw)$ kubectl get deploy
NAME   READY   UP-TO-DATE   AVAILABLE   AGE
test   3/3     3            3           17s
-> 컨테이너 3개가 실행 중이다.
dlrjsdn0414@cloudshell:~/0902 (rapa-0901-lgw)$ kubectl get rs
NAME              DESIRED   CURRENT   READY   AGE
test-69454c947b   3         3         3       54s
-> replicaset 이름: test-69454c947b
dlrjsdn0414@cloudshell:~/0902 (rapa-0901-lgw)$ kubectl get pod -o wide
NAME                    READY   STATUS    RESTARTS   AGE    IP           NODE                                           NOMINATED NODE   READINESS GATES
test-69454c947b-g62gz   1/1     Running   0          2m3s   10.96.2.14   gke-mytestcluster-default-pool-bd53b8ad-ml13   <none>           <none>
test-69454c947b-gv7jm   1/1     Running   0          2m3s   10.96.0.15   gke-mytestcluster-default-pool-bd53b8ad-fk0z   <none>           <none>
test-69454c947b-r85sp   1/1     Running   0          2m3s   10.96.1.18   gke-mytestcluster-default-pool-bd53b8ad-39ks   <none>           <none>
-> 컨테이너 3개가 실행 중이다.
- 배포 버전 확인
dlrjsdn0414@cloudshell:~/0902 (rapa-0901-lgw)$ kubectl rollout history deploy test
deployment.apps/test
REVISION  CHANGE-CAUSE
1 <none>- 배포 삭제
dlrjsdn0414@cloudshell:~/0902 (rapa-0901-lgw)$ kubectl delete -f nginx1.yaml
deployment.apps "test" deleted- record해서 배포 (--record)
dlrjsdn0414@cloudshell:~/0902 (rapa-0901-lgw)$ kubectl apply -f nginx1.yaml --record
Flag --record has been deprecated, --record will be removed in the future
deployment.apps/test created
kubectl apply -f nginx1.yaml --record
- 버전 확인 (rollout history)
dlrjsdn0414@cloudshell:~/0902 (rapa-0901-lgw)$ kubectl rollout history deploy test
deployment.apps/test
REVISION  CHANGE-CAUSE
1         kubectl apply --filename=nginx1.yaml --record=true
-> 배포 당시의 스냅샷이 기록되었음
Rolling Update vs Recreate
세 컨테이너를 새로운 버전으로 업데이트할 때 새로 컨테이너를 하나 생성하고 기존 컨테이너 하나를 삭제하는 것을 반복한다.
1. 롤링 업데이트 (새로 만든 숫자만큼 기존이 삭제되면 너무 오래 걸린다.)
2개 생성하고 2개 삭제하는 방식으로 개수를 지정하느다면 더 빠르다.
2. 기존 pod를 모두 종료(terminate)시킨 다음 새로운 pod로 전환시킨다.
type: Recreate 종료되는 도중에는 해당 애플리케이션으로의 외부 접속이 불가능해지는 문제가 발생한다.
Rolling Update
- yaml 작성
dlrjsdn0414@cloudshell:~/0902 (rapa-0901-lgw)$ cp nginx1.yaml nginx2.yaml
dlrjsdn0414@cloudshell:~/0902 (rapa-0901-lgw)$ vi nginx2.yaml-
컨테이너를 httpd로 변경
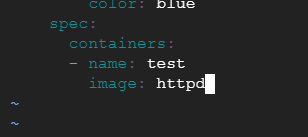
-
httpd 컨테이너 배포 전 후 비교
dlrjsdn0414@cloudshell:~/0902 (rapa-0901-lgw)$ kubectl apply -f nginx1.yaml ; \
> kubectl get pod ; \
> kubectl apply -f nginx2.yaml ; \
> kubectl get pod

deployment.apps/test unchanged
NAME                    READY   STATUS    RESTARTS   AGE
test-69454c947b-4wkv4   1/1     Running   0          4m11s
test-69454c947b-t57x6   1/1     Running   0          4m11s
test-69454c947b-vhp2x   1/1     Running   0          4m11s
deployment.apps/test configured
NAME                    READY   STATUS              RESTARTS   AGE
test-69454c947b-4wkv4   1/1     Running             0          4m12s
test-69454c947b-t57x6   1/1     Running             0          4m12s
test-69454c947b-vhp2x   1/1     Running             0          4m12s
test-6bcd9c8c7b-d9z5z   0/1     ContainerCreating   0          0s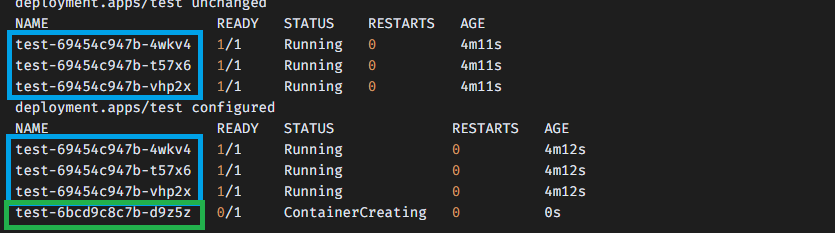
-> httpd 컨테이너(test-6bcd9c8c7b-d9z5z)가 생성되어 실행된 후, 기존의 nginx 컨테이너(test-69454c947b)를 삭제한다.
Recreate
- 기존 배포 삭제
dlrjsdn0414@cloudshell:~/0902 (rapa-0901-lgw)$ kubectl delete deploy test
deployment.apps "test" deleted- stretegy 변경 (Recreate)
dlrjsdn0414@cloudshell:~/0902 (rapa-0901-lgw)$ vi nginx1.yaml 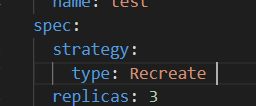
- 배포
dlrjsdn0414@cloudshell:~/0902 (rapa-0901-lgw)$ kubectl apply -f nginx1.yaml
deployment.apps/test created- 배포 확인
dlrjsdn0414@cloudshell:~/0902 (rapa-0901-lgw)$ kubectl get pod
NAME                    READY   STATUS    RESTARTS   AGE
test-69454c947b-2d6pj   1/1     Running   0          4s
test-69454c947b-hqxj4   1/1     Running   0          4s
test-69454c947b-vk9kk 1/1 Running 0 4s- 컨테이너 이미지를 httpd로 변경
dlrjsdn0414@cloudshell:~/0902 (rapa-0901-lgw)$ vi nginx1.yaml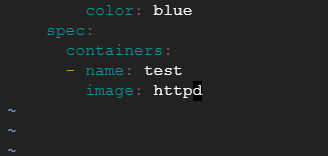
- 재배포 전 후 비교
dlrjsdn0414@cloudshell:~/0902 (rapa-0901-lgw)$ kubectl get pod ; \
> kubectl apply -f nginx1.yaml ; \
> kubectl get pod ;
NAME                    READY   STATUS    RESTARTS   AGE
test-69454c947b-2d6pj   1/1     Running   0          64s
test-69454c947b-hqxj4   1/1     Running   0          64s
test-69454c947b-vk9kk   1/1     Running   0          64s
deployment.apps/test configured
NAME                    READY   STATUS        RESTARTS   AGE
test-69454c947b-2d6pj   1/1     Terminating   0          65s
test-69454c947b-hqxj4   1/1     Terminating   0          65s
test-69454c947b-vk9kk   1/1     Terminating   0          65s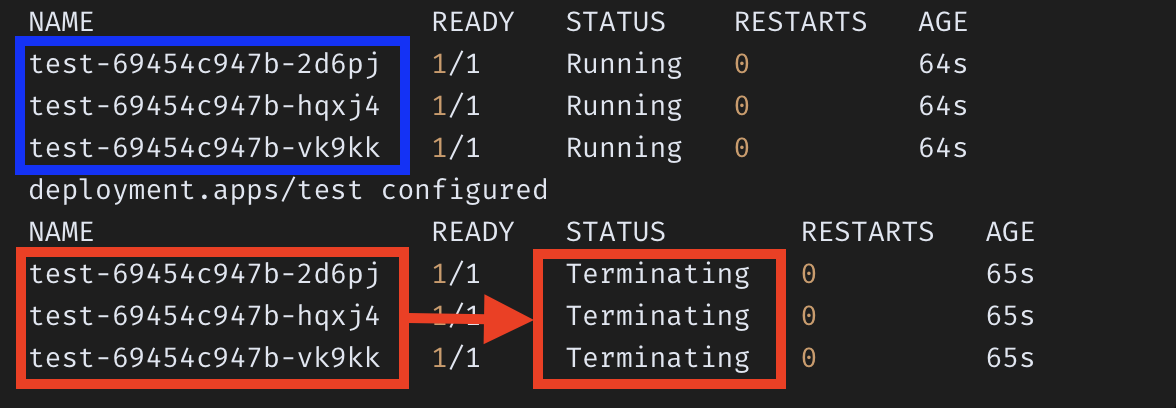
-> Recreate를 적용했더니, Rolling update 방식이 아니라 세 컨테이너를 모두 종료시킨 후 한꺼번에 업데이트를 한다.
Rolling Update Strategy
- 기존 배포 삭제
dlrjsdn0414@cloudshell:~/0902 (rapa-0901-lgw)$ kubectl delete deploy test
deployment.apps "test" deleted
dlrjsdn0414@cloudshell:~/0902 (rapa-0901-lgw)$ vi nginx1.yaml
step 0) yaml 파일 작성 (httpd 컨테이너)
dlrjsdn0414@cloudshell:~/0902 (rapa-0901-lgw)$ cat nginx1.yaml
apiVersion: apps/v1
kind: Deployment
metadata:
  name: test
spec:
  strategy:
    type: RollingUpdate
    rollingUpdate:
      maxSurge: 2
      maxUnavailable: 2
  replicas: 3
  selector:
    matchLabels:
      color: blue
  template:
    metadata:
      labels:
        color: blue
    spec:
      containers:
      - name: test
image: httpd- RollingUpdate 전략 설정
  strategy:
    type: RollingUpdate
    rollingUpdate:
      maxSurge: 2 # 2개 생성
      maxUnavailable: 2 # 2개 삭제
-> 컨테이너 2개는 유지시키고 컨테이너 2개를 새로 생성하는 방식
- maxSurge: 롤링 업데이트 도중 전체 pod의 개수가 deployment의 replicas 값보다 얼마나 더 많이 존재할 수 있는지를 설정
- maxUnavailable: 롤링 업데이트 도중 사용 불가능한 상태가 되는 pod의 최대 개수
step 1) 배포하기 (httpd 컨테이너)
dlrjsdn0414@cloudshell:~/0902 (rapa-0901-lgw)$ kubectl apply -f nginx1.yaml
deployment.apps/test unchanged

dlrjsdn0414@cloudshell:~/0902 (rapa-0901-lgw)$ kubectl get pod
NAME                    READY   STATUS    RESTARTS   AGE
test-6bcd9c8c7b-h69r2   1/1     Running   0          2m35s
test-6bcd9c8c7b-hbgwf   1/1     Running   0          2m35s
test-6bcd9c8c7b-rdfhf   1/1     Running   0          2m35s
step 2) 컨테이너 수정(httpd -> nginx) 재배포 전 후 비교
dlrjsdn0414@cloudshell:~/0902 (rapa-0901-lgw)$ kubectl get pod ; \
> sed -i 's/image: httpd/image: nginx/' nginx1.yaml ; \
> kubectl apply -f nginx1.yaml ; \
> kubectl get pod
NAME                    READY   STATUS    RESTARTS   AGE
test-6bcd9c8c7b-h69r2   1/1     Running   0          4m10s
test-6bcd9c8c7b-hbgwf   1/1     Running   0          4m10s
test-6bcd9c8c7b-rdfhf   1/1     Running   0          4m10s
deployment.apps/test configured
NAME                    READY   STATUS        RESTARTS   AGE
test-69454c947b-css74   0/1     Pending       0          0s
test-6bcd9c8c7b-h69r2   1/1     Running       0          4m11s
test-6bcd9c8c7b-hbgwf   1/1     Terminating   0          4m11s
test-6bcd9c8c7b-rdfhf   1/1     Terminating   0          4m11s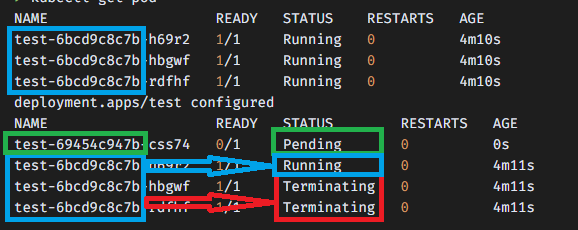
-> 기존 서비스의 중단 없이, 새 컨테이너로 교체함
- ReplicaSet 확인
dlrjsdn0414@cloudshell:~/0902 (rapa-0901-lgw)$ kubectl get rs
NAME              DESIRED   CURRENT   READY   AGE
test-69454c947b   3         3         3       22m
test-6bcd9c8c7b 0 0 0 26m- Deployment 상세 정보 확인
dlrjsdn0414@cloudshell:~/0902 (rapa-0901-lgw)$ kubectl describe deploy test
dName:                   test
Namespace:              default
CreationTimestamp:      Fri, 02 Sep 2022 02:03:29 +0000
Labels:                 <none>
Annotations:            deployment.kubernetes.io/revision: 2
Selector:               color=blue
Replicas:               3 desired | 3 updated | 3 total | 3 available | 0 unavailable
StrategyType:           RollingUpdate
MinReadySeconds:        0
RollingUpdateStrategy:  2 max unavailable, 2 max surge
Pod Template:
  Labels:  color=blue
  Containers:
   test:
    Image:        nginx
    Port:         <none>
    Host Port:    <none>
    Environment:  <none>
    Mounts:       <none>
  Volumes:        <none>
Conditions:
  Type           Status  Reason
  ----           ------  ------
  Available      True    MinimumReplicasAvailable
  Progressing    True    NewReplicaSetAvailable
OldReplicaSets:  <none>
NewReplicaSet:   test-69454c947b (3/3 replicas created)
Events:
  Type    Reason             Age   From                   Message
  ----    ------             ----  ----                   -------
  Normal  ScalingReplicaSet  27m   deployment-controller  Scaled up replica set test-6bcd9c8c7b to 3
  Normal  ScalingReplicaSet  23m   deployment-controller  Scaled up replica set test-69454c947b to 2
  Normal  ScalingReplicaSet  23m   deployment-controller  Scaled down replica set test-6bcd9c8c7b to 1
  Normal  ScalingReplicaSet  23m   deployment-controller  Scaled up replica set test-69454c947b to 3
  Normal  ScalingReplicaSet  23m   deployment-controller  Scaled down replica set test-6bcd9c8c7b to 0
Service
1. clusterIP

세 개의 pod가 있는 경우 각 pod 별로 별도의 ip 주소를 사용한다. 이들은 서로 간에 통신을 할 경우 각 pod가 서로 다른 노드에 있다고 가정한다면 이들을 마치 하나의 네트워크에 연결하기 위한 환경이 필요한데, 이러한 클러스터 상에서 서로 다른 노드에 있는 pod들 간 통신이 가능하도록 하기 위하여 cluster ip를 두게 된다.
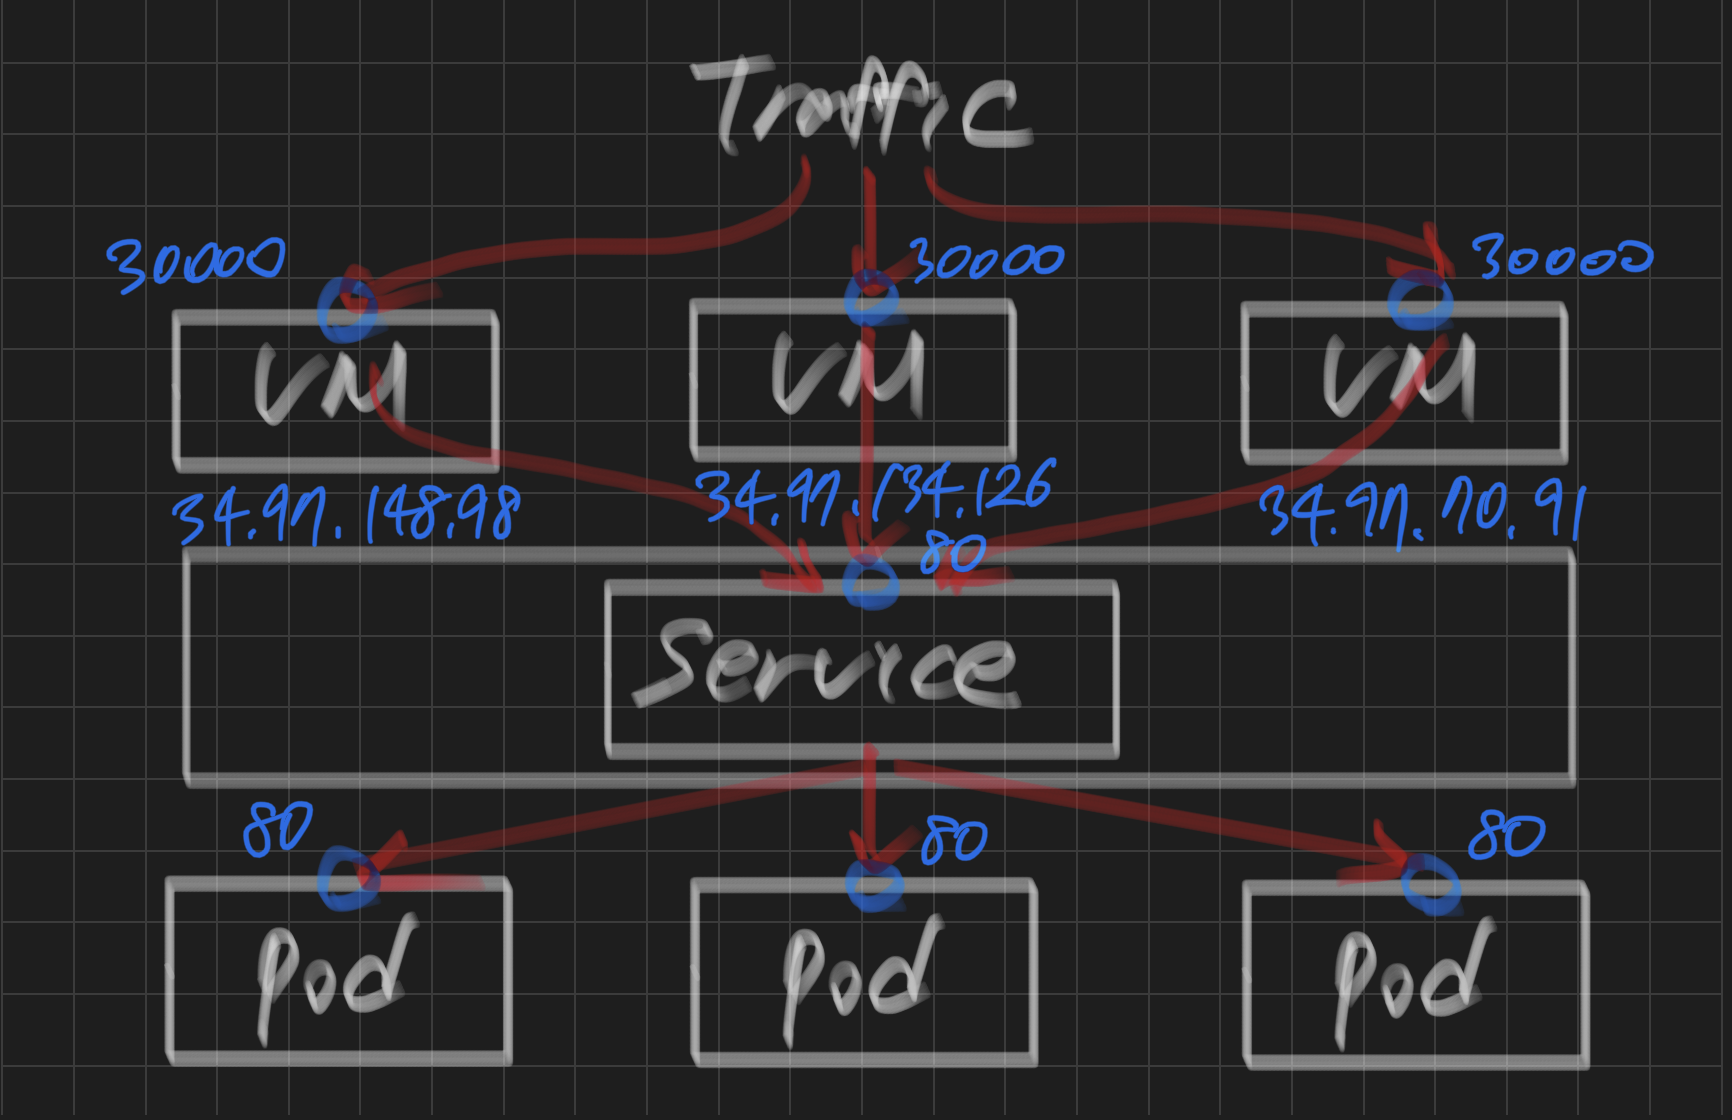
2. nodePort

port가 총 3개 필요함
: 1️⃣ 노드의 포트 (30000) -> 2️⃣ nodePort Service의 포트 -> 3️⃣ Pod의 포트
3. LoadBalancer

Selector는 replicaset과 service의 label을 확인한다.
-
replicaset: 특정 pod의 label을 확인하고 지정된 개수를 유지할 것인가에 활용 (label을 확인)
-
service: node port에서 노드의 포트로 접속된 트래픽에 대하여 특정 pod에게 전달 (label을 확인)
NodePort Service 배포

step 1) node Port 30000: 외부에서 가상 머신의 어떤 포트로 접속하면
step 2) port 80: nodeport로 접속된 트래픽이 nodeport 서비스의 특정 포트(80/tcp)로 유입되면
step 3) target port 80: 최종적으로 목적지 pod의 80번 포트로 전달함
1️⃣ node Port 30000 -> 2️⃣ port 80 -> 3️⃣ target port 80
- nodePort 서비스 추가
dlrjsdn0414@cloudshell:~/0902 (rapa-0901-lgw)$ vi nginx1.yamlapiVersion: apps/v1
kind: Deployment
metadata:
name: test
spec:
strategy:
type: RollingUpdate
rollingUpdate:
maxSurge: 2
maxUnavailable: 2
replicas: 3
selector:
matchLabels:
color: blue
template:
metadata:
labels:
color: blue
spec:
containers:
- name: test
image: nginx
---
apiVersion: v1
kind: Service
metadata:
name: test
spec:
selector:
color: blue
ports:
- name: http
protocol: TCP
port: 80 # 2️⃣ nodeport로 접속된 트래픽이 nodeport 서비스의 특정 포트(80/tcp)로 유입되면
targetPort: 80 # 3️⃣ 최종적으로 목적지 pod의 80번 포트로 전달함
nodePort: 30000 # 1️⃣ 외부에서 가상 머신의 어떤 포트로 접속하면
type: NodePort1️⃣ node Port 30000 -> 2️⃣ port 80 -> 3️⃣ target port 80
- nodePort 서비스 배포
dlrjsdn0414@cloudshell:~/0902 (rapa-0901-lgw)$ kubectl apply -f nginx1.yaml
deployment.apps/test unchanged
service/test created
dlrjsdn0414@cloudshell:~/0902 (rapa-0901-lgw)$ kubectl get svc
NAME         TYPE        CLUSTER-IP      EXTERNAL-IP   PORT(S)        AGE
kubernetes   ClusterIP   10.100.0.1      <none>        443/TCP        18h
test         NodePort    10.100.12.249   <none>        80:30000/TCP   7s
-> 30000 포트로 접속하면 내부의 80 포트로 연결
- 노드 정보 상세히 보기
dlrjsdn0414@cloudshell:~/0902 (rapa-0901-lgw)$ kubectl get node -o yaml- 노드 ip 주소 확인
dlrjsdn0414@cloudshell:~/0902 (rapa-0901-lgw)$ kubectl get node -o wide
NAME                                           STATUS   ROLES    AGE   VERSION            INTERNAL-IP   EXTERNAL-IP     OS-IMAGE             KERNEL-VERSION   CONTAINER-RUNTIME
gke-mytestcluster-default-pool-bd53b8ad-39ks   Ready    <none>   24h   v1.22.11-gke.400   10.174.0.3    34.97.148.98    Ubuntu 20.04.4 LTS   5.4.0-1076-gke   docker://19.3.8
gke-mytestcluster-default-pool-bd53b8ad-fk0z   Ready    <none>   24h   v1.22.11-gke.400   10.174.0.2    34.97.134.126   Ubuntu 20.04.4 LTS   5.4.0-1076-gke   docker://19.3.8
gke-mytestcluster-default-pool-bd53b8ad-ml13   Ready    <none>   24h   v1.22.11-gke.400   10.174.0.4    34.97.70.91     Ubuntu 20.04.4 LTS   5.4.0-1076-gke   docker://19.3.8
-> 30000 포트가 열려있지 않다.
- gcloud 방화벽 설정 -> 30000 허용
dlrjsdn0414@cloudshell:~/0902 (rapa-0901-lgw)$ gcloud compute firewall-rules create \
> permitnp --allow=tcp:30000
Creating firewall...working..Created [https://www.googleapis.com/compute/v1/projects/rapa-0901-lgw/global/firewalls/permitnp].
Creating firewall...done.
NAME: permitnp
NETWORK: default
DIRECTION: INGRESS
PRIORITY: 1000
ALLOW: tcp:30000
DENY:
DISABLED: False
각 노드 접속
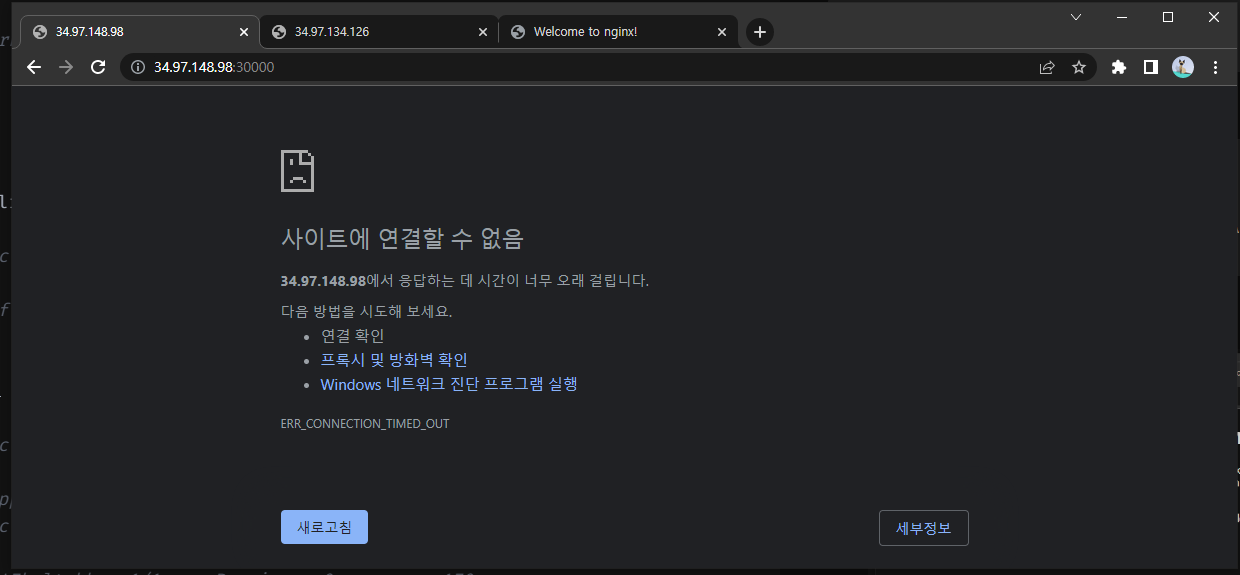
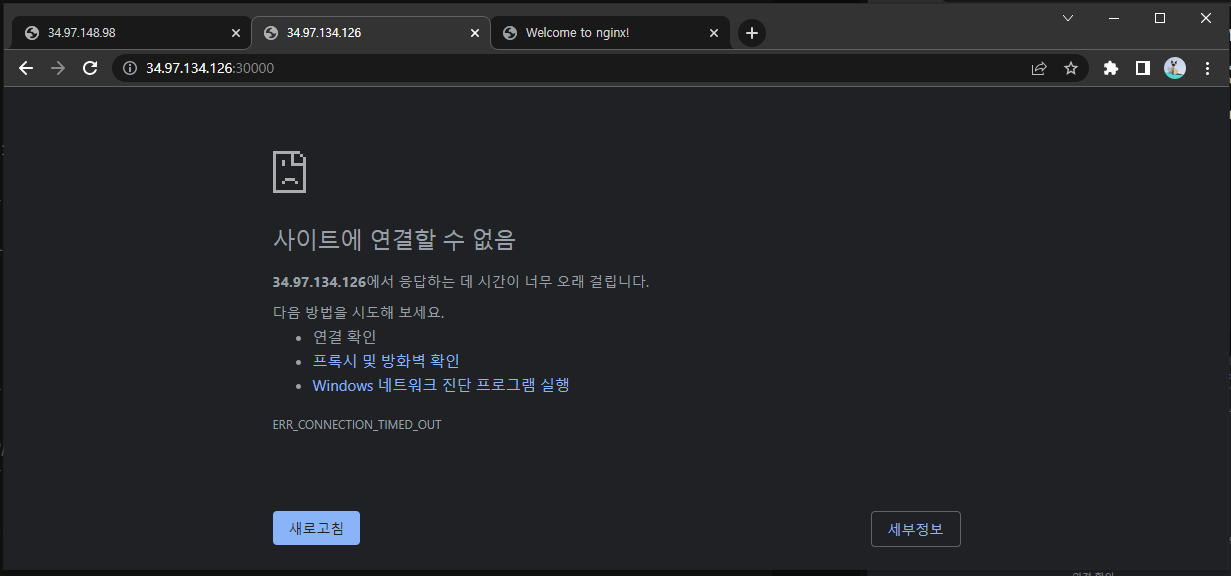
- 34.97.148.98:30000
- 34.97.134.126:30000
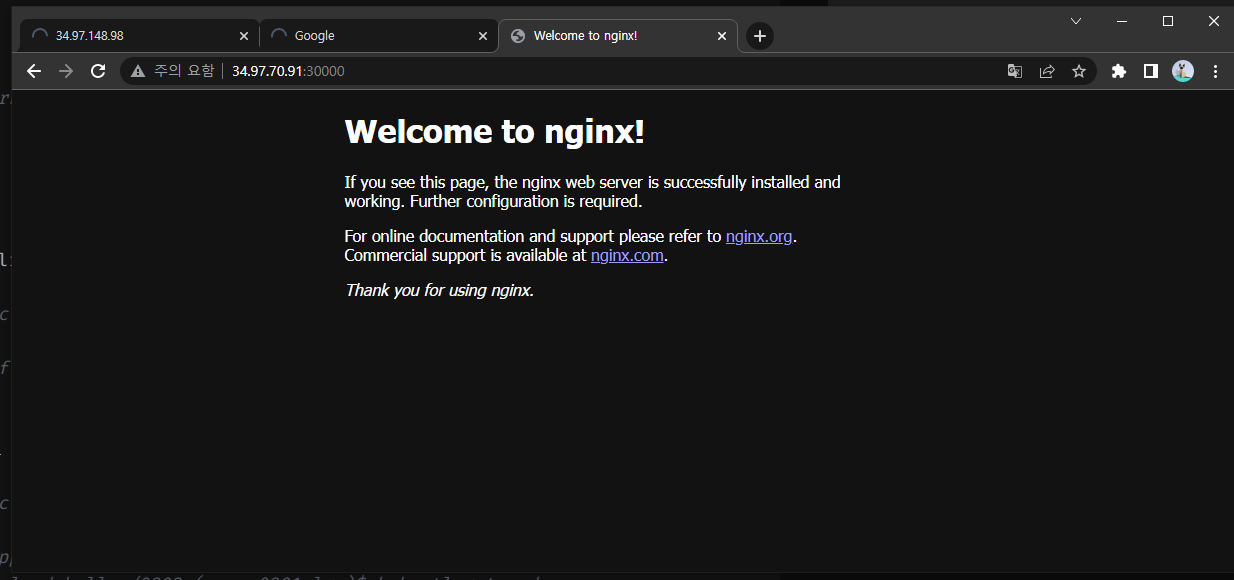
- 34.97.70.91:30000

- scale 1로 줄이기 (3 pods -> 1 pod)
dlrjsdn0414@cloudshell:~ (rapa-0901-lgw)$ kubectl scale \
> --replicas 1 \
> deploy test
deployment.apps/test scaled- pod 확인
dlrjsdn0414@cloudshell:~ (rapa-0901-lgw)$ kubectl get pod -o wide
NAME                    READY   STATUS    RESTARTS   AGE    IP           NODE                                           NOMINATED NODE   READINESS GATES
test-69454c947b-ltnbk   1/1     Running   0          154m   10.96.2.20   gke-mytestcluster-default-pool-bd53b8ad-ml13   <none>           <none>
dlrjsdn0414@cloudshell:~ (rapa-0901-lgw)$ kubectl get node -o wide | grep gke-mytestcluster-default-pool-bd53b8ad-ml13
gke-mytestcluster-default-pool-bd53b8ad-ml13 Ready <none> 26h v1.22.11-gke.400 10.174.0.4 34.97.70.91 Ubuntu 20.04.4 LTS 5.4.0-1076-gke docker://19.3.8External Traffic Policy 확인 (Cluster)
dlrjsdn0414@cloudshell:~ (rapa-0901-lgw)$ kubectl describe svc test | grep Traffic
External Traffic Policy:  Cluster
해당 노드에 pod가 없더라도 클러스터를 통해 다른 노드에 있는 pod로 트래픽이 전송된다. 이 때 hop을 바꾸기 때문에 결국 라우팅이 발생한다.
Local로 변경하면 해당 노드에 있는 pod로만 접속하게 되고 만약 pod가 없다면 서비스를 받을 수 없게 된다. 하지만 불필요한 라우팅은 없기 때문에 DataCenter에 부담을 줄일 수 있게 된다.
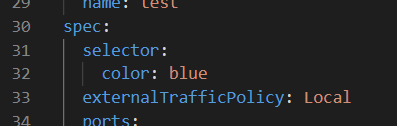
External Traffic Policy 변경 (Local)
dlrjsdn0414@cloudshell:~/0902 (rapa-0901-lgw)$ vi nginx1.yaml---
...
spec:
selector:
color: blue
externalTrafficPolicy: Local
...
- 재배포
dlrjsdn0414@cloudshell:~/0902 (rapa-0901-lgw)$ kubectl apply -f nginx1.yaml
deployment.apps/test configured
service/test configured- 배포 확인
dlrjsdn0414@cloudshell:~/0902 (rapa-0901-lgw)$ kubectl get pod,svc
NAME                        READY   STATUS    RESTARTS   AGE
pod/test-69454c947b-79m54   1/1     Running   0          16s
pod/test-69454c947b-898pd   1/1     Running   0          16s
pod/test-69454c947b-ltnbk   1/1     Running   0          167m

NAME                 TYPE        CLUSTER-IP      EXTERNAL-IP   PORT(S)        AGE
service/kubernetes   ClusterIP   10.100.0.1      <none>        443/TCP        20h
service/test NodePort 10.100.12.249 <none> 80:30000/TCP 94m- External Traffic Policy 확인 (Local)
dlrjsdn0414@cloudshell:~/0902 (rapa-0901-lgw)$ kubectl describe svc test | grep Traffic
External Traffic Policy: Local- scale 1개로 변경
dlrjsdn0414@cloudshell:~/0902 (rapa-0901-lgw)$ kubectl scale --replicas 1 deploy test
deployment.apps/test scaled
dlrjsdn0414@cloudshell:~/0902 (rapa-0901-lgw)$ kubectl get pod
NAME                    READY   STATUS    RESTARTS   AGE
test-69454c947b-ltnbk 1/1 Running 0 170m- 노드 접속해보기
세 페이지로 접속해 보면 한 곳에서만 정상적으로 페이지가 보이고 나머지 두 곳은 페이지로 접속이 되지 않는다.
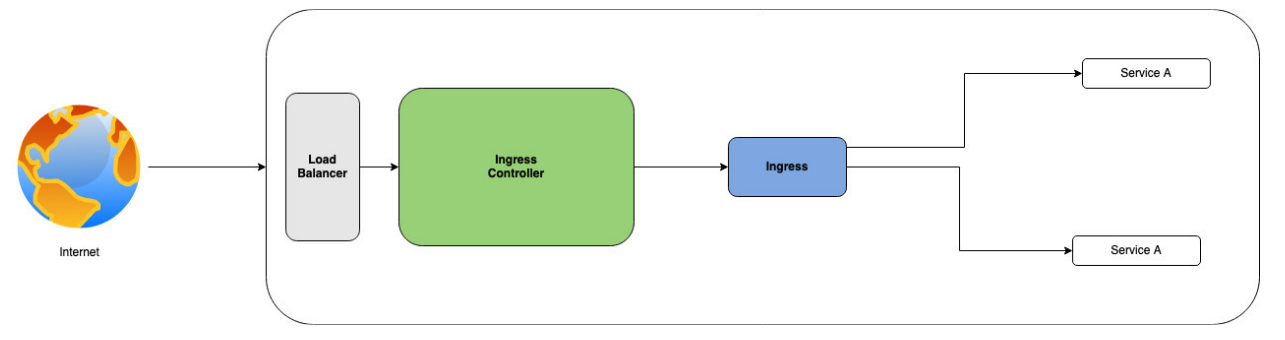
Ingress(인그레스)
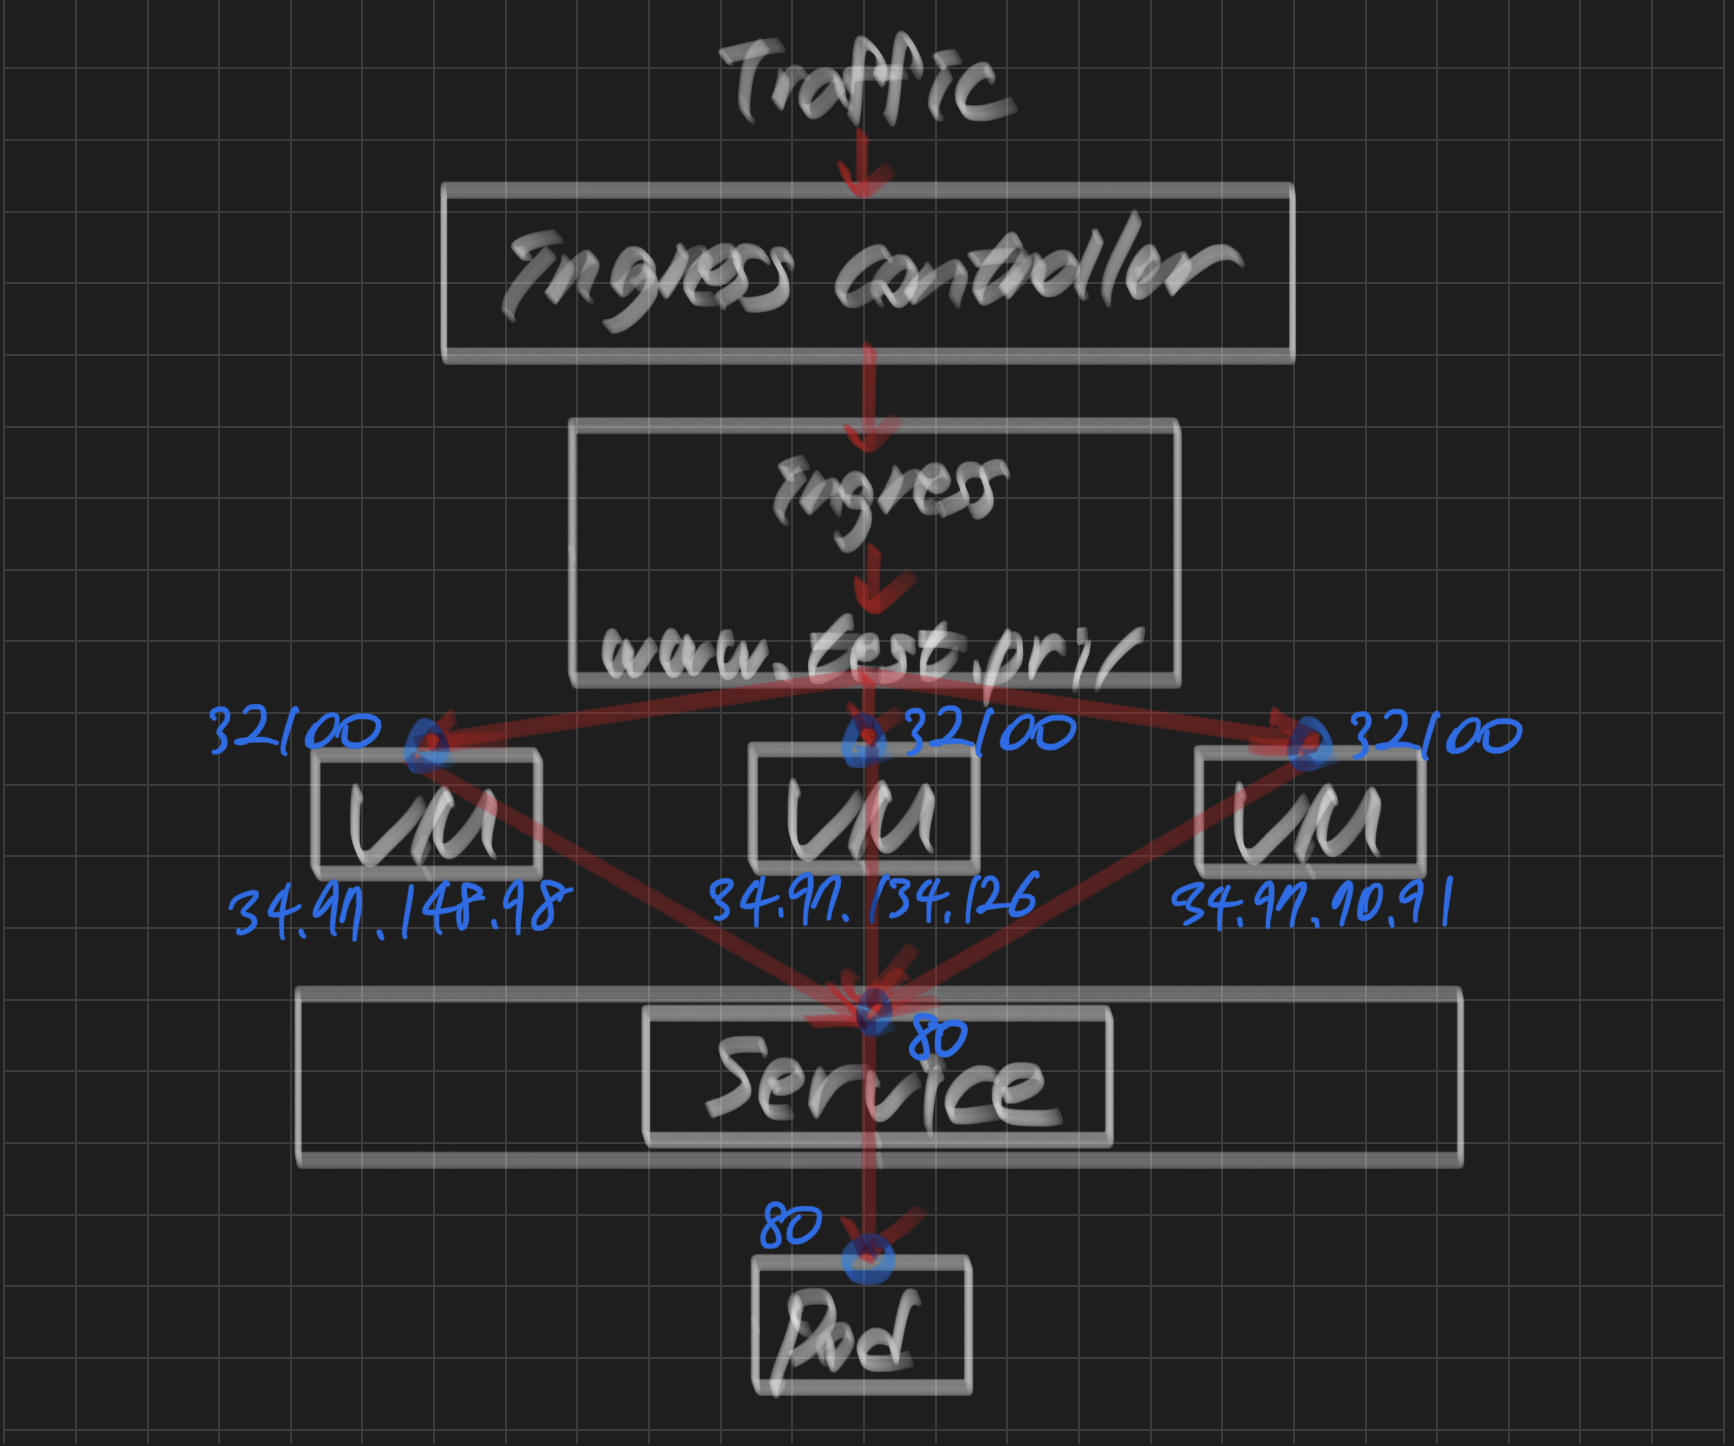

ingress는 svc와 연결하여 사용해야 한다.
LB | NodePort ---> ingress-controller
- hosts에 노드 등록
dlrjsdn0414@cloudshell:~ (rapa-0901-lgw)$ sudo vi /etc/hostsdlrjsdn0414@cloudshell:~ (rapa-0901-lgw)$ cat /etc/hosts
# Kubernetes-managed hosts file.
127.0.0.1 localhost
::1 localhost ip6-localhost ip6-loopback
fe00::0 ip6-localnet
fe00::0 ip6-mcastprefix
fe00::1 ip6-allnodes
fe00::2 ip6-allrouters
172.17.0.4 cs-756626654967-default
34.97.148.98 www.test.pri
34.97.134.126 www.test.pri
34.97.70.91 www.test.pristep 1) ingress yaml 파일 작성
dlrjsdn0414@cloudshell:~/0902 (rapa-0901-lgw)$ vi ingress.yamlapiVersion: networking.k8s.io/v1
kind: Ingress
metadata:
name: example # ingress 명
spec:
rules:
- host: www.test.pri
http:
paths:
- path: /
pathType: Prefix
backend:
service:
name: example # 서비스 명
port:
number: 80 # nodePort Service의 포트 번호 step 2) ingress controller 배포
dlrjsdn0414@cloudshell:~/0902 (rapa-0901-lgw)$ kubectl apply -f \
https://raw.githubusercontent.com/kubernetes/ingress-nginx/controller-v1.1.2/deploy/static/provider/cloud/deploy.yaml

namespace/ingress-nginx created
serviceaccount/ingress-nginx created
serviceaccount/ingress-nginx-admission created
role.rbac.authorization.k8s.io/ingress-nginx created
role.rbac.authorization.k8s.io/ingress-nginx-admission created
clusterrole.rbac.authorization.k8s.io/ingress-nginx created
clusterrole.rbac.authorization.k8s.io/ingress-nginx-admission created
rolebinding.rbac.authorization.k8s.io/ingress-nginx created
rolebinding.rbac.authorization.k8s.io/ingress-nginx-admission created
clusterrolebinding.rbac.authorization.k8s.io/ingress-nginx created
clusterrolebinding.rbac.authorization.k8s.io/ingress-nginx-admission created
configmap/ingress-nginx-controller created
service/ingress-nginx-controller created
service/ingress-nginx-controller-admission created
deployment.apps/ingress-nginx-controller created
job.batch/ingress-nginx-admission-create created
job.batch/ingress-nginx-admission-patch created
ingressclass.networking.k8s.io/nginx created
validatingwebhookconfiguration.admissionregistration.k8s.io/ingress-nginx-admission created- ingress 컨트롤러 배포 확인
dlrjsdn0414@cloudshell:~/0902 (rapa-0901-lgw)$ kubectl get pods -A | grep nginx-controller
ingress-nginx   ingress-nginx-controller-cb87575f5-xrssb                  1/1     Running     0          52s
dlrjsdn0414@cloudshell:~/0902 (rapa-0901-lgw)$ kubectl get pod -n ingress-nginx
NAME READY STATUS RESTARTS AGE
ingress-nginx-admission-create-kjgg9 0/1 Completed 0 2m17s
ingress-nginx-admission-patch-bjqnf 0/1 Completed 0 2m16s
ingress-nginx-controller-cb87575f5-xrssb 1/1 Running 0 2m17sstep 3) 서비스 실행을 위한 pod 배포 (pod/example)
dlrjsdn0414@cloudshell:~/0902 (rapa-0901-lgw)$ kubectl run example \
> --image=nginx
pod/example created- pod의 80번 포트 expose
dlrjsdn0414@cloudshell:~/0902 (rapa-0901-lgw)$ kubectl expose pod example \
> --port=80 \
> --name example \
> --type=NodePort
service/example exposed- 포트 확인
dlrjsdn0414@cloudshell:~/0902 (rapa-0901-lgw)$ kubectl get svc
NAME         TYPE        CLUSTER-IP      EXTERNAL-IP   PORT(S)        AGE
example      NodePort    10.100.12.239   <none>        80:32100/TCP   62s
kubernetes   ClusterIP   10.100.0.1      <none>        443/TCP        21h
test         NodePort    10.100.12.249   <none>        80:30000/TCP   163m
-> 랜덤 포트는 32100
-> www.test.pri:32100 --> nodeport:80 --> pod/example:80
step 4) ingress의 yaml에 메타데이터 추가
dlrjsdn0414@cloudshell:~/0902 (rapa-0901-lgw)$ vi ingress.yamlmetadata:
name: example # ingress 명
annotations:
nginx.ingress.kubernetes.io/rewrite-target: /$1
kubernetes.io/ingress.class: "nginx" 
참고:
Nginx Ingress Controller Annotations - Rewirte
https://gruuuuu.github.io/cloud/ingress-annotations/
163. [Kubernetes] 2편 : 쿠버네티스 Ingress의 ClusterIP Bypass, Annotation, SSL/TLS를 위한 인증서 적용
https://blog.naver.com/PostView.naver?blogId=alice_k106&logNo=221503924911&redirect=Dlog&widgetTypeCall=true&directAccess=false
step 5) ingress 배포
dlrjsdn0414@cloudshell:~/0902 (rapa-0901-lgw)$ kubectl apply -f ingress.yaml
ingress.networking.k8s.io/example created
step 5) gcloud 방화벽 설정 -> 32100 허용
dlrjsdn0414@cloudshell:~/0902 (rapa-0901-lgw)$ gcloud compute firewall-rules create \
> permitingress --allow=tcp:32100
Creating firewall...working..Created [https://www.googleapis.com/compute/v1/projects/rapa-0901-lgw/global/firewalls/permitingress].
Creating firewall...done.
NAME: permitingress
NETWORK: default
DIRECTION: INGRESS
PRIORITY: 1000
ALLOW: tcp:32100
DENY:
DISABLED: False
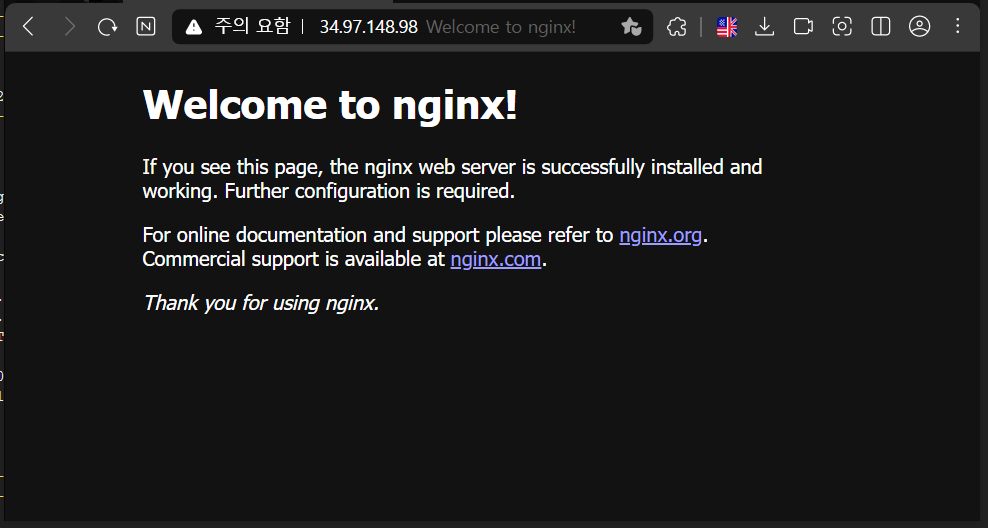
dlrjsdn0414@cloudshell:~/0902 (rapa-0901-lgwstep 6) 노드 접속 (http://www.test.pri:32100)
dlrjsdn0414@cloudshell:~/0902 (rapa-0901-lgw)$ curl -L http://www.test.pri:32100/
<!DOCTYPE html>
<html>
<head>
<title>Welcome to nginx!</title>
<style>
html { color-scheme: light dark; }
body { width: 35em; margin: 0 auto;
font-family: Tahoma, Verdana, Arial, sans-serif; }
</style>
</head>
<body>
<h1>Welcome to nginx!</h1>
<p>If you see this page, the nginx web server is successfully installed and
working. Further configuration is required.</p>

<p>For online documentation and support please refer to
<a href="http://nginx.org/">nginx.org</a>.<br/>
Commercial support is available at
<a href="http://nginx.com/">nginx.com</a>.</p>

<p><em>Thank you for using nginx.</em></p>
</body>
</html>
HPA(Horizontal Pod Autoscaler)
kubernetes에서 loadbalancer는 public과 openstack(로드밸런서)과 같은 클라우드 환경에서 사용이 가능하다. 만약 on-premise에서 LB를 사용하고 싶다면 k8s와 연계가 가능한 별도의 object가 필요하다. 이를 metallb를 통해 제공할 수 있다.
- HPA를 통한 오토스케일 구성
root@master:~# kubectl autoscale deploy autoscaletest \
> --cpu-percent=20 \
> --min=1 \
> --max=10
horizontalpodautoscaler.autoscaling/autoscaletest autoscaled- 외부에서 부하 발생시키기
[root@storage k8s]# ab -c 1000 -n 200 -t 60 http://211.183.3.101:30001/- gnuplot으로 확인해볼 수 있음
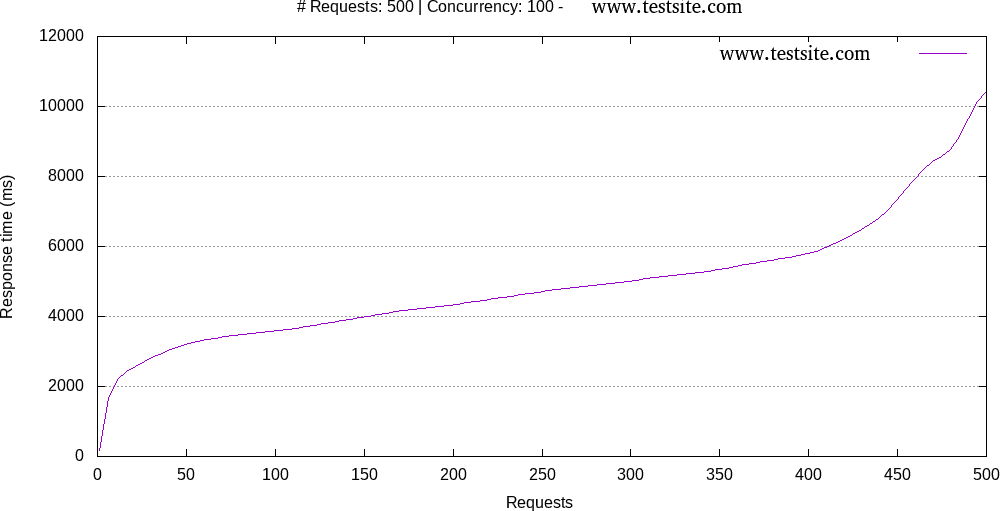
https://www.juanbaptiste.tech/2019/12/automating-apache-bench-results-plotting.html

잘보고 가요!!