롬복 (Lombok)
- 자바 개발자들의 필수 라이브러리이다.
- 자주 사용하는 Getter, Setter, 기본생성자, toString 등을 어노테이션으로 자동 생성해 준다.
- 롬복은 이미 설치 되어있어서 어노테이션만 설정 해준다.
- 플러그인 설치는 한번만 해도 되지만 롬복 설정(Enable annotation processing)과 라이브러리 추가는 프로젝트마다 설정 해야한다.

HelloController를 롬복으로 리팩토링 하기
1. dto 패키지, HelloResponseDto클래스 생성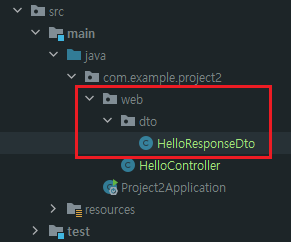
📌 HelloResponseDto클래스
package com.example.project2.web.dto;

import lombok.Getter;
import lombok.RequiredArgsConstructor;

@Getter //(1) ❓
@RequiredArgsConstructor //(2) ❓
public class HelloResponseDto {

    private final String name;
    private final int amount;
}
(1) @Getter
- 클래스 위에 쓸 경우 선언된 모든 필드의 get 메소드를 생성해준다.
(2) @RequiredArgsConstructor
- 선언된 모든 final필드가 포함된 생성자를 생성해 준다.
- final이 없는 필드는 생성자에 포함되지 않는다.
2. test파일에 dto 패키지, HelloResponseDto클래스 생성
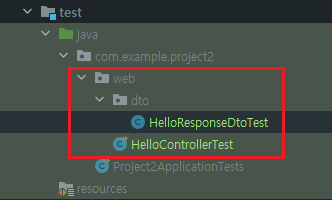
📝 HelloResponseDtoTest 클래스
package com.example.project2.web.dto;

import org.junit.Test;

import static org.assertj.core.api.Assertions.assertThat;


public class HelloResponseDtoTest {

    @Test
    public void lombokTest(){
        //given
        String name = "test";
        int amount = 1000;

        //when
        HelloResponseDto dto = new HelloResponseDto(name,amount);

        //then
        assertThat(dto.getName()).isEqualTo(name); //(1) (2) ❓
        assertThat(dto.getAmount()).isEqualTo(amount);

    }
}
(1) assertThat
- assertj라는 테스트 검증 라이브럴리의 검증 메소드
- 검증하고 싶은 대상을 메소드 인자로 받는다.
- 메소드 체이닝이 지원되어 isEqualTo와 같이 메소드를 이어서 사용할 수 있다.
(2) isEqualTo
- assertj의 동등 비교 메소드
- assertThat에 있는 값과 isEqualTo의 값을 비교해서 같을 때만 성공
🔔 assertj의 장점
여기서 Junit의 기본 assertThat이 아닌 assertj의 assertThat을 사용했다.
assertj도 역시 Junit에서 자동으로 라이브러리 등록을 해준다.
- coreMatchers와 달리 추가적으로 라이브러리가 필요하지 않다. (Junit의 assertThat을 쓰게 되면 is()와 같이 Core Matchers라이브러리가 필요함)
- 자동완성이 좀 더 확실하게 지원된다. (IDE에서는 CoreMatchers 와 같은 Matcher 라이브러리의 자동완성 지원이 약하다.)
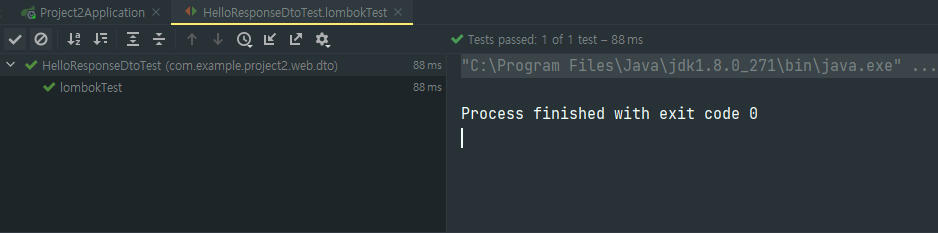
dto 테스트 성공
3. HelloController에 ResponseDto 적용
📌 HelloController 클래스에 코드 추가
package com.example.project2.web;

import com.example.project2.web.dto.HelloResponseDto;
import org.springframework.web.bind.annotation.GetMapping;
import org.springframework.web.bind.annotation.RequestParam;
import org.springframework.web.bind.annotation.RestController;

@RestController
public class HelloController {

    @GetMapping("/hello")
    public String hello(){
        return "hello";
    }
/***************************************INSERST****************************************/

    @GetMapping("/hello/dto")
    public HelloResponseDto helloDto(@RequestParam("name") String name, // ❓
                                     @RequestParam("amount") int amount){
        return new HelloResponseDto(name, amount);
    }

/*****************************************End****************************************/
}
@RequestParam
- 외부에서 API로 넘긴 파라미터를 가져오는 어노테이션
- 여기서는 외부에서 name(@RequestParam("name"))이란 이름으로 넘긴 파라미터를 메소드 파라미터 name(String name)에 저장하게 된다.
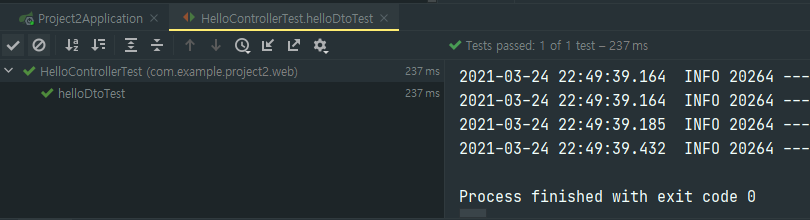
4. API 테스트
📝 HelloControllerTest 클래스에 코드 추가
package com.example.project2.web;

import org.junit.Test;
import org.junit.runner.RunWith;
import org.springframework.beans.factory.annotation.Autowired;
import org.springframework.boot.test.autoconfigure.web.servlet.WebMvcTest;
import org.springframework.test.context.junit4.SpringRunner;
import org.springframework.test.web.servlet.MockMvc;

import static org.hamcrest.Matchers.is;
import static org.springframework.test.web.servlet.request.MockMvcRequestBuilders.get;
import static org.springframework.test.web.servlet.result.MockMvcResultMatchers.*;

@RunWith(SpringRunner.class)
@WebMvcTest(controllers = HelloController.class)
public class HelloControllerTest {

    @Autowired
    private MockMvc mvc;

    @Test
    public void helloTest() throws Exception{
        String hello = "hello";

        mvc.perform(get("/hello"))
                .andExpect(status().isOk())
                .andExpect(content().string(hello));
    }
/***************************************INSERST****************************************/

   @Test
    public void helloDtoTest() throws Exception{
        String name = "hello";
        int amount =1000;

        mvc.perform(get("/hello/dto").param("name", name) //(1) ❓
                                     .param("amount", String.valueOf(amount)))
                .andExpect(status().isOk())
                .andExpect(jsonPath("$.name", is(name))) //(2) ❓
                .andExpect(jsonPath("$.amount", is(amount)));

/*****************************************End****************************************/
    }
}
(1) param
- API테스트할 때 사용될 요청 파라미터를 설정
- 단, 값은 String 만 허용
- 그래서 숫자/날짜 등의 데이터도 등록할 때는 문자열로 변경해야 한다.
(2) jsonPath
- JSON 응답값을 필드별로 검증할 수 있는 메소드
- $ 를 기준으로 필드명을 명시
- 여기서는 name과 amount를 검증하기 때문에 $.name $.amount로 검증한다.