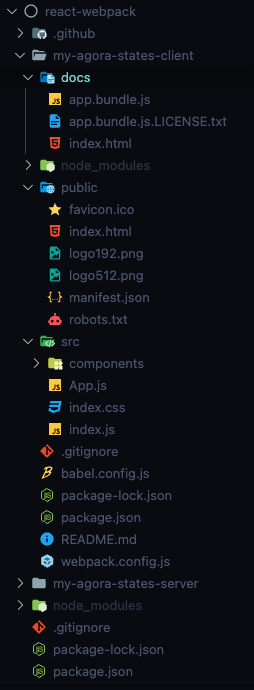
최종 디렉토리 구조
- client와 server가 같이 있는 레포지토리.
- server 디렉토리 쪽은 신경 안 써도 됨. (👉🏽 서버와 클라이언트는 따로 배포되어야 한다! server 디렉토리는 실제 작업에서는 없을 디렉토리..)
1. package.json
1) package.json 파일 있는지 확인
- 없으면 🦄
npm init -y로 생성
2) script에 build 추가
npm run build로 webpack이 실행되도록 추가
package.json
{
  "name": "my-agora-states-client",
  "version": "0.1.0",
  "private": true,
  "dependencies": {
    "@testing-library/jest-dom": "^5.16.4",
    "@testing-library/react": "^13.3.0",
    "@testing-library/user-event": "^13.5.0",
    "react": "^18.2.0",
    "react-dom": "^18.2.0",
    "react-scripts": "5.0.1",
    "web-vitals": "^2.1.4"
  },
  "scripts": {
    "start": "react-scripts start",
    "build": "webpack", // 👉🏽 build script 설정
    "test": "react-scripts test",
    "eject": "react-scripts eject"
  },
 ...
  "devDependencies": {
    "@babel/core": "^7.20.2",
    "@babel/preset-env": "^7.20.2",
    "@babel/preset-react": "^7.18.6",
    "babel-loader": "^9.1.0",
    "css-loader": "^6.7.2",
    "html-webpack-plugin": "^5.5.0",
    "style-loader": "^3.3.1",
    "webpack": "^5.75.0",
    "webpack-cli": "^5.0.0"
  }
}
2. entry 파일
- 보통
./src/index.js(기본값)
1) 디펜던시 export 하기
- 디펜던시 파일에서 export 해주고
src > App.js
import { Form, Discussions } from "./components";
import { useEffect, useState } from "react";

function App() {
 ...
}

export default App; // export 해주기
index.js의 디펜던시인App.js를 export 해준 것.- 그 외 서로 의존적인 파일, 모듈들 export, import로 연결해주기.
2) entry 파일에 디펜던시 불러오기
- entry 파일(
./src/index.js)에서 불러오기
src > index.js
import React from 'react';
import ReactDOM from 'react-dom/client';
import './index.css';
import App from './App';
...
- App.js, CSS 등 entry 파일의 디펜던시들 불러오기
3. webpack.config.js
1) 웹팩 설치하기
devDependency옵션을 설정하고 설치
🦄 npm install -D webpack webpack-cli
2) webpack.config.js 파일 설정하기
- 처음에는
entry,output정도만 설정해놓고
const path = require('path'); // path 모듈 불러오기

module.exports = {
  entry: './src/index.js', // entry 경로 지정
  output: {
    path: path.resolve(__dirname, 'docs'), // 번들 파일 출력될 경로와 파일 이름 지정
    filename: 'app.bundle.js',
  },
};
- Github Page로 배포하려면 output의 path를
'docs'로 설정해줘야 한다.
- 로더, 플러그인 추가할 때마다 그에 맞춰서 수정
const path = require('path');  // 🐿 path 모듈 불러오기
const HtmlWebpackPlugin = require('html-webpack-plugin'); // 🐿 플러그인은 불러오기 필요

module.exports = {
  entry: './src/index.js', // 🐿 entry 파일 경로, 파일 이름 확인
  output: { // 🐿 output 파일 경로, 파일 이름 확인
    path: path.resolve(__dirname, 'docs'),
    filename: 'app.bundle.js',
  },
  module: {
    rules: [
      {
        test: /\.js$/, // 파일명이 .js로 끝나는 모든 파일에 적용
        loader: 'babel-loader',   //  🐿 babel-loader 설정
        exclude: /node_modules/, // node_modules 안의 파일은 번들링 제외
      },
      {
        test: /\.css$/, // 파일명이 .css로 끝나는 모든 파일에 적용
        use: ['style-loader', 'css-loader'],  //  🐿 CSS 관련 로더 설정 (순서 지키기)
        exclude: /node_modules/, // node_modules 안의 파일은 번들링 제외
      },
    ],
  },
  plugins: [
    new HtmlWebpackPlugin({
      template: path.resolve(__dirname, 'public',  'index.html'), // 🐿 HTML 관련 플러그인 설정 (HTMl 파일 경로, 파일이름 확인)
    }),
  ],
  mode: 'development', // mode 추가 (안 하면 경고 뜸)
};
-
웹팩이 번들링 할 때
node_modules디렉토리 중 적용되는 파일까지 번들링하지 않도록exclude에 설정해준다. -
mode 추가하기 (상황에 따라
production또는 development`로) (아니면 아래 경고 뜸)
4. Loder, Plugin 설치
1) Babel 로더 설치
-
babel-loader등 설치
(babel-loader와 함께 설정값인core,preset-env,preset-react를 설치해준다) -
리액트는 파일이 JS가 아닌 JSX로 작성되어 있기 때문에 JSX를 JS로 변환해서 읽을 수 있게 해주는
babel-loader가 필요하다.
🦄 npm i -D babel-loader @babel/core @babel/preset-env @babel/preset-react
babel/core: 바벨 코어babel/preset-env: ES6+ 코드를 ES5 코드로 변환시켜줌babel/preset-react: jsx지원babel-loader: 바벨과 웹팩을 연결
2) 필요한 로더, 플러그인 설치하기
css-loaderstyle-loader설치
🦄 npm i -D css-loader style-loader
html-webpack-plugin설치
🦄 npm i -D html-webpack-plugin
2) webpack.config.js에서 설정 수정하기
- 설치한 로더, 플러그인에 맞춰서
webpack.config.js수정
5. babel.config.js
- 바벨의 경우, 설치하고 난 후에 따로 설정 파일을 만들어주어야 한다.
babel.config.js
module.exports = {
  presets: [
    ["@babel/preset-env"],
    ["@babel/preset-react", { runtime: "automatic" }],
  ],
};
6. 번들링
1) 웹팩으로 번들링 하기
npx webpack또는
npm run build
7. 번들 파일 확인
- output 경로에 번들 파일 제대로 생성됐는지 확인
1) HTML 파일 확인
-
HTML 파일에
<script defer="defer" src="app.bundle.js"></script>로 번들 JS 파일 연결됐는지 확인 -
아래 코드들 없는지 확인
: CSS, 데이터 모듈 등 디펜던시는 모두 entry JS 안에 불러와서 번들 파일로 만들었고, 번들 JS 파일은 위 코드로 연결시켰으므로 아래 코드들은 필요 X)(
<head>안에)
<link rel="stylesheet" href="style.css">(
<body>아래)
<script src="data.js"></script>
<script src="script.js"></script>
docs > index.html
<!DOCTYPE html>
<html lang="en">
  <head>
    <meta charset="UTF-8" />
    <meta http-equiv="X-UA-Compatible" content="IE=edge" />
    <meta name="viewport" content="width=device-width,initial-scale=1" />
    <title>My Agora States</title>
    <script src="https://..."></script>
    <script defer="defer" src="app.bundle.js"></script>
  </head>
  <body>
    <main>
      <h1>My Agora States</h1>
      ...
      </section>
    </main>
  </body>
</html>
8. 배포하기 (Github Page)
1) 작업한 결과물을 Github 레포지토리 만들어서 올린다.
2) 해당 레포지토리의 Settings > Pages
3) Branch에서 해당 브랜치 선택 - /docs 선택 - save

Advenced
1. 작동 모드 설정 - 개발환경과 배포환경 나누기
- 웹팩 설정 파일(
webpack.config.js)에 mode 속성을 추가해서 사용할 수 있다.
production 모드
- 배포 모드 (기본 값)
- 웹팩 모듈 번들링 과정에서 코드를 최적화해서 용량을 줄여준다.
development 모드
- 개발 모드
- 안전한 로컬 환경에서 개발한다고 가정하고, 편리한 개발을 위해 어느 파일에서 에러가 발생했는지도 알려주는 최적화되지 않은 번들 파일을 제공한다.
2. Output 관리
clean: true
clean속성 : 번들링 할 때마다/dist(또는/docs; 아웃풋 저장되는 폴더)에 해당 번들링으로 생성된 파일만 있도록 정리된다. (이전의 파일들은 지워짐)
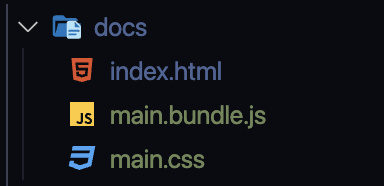
filename : [name].bundle.js
- 번들 파일 이름 동적으로 맵핑
filename의 값을[name].bundle.js로 지정하면, Entry가 여러 개일 때 각각 해당 파일의 이름으로 맵핑되어 번들 파일이 생성된다. (Entry가 한 개일 때는main.bundle.js로 생성)- (코드 스플리팅을 이런 방식으로 할 수 있다.)
webpack.config.js
...
output: {
     filename: '[name].bundle.js',
     path: path.resolve(__dirname, 'dist'),
    clean: true,
   },
3. Asset 관리
- CSS에 minify를 적용
mini-css-extract-plugin: CSS 파일을 별도로 추출css-minimizer-webpack-plugin: CSS를 최적화(압축)
1) 설치하기
npm install -D mini-css-extract-plugin css-minimizer-webpack-plugin
2) webpack.config.js에서 플러그인 설정
webpack.config.js
const MiniCssExtractPlugin = require('mini-css-extract-plugin'); // 🐿 불러오기
const CssMinimizerPlugin = require('css-minimizer-webpack-plugin'); // 🐿 불러오기

...
module: {
    rules: [
      {
      ...
        test: /\.css$/,
        use: ['style-loader', MiniCssExtractPlugin.loader, 'css-loader'], // 🐿 MiniCssExtractPlugin.loader 가운데 넣기
        exclude: /node_modules/,
      },
    ],
  },
  plugins: [
    new HtmlWebpackPlugin({
      template: path.resolve(__dirname, 'public', 'index.html'),
    }),
    new MiniCssExtractPlugin(), // 🐿 플러그인 추가
  ],
  optimization: {
    minimizer: [new CssMinimizerPlugin()], // 🐿 최적화 관련이기 때문에 optimization 속성 만들어서 작성
  },
  mode: 'development',
};
3) 결과 확인
npm run build로 빌드 새로 하면 CSS 파일이 따로 생긴 것을 볼 수 있다. (main.css)
4) style-loader 지우기
MiniCssExtractPlugin.loader를 사용하면style-loader는 더 이상 필요가 없으므로 웹팩 설정에서 지워준다.
webpack.config.js
...
use: [MiniCssExtractPlugin.loader, 'css-loader'],
...
4. 개발용 서버
webpack-dev-server: 간단한 웹 서버와 실시간 다시 로딩 기능을 제공 (라이브 서버와 비슷)
1) 설치하기
npm install --save-dev webpack-dev-server
2) 웹팩 설정하기
devServer속성 설정하기optimization속성에runtimeChunk: 'single'설정하기
webpack.config.js
module.exports = {
 ...
  devServer: {            // 🐿
    static: './dist',
  },
  ...
   optimization: {
    minimizer: [new CssMinimizerPlugin()],
    runtimeChunk: 'single' // 🐿
  },
3) 스크립트 추가하기
pacakge.json
 "scripts": {
 ..
    "start": "webpack serve --open"
  },
5. eslint 설치
- 코드에 문제가 없는지 검사하는 eslint
기본 eslint 설치
1) 설치하기
// 기본 eslint
npm install -D eslint eslint-plugin-react @babel/eslint-parser

// JSX에서 웹 접근성을 지키는 eslint
npm install -D eslint-plugin-jsx-a11y
2) scripts 추가
pacakge.json
"lint": "eslink ./src",
3) eslint 설정 파일 작성
.eslintrc.js
module.exports = {
  parser: "@babel/eslint-parser",
  env: {
    browser: true,
    commonjs: true,
    es6: true,
    node: true,
  },
  extends: [
    "eslint:recommended",
    "plugin:react/recommended",
    "plugin:jsx-a11y/recommended",
  ],
  parserOptions: {
    ecmaFeatures: {
      jsx: true,
    },
    ecmaVersion: 2018,
    sourceType: "module",
  },
  settings: {
    react: {
      version: "18.2.0",
    },
  },
  plugins: ["react"],
  rules: {
    "react/react-in-jsx-scope": 0,
    "react/jsx-uses-react": 0,
    "react/prop-types": 0,
  },
};
6. prettirer 설치
- 코드 형식을 통일해주는 prettier
1) 설치하기
npm install -D prettier
2) script 추가
pacakge.json
"pretty": "prettier --write ./",
3) prettier 설정 파일 작성
.prettierrc.js
module.exports = {
  singleQuote: true,
  jsxSingleQuote: true,
};
7. 더 공부할 것...
react-hot-reloaderwebpack-bundle-analyzer: 웹팩 번들에 얼마나 많은 모듈이 포함되어 있는지 쉽게 분석할 수 있게 해준다.
참고