HTML도 번들에 포함시켜 보자!
실제 개발 과정에서처럼 HTML 작성하기 (위치 옮기기)
dist디렉토리에 있던index.html파일을src디렉토리로 옮긴다.
1. 플러그인 설치
- HTML 파일을 원하는 형태로 가공해 번들에 포함할 수 있게 돕는
html-webpack-plugin플러그인 설치
npm i -D html-webpack-plugin
2. webpack.config.js에 플러그인 적용
webpack.config.js
const path = require("path");
const HtmlWebpackPlugin = require('html-webpack-plugin')

module.exports = {
  entry: "./src/index.js",
  output: {
    path: path.resolve(__dirname, "dist"),
    filename: "app.bundle.js",
  },
  module: {
    rules: [
      {
        test: /\.css$/,
        use: ["style-loader", "css-loader"],
        exclude: /node_modules/,
      },
    ],
  },
  plugins: [new HtmlWebpackPlugin({
    template: path.resolve(__dirname, "src", "index.html")
  })]
};
🔥🔥🔥 플러그인
-
번들링 과정 중에 개발자가 원하는 다양한 작업을 할 수 있도록 도와준다.
3. 번들링하기
npm run build로 새로 번들링
👉🏽dist디렉토리에 새로운index.html파일이 생성된 것을 볼 수 있다. (src/index.html은 그대로 있음)
dist > index.html
<html lang="en">
  <head>
    <meta charset="UTF-8" />
    <meta http-equiv="X-UA-Compatible" content="IE=edge" />
    <meta name="viewport" content="width=device-width,initial-scale=1" />
    <title>Shout Lorem Ipsum</title>
    <script defer="defer" src="app.bundle.js"></script> // 플러그인이 자동으로 넣어 줌
  </head>
  <body>
    <main>
      <h1>Shout Lorem Ipsum Once</h1>
      <div id="app"></div>
    </main>
    <script src="app.bundle.js"></script> // 지워주기...아니면 두 번 실행됨...QQQ???
  </body>
</html>
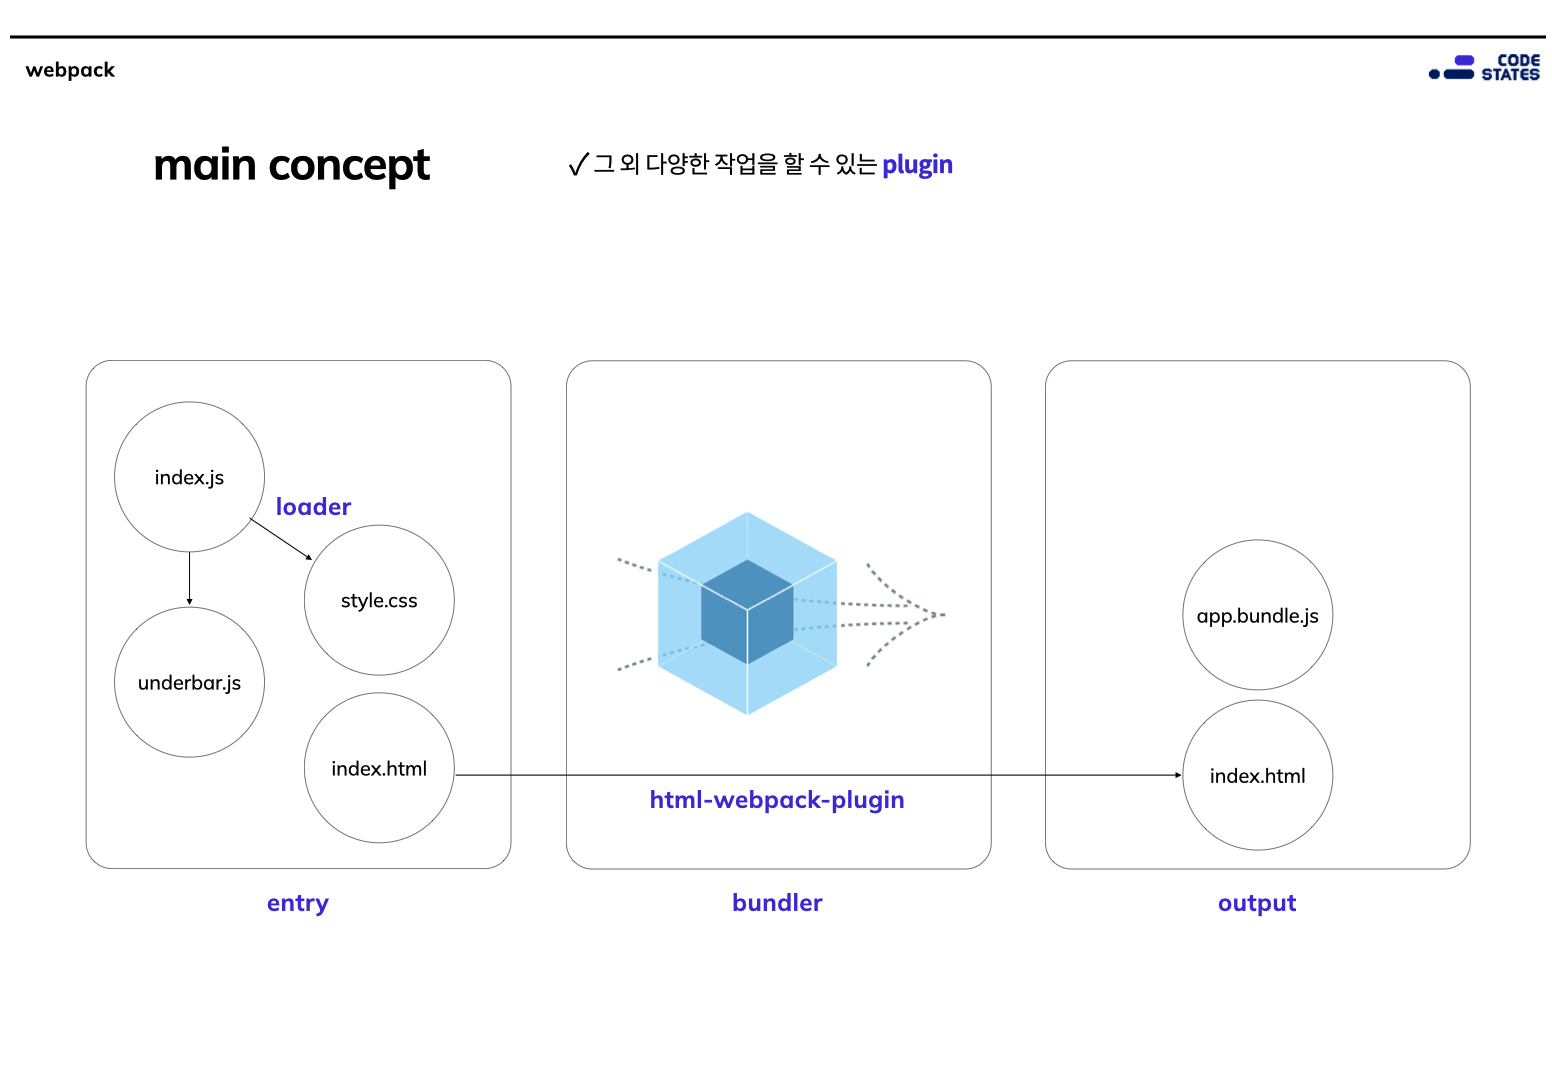
- 플러그인이 HTML 파일을 원하는 형태로 가공해 번들에 포함될 수 있도록 도와준다.
- 번들 파일(
app.bundle.js과 자동으로 연결될 수 있도록 HTML 파일에<script defer="defer" src="app.bundle.js"></script>코드를 자동으로 넣어준다.- (CSS는
app.bundle.js에 연결되어 있다.)
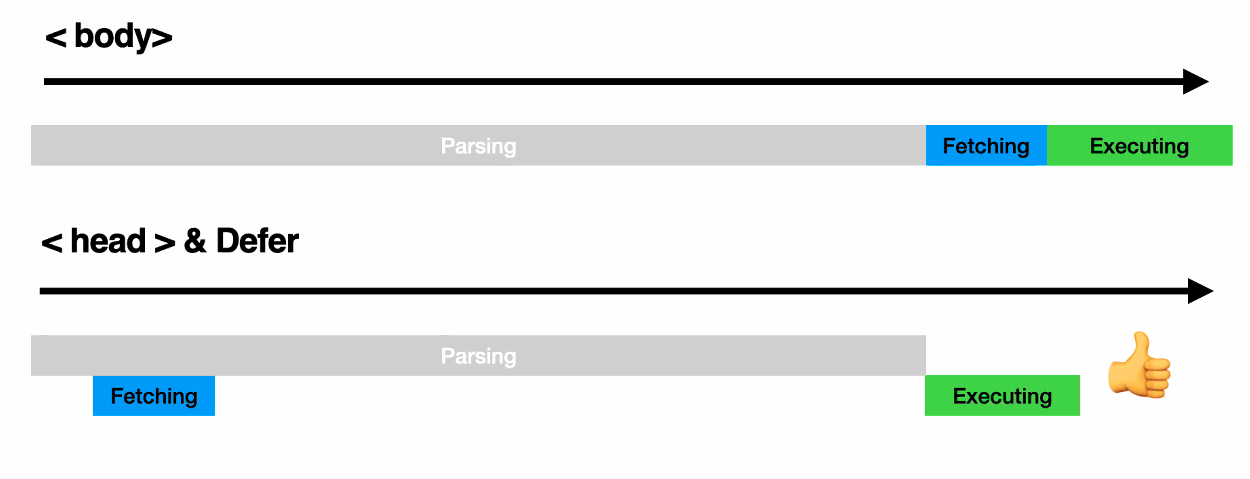
<script>요소를 body의 마지막에 넣는 경우와 defer 속성을 주고 head에 넣는 경우 비교
defer속성이 있는<script>요소는 HTML 파싱 과정에서 Fetching만 하고 실행은 파싱이 다 끝난 후에 한다. 시간을 훨씬 줄여줌!