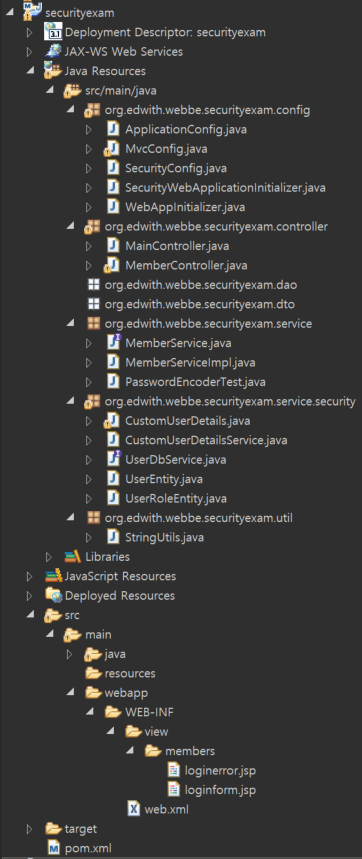
- Directory 구조
1. PasswordEncoder 테스트
PasswordEncoderTest.java
/* SecurityConfig.java 파일에서 PasswordEncode 객체를 Bean으로 등록했다.
 * 해당 Bean을 테스트하여 암호가 인코딩되는지 확인하자
 */

package org.edwith.webbe.securityexam.service;

import org.edwith.webbe.securityexam.config.ApplicationConfig;
import org.edwith.webbe.securityexam.config.SecurityConfig;
import org.junit.Test;
import org.junit.runner.RunWith;
import org.springframework.beans.factory.annotation.Autowired;
import org.springframework.security.crypto.password.PasswordEncoder;
import org.springframework.test.context.ContextConfiguration;
import org.springframework.test.context.junit4.SpringJUnit4ClassRunner;

// 스프링 빈 컨테이너가 관리하는 빈을 테스트하려면 @RunWith와 @ContextConfiguration 어노테이션을 사용
@RunWith(SpringJUnit4ClassRunner.class)
@ContextConfiguration(classes = {ApplicationConfig.class, SecurityConfig.class})
public class PasswordEncoderTest {
    @Autowired
    PasswordEncoder passwordEncoder;

    /* passwordEncode의 encode메소드를 이용해 문자열 "1234"를 인코딩한 후 출력(원래는 assert 메서드로 검사하는 것이 정석)
     * 실행할 때마다 다른 결과가 나온다. 또한, 인코딩된 문자열을 원래 문자열로 바꿀수 없다.(단방향 암호화)
     */
    @Test
    public void passwordEncode() throws Exception{
        System.out.println(passwordEncoder.encode("1234"));
    }


    @Test
    public void passwordTest() throws Exception{
    	String encodePasswd = "$2a$10$xgWp2kXNabPQys6CBRShwOmz7f4/u6Gxf38XJkcGe/HHJak7t.Akm";
    	String password = "1234";
    	// 결과가 true이면 encodePasswd는 password가 인코딩된 문자열이라는 뜻
    	// Spring security는 내부적으로 matches() 메서드를 이용해서 검증을 수행
    	boolean test = passwordEncoder.matches(password, encodePasswd);
    	System.out.println(test);
    }
}
2. 로그인/로그아웃 처리를 위한 설정 수정
SecurityConfig.java
package org.edwith.webbe.securityexam.config;

import org.edwith.webbe.securityexam.service.security.CustomUserDetailsService;
import org.springframework.beans.factory.annotation.Autowired;
import org.springframework.context.annotation.Bean;
import org.springframework.context.annotation.Configuration;
import org.springframework.security.config.annotation.authentication.builders.AuthenticationManagerBuilder;
import org.springframework.security.config.annotation.web.builders.HttpSecurity;
import org.springframework.security.config.annotation.web.builders.WebSecurity;
import org.springframework.security.config.annotation.web.configuration.EnableWebSecurity;
import org.springframework.security.config.annotation.web.configuration.WebSecurityConfigurerAdapter;
import org.springframework.security.crypto.bcrypt.BCryptPasswordEncoder;
import org.springframework.security.crypto.password.PasswordEncoder;

@Configuration
@EnableWebSecurity
public class SecurityConfig extends WebSecurityConfigurerAdapter {
    // CustomUserDetailsService 객체 주입
    @Autowired
    CustomUserDetailsService customUserDetailsService;

    @Override
    public void configure(WebSecurity web) throws Exception {
        web.ignoring().antMatchers(
                "/webjars/**");
    }

    /* WebSecurityConfigurerAdapter가 가지고 있는 void configure(AuthenticationManagerBuilder auth)를 오버라이딩
     * AuthenticationFilter가 아이디/암호를 입력해서 로그인 할 때 처리해주는 필터이고 아이디에 해당하는 정보를
     * 데이터베이스에서 읽어 들일 때 UserDetailsService를 구현하고 있는 객체를 이용한다(Spring Security 개요 참조)
     * UserDetailsService는 인터페이스이고, 해당 인터페이스를 구현하고 있는 Bean을 사용
     * 주입된 CustomUserDetailsService객체를 auth.userDetailsService(customUserDetailsService)로 설정하고 있다.
     * 이렇게 설정된 객체는 아이디/암호를 입력 받아 로그인을 처리하는 AuthenticationFilter에서 사용
     * CustomUserDetailsService는 UserDetailsService를 구현하고 있는 객체여야 한다.
     */
    @Override
    protected void configure(AuthenticationManagerBuilder auth) throws Exception {
        auth.userDetailsService(customUserDetailsService);
    }

    /* 로그인 과정없이 사용할 수 있는 경로 추가("/", "/main", "/members/loginerror", "/members/joinform", "/members/join", "/members/welcome")
     * "/securepage", "/members/**"는 로그인도 되어 있어야 하고 "USER"권한도 가지고 있어야 접근할 수 있도록 설정
     * 로그인 폼은 "/members/loginform"이 경로라는 것을 의미. 해당 경로가 요청 왔을 때 로그인 폼을 보여주는 컨트롤러 메소드를 작성해야 한다.
     * 로그인 폼에서 input태그의 이름은 "userId", "password"이어야 한다는 설정을 하고 있다.
     * ex. <input type="text" name="userId">, <input type="password" name="password">
     * 아이디와 암호를 입력 받아 로그인 처리를 해주는 경로는 "/authenticate"로 설정
     * "/authenticate" 경로는 직접 구현하는 것이 아니라, 아래와 같이 설정만 해주면
     * Spring Security Filter가 해당 경로를 검사하다가 아이디가 전달되면 로그인을 처리해준다.
     * <form method="post" action="/securityexam/authenticate"> 와 같이 action 설정해야한다.
     * 프로젝트의 Context Path가 "/securityexam"이기 때문에 "/securityexam/authenticate"이다.
     * 만약 로그인 처리가 실패하게 되면 "/loginerror?login_error=1"로 forwarding 된다.
     * 해당 경로를 처리하는 컨트롤러 메소드는 개발자가 작성해야한다.
     * 로그인을 성공하게 되면 "/"로 redirect 한다.
     * permitAll()이 붙어 있다는 것은 해당 로그인 폼이 아무나 접근 가능하다는 것을 의미한다.(로그인 페이지를 로그인 후에 접근할 수는 없으므로)
     * "/logout"요청이 오면 세션에서 로그인 정보를 삭제한 후 "/"로 redirect
     */
    @Override
    protected void configure(HttpSecurity http) throws Exception {
        http
                .csrf().disable()
                .authorizeRequests()
                .antMatchers("/", "/main", "/members/loginerror", "/members/joinform", "/members/join", "/members/welcome").permitAll()
                .antMatchers("/securepage", "/members/**").hasRole("USER")
                .anyRequest().authenticated()
                .and()
                    .formLogin()
                    .loginPage("/members/loginform")
                    .usernameParameter("userId")
                    .passwordParameter("password")
                    .loginProcessingUrl("/authenticate")
                    .failureForwardUrl("/members/loginerror?login_error=1")
                    .defaultSuccessUrl("/",true)
                    .permitAll()
                .and()
                    .logout()
                    .logoutUrl("/logout")
                    .logoutSuccessUrl("/");
    }

    @Bean
    public PasswordEncoder encoder() {
        return new BCryptPasswordEncoder();
    }
}
3. 로그인/로그아웃 처리를 위한 클래스 작성
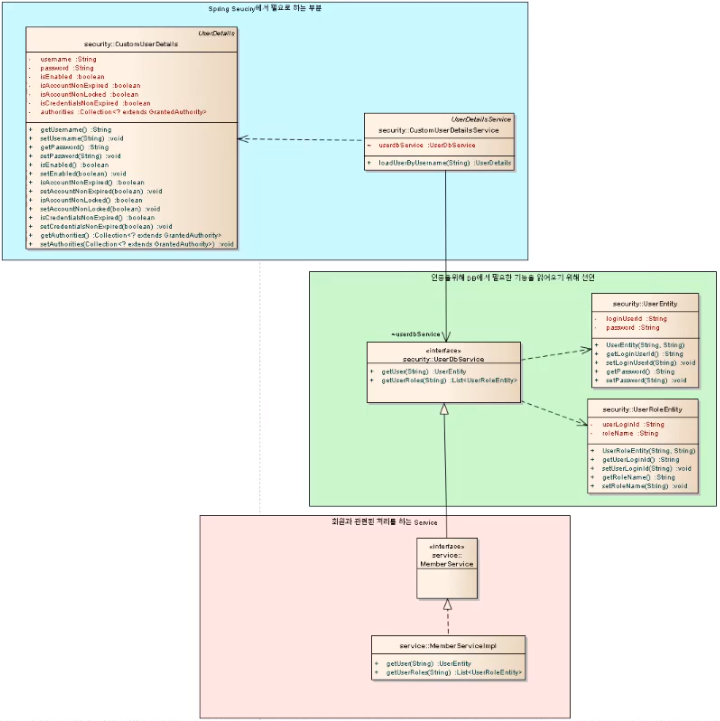
아이디와 암호를 전달받아 로그인을 처리하는 것은 AuthenticationFilter이다. AuthenticationFilter는 아이디에 해당하는 정보를 읽어 들이기 위해 UserDetailsService인터페이스를 구현하는 빈(Bean)을 사용한다.
UserDetailsService 인터페이스는 스프링 시큐리티에서 제공한다. 해당 인터페이스를 구현한다는 것은 스프링 시큐리티와 밀접한 연관을 맺는다는 것을 의미한다.
그런데, 사용자 정보를 읽어들이는 부분은 스프링 시큐리티와 상관 없을 수도 있다.
즉, 스프링 시큐리티 관련 부분과 회원 정보를 다루는 부분을 분리하기 위해 다음과 같은 구조로 인터페이스와 클래스를 작성하도록 하자.
UserEntity.java
- 로그인 아이디와 암호정보를 가지는 UserEntity 클래스 생성
package org.edwith.webbe.securityexam.service.security;

public class UserEntity {
    private String loginUserId;
    private String password;

    public UserEntity(String loginUserId, String password) {
        this.loginUserId = loginUserId;
        this.password = password;
    }

    public String getLoginUserId() {
        return loginUserId;
    }

    public void setLoginUserId(String loginUserId) {
        this.loginUserId = loginUserId;
    }

    public String getPassword() {
        return password;
    }

    public void setPassword(String password) {
        this.password = password;
    }

	@Override
	public String toString() {
		return "UserEntity [loginUserId=" + loginUserId + ", password=" + password + "]";
	}
}
UserRoleEntity.java
- 로그인 아이디와 권한(Role)정보를 가지는 UserRoleEntity 클래스 생성
package org.edwith.webbe.securityexam.service.security;

public class UserRoleEntity {
    private String userLoginId;
    private String roleName;

    public UserRoleEntity(String userLoginId, String roleName) {
        this.userLoginId = userLoginId;
        this.roleName = roleName;
    }

    public String getUserLoginId() {
        return userLoginId;
    }

    public void setUserLoginId(String userLoginId) {
        this.userLoginId = userLoginId;
    }

    public String getRoleName() {
        return roleName;
    }

    public void setRoleName(String roleName) {
        this.roleName = roleName;
    }

	@Override
	public String toString() {
		return "UserRoleEntity [userLoginId=" + userLoginId + ", roleName=" + roleName + "]";
	}
}
UserDbService.java
- UserDbService 인터페이스. 로그인한 사용자 id를 파라미터로 받아들여서 UserEntity와 List<'UserRoleEntity'>를 리턴하는 메소드를 갖는다.
- 로그인 정보가 저장된 DB 구조는 프로젝트마다 다르므로 Spring Security에서 알 수 없다.
- 로그인 정보가 어디에 저장되어 있든 해당 인터페이스를 구현하느 쪽에 맡기게 된다는 것을 의미
package org.edwith.webbe.securityexam.service.security;

import java.util.List;

public interface UserDbService {
	public UserEntity getUser(String loginUserId);
    public List<UserRoleEntity> getUserRoles(String loginUserId);
}
CustomUserDetails.java
- DB에서 읽어들인 정보는 UserDetails 인터페이스를 구현하고 있는 객체에 저장되어야 한다.
- UserDetails를 구현하고 있는 CustomUserDetails 클래스 생성
package org.edwith.webbe.securityexam.service.security;

import java.util.Collection;

import org.springframework.security.core.GrantedAuthority;
import org.springframework.security.core.userdetails.UserDetails;

public class CustomUserDetails implements UserDetails {
    private String username;
    private String password;
    private boolean isEnabled;
    private boolean isAccountNonExpired;
    private boolean isAccountNonLocked;
    private boolean isCredentialsNonExpired;
    private Collection<? extends GrantedAuthority>authorities;

    @Override
    public String getUsername() {
        return username;
    }

    public void setUsername(String username) {
        this.username = username;
    }

    @Override
    public String getPassword() {
        return password;
    }

    public void setPassword(String password) {
        this.password = password;
    }

    @Override
    public boolean isEnabled() {
        return isEnabled;
    }

    public void setEnabled(boolean enabled) {
        isEnabled = enabled;
    }

    @Override
    public boolean isAccountNonExpired() {
        return isAccountNonExpired;
    }

    public void setAccountNonExpired(boolean accountNonExpired) {
        isAccountNonExpired = accountNonExpired;
    }

    @Override
    public boolean isAccountNonLocked() {
        return isAccountNonLocked;
    }

    public void setAccountNonLocked(boolean accountNonLocked) {
        isAccountNonLocked = accountNonLocked;
    }

    @Override
    public boolean isCredentialsNonExpired() {
        return isCredentialsNonExpired;
    }

    public void setCredentialsNonExpired(boolean credentialsNonExpired) {
        isCredentialsNonExpired = credentialsNonExpired;
    }

    @Override
    public Collection<? extends GrantedAuthority> getAuthorities() {
        return authorities;
    }

    public void setAuthorities(Collection<? extends GrantedAuthority> authorities) {
        this.authorities = authorities;
    }

	@Override
	public String toString() {
		return "CustomUserDetails [username=" + username + ", password=" + password + ", isEnabled=" + isEnabled
				+ ", isAccountNonExpired=" + isAccountNonExpired + ", isAccountNonLocked=" + isAccountNonLocked
				+ ", isCredentialsNonExpired=" + isCredentialsNonExpired + ", authorities=" + authorities + "]";
	}
}
CustomUserDetailsService.java
- UserDetailsService인터페이스를 구현하는 CustomUserDetailsService를 생성
- UserDetailsService인터페이스는 public UserDetails loadUserByUsername(String loginId) throws UsernameNotFoundException 메소드만을 선언
- 사용자가 로그인을 할 때 아이디를 입력하면 해당 아이디를 loadUserByUsername()메소드의 인자로 전달
- DB에서 로그인 아이디에 해당하는 정보를 읽어 들이기 위해서 UserDbService를 구현한 객체를 주입받고 있다.
- UserDbService도 인터페이스이니 구현한 객체가 필요하다.
- 조금은 복잡하게 구현된 이유는 DB에서 읽어 들이는 코드와 스프링 시큐리티에서 사용되는 코드를 분리하기 위함이다.
- UserDbService에서는 스프링 시큐리티 관련 코드가 전혀 사용되지 않고 있는 걸 눈 여겨 보자
package org.edwith.webbe.securityexam.service.security;

import java.util.ArrayList;
import java.util.List;

import org.springframework.beans.factory.annotation.Autowired;
import org.springframework.security.core.GrantedAuthority;
import org.springframework.security.core.authority.SimpleGrantedAuthority;
import org.springframework.security.core.userdetails.UserDetails;
import org.springframework.security.core.userdetails.UserDetailsService;
import org.springframework.security.core.userdetails.UsernameNotFoundException;
import org.springframework.stereotype.Service;

@Service
public class CustomUserDetailsService implements UserDetailsService {
    // UserDbService는 인터페이스다. 해당 인터페이스를 구현하고 있는 객체가 Bean으로 등록되어 있어야 한다.
    @Autowired
    UserDbService userdbService;

// 사용자가 로그인할 때 아이디를 입력하면 loadUserByUsername에 인자로 전달한다.
    @Override
    public UserDetails loadUserByUsername(String loginId) throws UsernameNotFoundException {
        // loginId에 해당하는 정보를 데이터베이스에서 읽어 CustomUser객체에 저장한다.
        UserEntity customUser = userdbService.getUser(loginId);

        // 해당 아이디에 해당하는 정보가 없으면 UsernameNotFoundException이 발생
        if(customUser == null)
            throw new UsernameNotFoundException("사용자가 입력한 아이디에 해당하는 사용자를 찾을 수 없습니다.");

	// 정보가 있을 경우엔 UserDetails인터페이스를 구현한 객체를 리턴
        CustomUserDetails customUserDetails = new CustomUserDetails();
        customUserDetails.setUsername(customUser.getLoginUserId());
        customUserDetails.setPassword(customUser.getPassword());

        List<UserRoleEntity> customRoles = userdbService.getUserRoles(loginId);
        // 로그인 한 사용자의 권한 정보를 GrantedAuthority를 구현하고 있는 SimpleGrantedAuthority객체에 담아
        // 리스트에 추가한다. MemberRole 이름은 "ROLE_"로 시작되야 한다.
        List<GrantedAuthority> authorities = new ArrayList<>();
        if(customRoles != null) {
            for (UserRoleEntity customRole : customRoles) {
                authorities.add(new SimpleGrantedAuthority(customRole.getRoleName()));
            }
        }

        // CustomUserDetails객체에 권한 목록 (authorities)를 설정한다.
        customUserDetails.setAuthorities(authorities);
        customUserDetails.setEnabled(true);
        customUserDetails.setAccountNonExpired(true);
        customUserDetails.setAccountNonLocked(true);
        customUserDetails.setCredentialsNonExpired(true);
        return customUserDetails;
    }
}
MemberService.java
- UserDbService 인터페이스를 상속받는 MeberService 인터페이스 생성
- UserDbService는 스프링 시큐리티에서 필요로하는 정보를 가지고 오는 메소드를 갖는다.
- MemberService는 앞으로 회원과 관련된 모든 정보를 처리하는 서비스가 될 예정이다.
(ex. 회원 등록과 관련된 메소드는 MemberService에 추가)
package org.edwith.webbe.securityexam.service;

import org.edwith.webbe.securityexam.service.security.UserDbService;

public interface MemberService extends UserDbService {

}
MemberServiceImpl.java
- MemberServiceImpl클래스는 MeberService인터페이스를 구현
- MemberService인터페이스를 구현한다는 것은 UserDbService 역시 구현해야한다는 것을 의미
- 현재는 DB를 읽어들이지 않고 loginUserId가 무엇이든지 간에 "carami"라는 사용자 정보를 리턴(앞으로 DB를 읽어들일 예정이다.)
package org.edwith.webbe.securityexam.service;

import java.util.ArrayList;
import java.util.List;

import org.edwith.webbe.securityexam.service.security.UserEntity;
import org.edwith.webbe.securityexam.service.security.UserRoleEntity;
import org.springframework.stereotype.Service;

@Service
public class MemberServiceImpl implements MemberService {
    @Override
    public UserEntity getUser(String loginUserId) {
        return new UserEntity("carami", "$2a$10$G/ADAGLU3vKBd62E6GbrgetQpEKu2ukKgiDR5TWHYwrem0cSv6Z8m");
    }

    @Override
    public List<UserRoleEntity> getUserRoles(String loginUserId) {
        List<UserRoleEntity> list = new ArrayList<>();
        list.add(new UserRoleEntity("carami", "ROLE_USER"));
        return list;
    }
}
4. 로그인 처리를 위한 컨트롤러와 뷰 작성
MemberController.java
- 로그인 처리를 위해 로그인 폼을 보여주는 컨트롤러 클래스
package org.edwith.webbe.securityexam.controller;
import org.edwith.webbe.securityexam.service.MemberService;
import org.springframework.stereotype.Controller;
import org.springframework.web.bind.annotation.GetMapping;
import org.springframework.web.bind.annotation.RequestMapping;
import org.springframework.web.bind.annotation.RequestParam;
@Controller
@RequestMapping(path = "/members")
public class MemberController {
// 스프링 컨테이너가 생성자를 통해 자동으로 주입한다.
private final MemberService memberService;
public MemberController(MemberService memberService){
this.memberService = memberService;
}
@GetMapping("/loginform")
public String loginform(){
return "members/loginform";
}
@RequestMapping("/loginerror")
public String loginerror(@RequestParam("login_error")String loginError){
return "members/loginerror";
}
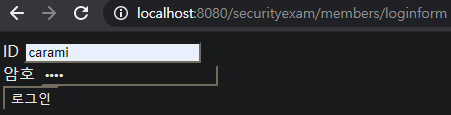
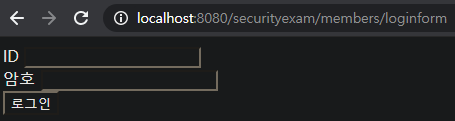
}loginform.jsp
- 아이디와 암호를 입력 받는 화면
<%@ page contentType="text/html; charset=utf-8" %>
<%@ taglib prefix="c" uri="http://java.sun.com/jsp/jstl/core" %>
<%@ taglib prefix="fn" uri="http://java.sun.com/jsp/jstl/functions"%>
<%@ taglib prefix="fmt" uri="http://java.sun.com/jsp/jstl/fmt"%>
<!DOCTYPE html>
  <html>
    <head>
      <title>로그인 </title>
    </head>
  <body>
    <div>
      <div>
        <form method="post" action="/securityexam/authenticate">
          <div>
            <label>ID</label>
            <input type="text" name="userId">
          </div>
          <div>
            <label>암호</label>
            <input type="password" name="password">
          </div>
          <div>
            <label></label>
            <input type="submit" value="로그인">
          </div>
        </form>
      </div>
    </div>
  </body>
</html>
loginerror.jsp
- 로그인 오류가 발생할 경우 보여줄 화면
<%@ page contentType="text/html; charset=utf-8" %>
<%@ taglib prefix="c" uri="http://java.sun.com/jsp/jstl/core" %>
<%@ taglib prefix="fn" uri="http://java.sun.com/jsp/jstl/functions"%>
<%@ taglib prefix="fmt" uri="http://java.sun.com/jsp/jstl/fmt"%>
<!DOCTYPE html>
<html>
  <head>
    <title>로그인 오류</title>
  </head>
  <body>
    <h1>로그인 오류가 발생했습니다. id나 암호를 다시 입력해주세요.</h1>
    <a href="/securityexam/members/loginform">login</a>
  </body>
</html>
결과
1. 로그인 성공
- id : carami, 암호 : 1234 입력시 main page 이동

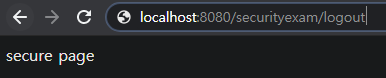
- secure page도 잘 보여진다.

- logout을 입력하면 로그아웃이 되고 main page가 보여진다.
2. 로그인 실패
- id : carami, 암호 : 1234 와 다른 값을 넣을 경우 loginerror 페이지 포워딩

- 로그인 안 된 상태에서 secure page 접속시 loginform으로 redirect

Enjoy to study