Styled-Components 시작하기 #3, attrs, Pseudoelements, pseudoselectors, and nesting
styled-components
1. attrs 사용해보기
attrs는 해당 컴포넌트에 attributes를 부여하는 것이다.
const Input = styled.input`
  background-color: palevioletred;
  height: 120px;
  border: none;
  border-radius: 3px;
`;
styled를 이용해서 다음과 같은 Input을 만들었다.
...
<Wrapper>
<Input required />
<Input required />
<Input required />
</Wrapper>
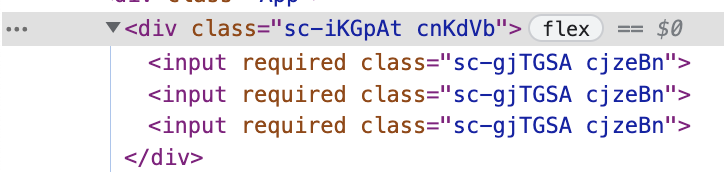
...위에처럼 렌더링을 진행하면, required가 3번 반복되는 것을 볼 수 있다. 개발자라면 참을 수 없는 반복을 찾아버린것이다! 이를 해결하기 위해서 styled의 attrs를 사용하면 쉽게 해결 가능하다.
const Input = styled.input.attrs({ required: true })`
  background-color: palevioletred;
  height: 120px;
  border: none;
  border-radius: 3px;
`;
...
    <Wrapper>
      <Input />
      <Input />
      <Input />
    </Wrapper>
...styled.input.attrs()을 적고 {} 내부에 html attributes를 적어주면 이 Input을 사용할 때마다 required 가 적용된다!
2. Pseudoelements, pseudoselectors, and nesting 의미
Pseudo Elements는 번역하면 가상요소, 의사요소라고 말한다.
div::hover {
	background : black;
}
::hover 이 부분을 Pseudo Elements라고 한다!
선택한 요소의 지정된 부분에 대해 스타일 적용할 수 있다! hover, after, before, first-line 등등,,,
Psuedo Selectors는 마찬가지로 가상 선택자, 의사 선택자이다
가상 클래스(Pseudo class)라고도 한다!
input[type="submit"] {
	background-color : red;
}
div:first-child {
	background-color : red;
}
 div:last-child {
	background-color : red;
}
Psuedo Selectors는 HTML요소를 직접적으로 선택하지 않고, 요소의 상태에 따라 선택적으로 꾸며주는 것을 의미한다!
nesting은 간단하게 부모 요소 내에 자식 요소를 넣는 것을 말한다!
div {
	background : black;
}

div p {
	color : white;
}
라고 적던 것을
div {
	background : black;
   p {
   	color : white;
   }
}
이렇게 적는 방식을 nesting이라고 한다!
3. Pseudoelements, pseudoselectors, and nesting 사용해보기!
-
&사용 예시const Thing = styled.div.attrs(() => ({ tabIndex: 0 }))` color: blue; &:hover { color: red; } & ~ & { background: tomato; } & + & { background: lime; } &.something { background: orange; } .something-else & { border: 1px solid; } `; ... <Wrapper> <Thing> Hello world!</Thing> <Thing> How ya doing? </Thing> <Thing className="something"> The sun is shining.. </Thing> <div> Pretty nice day today. </div> <Thing> Don't you think? </Thing> <div className="something-else"> <Thing> Splendid</Thing> </div> </Wrapper> ...Thingattributes로tabIndex:0을 통해서 탭이 가능한div를 생성했다const Thing = styled.div.attrs((/* props */) => ({ tabIndex : 0 }))글자색은
color : blue로 파란색으로 만들어주고, hover 이벤트시 빨간색이 표시되도록&:hover를 통해 스타일을 적용했다. 여기서&은Thing컴포넌트의 class를 가져온단 소리다!& + &는 따라서className + className이 되어 앞의 요소 바로 뒤에 있는 요소만 선택할 것이다!
마찬가지로& ~ &는 따라서className ~ className&+&와 유사하지만 덜 엄격해 모든 요소를 선택할 것이다!해당 내용은 반드시 기억해야 하는 CSS 선택자 30개을 참고바란다!
나아가
&.something은Thing의 something이라는 자식에 대한 스타일이고,
.something-else &은 something-else 라는 부모의 Thing이라는 자식에게 주는 스타일이다!
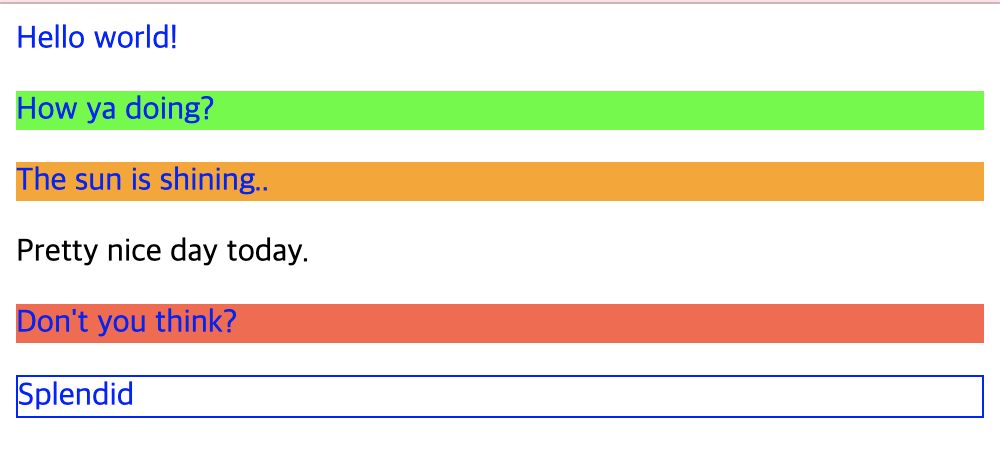
추가적으로 중간에 일반 div가 들어간 이유는
&~&를 확인하기 위해서이다.&+&로 인해서 바로 다음 Thing은 색깔이lime이 되는데, 중간에 div를 함 넣어줌으로써&+&는 끝나고, 느슨하게 연결되는&~&가 적용되서 색깔이tomato가 적용되는 거시다.
분량이 길어져서 Psuedo의 &&은 다음에!