
react-query로 Pagination 적용하기
Pagination을 구현하기 위해 필요한 것은 title마다의 comment를 보기 위해 사용했던 방식과 같이 각각의 queryKey들이 필요하다. 그리고 현재 페이지의 상태(currentPage)를 next, prev페이지로 이동시키는 것도 필요하다.
// Post.jsx

import { useState } from "react";
import { useQuery } from "react-query";

import { PostDetail } from "./PostDetail";
const maxPostPage = 10;

async function fetchPosts() {
  const response = await fetch("https://jsonplaceholder.typicode.com/posts?_limit=10&_page=0");
  return response.json();
}

export function Posts() {
  const [currentPage, setCurrentPage] = useState(1);
  const [selectedPost, setSelectedPost] = useState(null);

  const { data, isLoading, isError, error } = useQuery(["post", currentPage], fetchPosts, { staleTime: 10000 });
  if (isLoading) return <h2>Loading...</h2>;
  if (isError)
    return (
      <>
        <h2>Error!</h2>
        <p>{error.toString()}</p>
      </>
    );

  return (
    <>
      <ul>
        {data.map((post) => (
          <li key={post.id} className='post-title' onClick={() => setSelectedPost(post)}>
            {post.title}
          </li>
        ))}
      </ul>
      <div className='pages'>
        <button disabled onClick={() => {}}>
          Previous page
        </button>
        <span>Page {currentPage + 1}</span>
        <button disabled onClick={() => {}}>
          Next page
        </button>
      </div>
      <hr />
      {selectedPost && <PostDetail post={selectedPost} />}
    </>
  );
}
위의 코드와 같이 useState를 사용하여 현재 페이지 1을 설정하고 posts를 업데이트하는 의존성 배열을 추가해준다.
또한 위의 코드에서 fetchPosts의 함수가 데이터를 요청하는 옵션은 하드코딩으로 0 page만 가져오므로 바꿔주어야한다.
async function fetchPosts(pageNum) {
  const response = await fetch(
    `https://jsonplaceholder.typicode.com/posts?_limit=10&_page=${pageNum}`
  );
  return response.json();
}
const { data, isLoading, isError, error } = useQuery("post", () => fetchPosts(currentPage), {
staleTime: 10000,
});```
currentPage를 인자로 넣어 현재 페이지 값을 전달해주면 된다.
그럼 이제 html 부분도 변경해 보자.
```jsx
return (
<>
<ul>
{data.map((post) => (
<li key={post.id} className='post-title' onClick={() => setSelectedPost(post)}>
{post.title}
</li>
))}
</ul>
<div className='pages'>
<button
disabled={currentPage <= 1}
onClick={() => {
setCurrentPage((prevValue) => prevValue - 1);
}}
>
Previous page
</button>
<span>Page {currentPage + 1}</span>
<button
disabled={currentPage >= maxPostPage}
onClick={() => {
setCurrentPage((prevValue) => prevValue + 1);
}}
>
Next page
</button>
</div>
<hr />
{selectedPost && <PostDetail post={selectedPost} />}
</>
);사용한 오픈API는 최대 max데이터가 100이며 그에맞춰 한번 요청할 때마다 10개씩 가져오도록 api호출에 옵션을 주었다.
이전 페이지 버튼을 비활성화 할 때는 현재 페이지가 1페이지 일때 더이상 이전 페이지로 갈 수 없도록 하였고, 100번째의 title이 나타날 때는 더이상 보여줄 데이터가 없기 때문에 비활성화를 적용시켜주면 된다. 이러한 방법 이외에도 데이터의 총 개수가 확실하지 않는 경우 데이터를 호출하는데 데이터가 더이상 없어서 undefined일 경우 비활성화 시키는 방법도 있다.
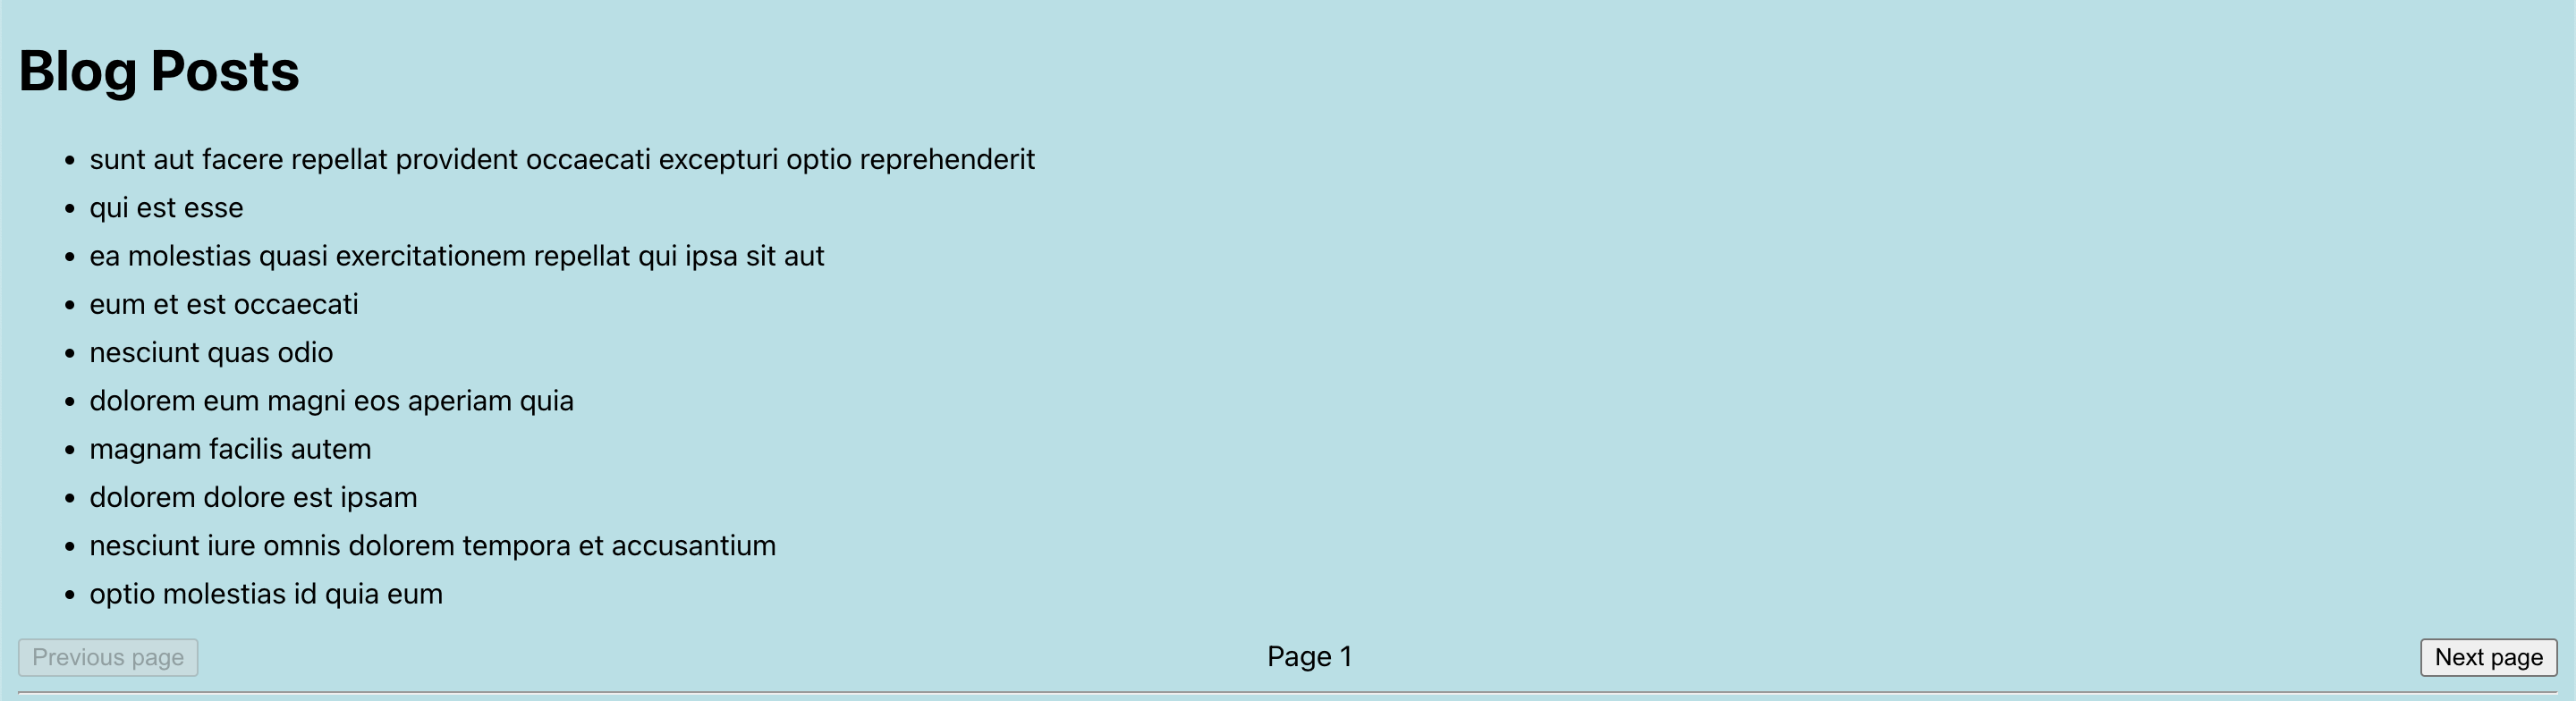
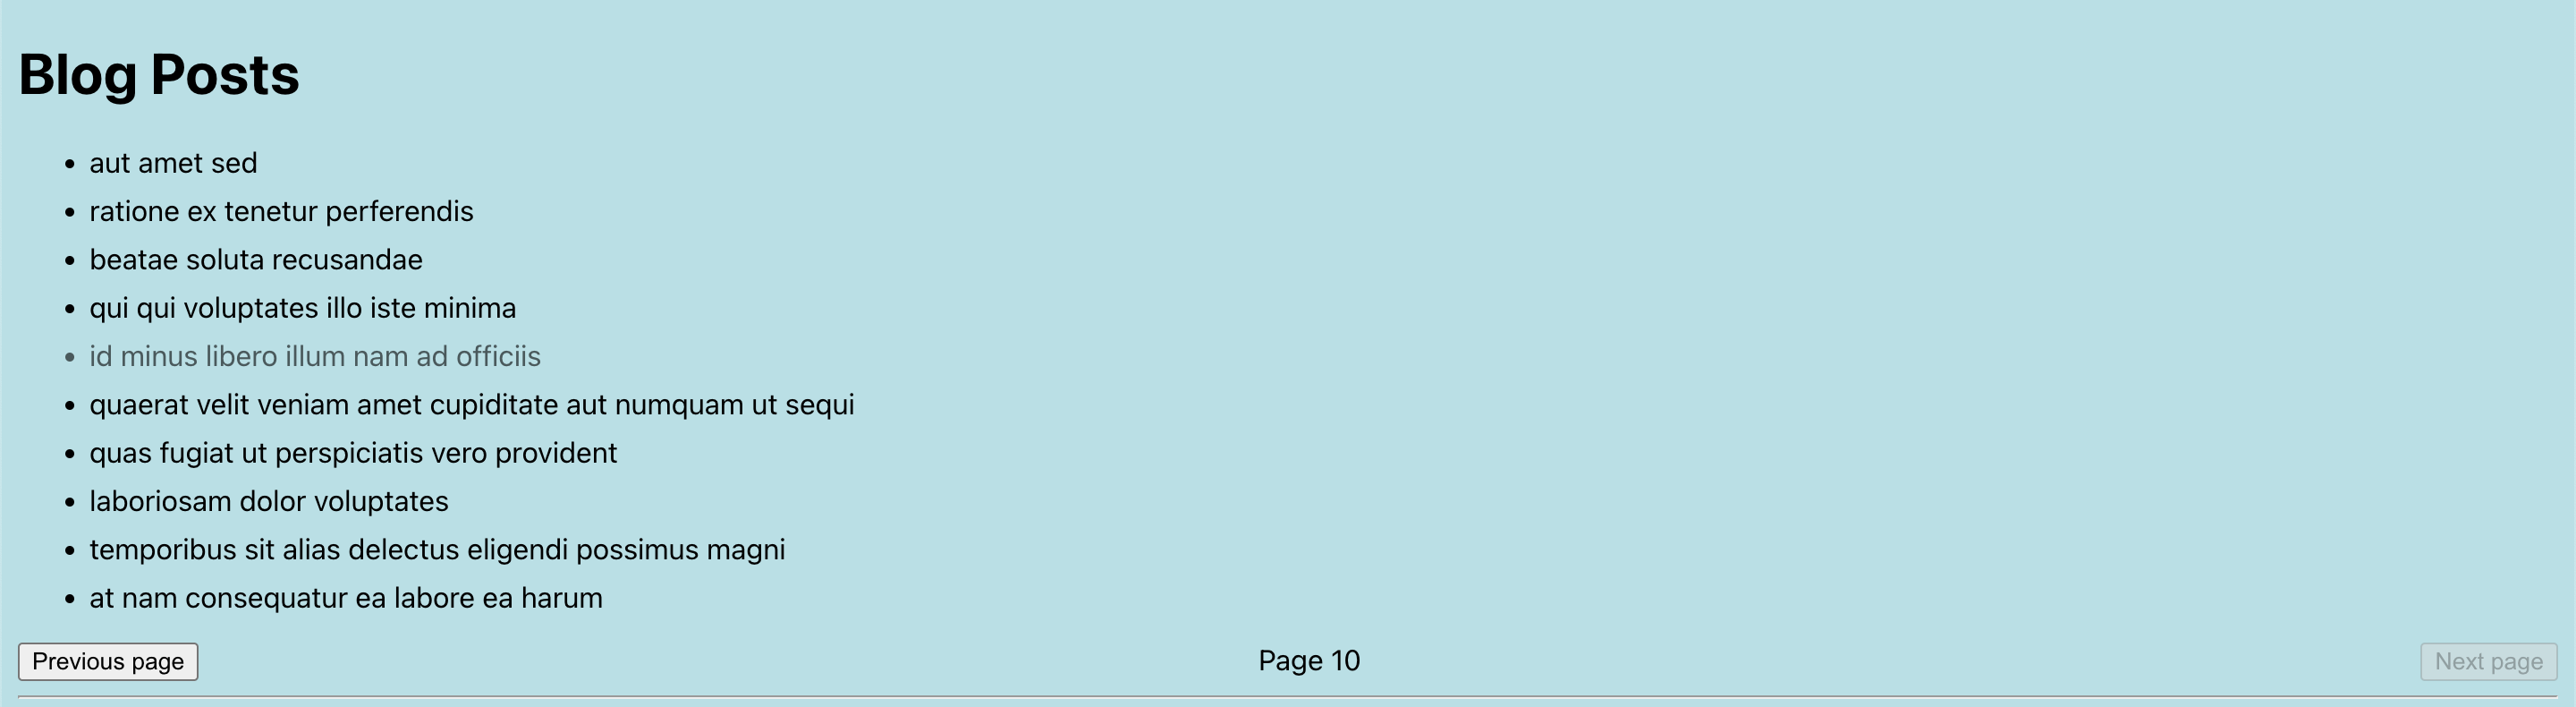
1페이지와 10페이지의 데이터가 잘 나오는 것과 button의 disable 기능도 잘 작동하는 것을 확인할 수 있다.
하지만 중간에 isLoading으로 인해 페이지가 깜박이는 것과 같은 현상이 발생한다. 이는 사용자 경험을 떨어뜨리는 문제이다. 이를 해결하기 위해서는 데이터를 prefetching 이라는 기능을 사용하면 해결할 수 있다.
prefetching
아까와 같은 좋지 않은 사용자 경험을 개선하기 위해서는 prefetching을 사용하면 해결이 가능하다. 이는 미리 다음에 보여줄 데이터를 캐시에 저장하는 방식으로 해결할 수 있다. 기본적으로 값은 stale상태이다 사용자가 다음 페이지를 볼지 안볼지 알 수 없기 때문이다.
Pagination 이외에도 만약 특정사이트의 메인화면에서 특정 페이지로 자주 넘어가는 경향이 보인다면(예를들어 메인화면에서 로그인 화면을 바로 누른다던가) 그 페이지의 데이터를 prefetching하여 미리 캐시에 저장하는 방법으로도 활용할 수 있다.
prefetching은 queryClient의 메서드이다. 이를 useQueryClient hook으로 불러올 수 있다.
// Posts.jsx
import { useEffect, useState } from "react";
import { useQuery, useQueryClient } from "react-query";

import { PostDetail } from "./PostDetail";
const maxPostPage = 10;

async function fetchPosts(pageNum) {
  const response = await fetch(
    `https://jsonplaceholder.typicode.com/posts?_limit=10&_page=${pageNum}`
  );
  return response.json();
}

export function Posts() {
  const [currentPage, setCurrentPage] = useState(1);
  const [selectedPost, setSelectedPost] = useState(null);

  const queryClient = useQueryClient();

  useEffect(() => {
    if (currentPage < maxPostPage) {
      const nextPage = currentPage + 1;
      queryClient.prefetchQuery(["post", nextPage], () => fetchPosts(nextPage));
    }
  }, [currentPage, queryClient]);

  const { data, isLoading, isError, error } = useQuery(
    ["post", currentPage],
    () => fetchPosts(currentPage),
    {
      staleTime: 10000,
      keepPreviousData: true,
    }
  );
  if (isLoading) return <h2>Loading...</h2>;
  if (isError)
    return (
      <>
        <h2>Error!</h2>
        <p>{error.toString()}</p>
      </>
    );
}
여기서 useEffect를 사용하여 현재 페이지의 값이 업데이트 된다면 prefetching이 발생하도록 코드를 작성하였다.
if 문은 currentPage가 10페이지 일 경우 더이상 prefetching할 필요가 없기 때문에 사용하지 않도록 조건문을 달았다.
또한 useQuery의 옵션에 keepPreviousData: true 을 추가하여 이전 데이터가 캐시로 저장되어 cacheTime이 만료되기 전까지는 데이터를 유지하도록 설정도 할 수 있다.
직접 실행해보면 이제는 loading 문구가 나오지 않게 된다.
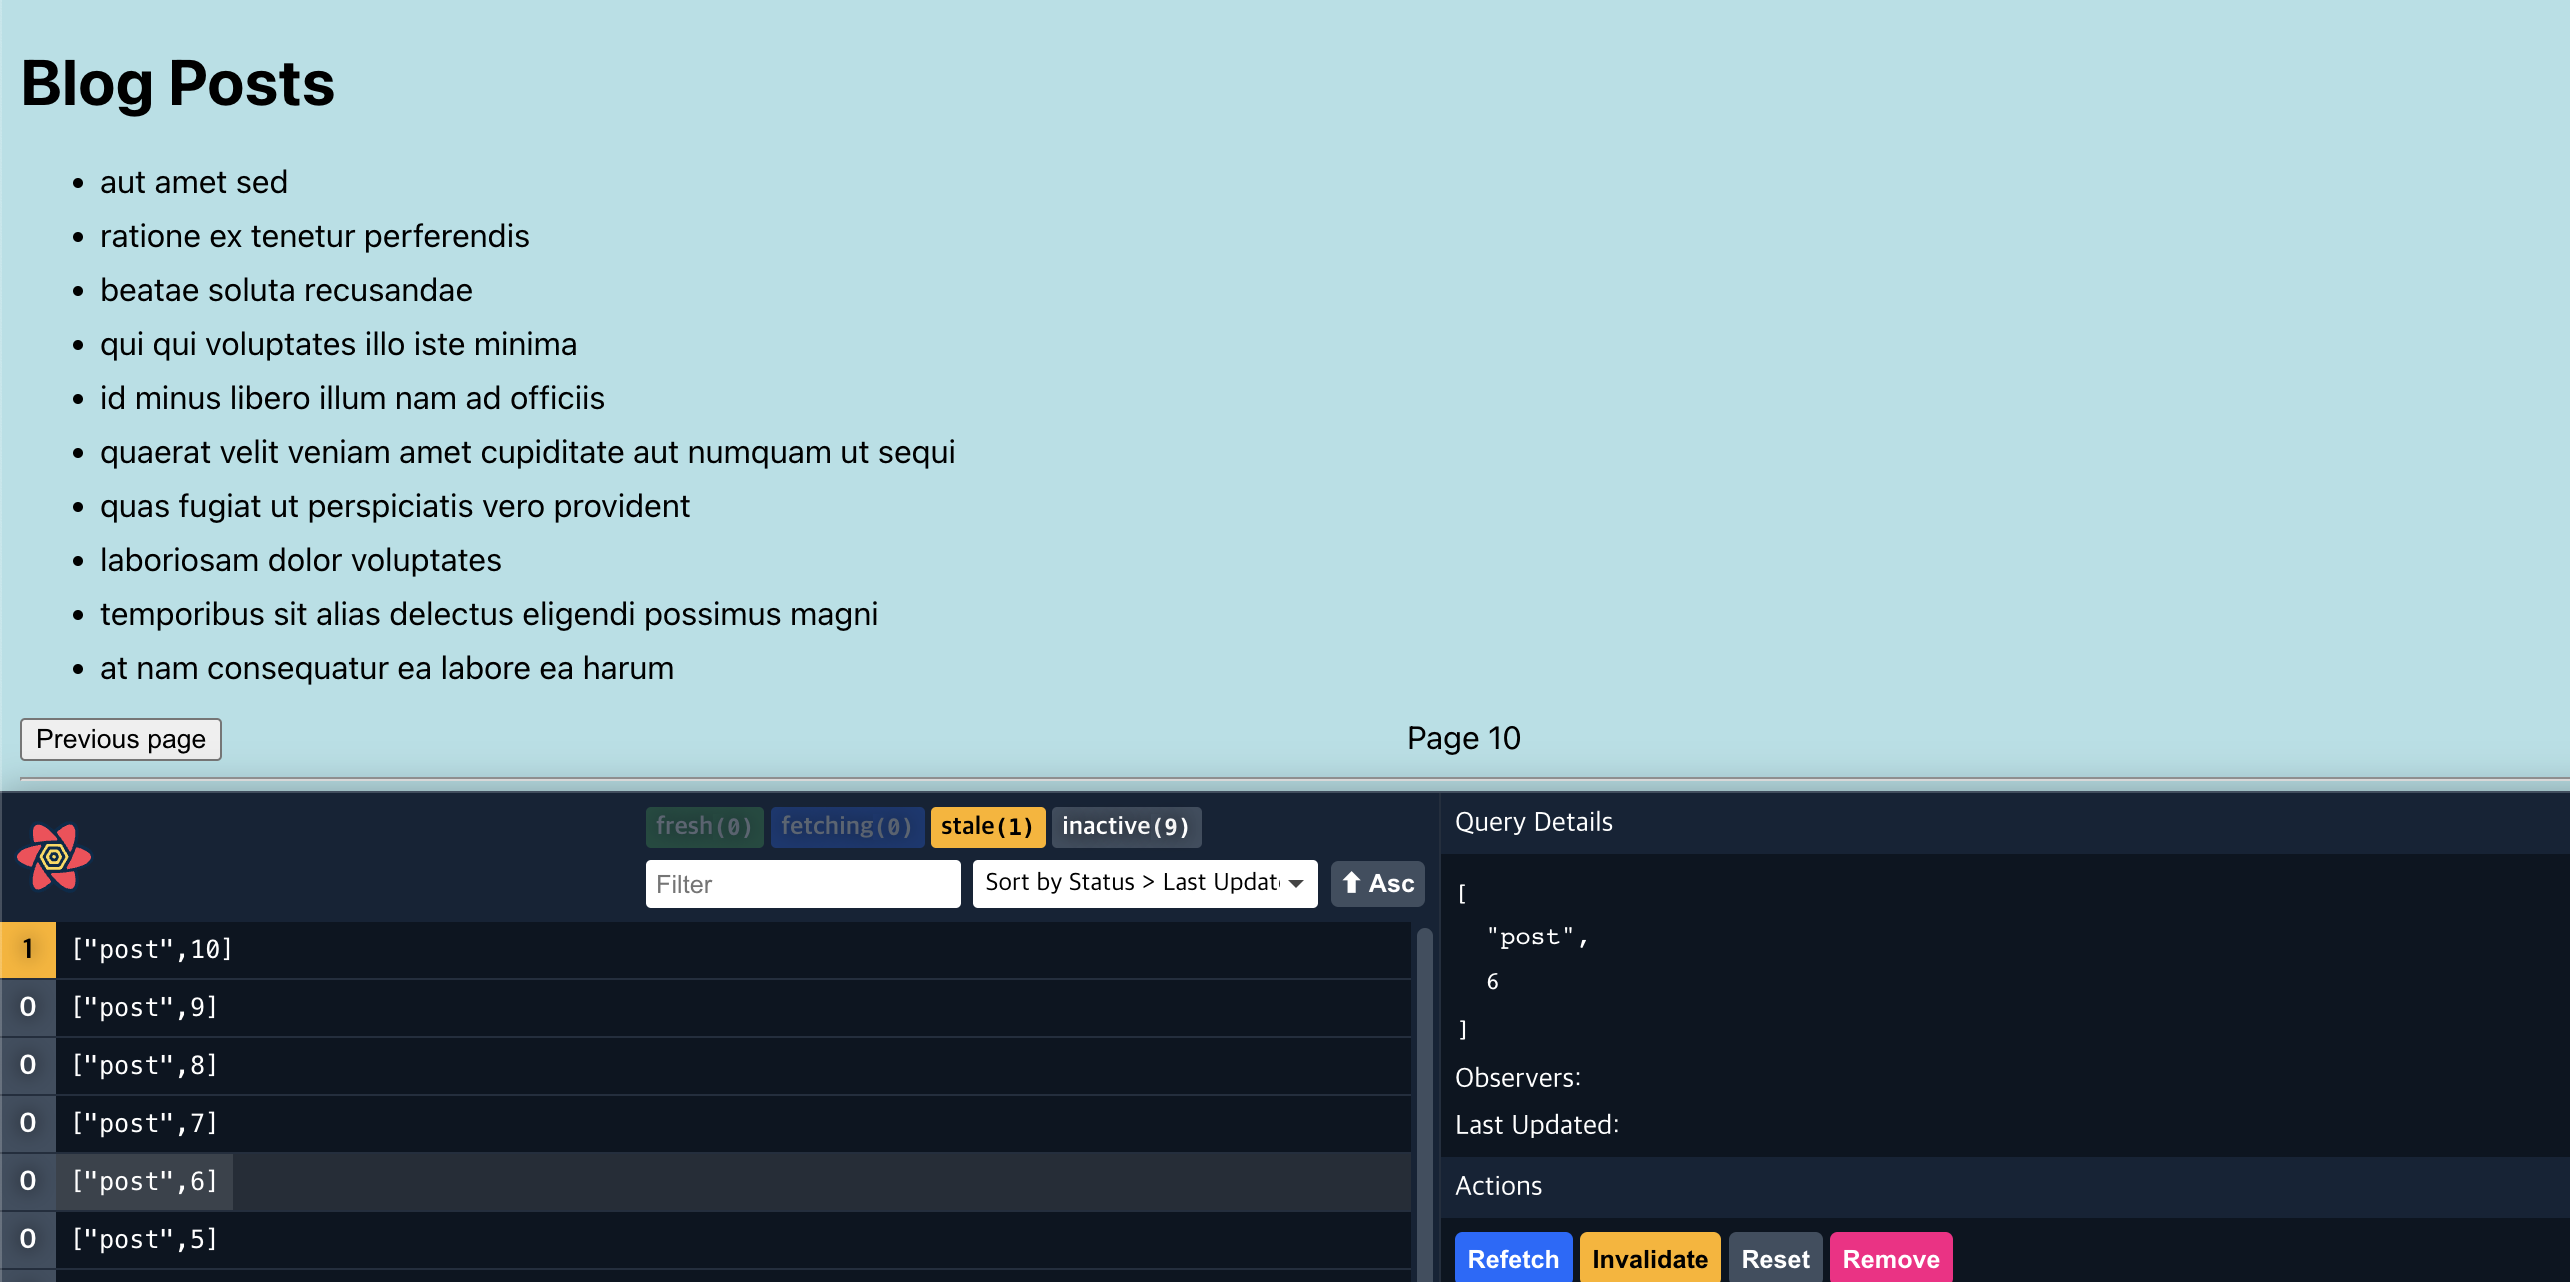
위와 같이 10번째 title은 더이상 prefetching을 하지 않는 것을 확인할 수 있다.
