
- Nuxt.js(vue)+Rails API 게시판 구현 하기.
- 본 포스팅에서는 기본적인 루비,레일즈,vue,nuxt 등의 설치는 따로 설명하지 않는다.
레일즈 새 앱 생성 하기 (API모드)
아래 명령어로 새 프로젝트를 생성 한다.
rails new mybackend --apiThe dependency tzinfo-data (>= 0) will be unused by any of the platforms Bundler is installing for. Bundler is installing for ruby but the dependency is only for x86-mingw32, x86-mswin32, x64-mingw32, java. To add those platforms to the bundle, run `bundle lock --add-platform x86-mingw32 x86-mswin32 x64-mingw32 java`.위 경고가 발생 한다면 프로젝트 폴더에서 아래 커맨드 실행
bundle lock --add-platform x86-mingw32 x86-mswin32 x64-mingw32 java
게시글 모델 생성하기, 이름은 자유롭게 정하면 된다. 여기서는 consult라고 명명 해보겠다. 제목title, 내용desc 을 넣어준다.
rails g scaffold consult title:string desc:string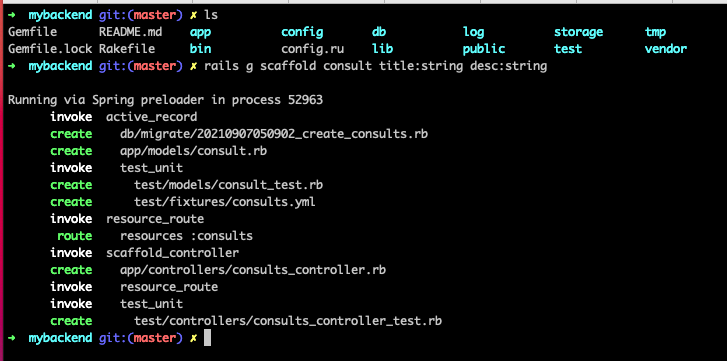
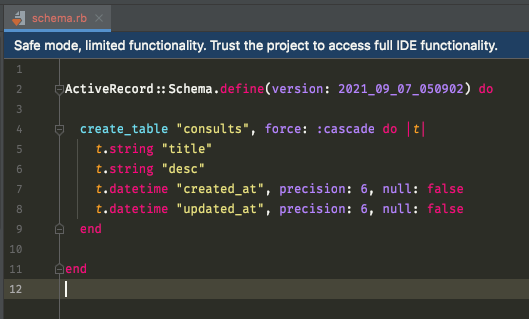
마이그레이션 실시
rails db:migrate아래 같은 느낌으로 schema.rb가 자동 생성 된다.
생성된 컨트롤러 소스코드
app/controllers/consults_controller.rb
class ConsultsController < ApplicationController
  before_action :set_consult, only: [:show, :update, :destroy]

  # GET /consults
  def index
    @consults = Consult.all

    render json: @consults
  end

  # GET /consults/1
  def show
    render json: @consult
  end

  # POST /consults
  def create
    @consult = Consult.new(consult_params)

    if @consult.save
      render json: { content: { consults: Consult.all } }, status: :created
    else
      render json: @consult.errors, status: :unprocessable_entity
    end
  end

  # PATCH/PUT /consults/1
  def update
    if @consult.update(consult_params)
      render json: @consult
    else
      render json: @consult.errors, status: :unprocessable_entity
    end
  end

  # DELETE /consults/1
  def destroy
    @consult.destroy
  end

  private
    # Use callbacks to share common setup or constraints between actions.
    def set_consult
      @consult = Consult.find(params[:id])
    end

    # Only allow a list of trusted parameters through.
    def consult_params
      params.require(:consult).permit(:title, :desc)
    end
end
routes.rb 는 scaffold로 자동 생성 된다.
Rails.application.routes.draw do
  resources :consults
end
rails s커맨드로 webbrick server를 실행 시킨다.
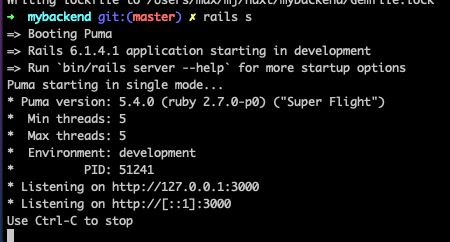
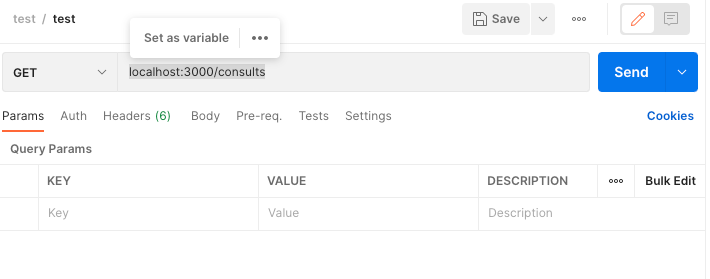
API 동작 확인은 포스트맨을 사용 하면 편리하다.
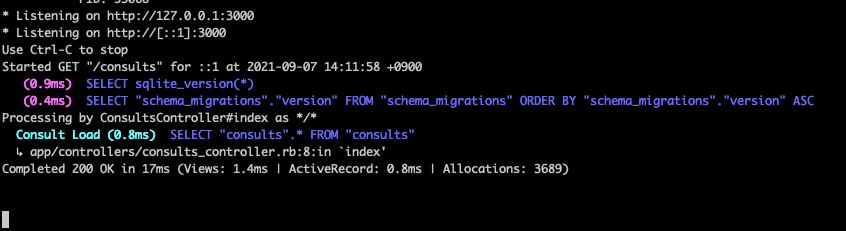
GET localhost:3000/consults 요청시 빈 배열이 잘 들어온다.
SELECT구문이 실행 된것을 서버 로그 에서 확인 할 수 있다.
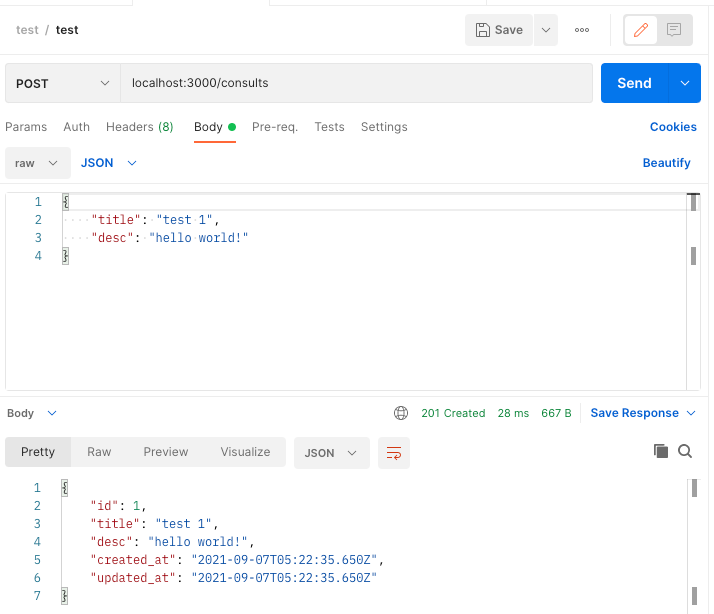
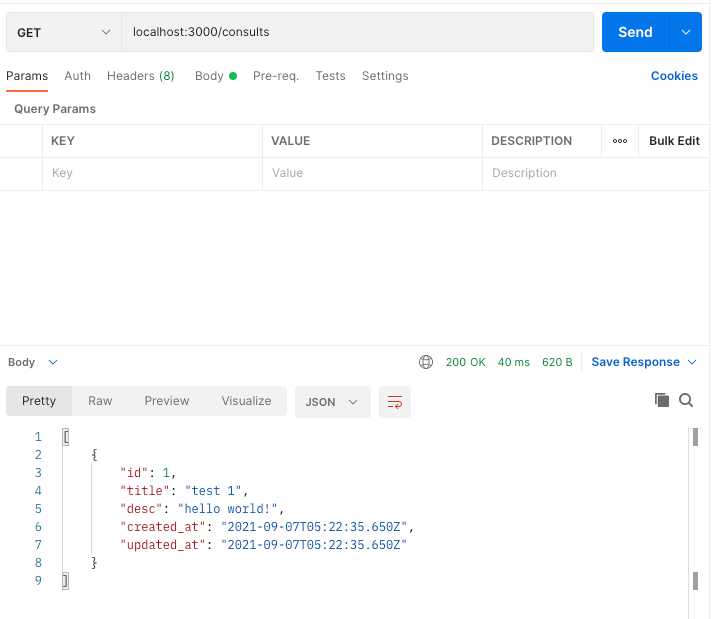
포스트맨을 이용해서 게시글을 하나 생성해보자.
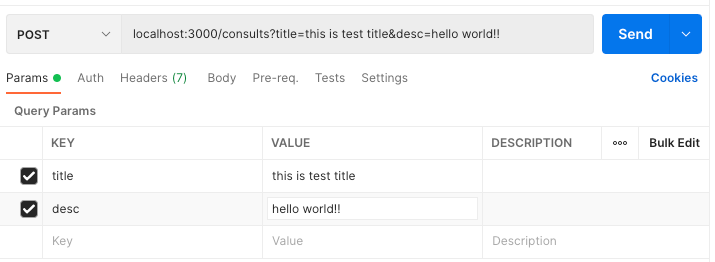
리퀘스트 종류를 POST로 변경 하고 body를 raw로, 본문을 json으로 지정 하고 아래처럼 title, desc 파라메터를 지정 해준다.
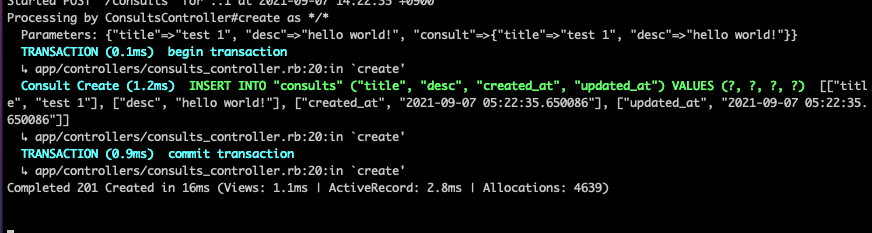
서버 로그를 보면 INSERT 구문이 잘 실행 되었다.
다시 GET 메소드로 목록을 확인 해보면 배열 요소가 1개 추가 되었다.
서버의 동작을 확인 하는 또 다른 방법은 자동화 테스트이다.
rails test 커맨드를 콘솔에 입력하면 자동화 테스트가 실행이 된다.
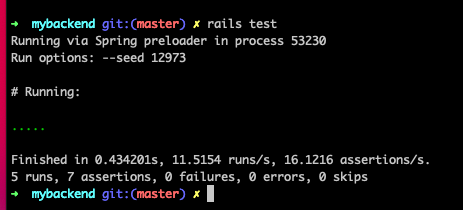
녹색점 5개는 테스트케이스가 5개이고 모두 성공 했음을 의미 한다.
scaffold에 의해 자동 생성된 테스트는 test/controllers/consults_controller_test.rb 에 존재한다.
내용은 아래와 같다.
require "test_helper"

class ConsultsControllerTest < ActionDispatch::IntegrationTest
  setup do
    @consult = consults(:one)
  end

  test "should get index" do
    get consults_url, as: :json
    assert_response :success
  end

  test "should create consult" do
    assert_difference('Consult.count') do
      post consults_url, params: { consult: { desc: @consult.desc, title: @consult.title } }, as: :json
    end

    assert_response 201
  end

  test "should show consult" do
    get consult_url(@consult), as: :json
    assert_response :success
  end

  test "should update consult" do
    patch consult_url(@consult), params: { consult: { desc: @consult.desc, title: @consult.title } }, as: :json
    assert_response 200
  end

  test "should destroy consult" do
    assert_difference('Consult.count', -1) do
      delete consult_url(@consult), as: :json
    end

    assert_response 204
  end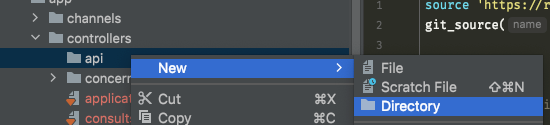
endapi/v1네임스페이스 넣기
1.routes.rb에 아래처럼 네임스페이스를 넣어주자.
Rails.application.routes.draw do
  ## API
  namespace :api, defaults: {format: :json} do
    namespace :v1 do
      resources :consults
    end
  end
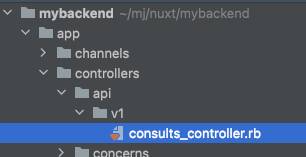
end2.app/controllers/api/v1/consults_controller.rb 로 컨트롤러 파일을 옮겨주자.
consults_controller.rb파일에 네임스페이스를 아래처럼 변경 한다.
class Api::V1::ConsultsController < ApplicationController그리고 프론트에 돌려주는 content 형식을 약간 손봐주자.
완성된 컨트롤러 소스 코드는 아래와 같다.
class Api::V1::ConsultsController < ApplicationController
  before_action :set_consult, only: [:show, :update, :destroy]

  # GET /consults
  def index
    render json: {content: {consults: Consult.all.order("id DESC")}}
  end

  # GET /consults/1
  def show
    render json: @consult
  end

  # POST /consults
  def create
    @consult = Consult.new(consult_params)

    if @consult.save
      render json: {content: {consults: Consult.all.order("id DESC")}}, status: :created
    else
      render json: @consult.errors, status: :unprocessable_entity
    end
  end

  # PATCH/PUT /consults/1
  def update
    if @consult.update(consult_params)
      render json: {content: {consults: Consult.all.order("id DESC")}}
    else
      render json: @consult.errors, status: :unprocessable_entity
    end
  end

  # DELETE /consults/1
  def destroy
    @consult.destroy
      render json: {content: {consults: Consult.all.order("id DESC")}}
  end

  private
    # Use callbacks to share common setup or constraints between actions.
    def set_consult
      @consult = Consult.find(params[:id])
    end

    # Only allow a list of trusted parameters through.
    def consult_params
      params.require(:consult).permit(:title, :desc)
    end
end
마지막으로 API CORS설정을 해보자.
Gemfile에 아래를 추가 한다.
gem 'rack-cors'추가 후 bundle install 명령어를 실행 한다.
config/application.rb파일에 아래와 같이 추가 해주자.
require_relative "boot"

require "rails"
require "active_model/railtie"
require "active_job/railtie"
require "active_record/railtie"
require "active_storage/engine"
require "action_controller/railtie"
require "action_mailer/railtie"
require "action_mailbox/engine"
require "action_text/engine"
require "action_view/railtie"
require "action_cable/engine"
require "rails/test_unit/railtie"

Bundler.require(*Rails.groups)

module Mybackend
  class Application < Rails::Application
    config.load_defaults 6.1

    config.middleware.insert_before 0, Rack::Cors do
      allow do
        origins '*'
        resource '*', headers: :any, methods: [:get, :post, :put, :patch, :delete, :options, :head]
      end
    end

    config.api_only = true
  end
end
이로써 API서버의 준비는 완료 되었다.
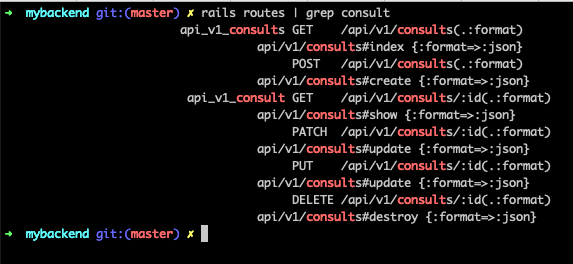
rails routes명령어를 이용하면 URL목록을 확인 할 수 있다.
프론트엔드 NUXT앱 개발 하기
아래 커맨드를 이용해서 새 프로젝트 생성
yarn create nuxt-app myfront
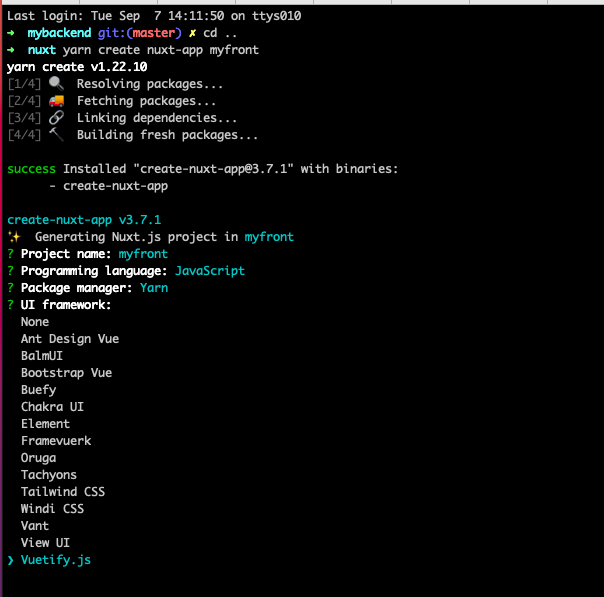
여러 선택 가능한 옵션들이 주어지는데,
여기서는 JavaScript, Yarn, Vuetify(UI)를 고르겠다. 자신이 좋아하는 것을 고르면 된다.
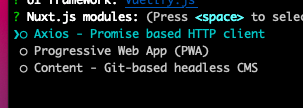
단, Nuxt.js modules에서는 API사용을 위해 Axios를 고르자.
적당히 디폴트값을 골랐다.
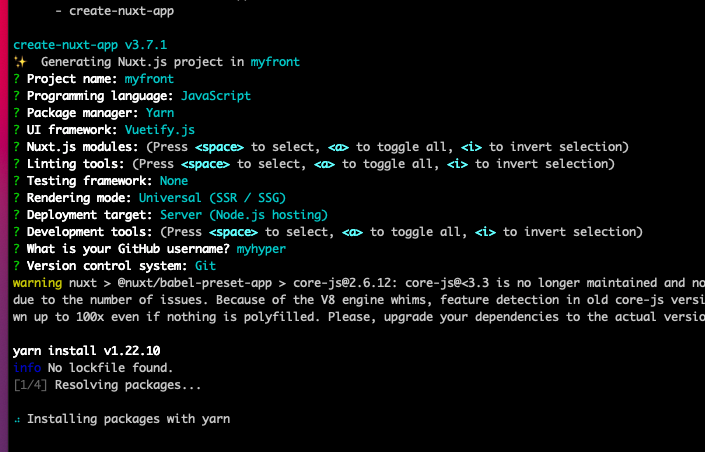
설치가 진행 된다.
아래 커맨드를 입력 하면 서버가 실행 된다.
	cd myfront
	yarn dev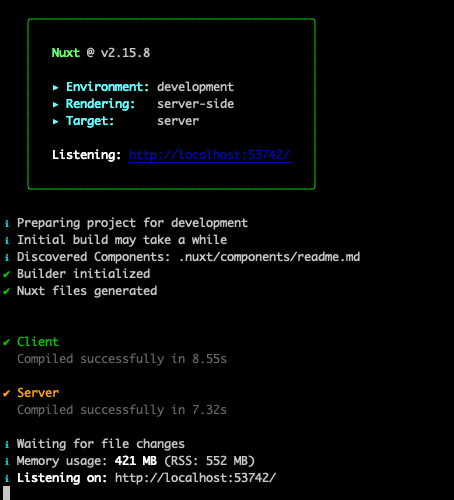
각자의 환경마다, 설정마다 포트는 다르게 표시 된다. 콘솔에 찍힌 URL을 웹브라우저로 열어보자.

기본 넉스트 프로젝트가 생성 되었다.
만약 포트 설정을 변경 하고 싶다면 nuxt.config.js파일에 아래 라인을 추가 하면 된다.
...
  server: {
    port: 8080,
  },
...
VSC 등 텍스트 에디터를 이용해 Nuxt프로젝트를 열어주자.
pages/index.vue 인덱스 파일을 게시글 목록으로 바꿔보자.
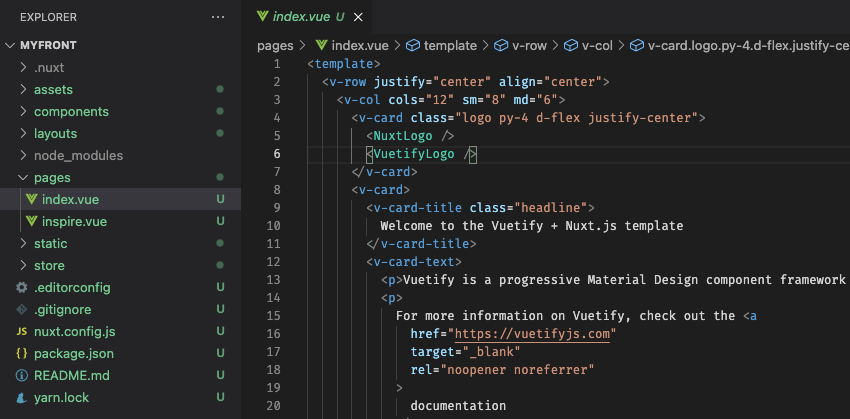
기본 생성 되어 있는 코드를 삭제 하고 아래로 바꾼다.
<template>
<v-row justify="center" align="center">
<v-col cols="12" sm="8" md="6">
<v-card>
<v-card-title class="headline">
게시판
</v-card-title>
<v-card-text>
</v-card-text>
<v-card-actions>
<v-spacer />
<v-btn
color="primary"
nuxt
>
새글 쓰기
</v-btn>
</v-card-actions>
</v-card>
</v-col>
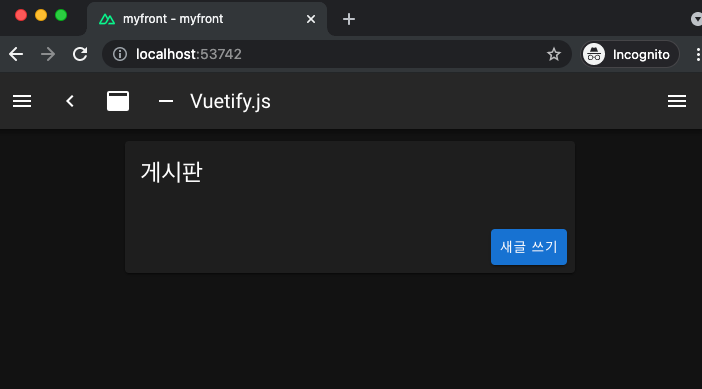
</v-row>
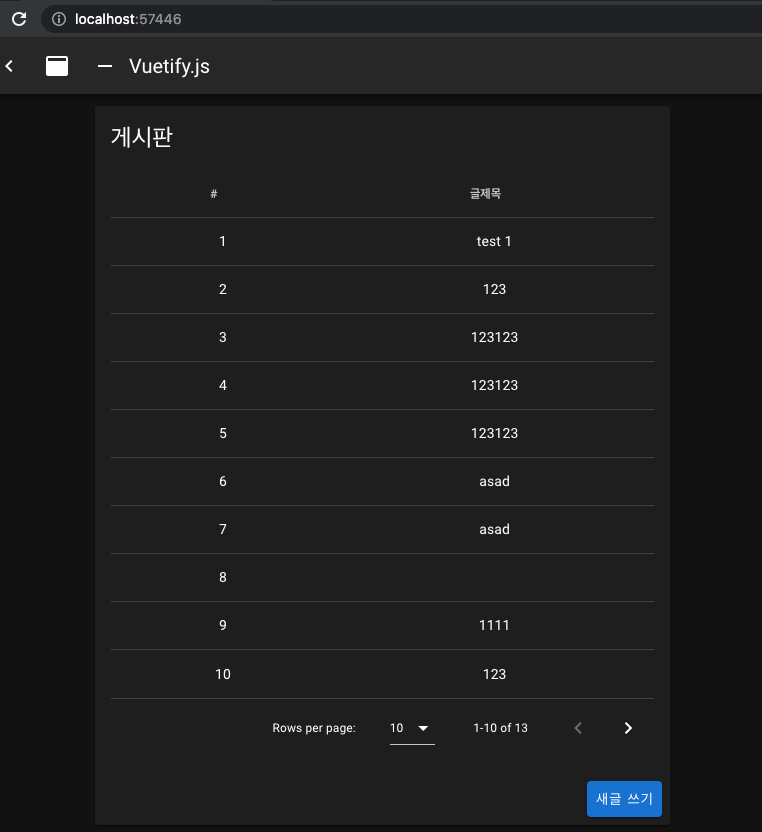
</template>실행 결과
이제 레일즈 API와 연동을 해보자.
yarn add axios 커맨드로 라이브러리를 추가 해준다.
스토어 세팅 하기
nuxt.config.js파일에 플러그인을 추가 한다.

yarn add vuex-persistedstate 로 라이브러리를 추가 한다.
plugins/store.js를 작성 한다.
import createPersistedState from 'vuex-persistedstate'

export default ({ store, isHMR }) => {
  if (isHMR) return

  if (process.client) {
    window.onNuxtReady((nuxt) => {
      createPersistedState({ storage: window.sessionStorage })(store)
    })
  }
}
store/consults/index.js
import actions from './actions'
import getters from './getters'
import mutations from './mutations'

export const state = () => ({
  consults: [],
})

export default {
  namespaced: true,
  state,
  actions,
  mutations,
  getters,
}
store/consults/actions.js
import axios from 'axios'

const plainAxiosInstance = axios.create({
  baseURL: 'http://localhost:3000/',
  withCredentials: false,
  headers: {
    'Content-Type': 'application/json',
  },
})

export default {
  index_consults({ commit }, payload) {
    return new Promise((resolve, reject) => {
      plainAxiosInstance
        .get('/api/v1/consults', {
          params: {
          },
        })
        .then((resp) => {
          const rtv = resp.data.content.consults
          commit(`SET_CONSULTS`, rtv)
          resolve(resp)
        })
        .catch((err) => {
          reject(err)
        })
    })
  },

  create_consult({ commit }, consult) {
    return new Promise((resolve, reject) => {
      plainAxiosInstance
        .post('/api/v1/consults', consult)
        .then((resp) => {
          window.console.log("[test] ", resp.data.content)
          const rtv = resp.data.content.consults
          commit(`SET_CONSULTS`, rtv)
          resolve(resp)
        })
        .catch((err) => {
          reject(err)
        })
    })
  },
}
store/consults/getters.js
export default {
  getConsults: (state) => state.consults || [],
}
store/consults/mutations.js
import Vue from 'vue'

export default {
  SET_CONSULTS(state, consults) {
    state.consults = consults
  }
}
그리고 index.vue에 <v-data-table>를 추가 해준다.
<template>
  <v-row justify="center" align="center">
    <v-col cols="12" sm="8" md="6">
      <v-card>
        <v-card-title class="headline">
          게시판
        </v-card-title>
        <v-card-text>
          <v-data-table
            :items="getConsults"
            :headers="headers"
          >
          </v-data-table>
        </v-card-text>
        <v-card-actions>
          <v-spacer />
          <v-btn
            color="primary"
            nuxt
            to="/new"
          >
            새글 쓰기
          </v-btn>
        </v-card-actions>
      </v-card>
    </v-col>
  </v-row>
</template>

<script>
import { mapGetters } from 'vuex'
export default {
  data: () => ({
    headers: [
      {
        text: '#',
        align: 'center',
        filterable: true,
        value: 'id',
      },
      {
        text: '글제목',
        align: 'center',
        filterable: true,
        value: 'title',
      },
    ]
  }),
  computed: {
    ...mapGetters('consults', ['getConsults']),
  },
  mounted () {
    this.get_consults()
  },
  methods: {
    get_consults() {
      this.$store.dispatch('consults/index_consults')
    }
  }
}
</script>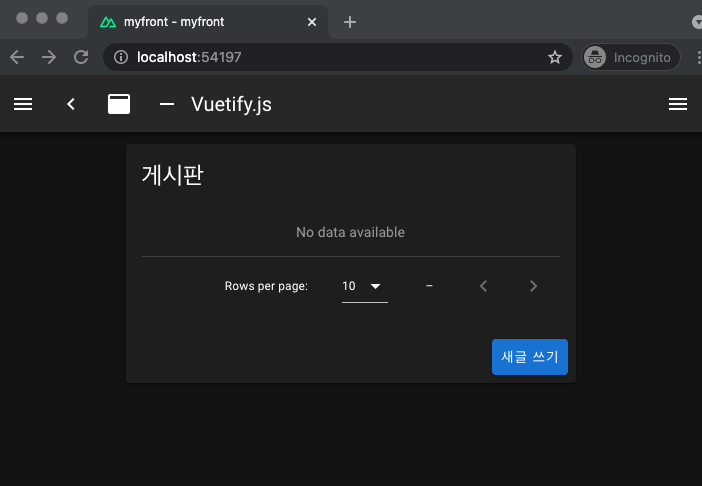
새 글 쓰기를 구현 해보자.
pages/new.vue파일을 추가 한다.
<template>
  <v-row justify="center" align="center">
    <v-col cols="12" sm="8" md="6">
      <v-form
        @submit.prevent="onSubmit"
      >
        <v-card>
          <v-card-title class="headline">
            새글 작성
          </v-card-title>
          <v-card-text>
              <v-text-field
                v-model="consult.title"
                outlined
                label="제목"
                type="text"
                placeholder="제목"
                required
              />
              <v-textarea
                v-model="consult.desc"
                outlined
                label="내용"
                type="text"
                placeholder="내용"
                required
              />
          </v-card-text>
          <v-card-actions>
            <v-spacer />
            <v-btn
              color="secondary"
              type="submit"
              nuxt
            >
              저장
            </v-btn>
          </v-card-actions>
        </v-card>
      </v-form>
    </v-col>
  </v-row>
</template>

<script>
import { mapGetters } from 'vuex'
export default {
  name: 'NewConsult',
  data: () => ({
    consult: {
      title: '',
      desc: '',
    }
  }),
  computed: {
    ...mapGetters('consults', ['getConsults']),
  },
  methods: {
    onSubmit() {
      this.$store.dispatch('consults/create_consult', this.consult)
      .then((resp) => {
        this.$router.push('/')
      })
    }
  }
}
</script>
실행 결과
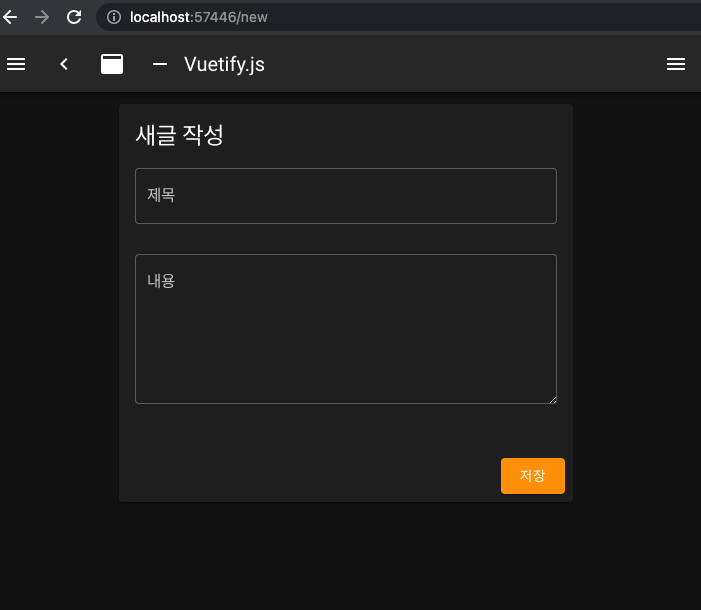
새 글을 작성 하면 목록 페이지에 나타 나는 것을 알 수 있다.
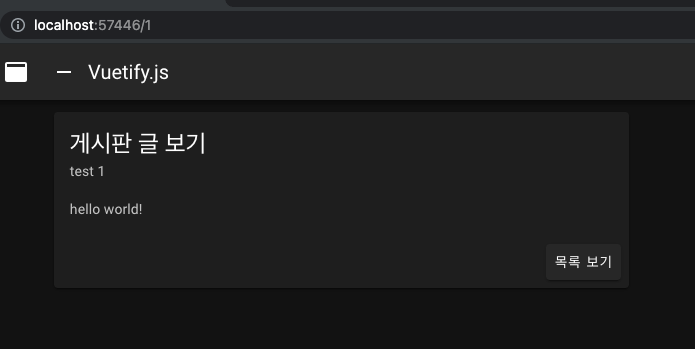
글을 클릭 하면 상세 페이지로 이동 하게 만들어보자.
pages/_id.vue파일을 추가 해준다.
<template>
  <v-row justify="center" align="center">
    <v-col cols="12" sm="8" md="6">
      <v-card v-if="!consult" :loading="!consult">
        <v-card-title>Loading...</v-card-title>
      </v-card>
      <v-card v-else>
        <v-card-title class="headline">
          게시판 글 보기
        </v-card-title>
        <v-card-subtitle>
          {{ consult.title || '제목없음' }}
        </v-card-subtitle>
        <v-card-text>
          {{ consult.desc }}
        </v-card-text>
        <v-card-actions>
          <v-spacer />
          <v-btn
            nuxt
            to="/"
          >
            목록 보기
          </v-btn>
        </v-card-actions>
      </v-card>
    </v-col>
  </v-row>
</template>

<script>
import { mapGetters } from 'vuex'
export default {
  name: 'ShowConsult',
  data: () => ({
  }),
  computed: {
    ...mapGetters('consults', ['getConsults']),
    consult() {
      const id = this.$route.params.id
      return this.getConsults.filter((e) => e.id == id)[0]
    }
  },
  mounted () {
    this.get_consults()
  },
  methods: {
    get_consults() {
      this.$store.dispatch('consults/index_consults')
      .then((resp) => {
      })
    }
  }
}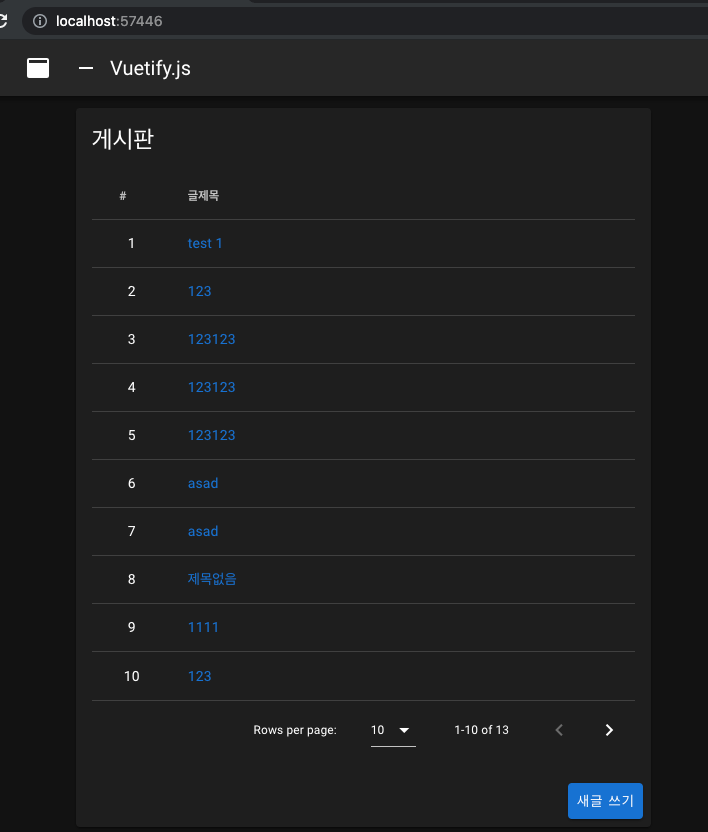
</script>pages/index.vue파일을 업그레이드 해준다.
<template>
  <v-row justify="center" align="center">
    <v-col cols="12" sm="8" md="6">
      <v-card>
        <v-card-title class="headline">
          게시판
        </v-card-title>
        <v-card-text>
          <v-data-table
            :items="getConsults"
            :headers="headers"
          >
            <template #[`item.id`]="{ item }">
              {{ item.id }}
            </template>
            <template #[`item.title`]="{ item }">
              <nuxt-link :to="`/${item.id}`">
                {{ item.title || '제목없음' }}
              </nuxt-link>
            </template>
          </v-data-table>
        </v-card-text>
        <v-card-actions>
          <v-spacer />
          <v-btn
            color="primary"
            nuxt
            to="/new"
          >
            새글 쓰기
          </v-btn>
        </v-card-actions>
      </v-card>
    </v-col>
  </v-row>
</template>

<script>
import { mapGetters } from 'vuex'
export default {
  data: () => ({
    headers: [
      {
        text: '#',
        align: 'center',
        filterable: true,
        value: 'id',
        width: '80px'
      },
      {
        text: '글제목',
        align: 'left',
        filterable: true,
        value: 'title',
      },
    ]
  }),
  computed: {
    ...mapGetters('consults', ['getConsults']),
  },
  mounted () {
    this.get_consults()
  },
  methods: {
    get_consults() {
      this.$store.dispatch('consults/index_consults')
      .then((resp) => {
      })
    }
  }
}
</script>

<style scoped>
a { text-decoration: none; }
</style>pages/new.vue에도 '목록 보기'버튼을 추가 하자.
...
          <v-card-actions>
            <v-spacer />
            <v-btn
              nuxt
              to="/"
            >
              목록 보기
            </v-btn>
            <v-btn
              color="secondary"
              type="submit"
              nuxt
            >
              저장
            </v-btn>
          </v-card-actions>
...
결과물
글을 삭제 하는 기능을 만들어 보자.
store/consults/actions.js파일에 delete액션을 추가 하자.
....
  delete_consult({ commit }, consult) {
    return new Promise((resolve, reject) => {
      plainAxiosInstance
        .delete(`/api/v1/consults/${consult.id}`)
        .then((resp) => {
          const rtv = resp.data.content.consults
          commit(`SET_CONSULTS`, rtv)
          resolve(resp)
        })
        .catch((err) => {
          reject(err)
        })
    })
  },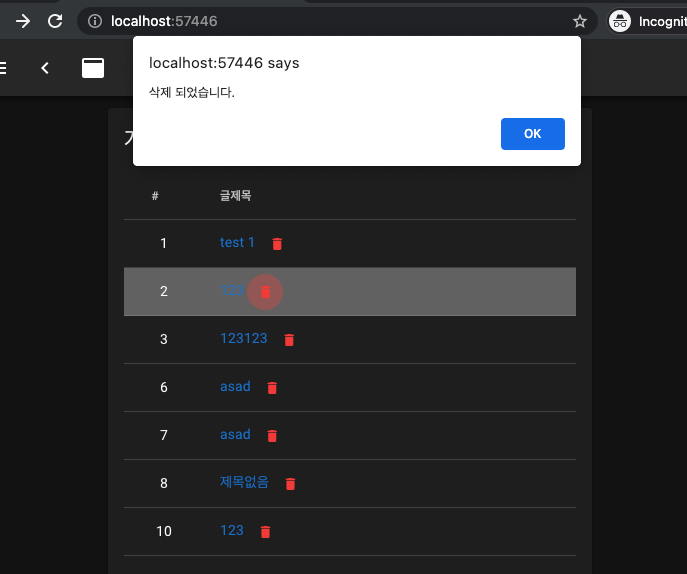
...pages/index.vue파일에 삭제 링크(아이콘) 과 delete_consult() 함수를 추가 한다. 전체 코드는 아래와 같다.
<template>
  <v-row justify="center" align="center">
    <v-col cols="12" sm="8" md="6">
      <v-card>
        <v-card-title class="headline">
          게시판
        </v-card-title>
        <v-card-text>
          <v-data-table
            :items="getConsults"
            :headers="headers"
          >
            <template #[`item.id`]="{ item }">
              {{ item.id }}
            </template>
            <template #[`item.title`]="{ item }">
              <nuxt-link :to="`/${item.id}`">
                {{ item.title || '제목없음' }}
                <v-btn icon color="red" @click.prevent="delete_consult(item)">
                  <v-icon small>mdi-delete</v-icon>
                </v-btn>
              </nuxt-link>
            </template>
          </v-data-table>
        </v-card-text>
        <v-card-actions>
          <v-spacer />
          <v-btn
            color="primary"
            nuxt
            to="/new"
          >
            새글 쓰기
          </v-btn>
        </v-card-actions>
      </v-card>
    </v-col>
  </v-row>
</template>

<script>
import { mapGetters } from 'vuex'
export default {
  data: () => ({
    headers: [
      {
        text: '#',
        align: 'center',
        filterable: true,
        value: 'id',
        width: '80px'
      },
      {
        text: '글제목',
        align: 'left',
        filterable: true,
        value: 'title',
      },
    ]
  }),
  computed: {
    ...mapGetters('consults', ['getConsults']),
  },
  mounted () {
    this.get_consults()
  },
  methods: {
    get_consults() {
      this.$store.dispatch('consults/index_consults')
      .then((resp) => {})
    },

    delete_consult(consult) {
      this.$store.dispatch('consults/delete_consult', consult)
      .then((resp) => {
      })
    }
  }
}
</script>

<style scoped>
a { text-decoration: none; }
</style>
잘 삭제 된다.
기존 글 수정 기능 만들기

pages/edit/_id.vue 파일을 생성 한다.
store/consults/actions.js에서 에디트 액션을 아래와같이 추가 한다.
...
  update_consult({ commit }, consult) {
    return new Promise((resolve, reject) => {
      plainAxiosInstance
        .patch(`/api/v1/consults/${consult.id}`, {
          consult,
        })
        .then((resp) => {
          const rtv = resp.data.content.consults
          commit(`SET_CONSULTS`, rtv)
          resolve(resp)
        })
        .catch((err) => {
          reject(err)
        })
    })
  },
...
pages/_id.vue 글 보기 페이지에서 '글수정' 버튼을 추가 한다.
...
          <v-btn
            nuxt
            color="blue"
            :to="`/edit/${consult.id}`"
          >
            글 수정
          </v-btn>
...
전체 코드는 아래와 같다.
<template>
  <v-row justify="center" align="center">
    <v-col cols="12" sm="8" md="6">
      <v-card>
        <v-card-title class="headline">
          게시판 글 보기
        </v-card-title>
        <v-card-subtitle>
          {{ consult.title || '제목없음' }}
        </v-card-subtitle>
        <v-card-text>
          {{ consult.desc }}
        </v-card-text>
        <v-card-actions>
          <v-spacer />
          <v-btn
            nuxt
            color="blue"
            :to="`/edit/${consult.id}`"
          >
            글 수정
          </v-btn>
          <v-btn
            nuxt
            to="/"
          >
            목록 보기
          </v-btn>
        </v-card-actions>
      </v-card>
    </v-col>
  </v-row>
</template>

<script>
import { mapGetters } from 'vuex'
export default {
  name: 'ShowConsult',
  data: () => ({
    headers: [
      {
        text: '#',
        align: 'center',
        filterable: true,
        value: 'id',
      },
      {
        text: '글제목',
        align: 'center',
        filterable: true,
        value: 'title',
      },
    ]
  }),
  computed: {
    ...mapGetters('consults', ['getConsults']),
    consult() {
      const id = this.$route.params.id
      return this.getConsults.filter((e) => e.id == id)[0]
    }
  },
  mounted () {
    this.get_consults()
  },
  methods: {
    get_consults() {
      this.$store.dispatch('consults/index_consults')
      .then((resp) => {
      })
    }
  }
}
</script>
글 수정 페이지를 작성 한다.
pages/edit/_id.vue
<template>
  <v-row justify="center" align="center">
    <v-col cols="12">
      <v-card v-if="!consult" :loading="!consult">
        <v-card-title>Loading...</v-card-title>
      </v-card>
      <v-form v-else @submit.prevent="onSubmit">
        <v-card>
          <v-card-title>글 수정</v-card-title>
          <v-card-text>
            <v-text-field
              v-model="consult.title"
              outlined
              label="제목"
              type="text"
              placeholder="제목"
              required
            />
            <v-textarea
              v-model="consult.desc"
              outlined
              label="내용"
              type="text"
              placeholder="내용"
              required
            />
          </v-card-text>
          <v-card-actions>
            <v-spacer />
            <v-btn nuxt to="/"> 목록으로 </v-btn>
            <v-btn color="secondary" type="submit">저장</v-btn>
          </v-card-actions>
        </v-card>
      </v-form>
    </v-col>
  </v-row>
</template>

<script>
import { mapGetters } from "vuex"
export default {
  name: "EditConsult",
  data: () => ({}),
  computed: {
    ...mapGetters("consults", ["getConsults"]),
    consult() {
      const id = this.$route.params.id
      const con = this.getConsults.filter(e => e.id == id)[0]
      return JSON.parse(JSON.stringify(con))
    },
  },
  methods: {
    onSubmit() {
      this.$store
        .dispatch("consults/update_consult", this.consult)
        .then(resp => {
          this.$router.push("/")
        })
    },
  },
}
</script>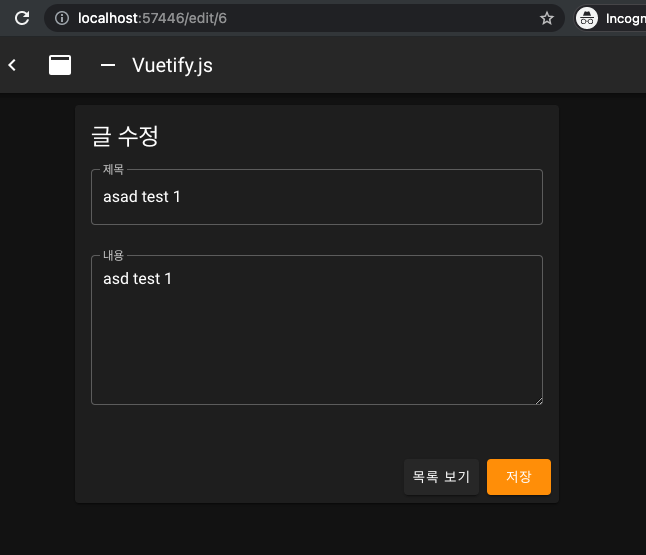
잘 동작 한다. 이로써 게시판 완성이다.
pages/new.vue 새글쓰기 페이지 전체 소스 코드
<template>
  <v-row justify="center" align="center">
    <v-col cols="12" sm="8" md="6">
      <v-form
        @submit.prevent="onSubmit"
      >
        <v-card>
          <v-card-title class="headline">
            새글 작성
          </v-card-title>
          <v-card-text>
              <v-text-field
                v-model="consult.title"
                outlined
                label="제목"
                type="text"
                placeholder="제목"
                required
              />
              <v-textarea
                v-model="consult.desc"
                outlined
                label="내용"
                type="text"
                placeholder="내용"
                required
              />
          </v-card-text>
          <v-card-actions>
            <v-spacer />
            <v-btn
              nuxt
              to="/"
            >
              목록 보기
            </v-btn>
            <v-btn
              color="secondary"
              type="submit"
              nuxt
            >
              저장
            </v-btn>
          </v-card-actions>
        </v-card>
      </v-form>
    </v-col>
  </v-row>
</template>

<script>
import { mapGetters } from 'vuex'
export default {
  name: 'NewConsult',
  data: () => ({
    consult: {
      title: '',
      desc: '',
    }
  }),
  computed: {
    ...mapGetters('consults', ['getConsults']),
  },
  methods: {
    onSubmit() {
      this.$store.dispatch('consults/create_consult', this.consult)
      .then((resp) => {
        this.$router.push('/')
      })
    }
  }
}
</script>
store/consults/actions.js 전체 소스코드 (최종)
import axios from 'axios'

const plainAxiosInstance = axios.create({
  baseURL: 'http://localhost:3000/',
  withCredentials: false,
  headers: {
    'Content-Type': 'application/json',
  },
})

export default {
  index_consults({ commit }, payload) {
    return new Promise((resolve, reject) => {
      plainAxiosInstance
        .get('/api/v1/consults', {
          params: {
          },
        })
        .then((resp) => {
          const rtv = resp.data.content.consults
          commit(`SET_CONSULTS`, rtv)
          resolve(resp)
        })
        .catch((err) => {
          reject(err)
        })
    })
  },

  create_consult({ commit }, consult) {
    return new Promise((resolve, reject) => {
      plainAxiosInstance
        .post('/api/v1/consults', consult)
        .then((resp) => {
          window.console.log("[test] ", resp.data.content)
          const rtv = resp.data.content.consults
          commit(`SET_CONSULTS`, rtv)
          resolve(resp)
        })
        .catch((err) => {
          reject(err)
        })
    })
  },

  update_consult({ commit }, consult) {
    return new Promise((resolve, reject) => {
      plainAxiosInstance
        .patch(`/api/v1/consults/${consult.id}`, {
          consult,
        })
        .then((resp) => {
          const rtv = resp.data.content.consults
          commit(`SET_CONSULTS`, rtv)
          resolve(resp)
        })
        .catch((err) => {
          reject(err)
        })
    })
  },


  delete_consult({ commit }, consult) {
    return new Promise((resolve, reject) => {
      plainAxiosInstance
        .delete(`/api/v1/consults/${consult.id}`)
        .then((resp) => {
          const rtv = resp.data.content.consults
          commit(`SET_CONSULTS`, rtv)
          resolve(resp)
        })
        .catch((err) => {
          reject(err)
        })
    })
  },
}
더욱 완성도를 높이고 싶다면 회원가입, OAuth토큰인증, 댓글 달기, 파일 첨부, 노티메시지추가, send스피너 추가 등을 추가 할 수도 있을 것이다. 포스팅이 길어지므로 다음 포스팅에서 차근차근 하나씩 알아보도록 하겠다.